Vital Signs
Overview
The Vital Signs section is used to record and manage essential physiological parameters measured during a patient visit.
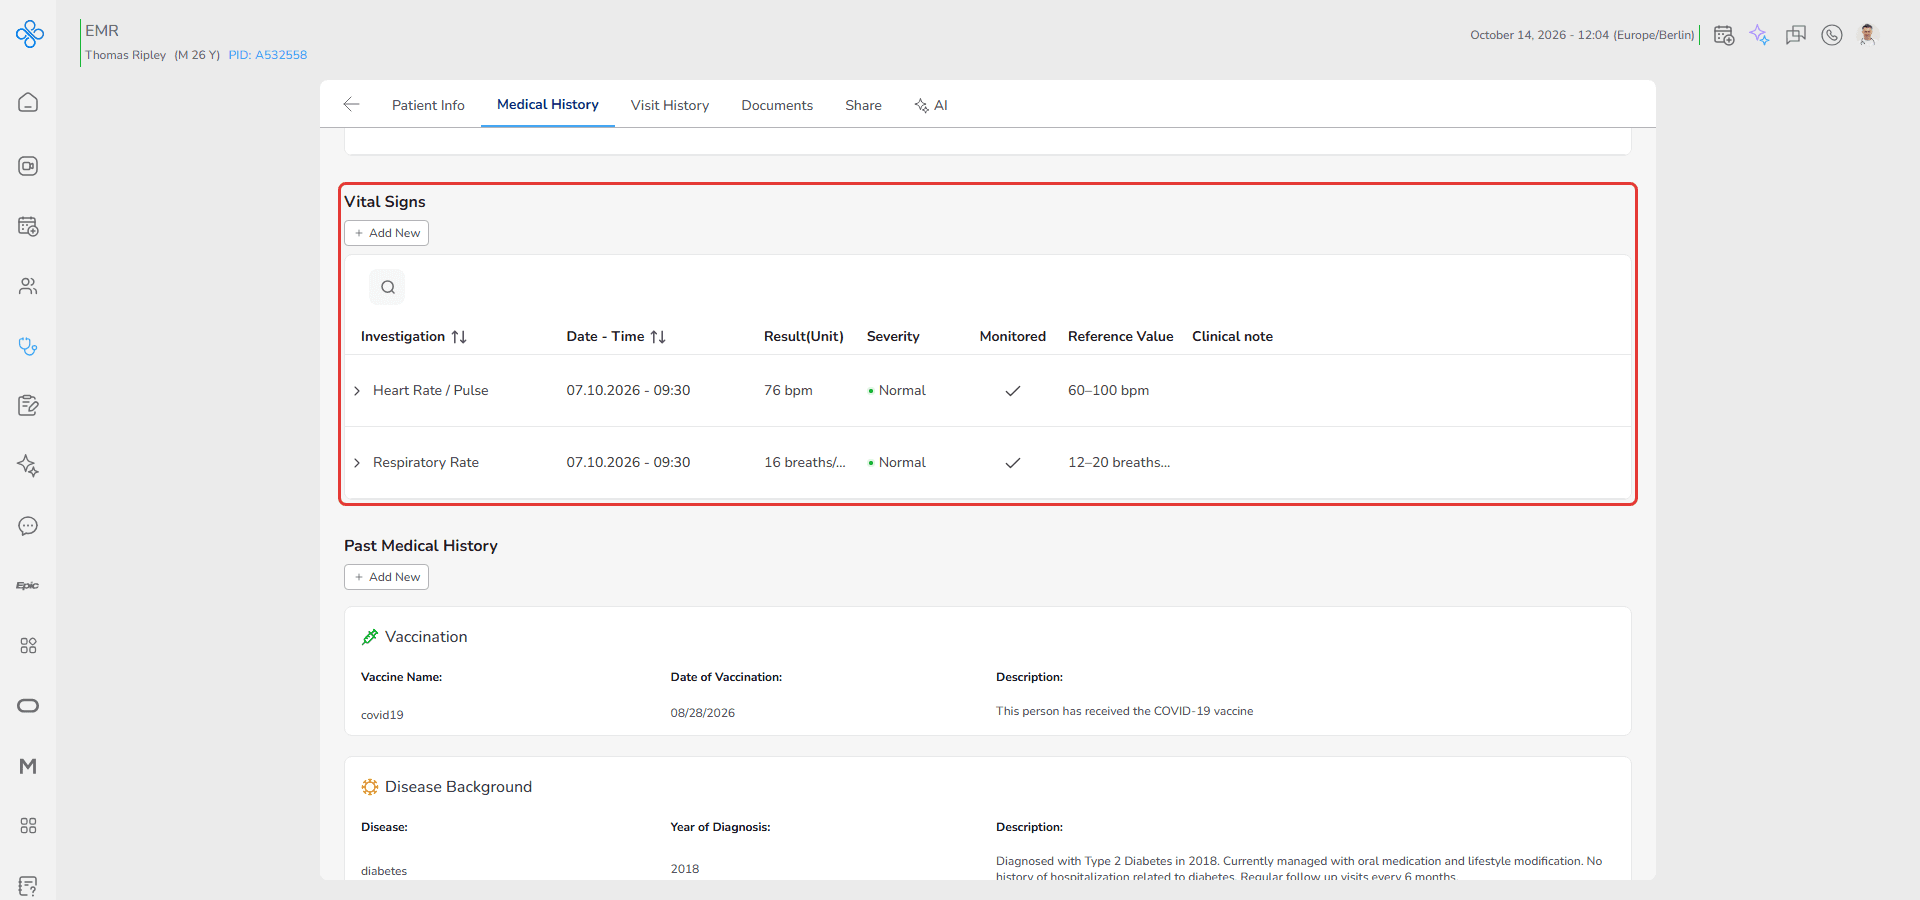
These measurements reflect the patient’s immediate clinical status and help detect acute changes or emerging risks.
Typical vital parameters include:
• Blood Pressure
• Heart Rate or Pulse
• Respiratory Rate
• Body Temperature
• Oxygen Saturation SpO₂
Each entry is stored as a structured clinical record and becomes part of the patient’s longitudinal medical history.
This section is intended for visit based documentation and continuous monitoring over time.
Access
To access Vital Signs:
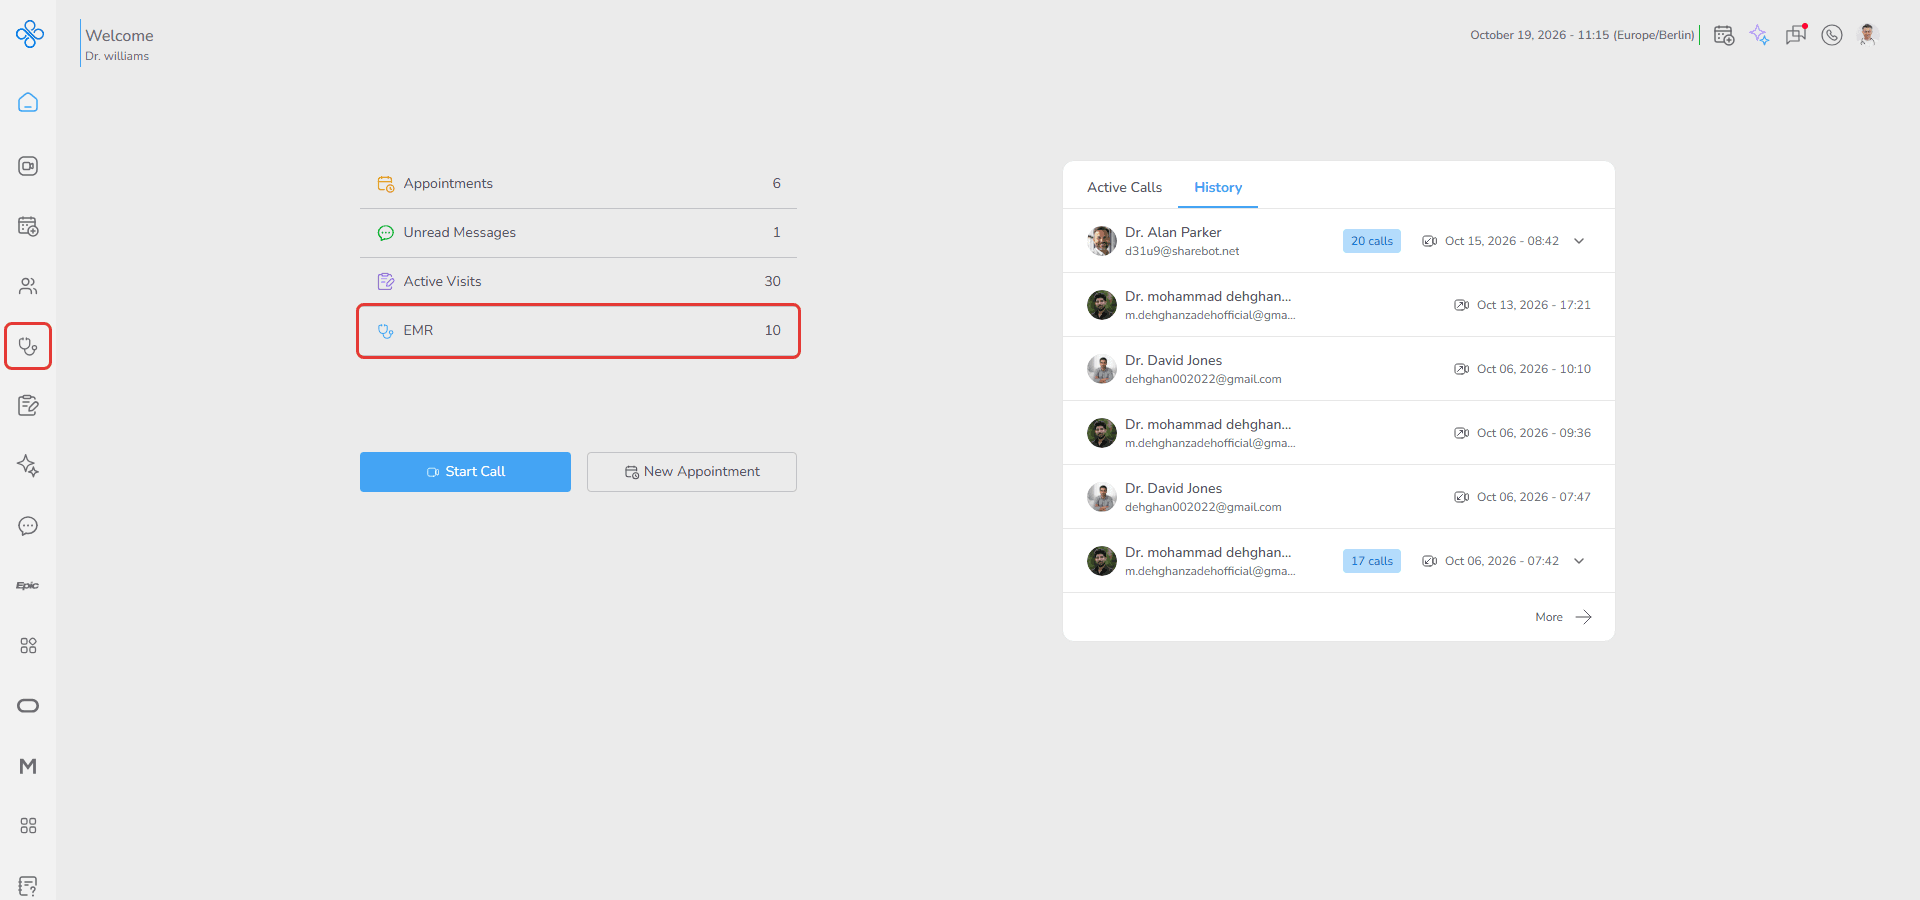
1. Open EMR from the Sidebar or Dashboard shortcut
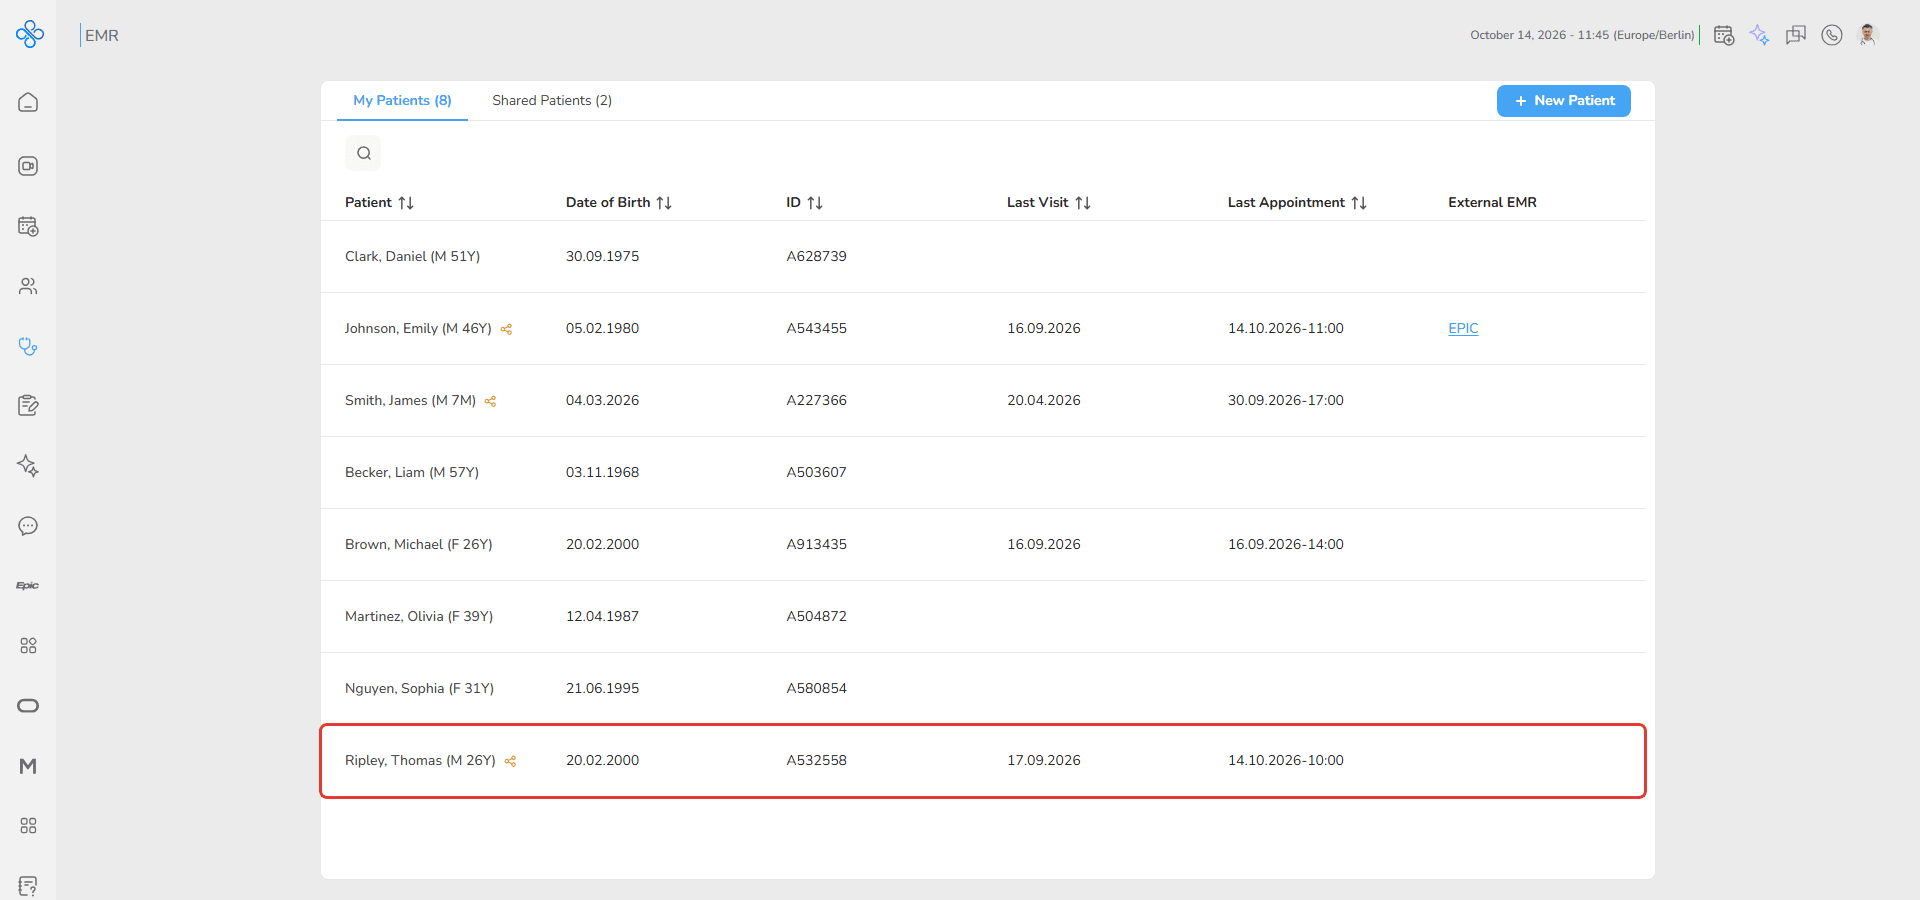
2. Select a patient from the list
3. Open the Medical History tab
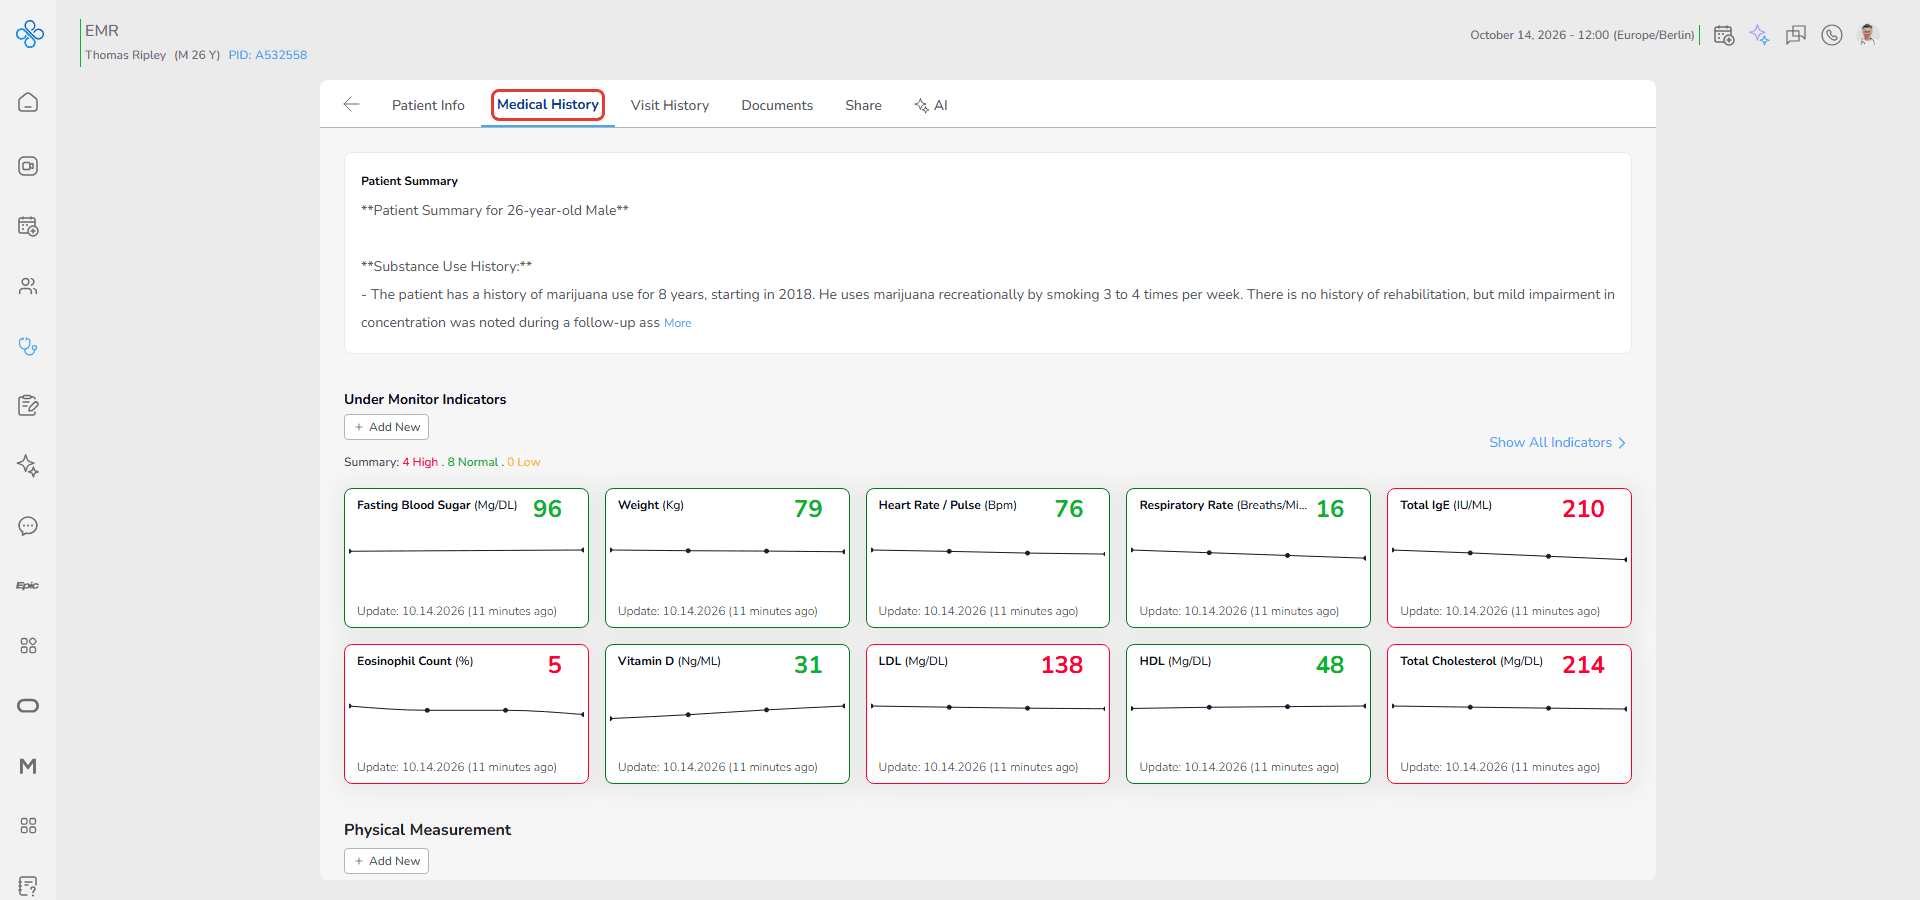
4. Scroll to the Physical Measurement section
If you do not have View permission for Medical History, this section will not be accessible.
If you do not have Edit permission, the Add and edit options will be disabled. (Access is explained in the Share guide.)
Steps to Create or Manage the Vital Signs
Step 1: Open the New Vital Sign Modal
- In the Vital Signs section, click + Add New
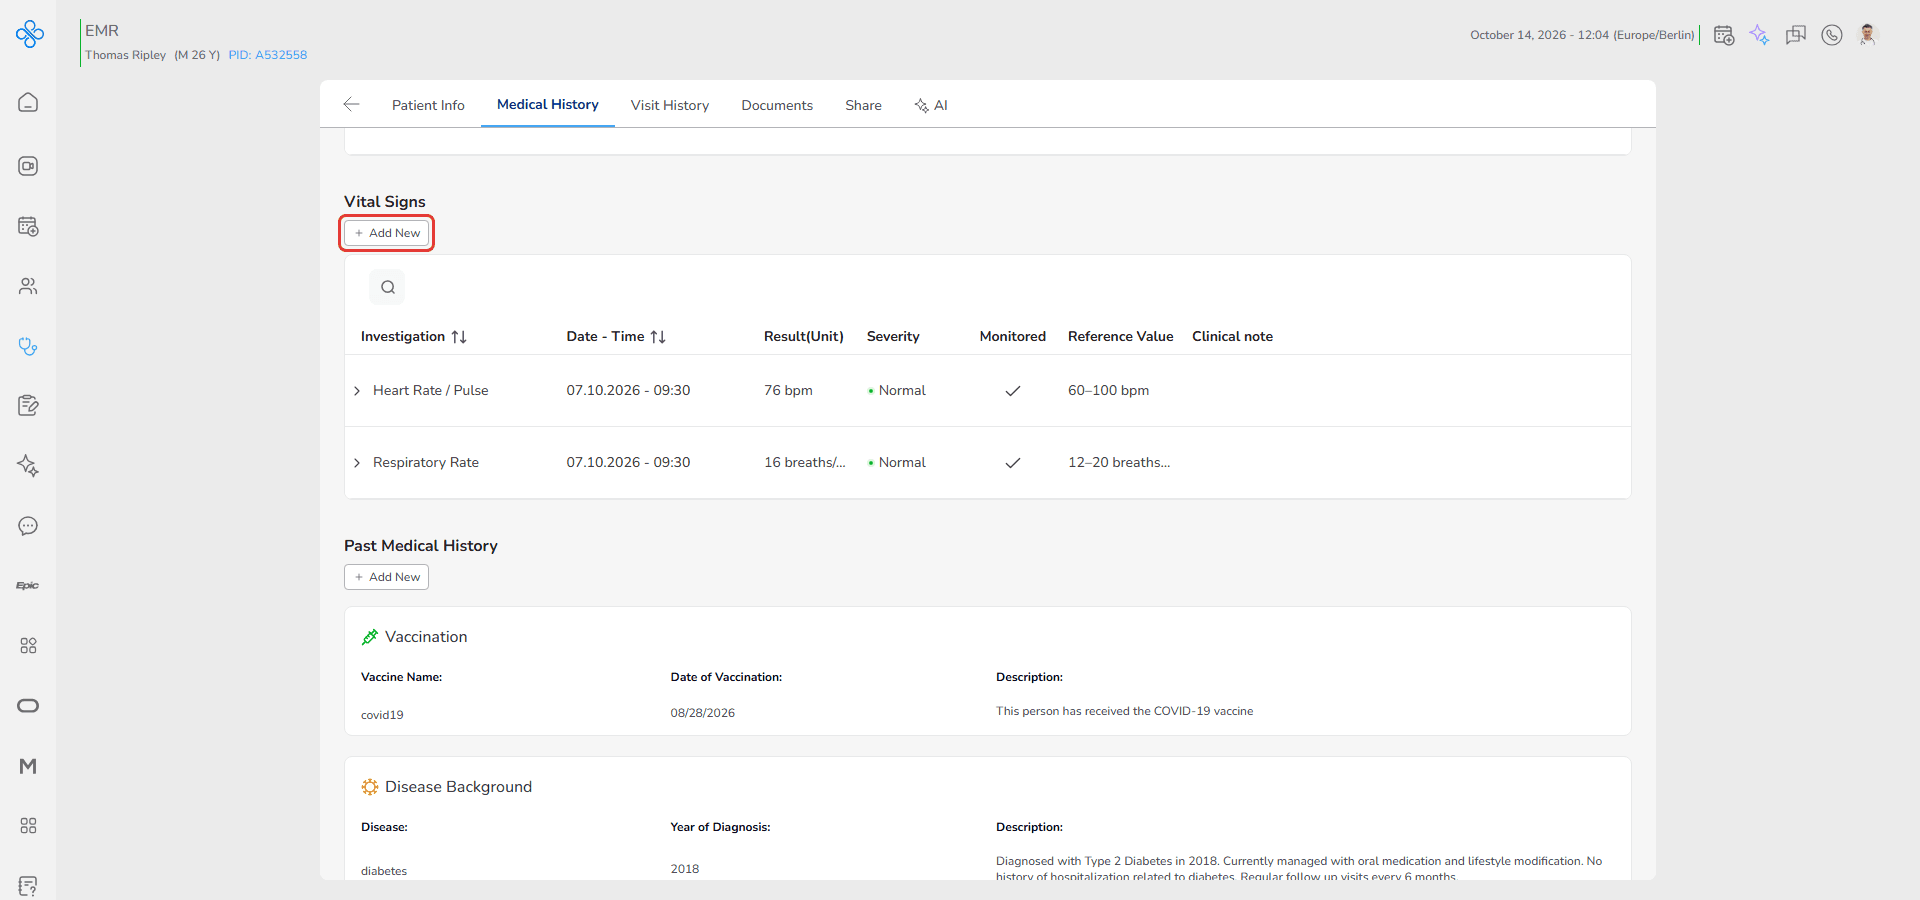
The New Vital Sign modal will open.
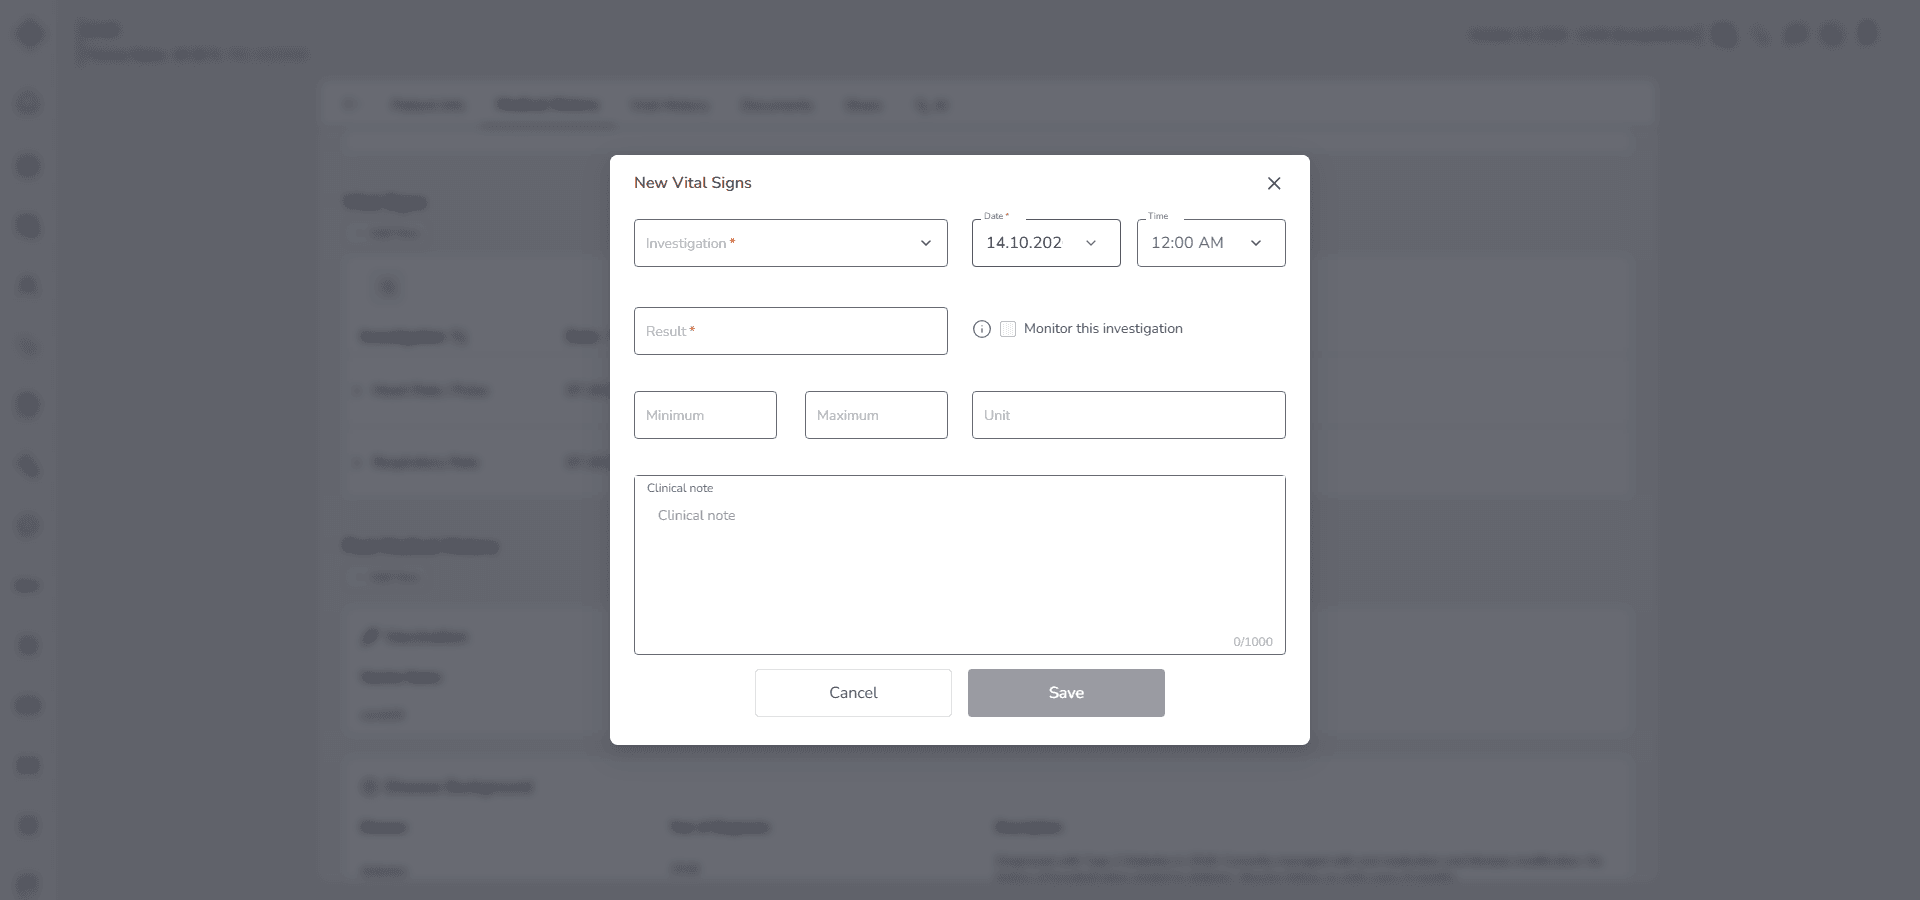
This modal contains structured fields for recording clinical measurements.
Step 2: Enter Measurement Data
Fill in the required fields carefully.
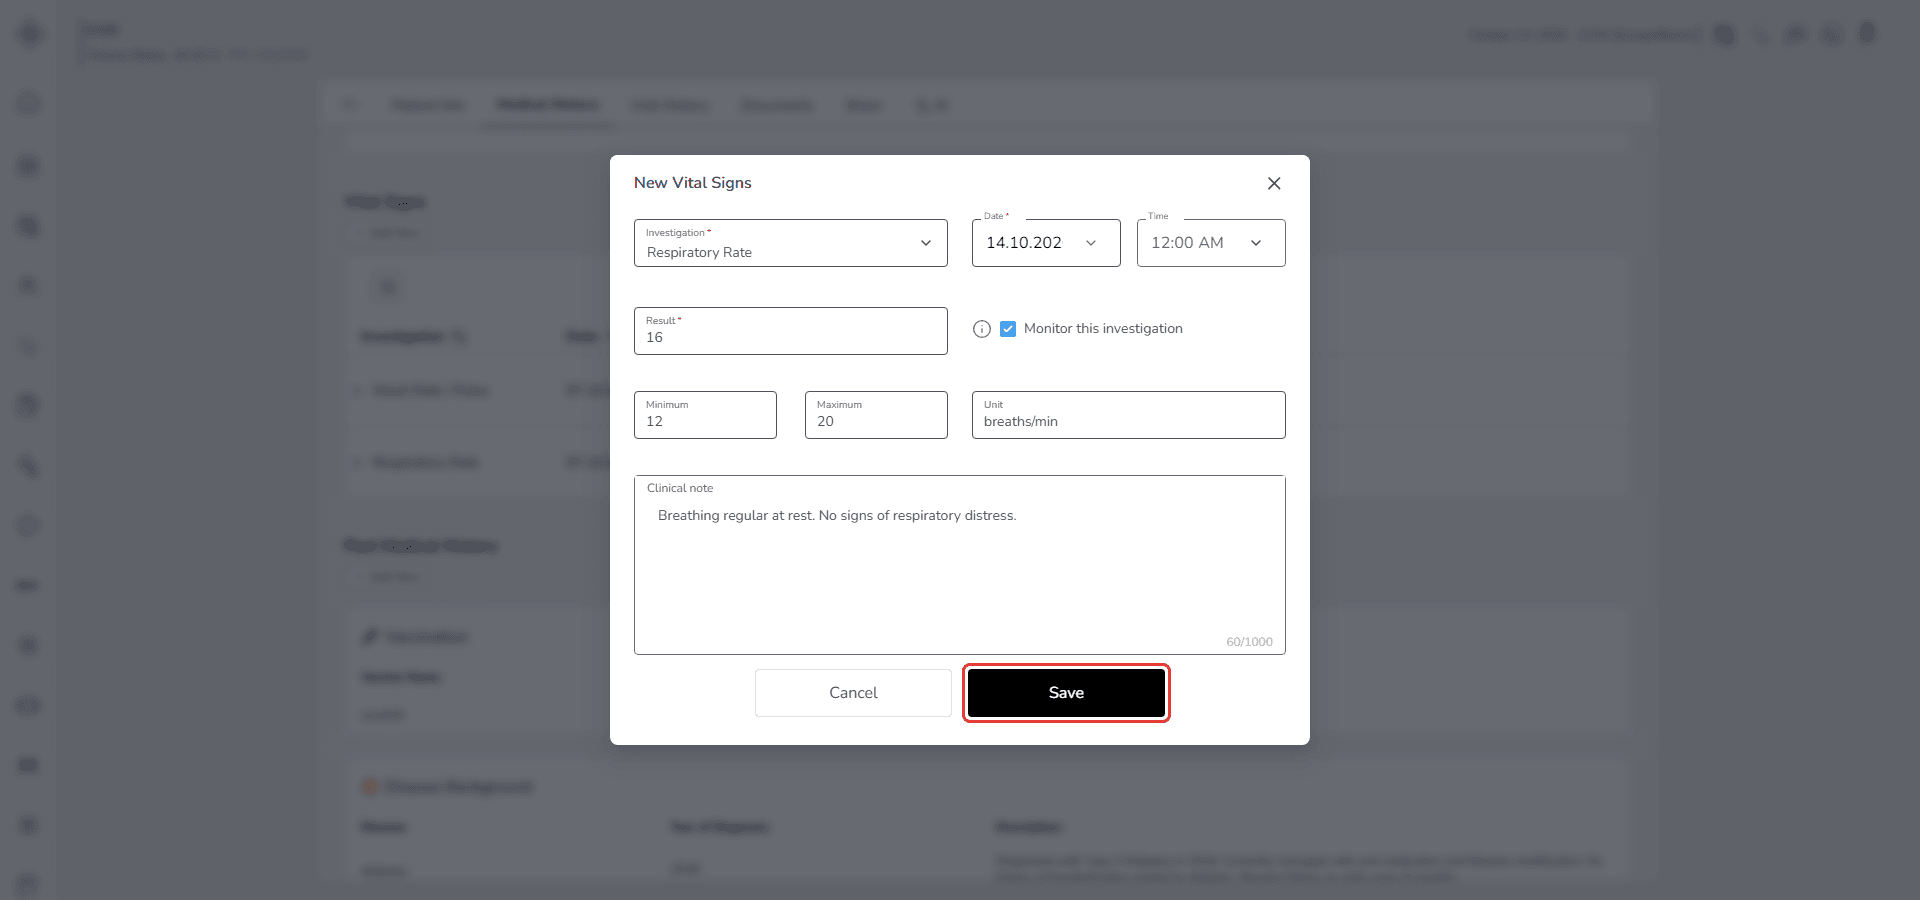
Make sure the values reflect the actual measured data and the correct unit.
If reference ranges are configured, they should match clinical standards.
Complete all mandatory fields before proceeding.
The system automatically evaluates the Severity based on the entered Result and the configured Reference Value. Optionally, enable Monitor this investigation if you want this vital sign to appear in the Under Monitor Indicators section.
Step 3: Save the Record
- Click Save to store the entry
- Click Cancel to exit without saving
After saving:
- The new record appears immediately in the Vital Signs list
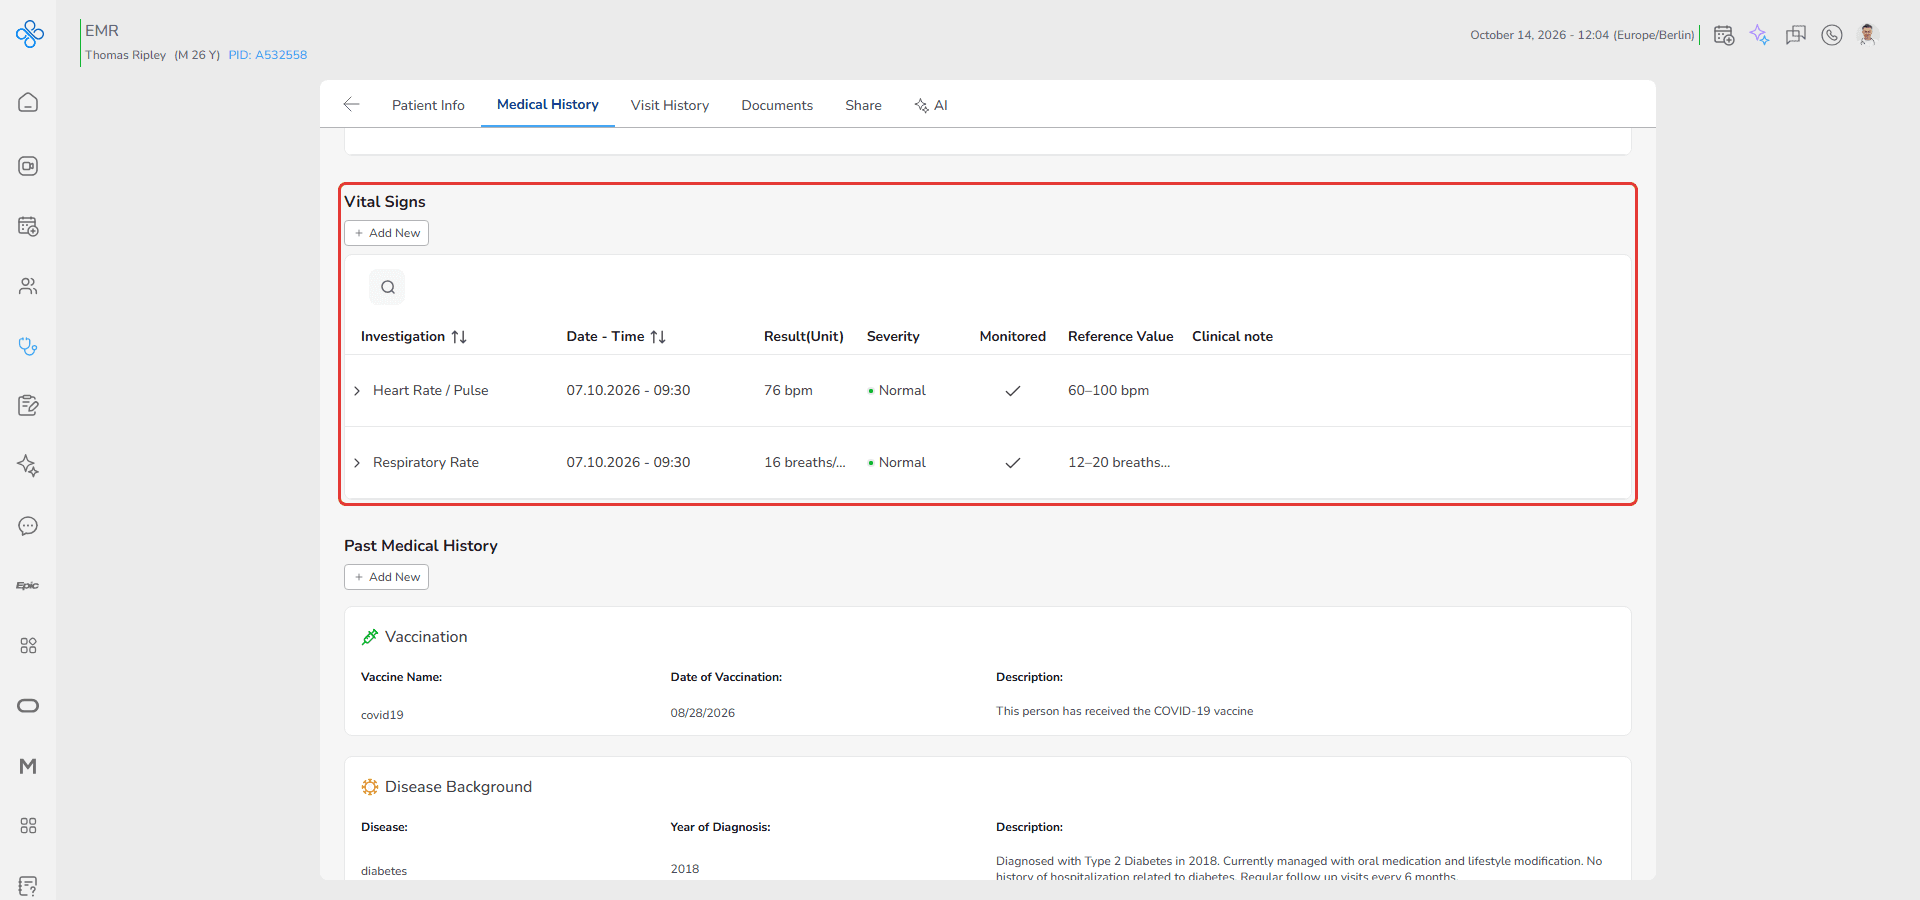
- The list updates without page refresh
- Severity is calculated automatically.
- If Monitor this investigation is enabled, the investigation is also added to the Under Monitor Indicators section.
Step 4: Manage an Existing Vital Sign Record
After saving a measurement, you can manage it directly from the Vital Sign list.
Each saved record includes a More Actions menu shown as ⋮ located between the values of the Investigation and Date columns.
Follow these steps:
Step 1: Open More Actions
*   Locate the measurement record in the list
*   Click the ⋮ icon
A dropdown menu will appear with available options.
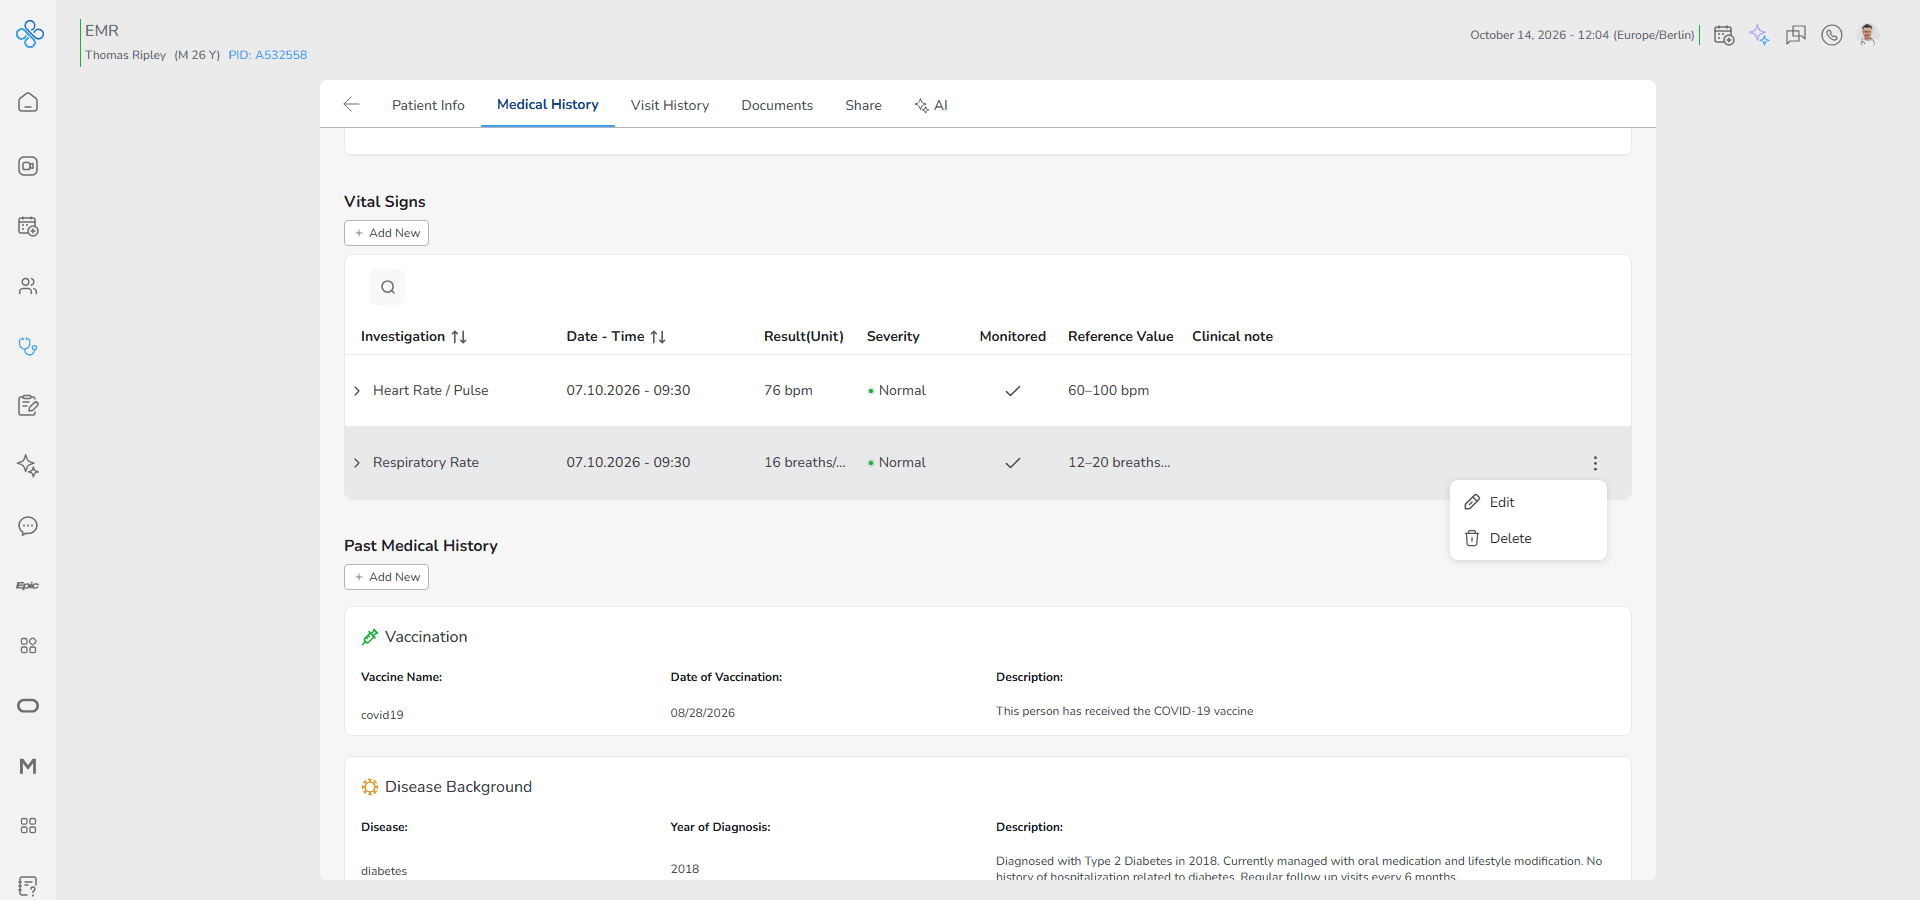
Step 2: Edit a Record
Use this option when you need to correct or update an existing entry.
- Click Edit from the More Actions menu
- The same Vital Sign modal will open
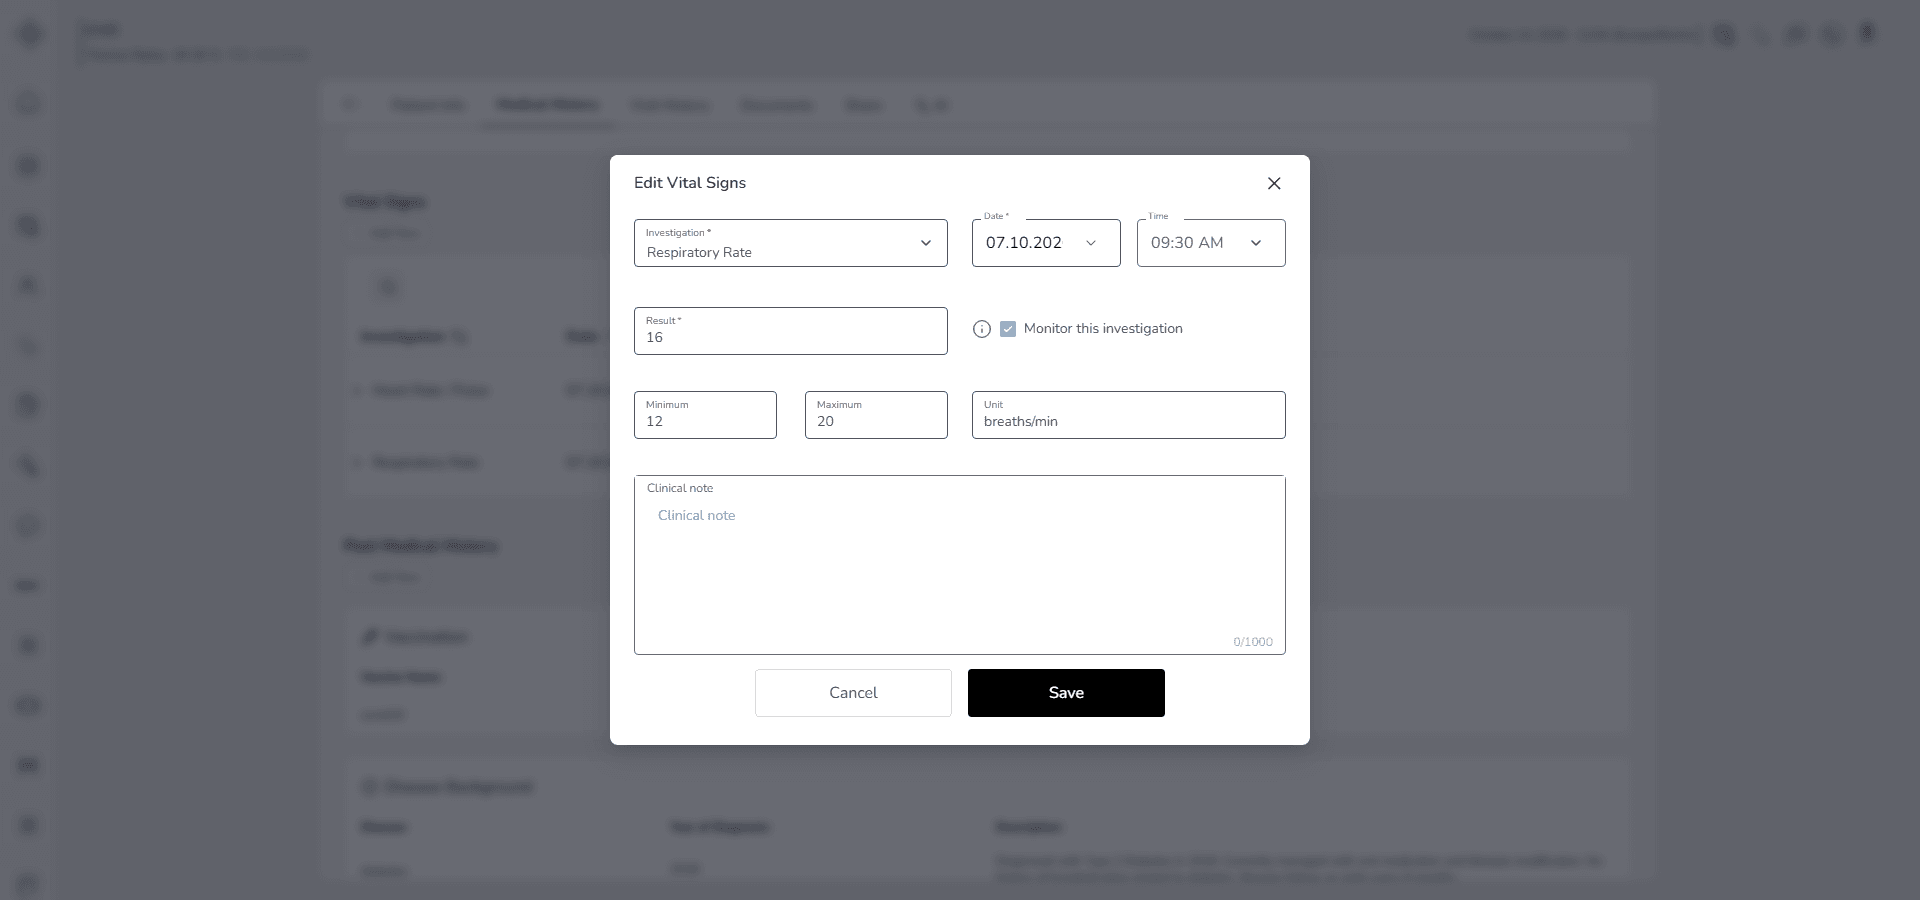
- All previously entered data will be prefilled in the form
You can now:
- Adjust the result value
- Modify Min or Max reference ranges if allowed
- Update the Clinical note
- Correct the measurement date and time
- Enable or disable Monitor this investigation
After making changes:
- Click Save to apply updates
- Click Cancel to discard changes
Once saved, the updated values appear immediately in the list.
Severity is recalculated automatically whenever the Result or Reference Value changes.
If the entered Result falls outside the configured Reference Value, the system automatically assigns the appropriate Severity.
If Monitor this investigation is enabled, the investigation is also displayed in the Under Monitor Indicators section.
Step 3: Delete a Record
Use this option when a measurement was entered by mistake or is no longer valid.
- Click Delete from the More Actions menu
- A confirmation prompt will appear
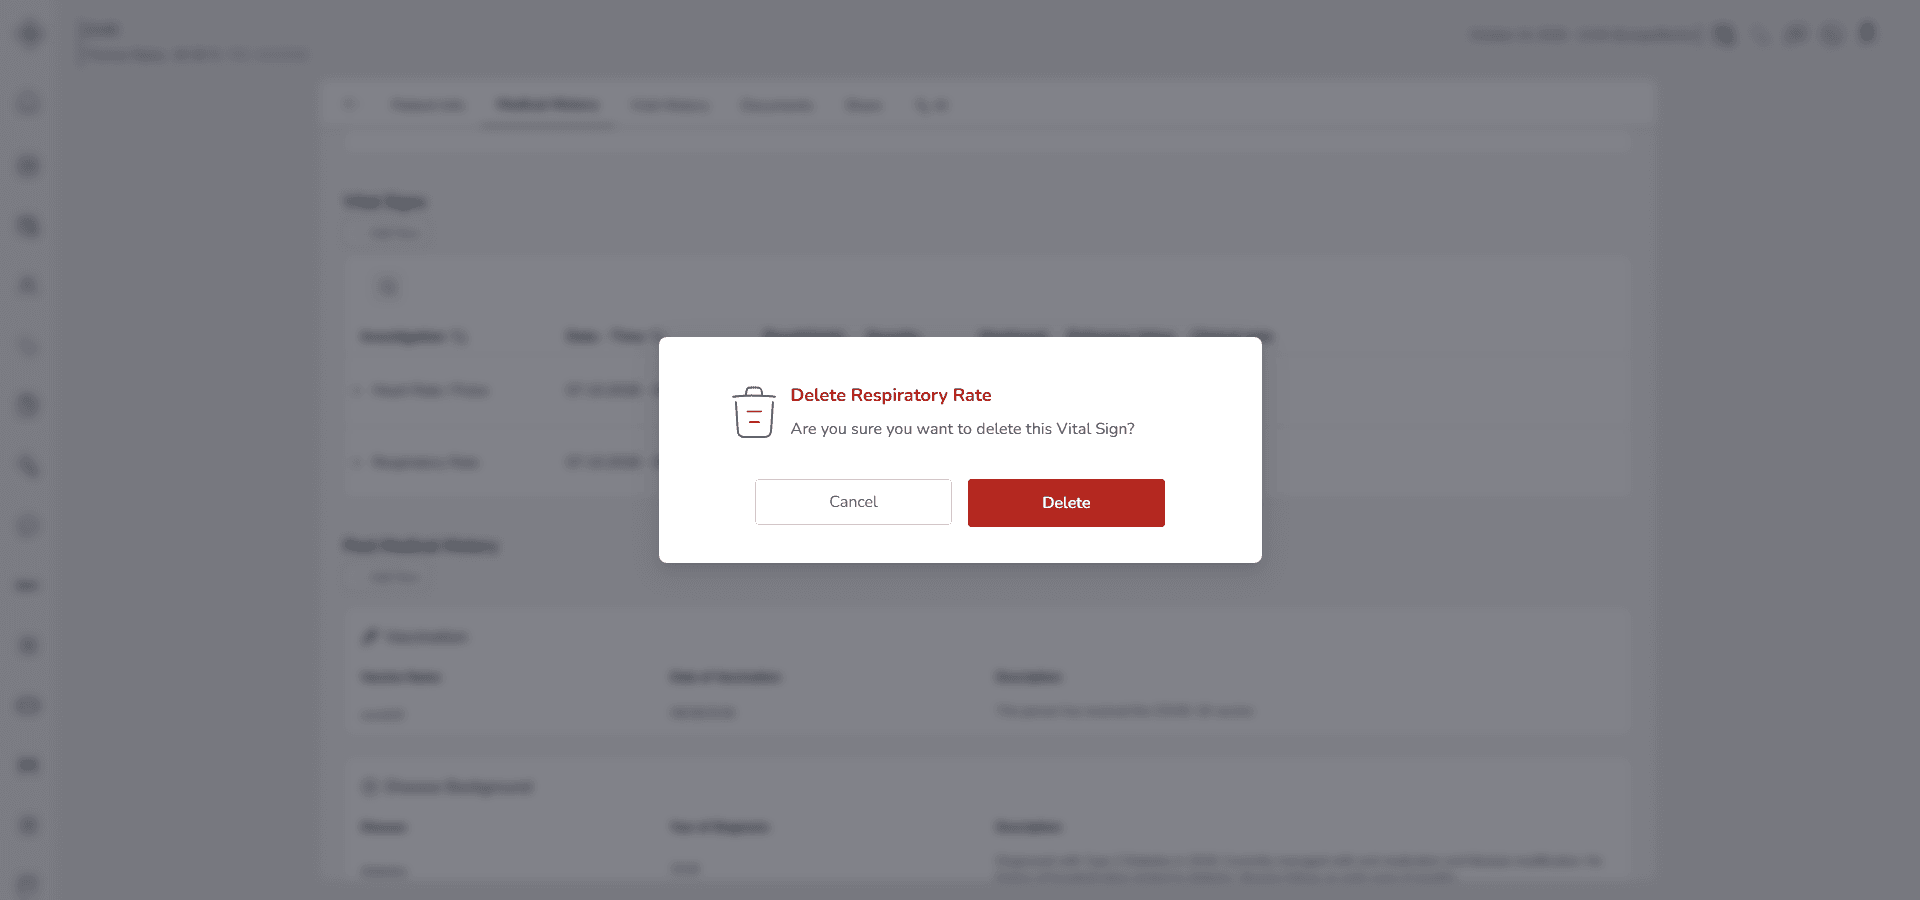
- Confirm the deletion
After confirmation:
- The record is permanently removed from the list
- The data will no longer appear in the Vital Sign section
Deletion cannot be undone.
Make sure the record is not clinically required before confirming removal.
Fields (Field Descriptions)
| Field | Description | Notes / Example |
|---|---|---|
| Investigation | Select the vital sign investigation | Required |
| Date | Measurement date | Required |
| Time | Measurement time | Required |
| Result | Recorded measurement value | Required |
| Monitor this investigation | Adds this investigation to Under Monitor Indicators | Optional |
| Reference Value | Minimum and maximum reference range | Optional |
| Unit | Unit of measurement | Optional |
| Clinical note | Additional clinical information | Optional (Maximum 1000 characters) |
Behavior & Expected Outcome
- After clicking Save, the Vital Sign appears immediately in the Vital Signs table.
- Severity is calculated automatically according to the configured Reference Value.
- The newest record is displayed at the top of the investigation history.
- Multiple measurements for the same investigation are grouped together and can be expanded or collapsed.
- If Monitor this investigation is enabled, the investigation also appears in the Under Monitor Indicators section.
- Edit opens the same form with all existing values prefilled.
- Delete removes the selected record after confirmation.
- View and Edit actions continue to follow the user's Medical History permissions.
- Without proper access rights, the Medical History tab remains inaccessible (Access is explained in the Share guide.)
This ensures that vital signs remain accurate, structured and clinically traceable.
Common Errors + Fixes
| Issue | Cause | Fix |
|---|---|---|
| Vital Sign cannot be saved | Required fields are missing | Complete all required fields before saving |
| Investigation list is empty | No available investigations exist | Create or configure the required investigation first |
| Severity is unexpected | Result falls outside the configured Reference Value | Review the entered Result and Reference Values |
| Vital Sign is not shown under Under Monitor Indicators | Monitor this investigation was not enabled | Edit the record and enable Monitor this investigation |
| Invalid Result | Entered value is not compatible with the selected investigation | Enter a valid numeric value using the appropriate unit |