Providers
Overview (What is this page?)
The Providers page is where you can find and work with doctors in a very simple and direct way.
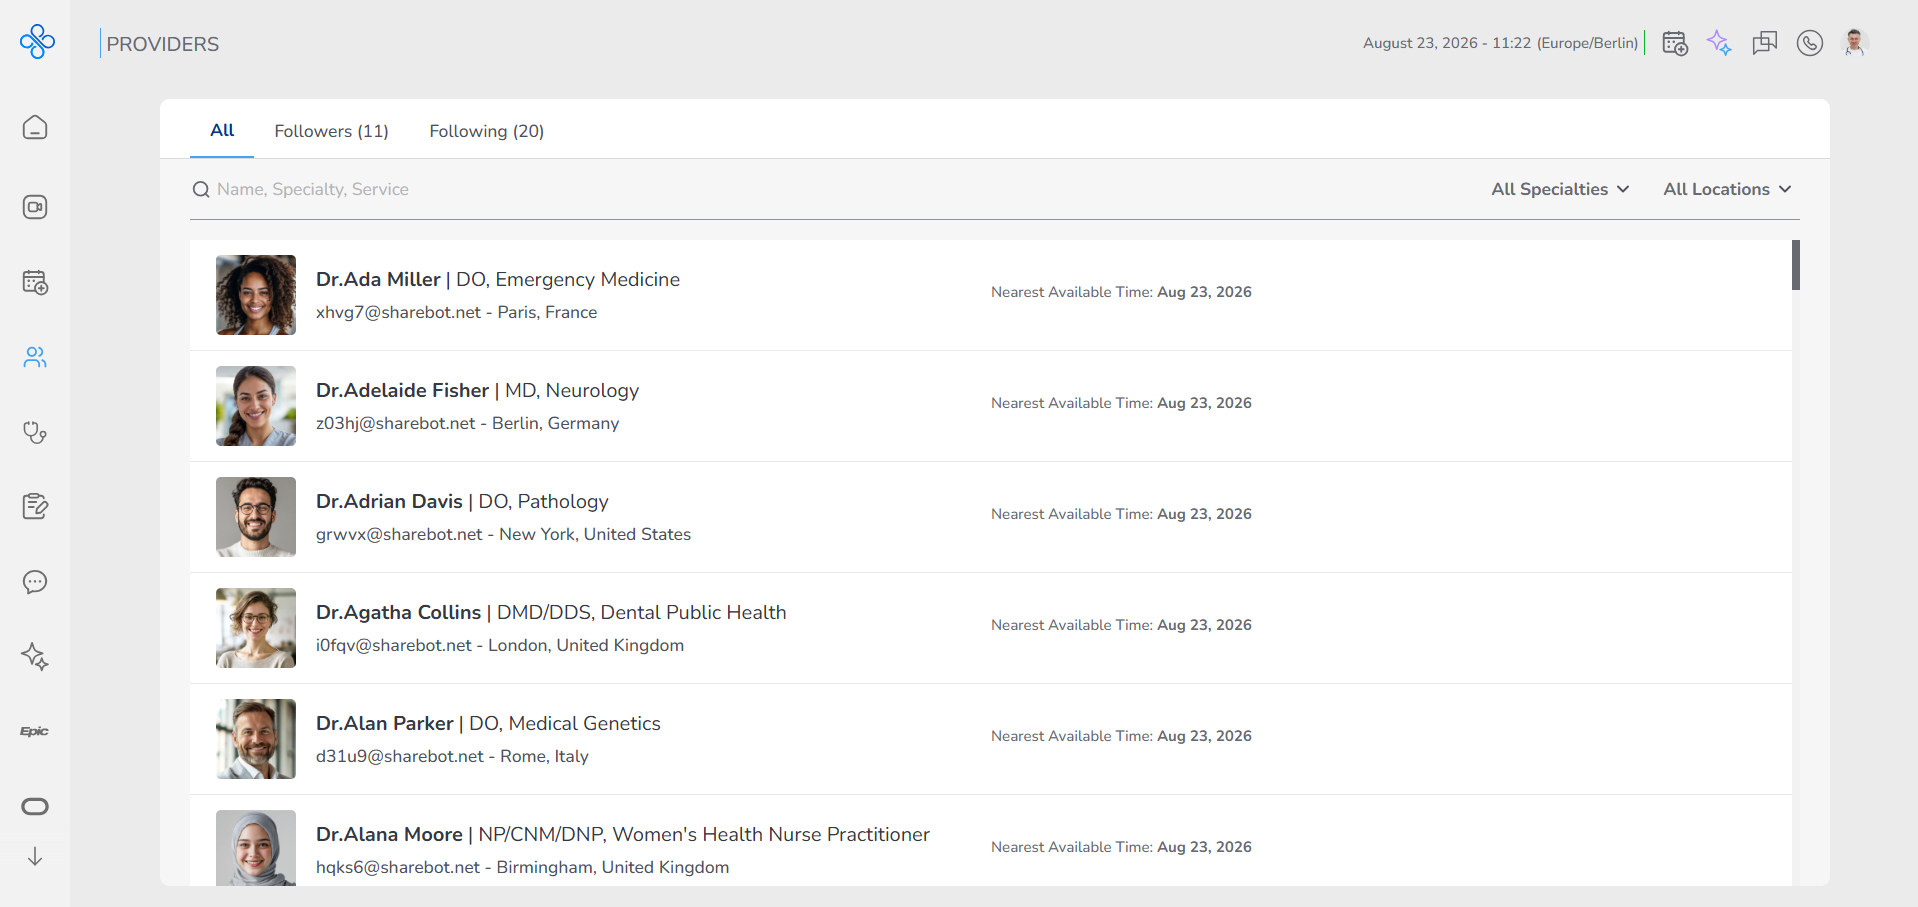
When you open this page, you see a list of providers along with basic information like their name, specialty, location, and nearest available time, so you can quickly understand who they are without opening anything. At the top of the page, you have a search bar and filters that help you narrow down the list based on what you are looking for, and the list updates instantly as you type or change filters. The page is also divided into tabs (All, Followers, Following) so you can easily switch between different groups of providers depending on your relationship with them.
👉 In simple terms, you use this page to find the right provider, check what they do, see when they are available, book appointments, follow them to stay connected, and chat, call, or share files with them — all in one place.
One very useful feature is that when you move your mouse over a provider, their available time slots appear right away, allowing you to quickly pick a time and start booking without extra steps. If you need more details, you can click on a provider to open their profile, where you can see full information and take actions like following them, booking appointments, or starting communication. Following a provider is important because it enables chat and helps you stay connected with them. Once connected, you can send messages, share files, or start voice and video calls directly inside the system. Overall, this page is designed to help you go from finding a provider to interacting with them as quickly and smoothly as possible, without needing to move between different sections.
How to Access the Providers Page
You can open the Providers page in the following way:
- From the Sidebar
-
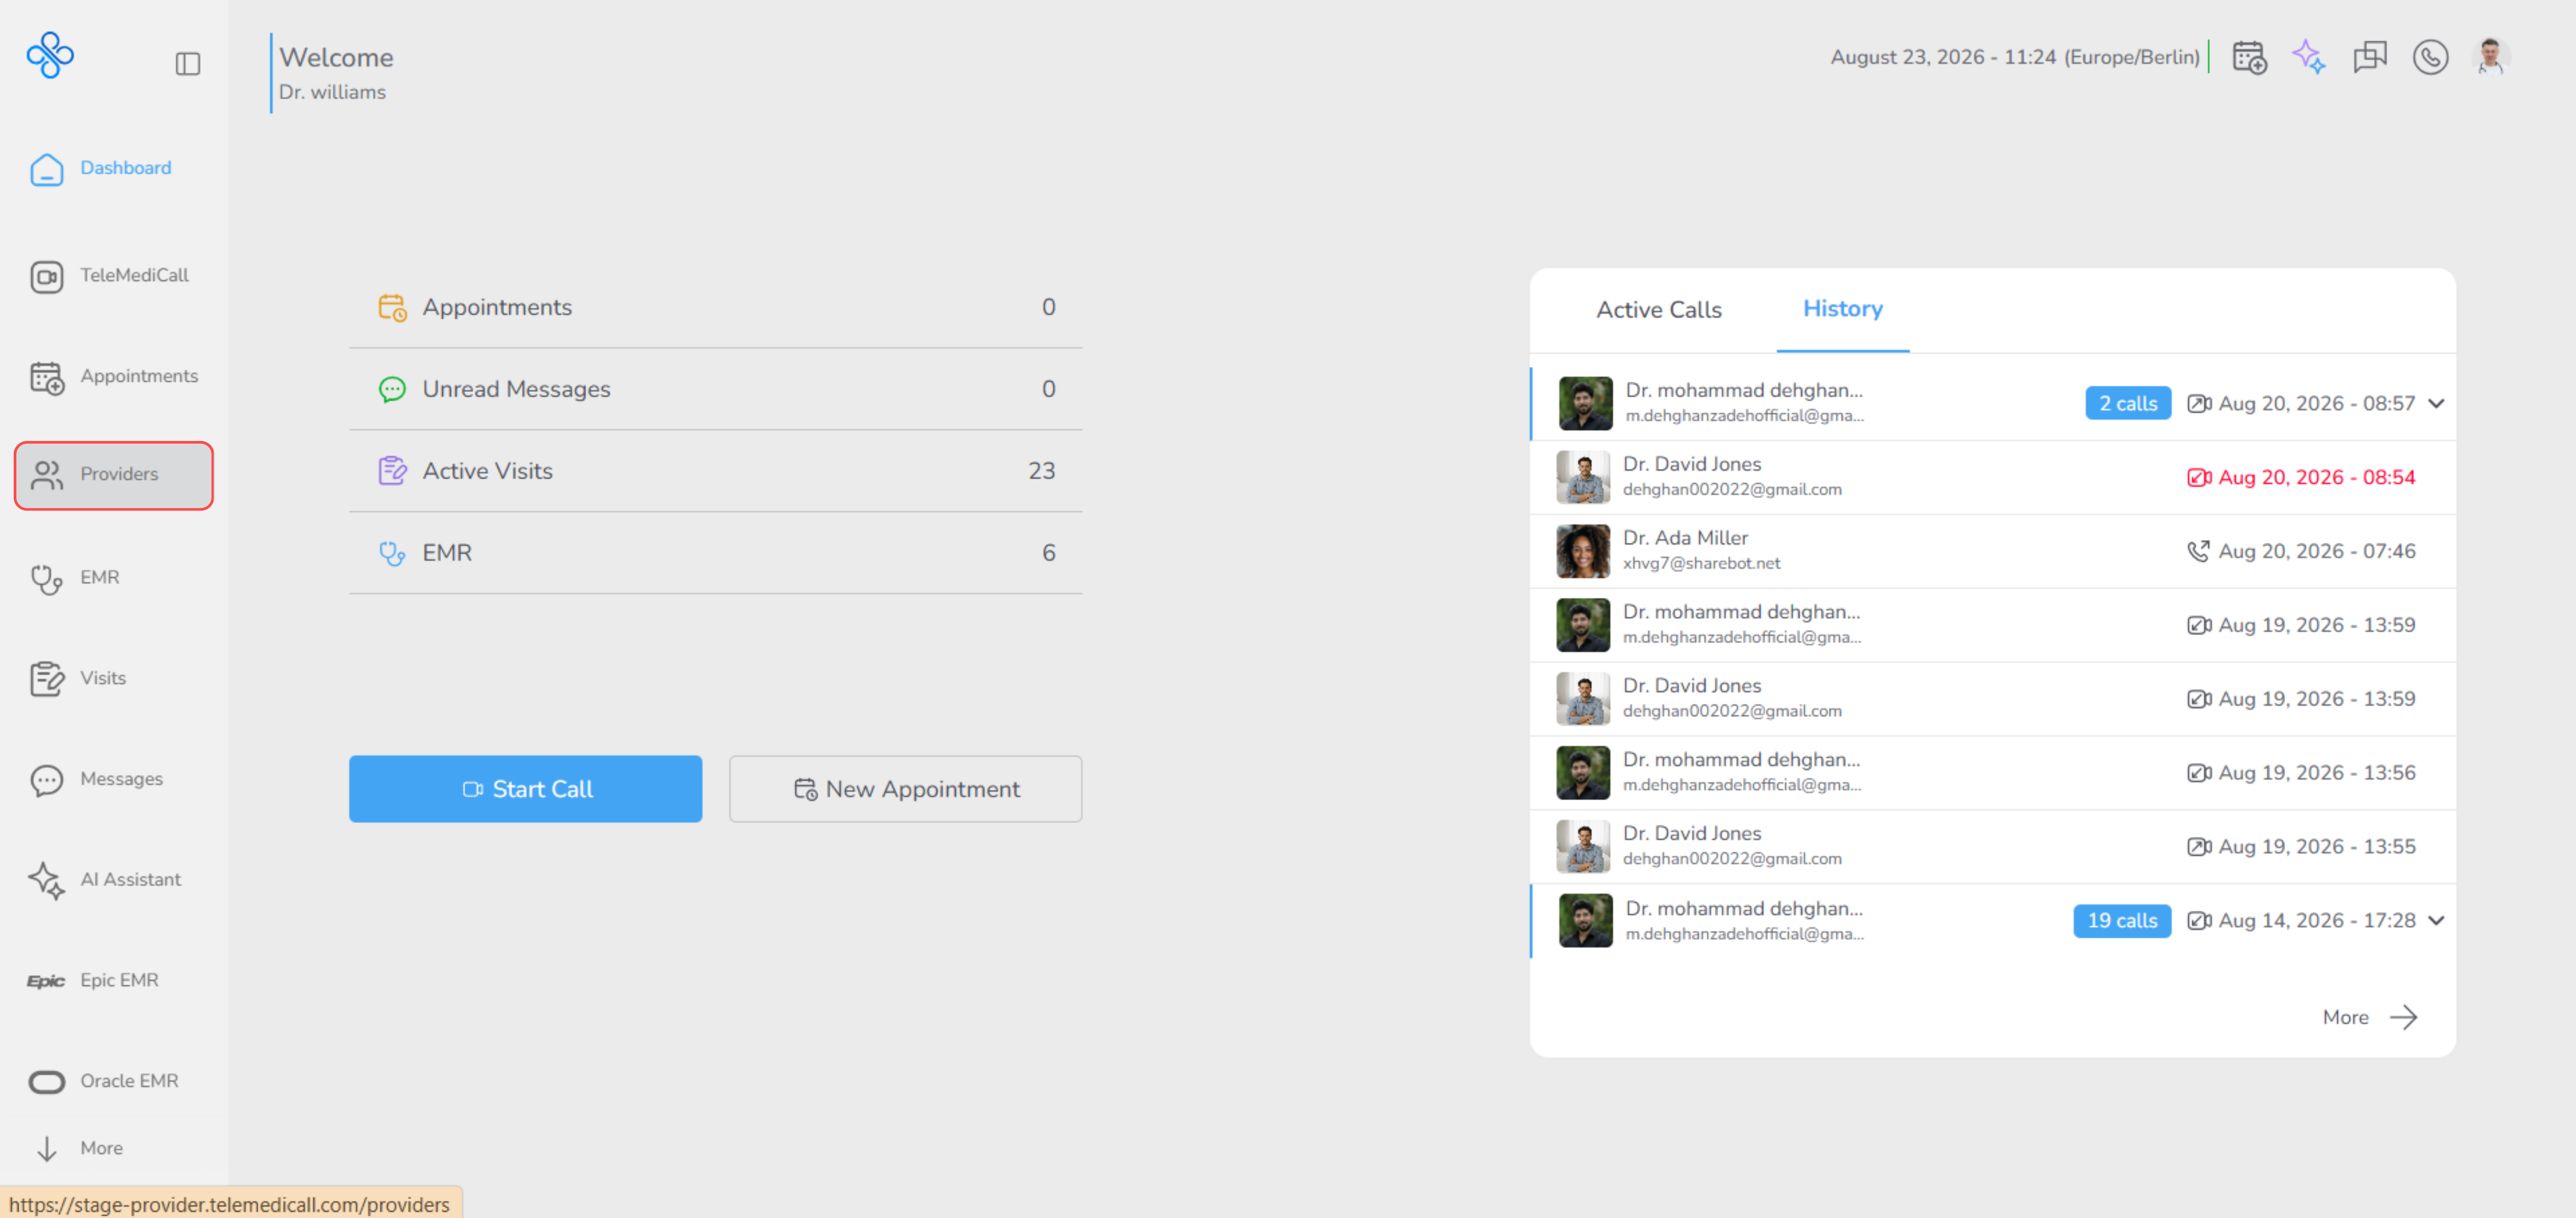
Click Providers in the left sidebar menu.
- From the Dashboard
-
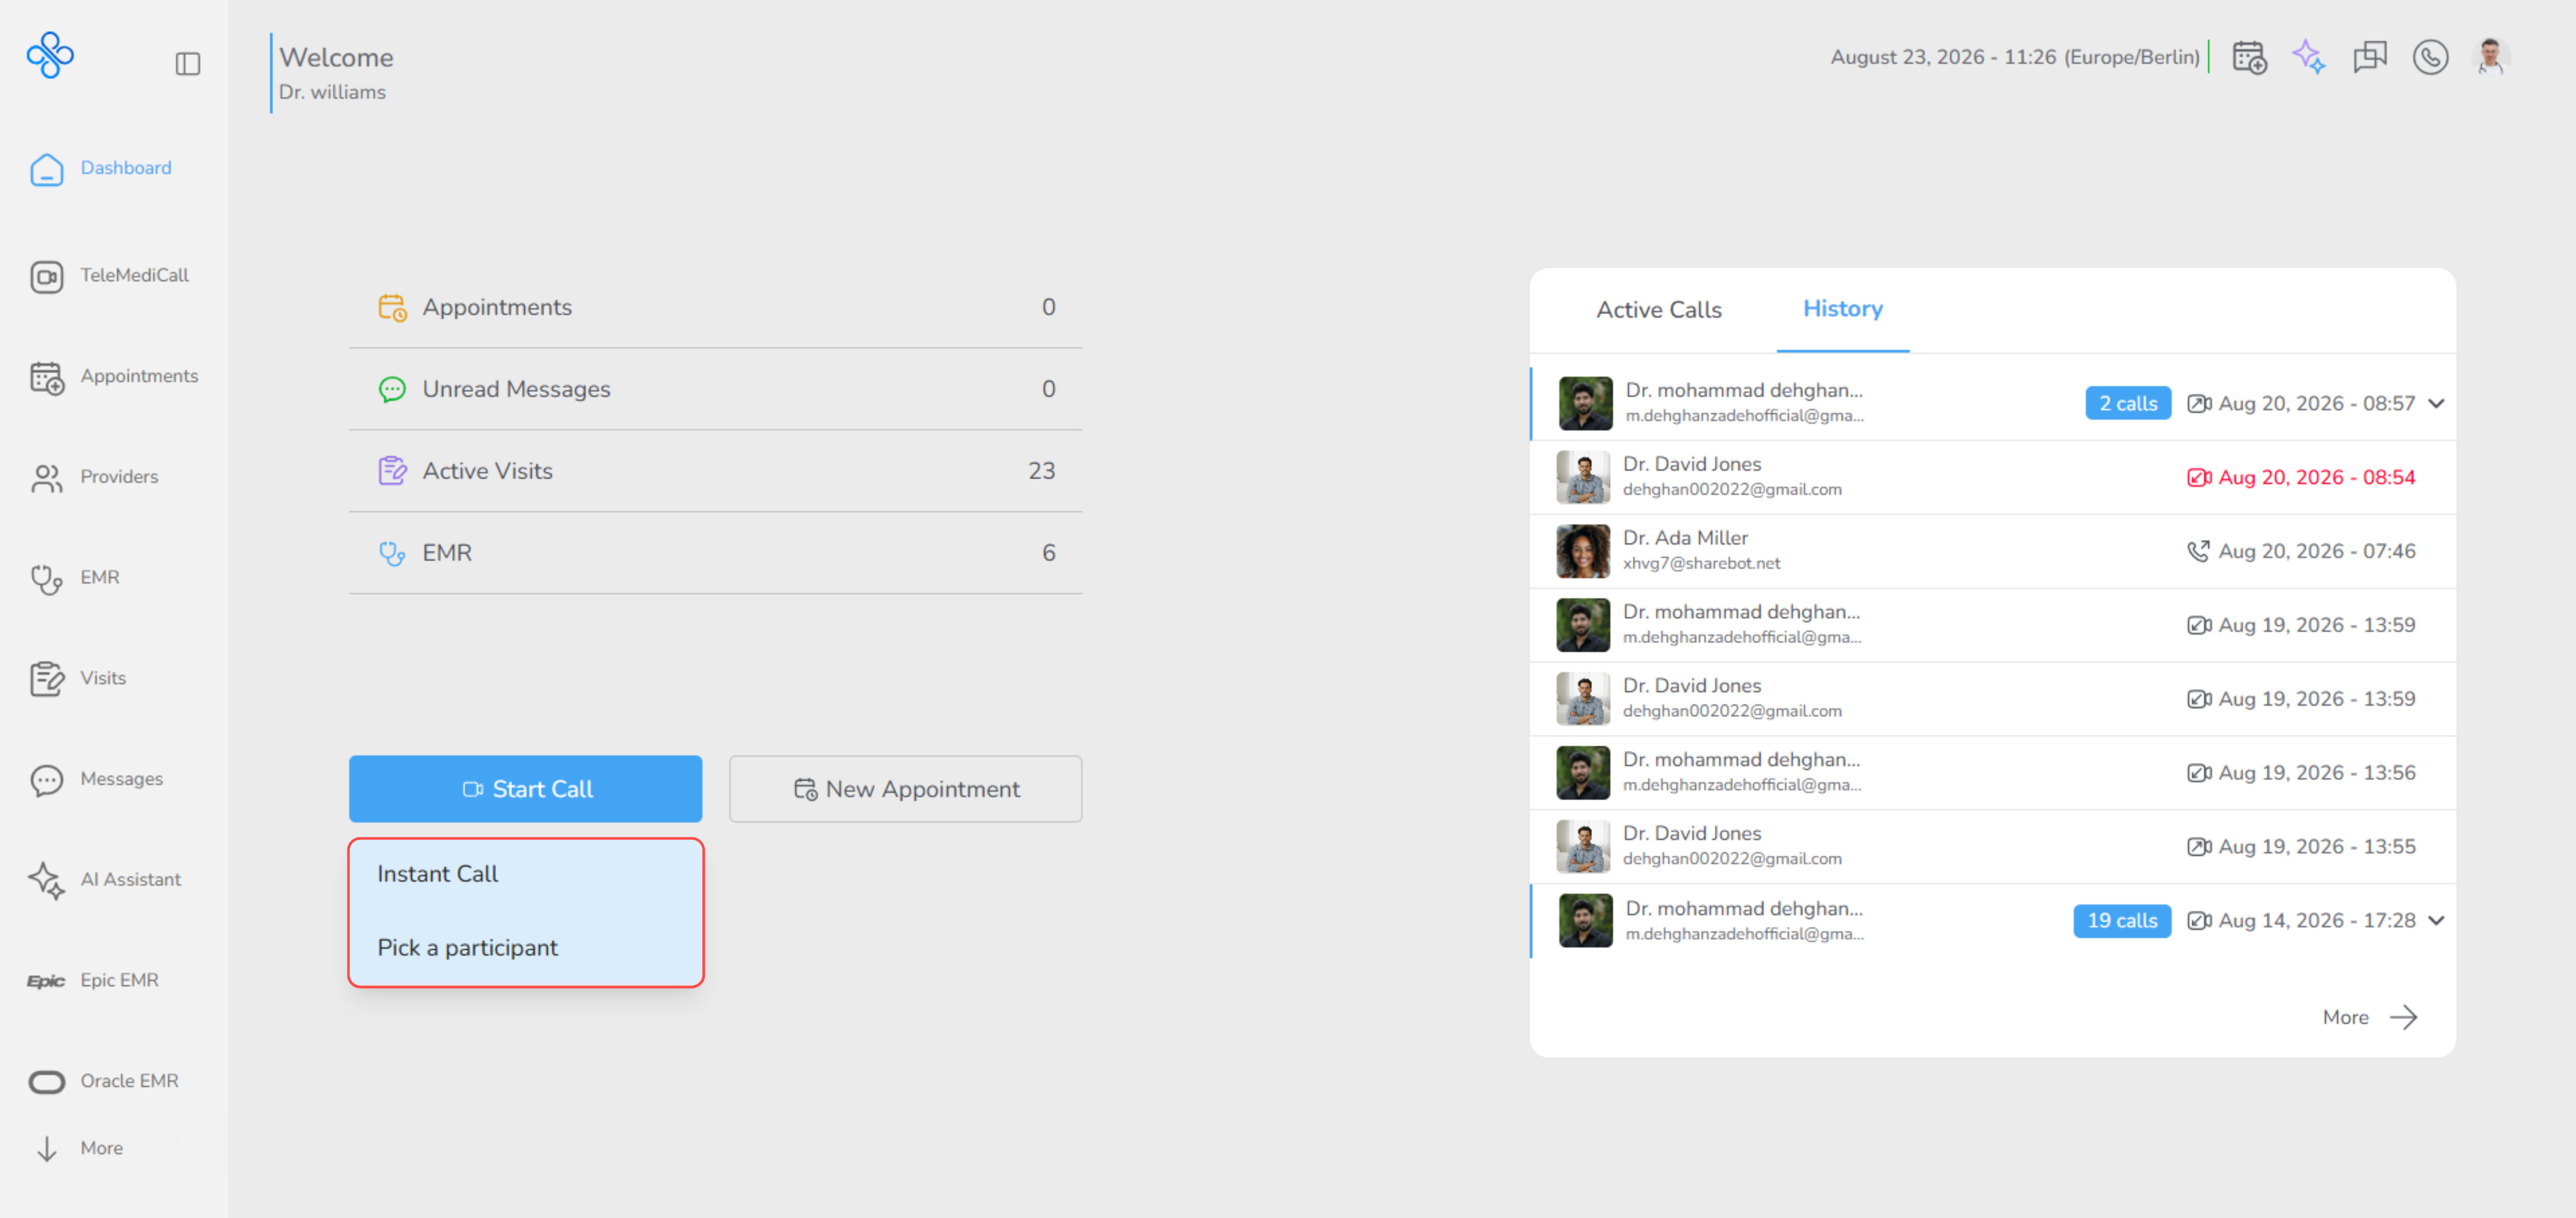
Click the Start Call button.
-
From the dropdown menu that appears, select New Instant Call.
Page Structure (What do you see here?)
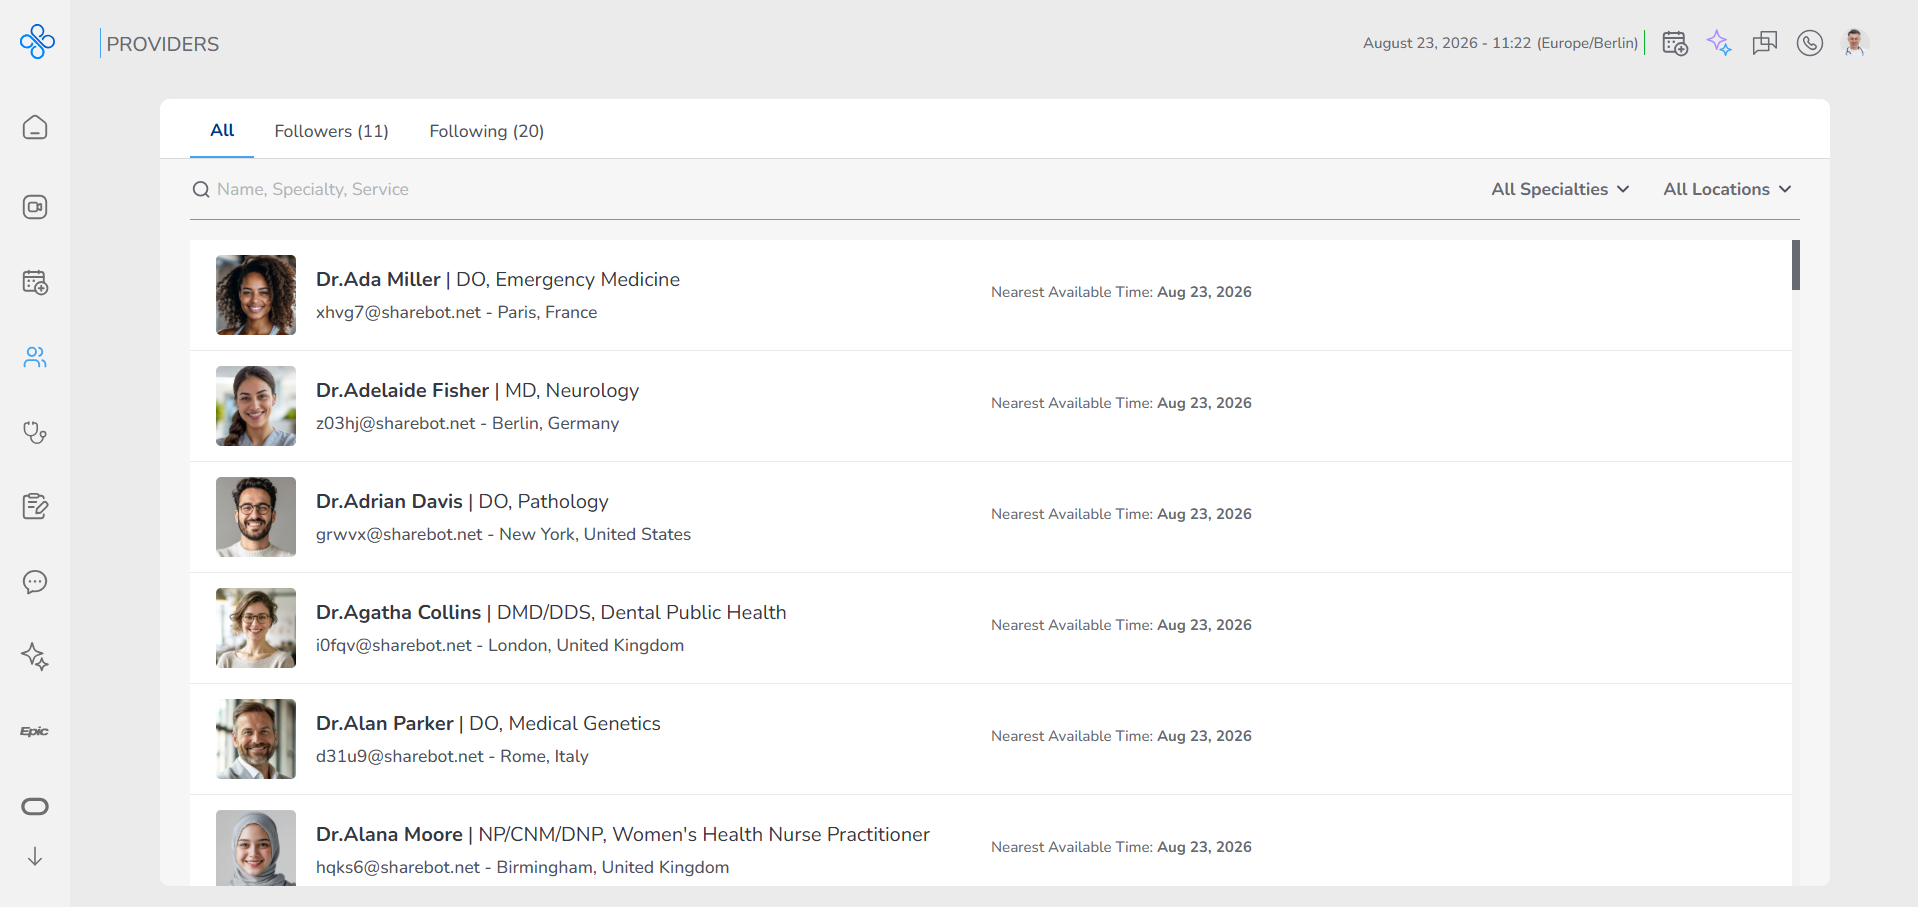
When you open the Providers page, everything is organized in a way that helps you find and choose a provider without confusion. Each part of the page has a clear purpose, so once you understand it, working with the page becomes very easy.
1. Tabs (Top of the list)
At the top of the page, you will see three tabs. These tabs help you control which providers you are looking at.
- All
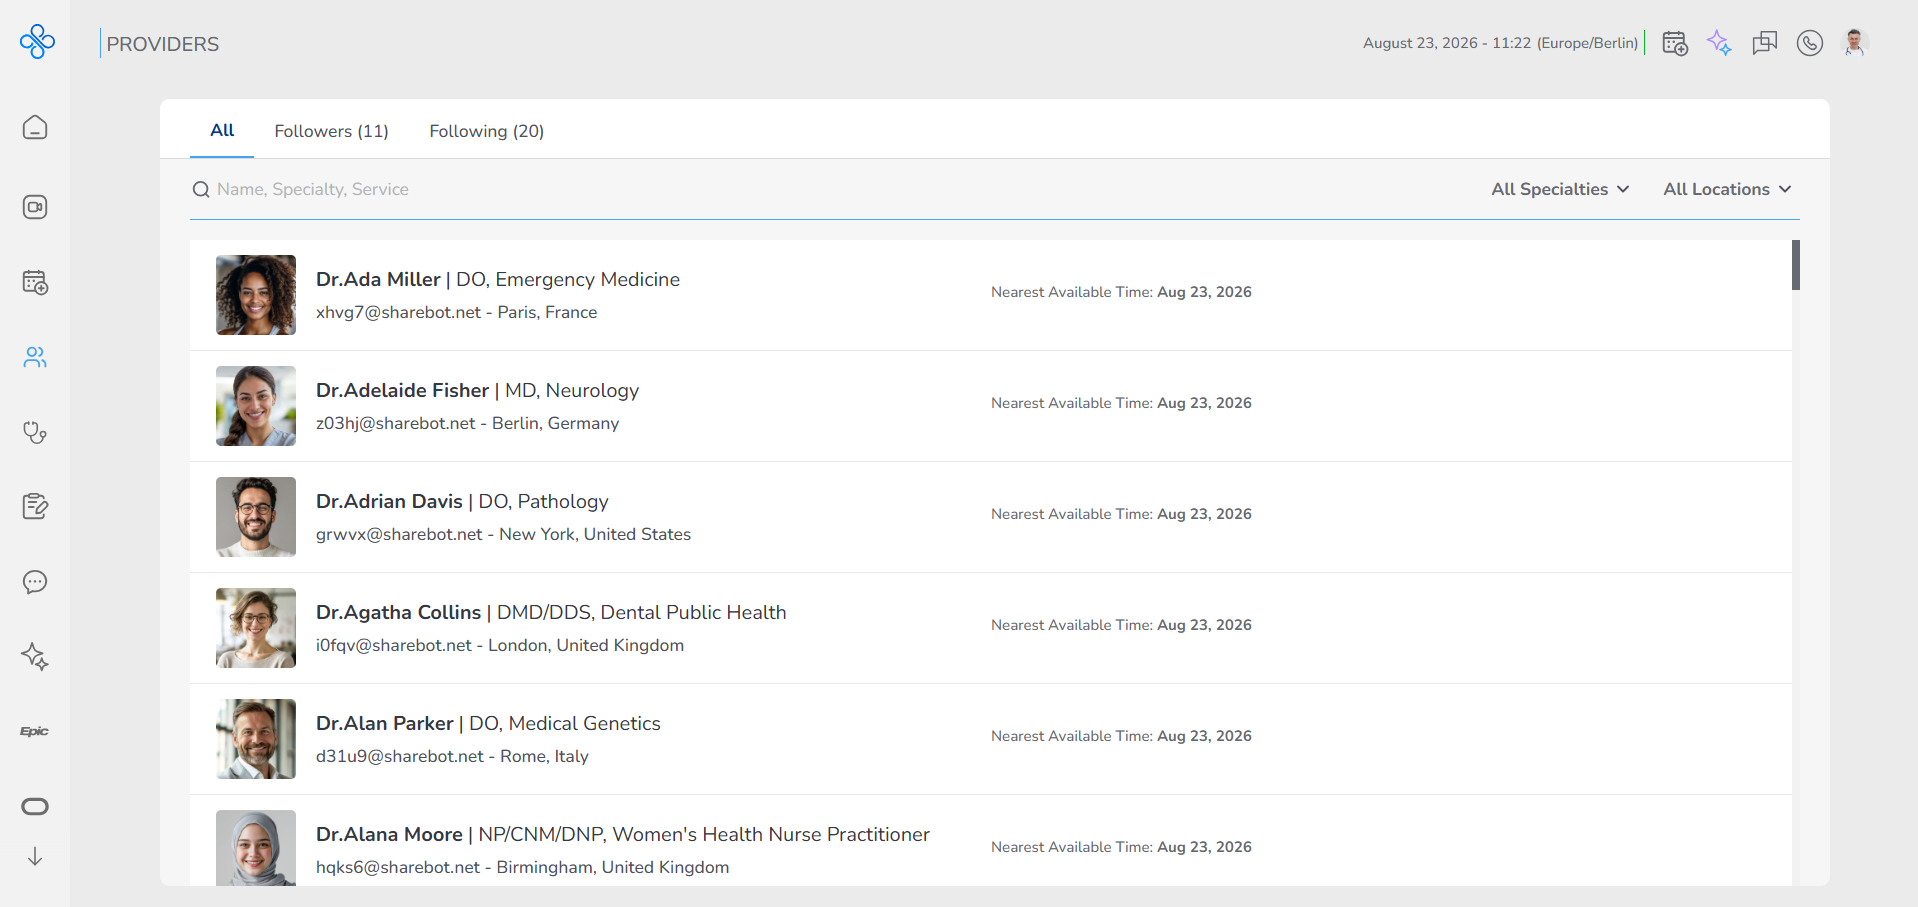
This shows every provider in the system. Use this when you want to explore or find someone new.
- Followers
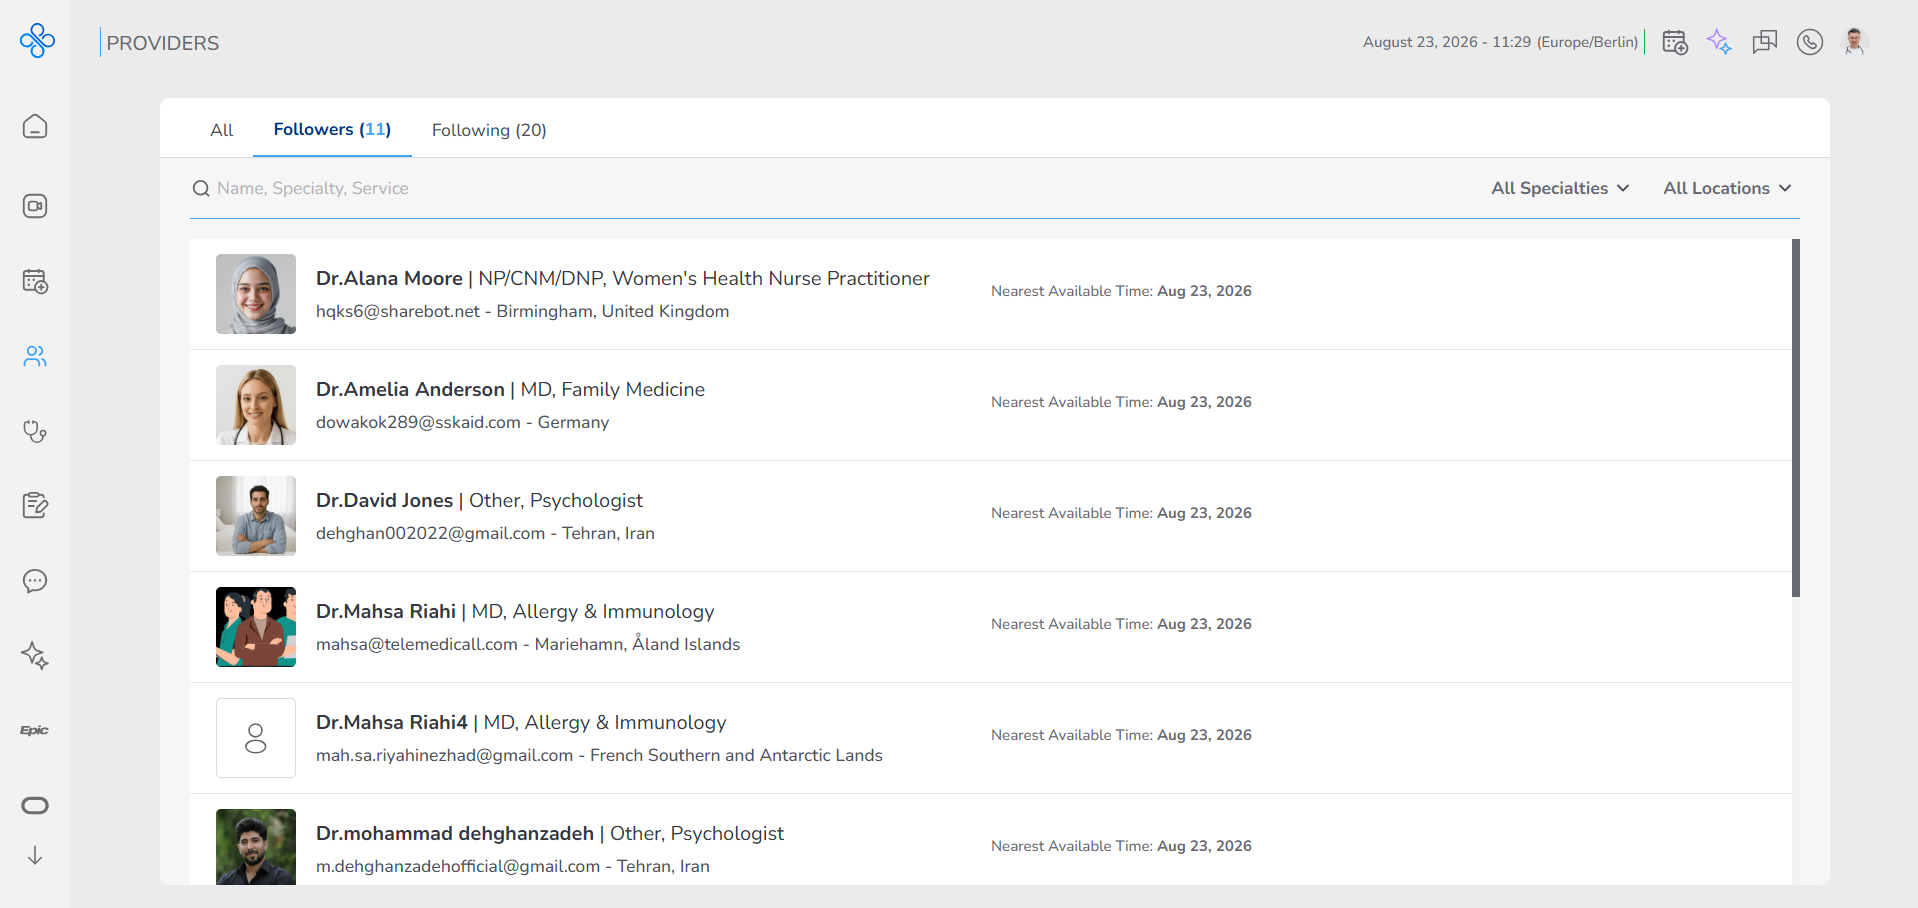
This shows providers who follow you. This is useful if someone has already connected with you.
- Following
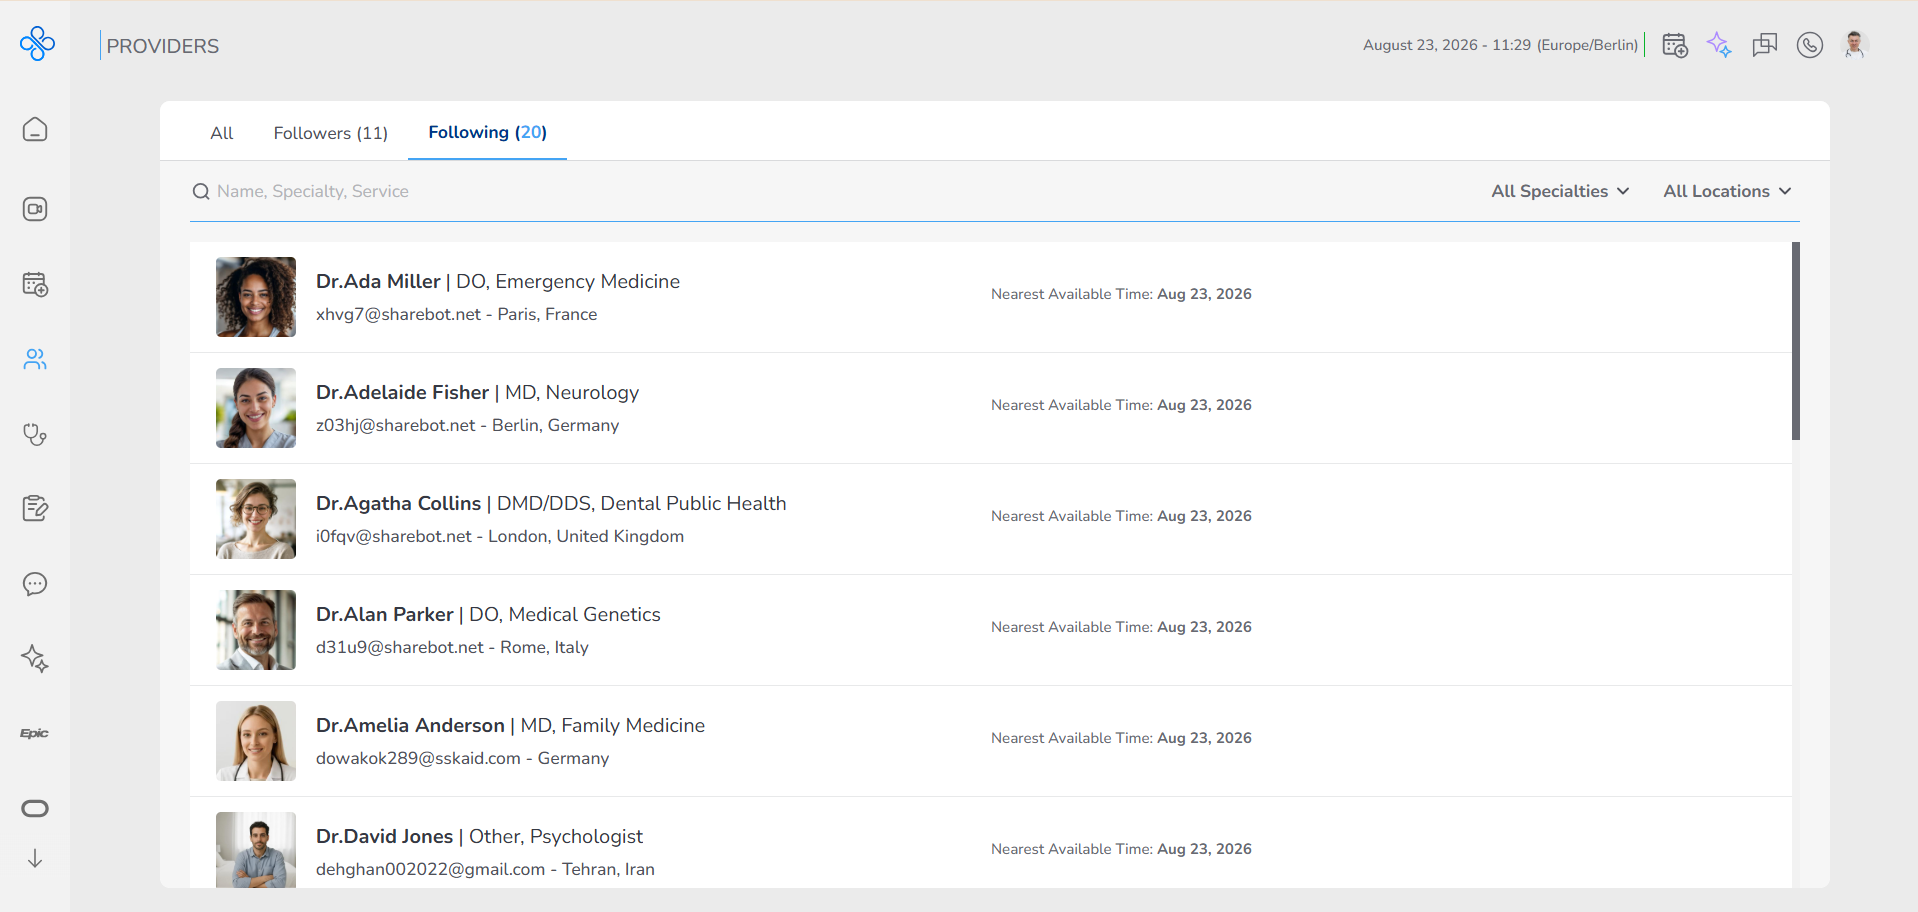
This shows providers you have chosen to follow. These are usually the providers you work with or want quick access to.
When you click on any of these tabs, the list changes immediately. There is no loading step or extra action needed.
2. Search and Filters
At the top of the page, you also have tools to help you find providers faster.
- Search bar
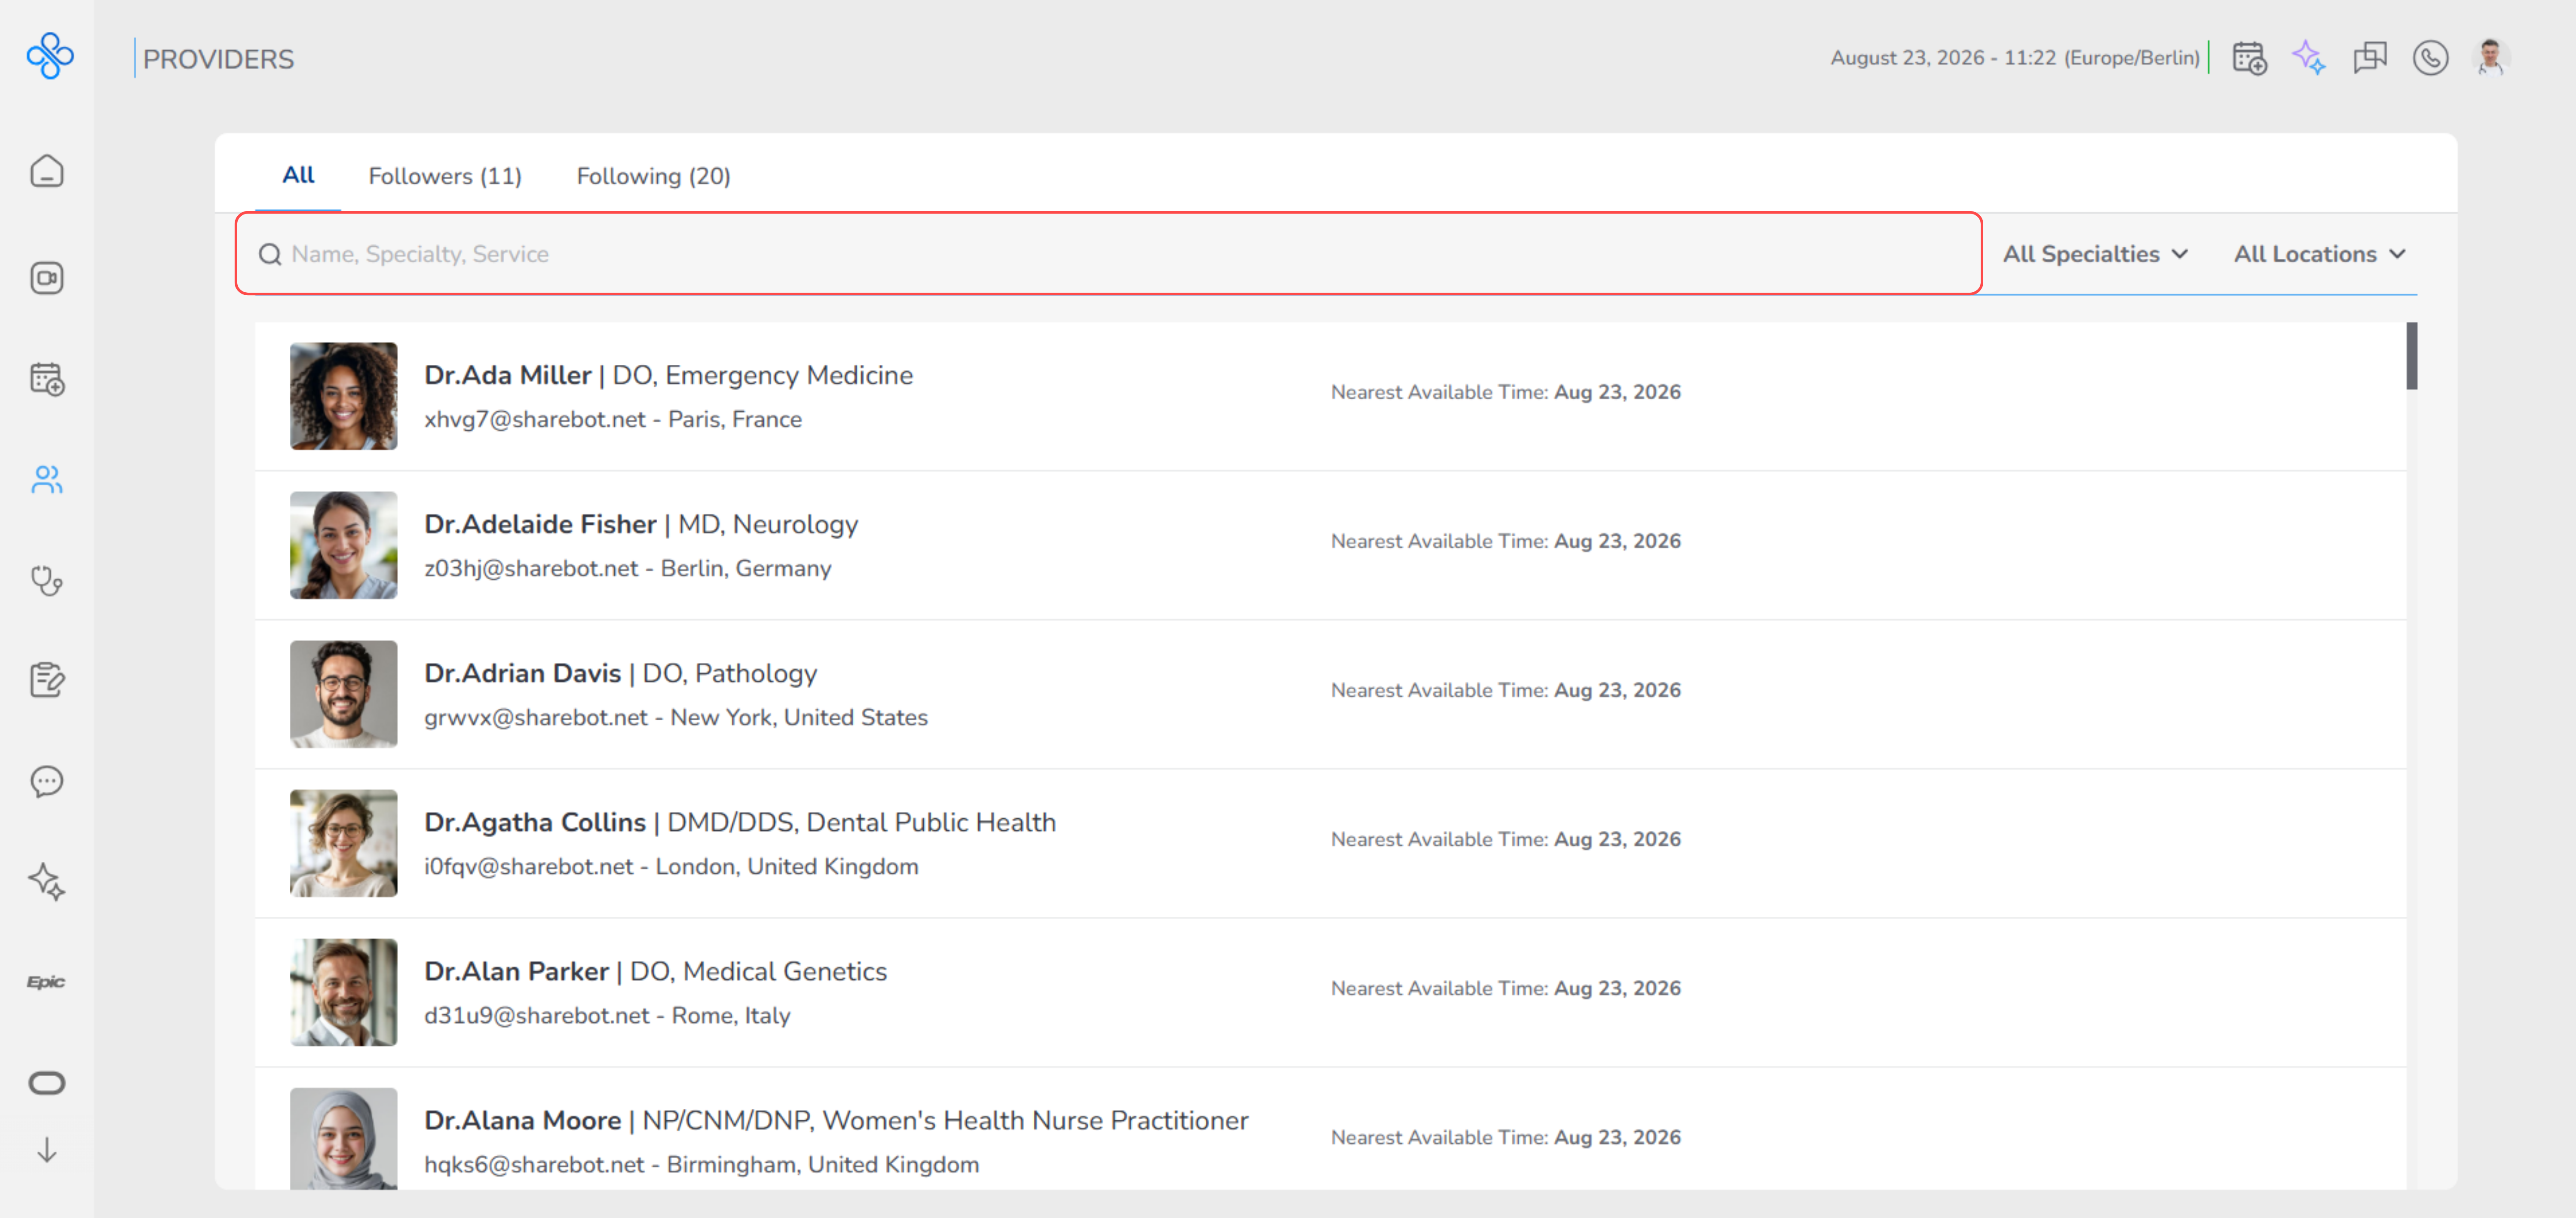
- You can type a provider’s name, specialty, or any related keyword.
- As you type, the list updates automatically.
- Specialty filter
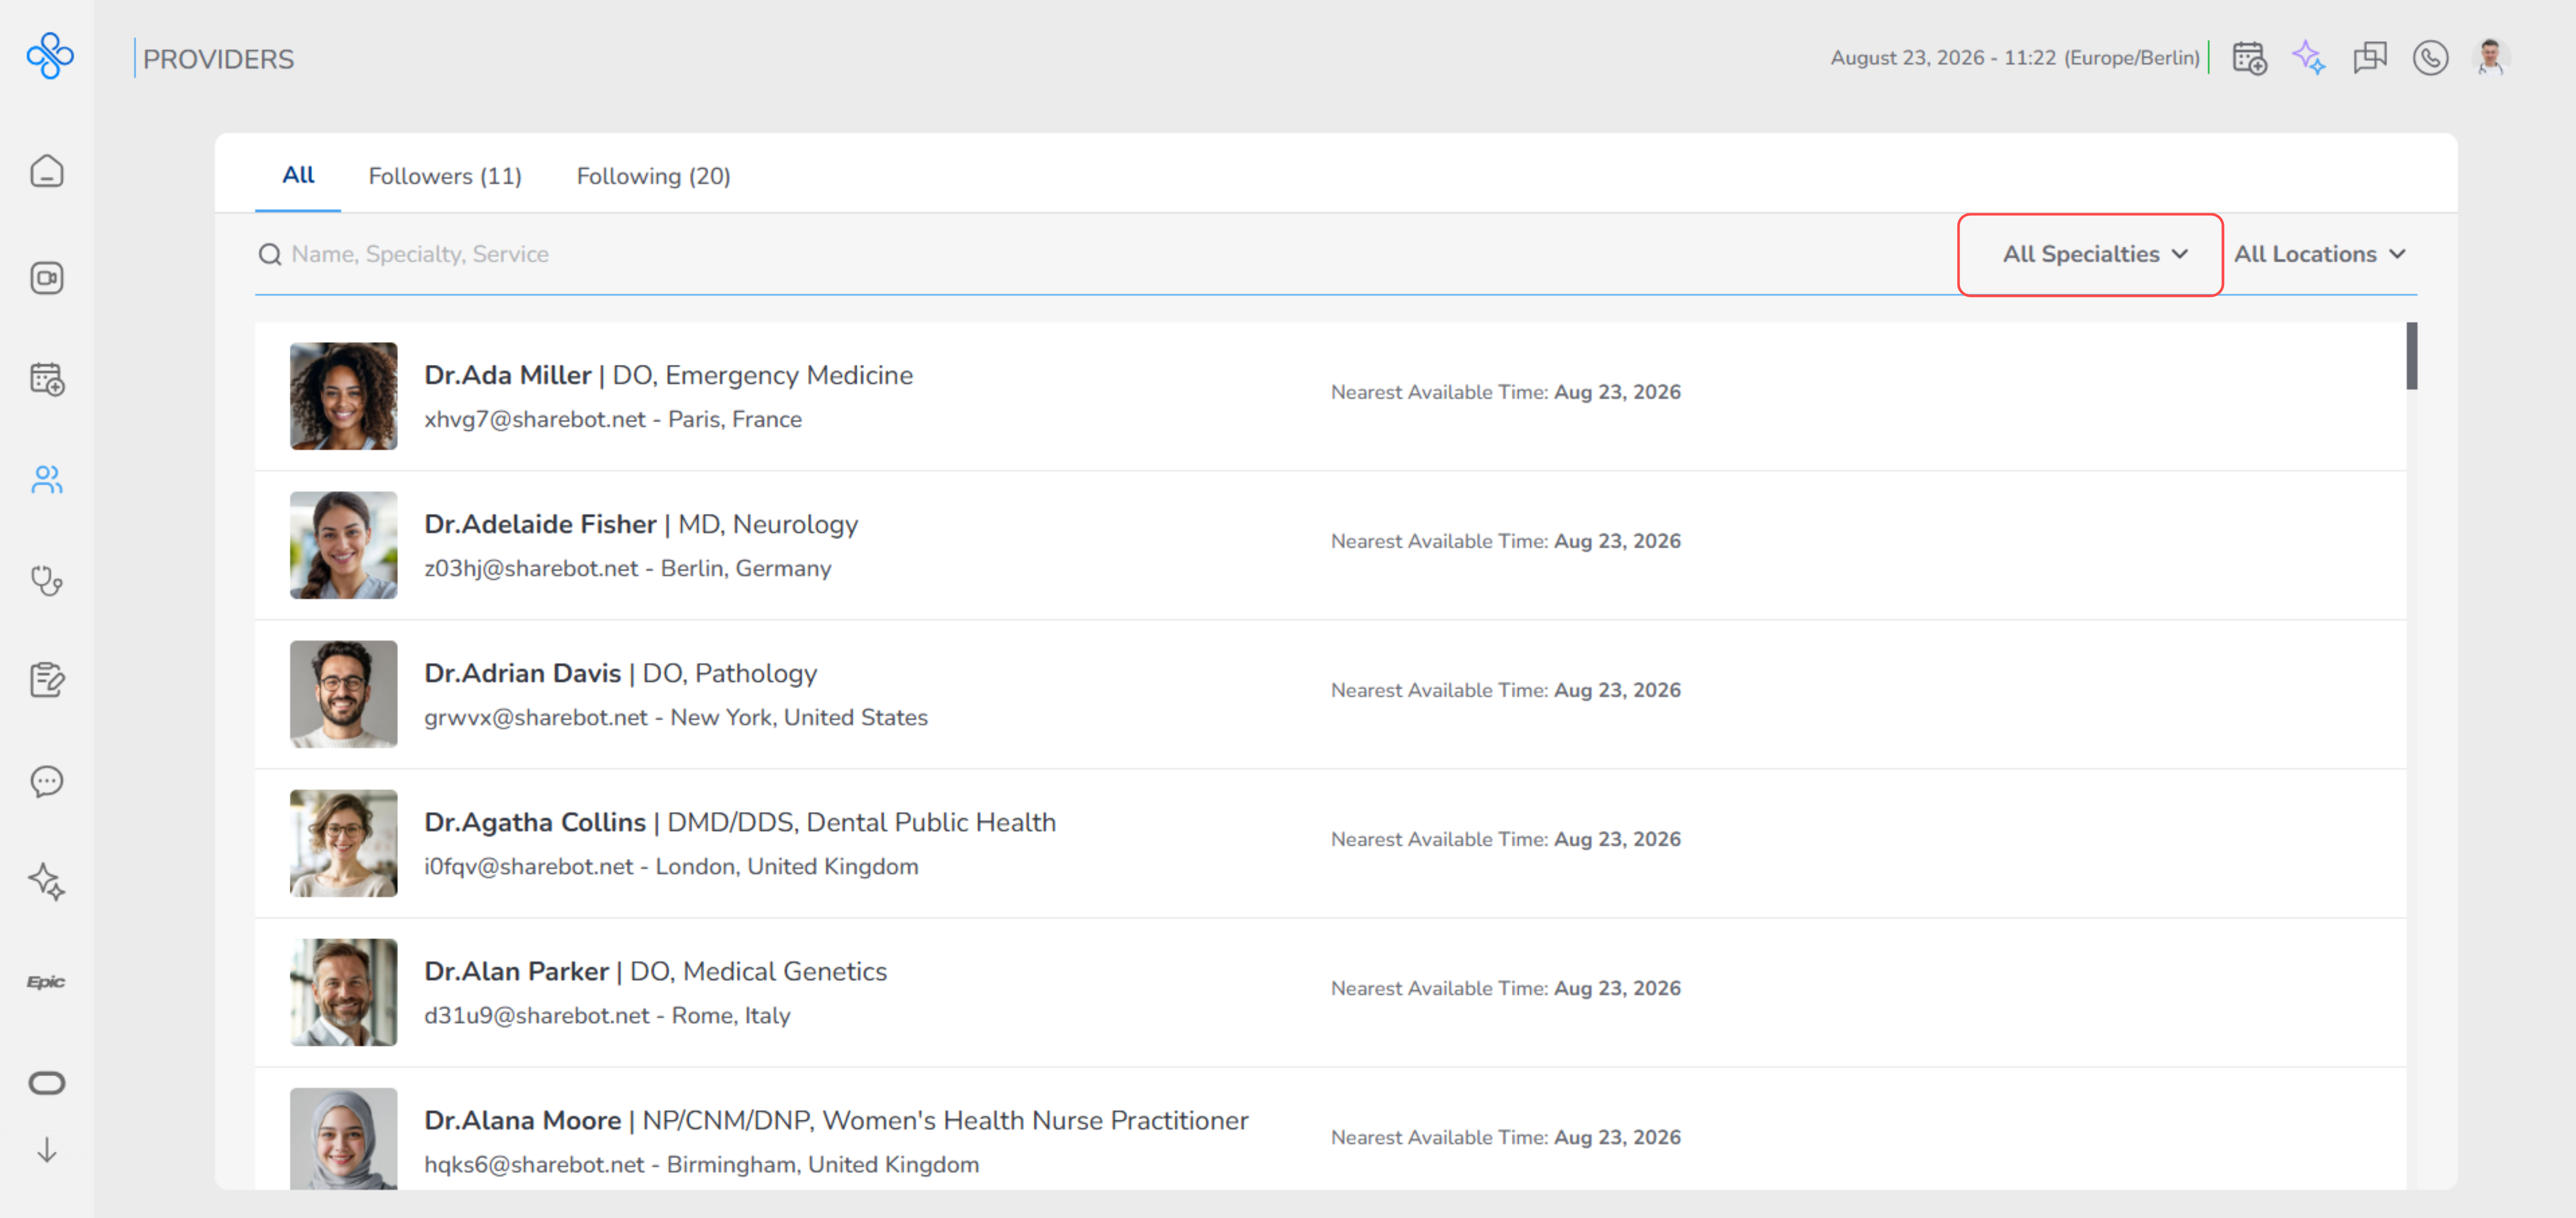
- Use this when you are looking for a specific type of provider, like cardiology or radiology.
- It removes providers that are not related to that field.
- Location filter
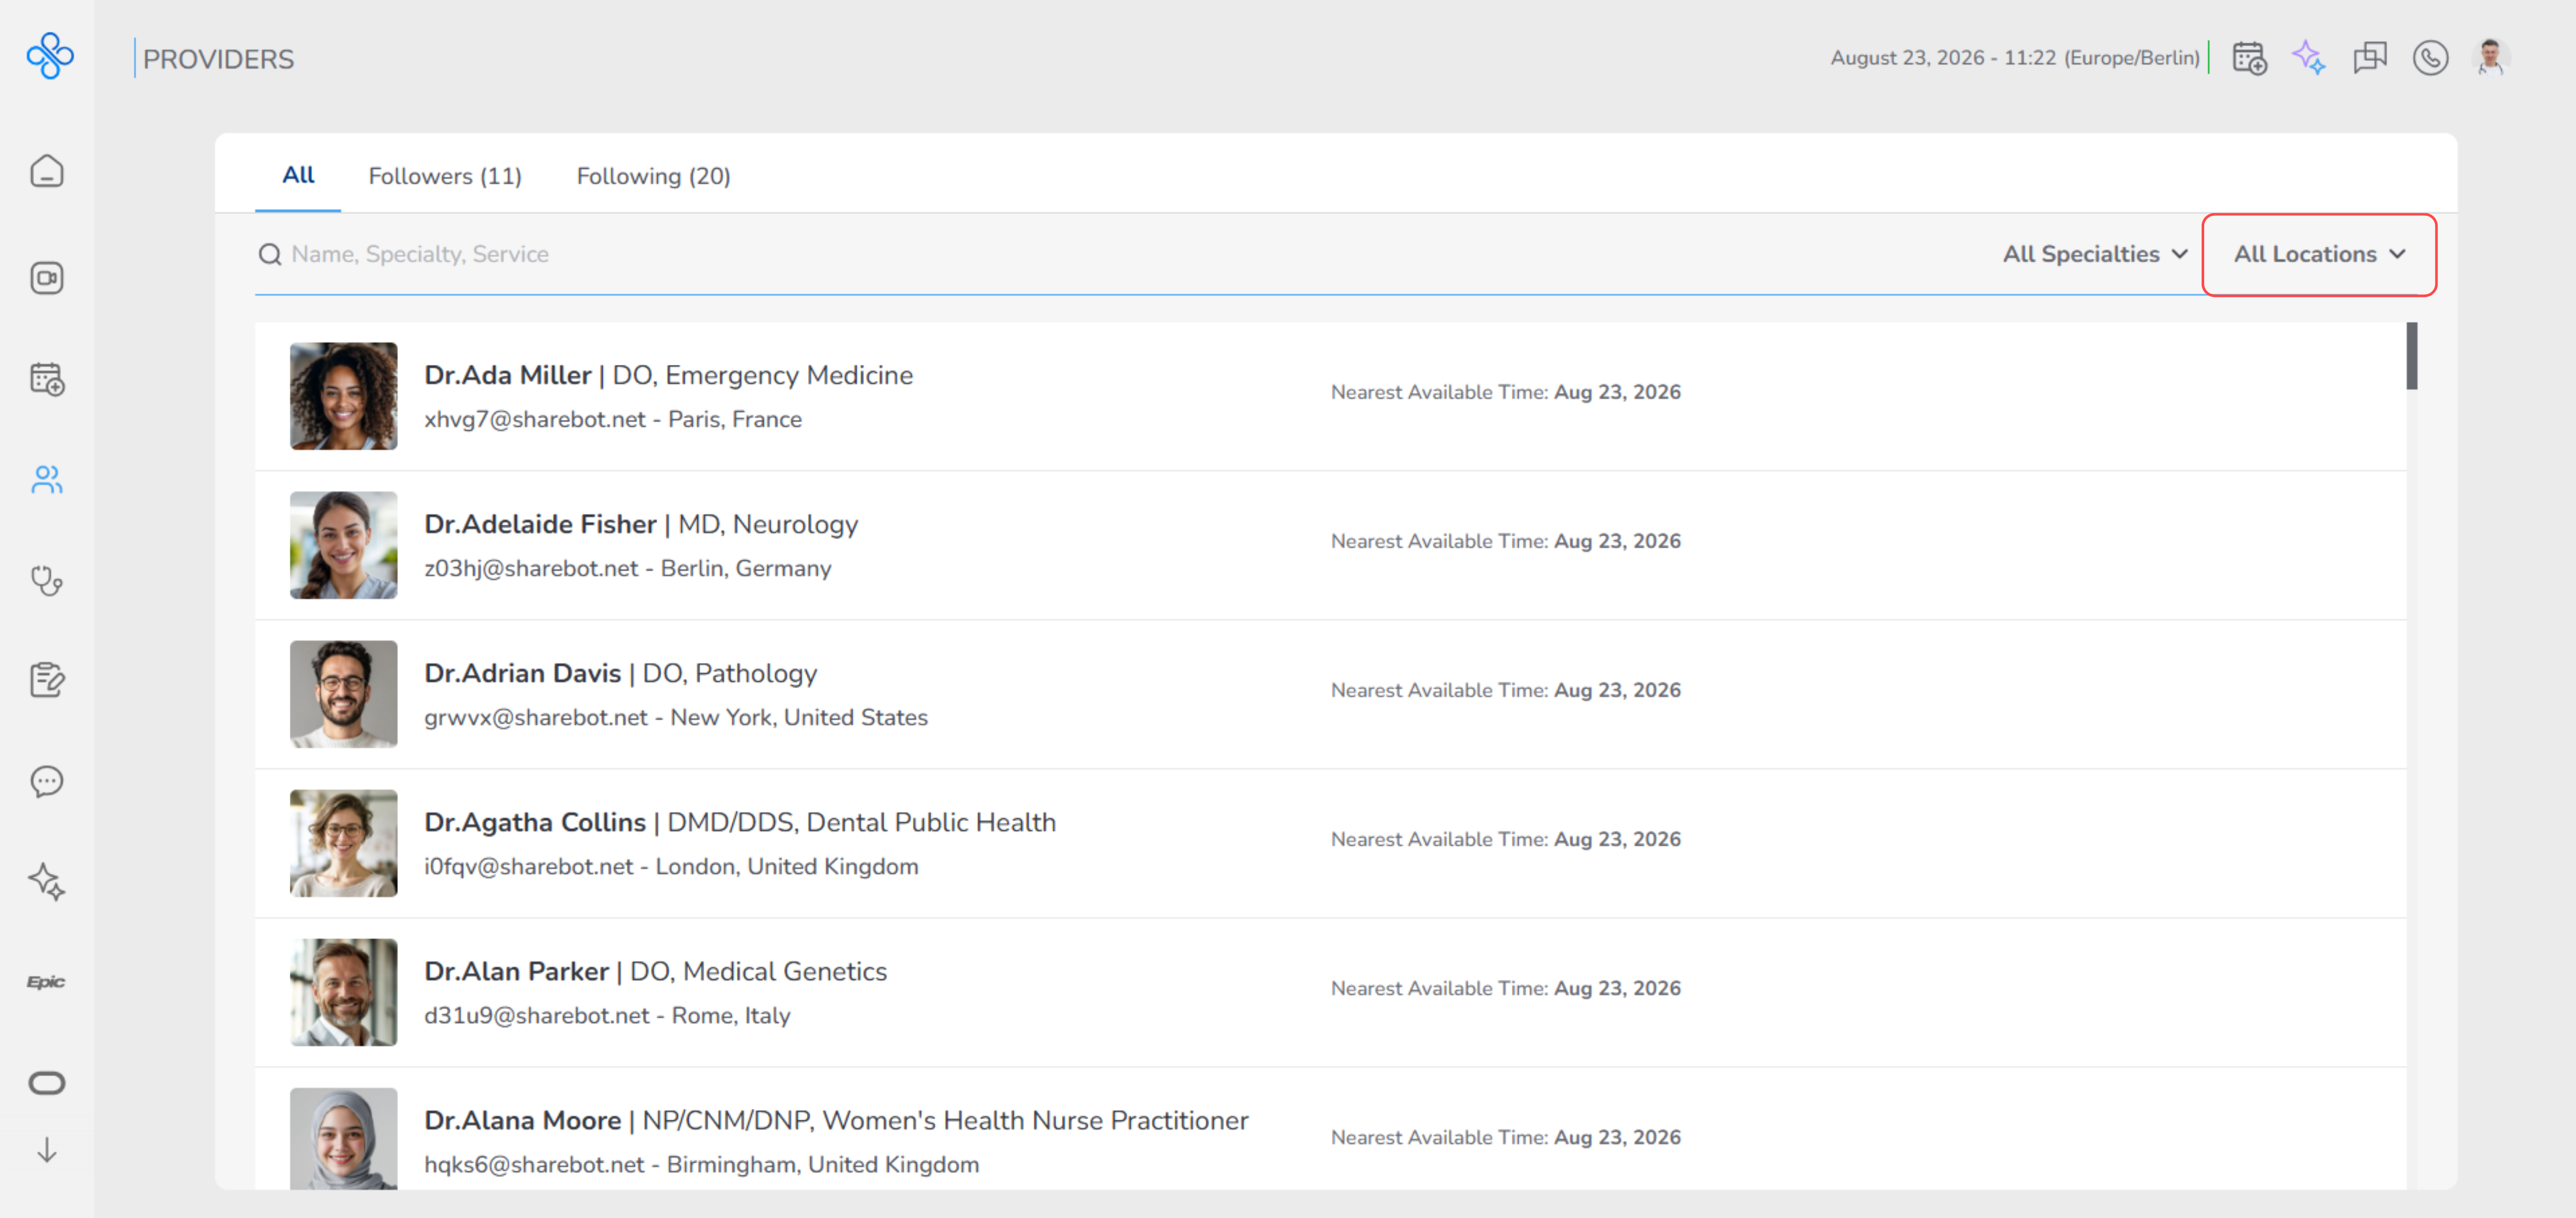
- Use this to narrow down providers based on location.
- This is helpful if you want someone in a specific region. You do not need to click a search button. Everything updates instantly as you type or select filters.
3. Providers List
This is the main part of the page where you see all providers.
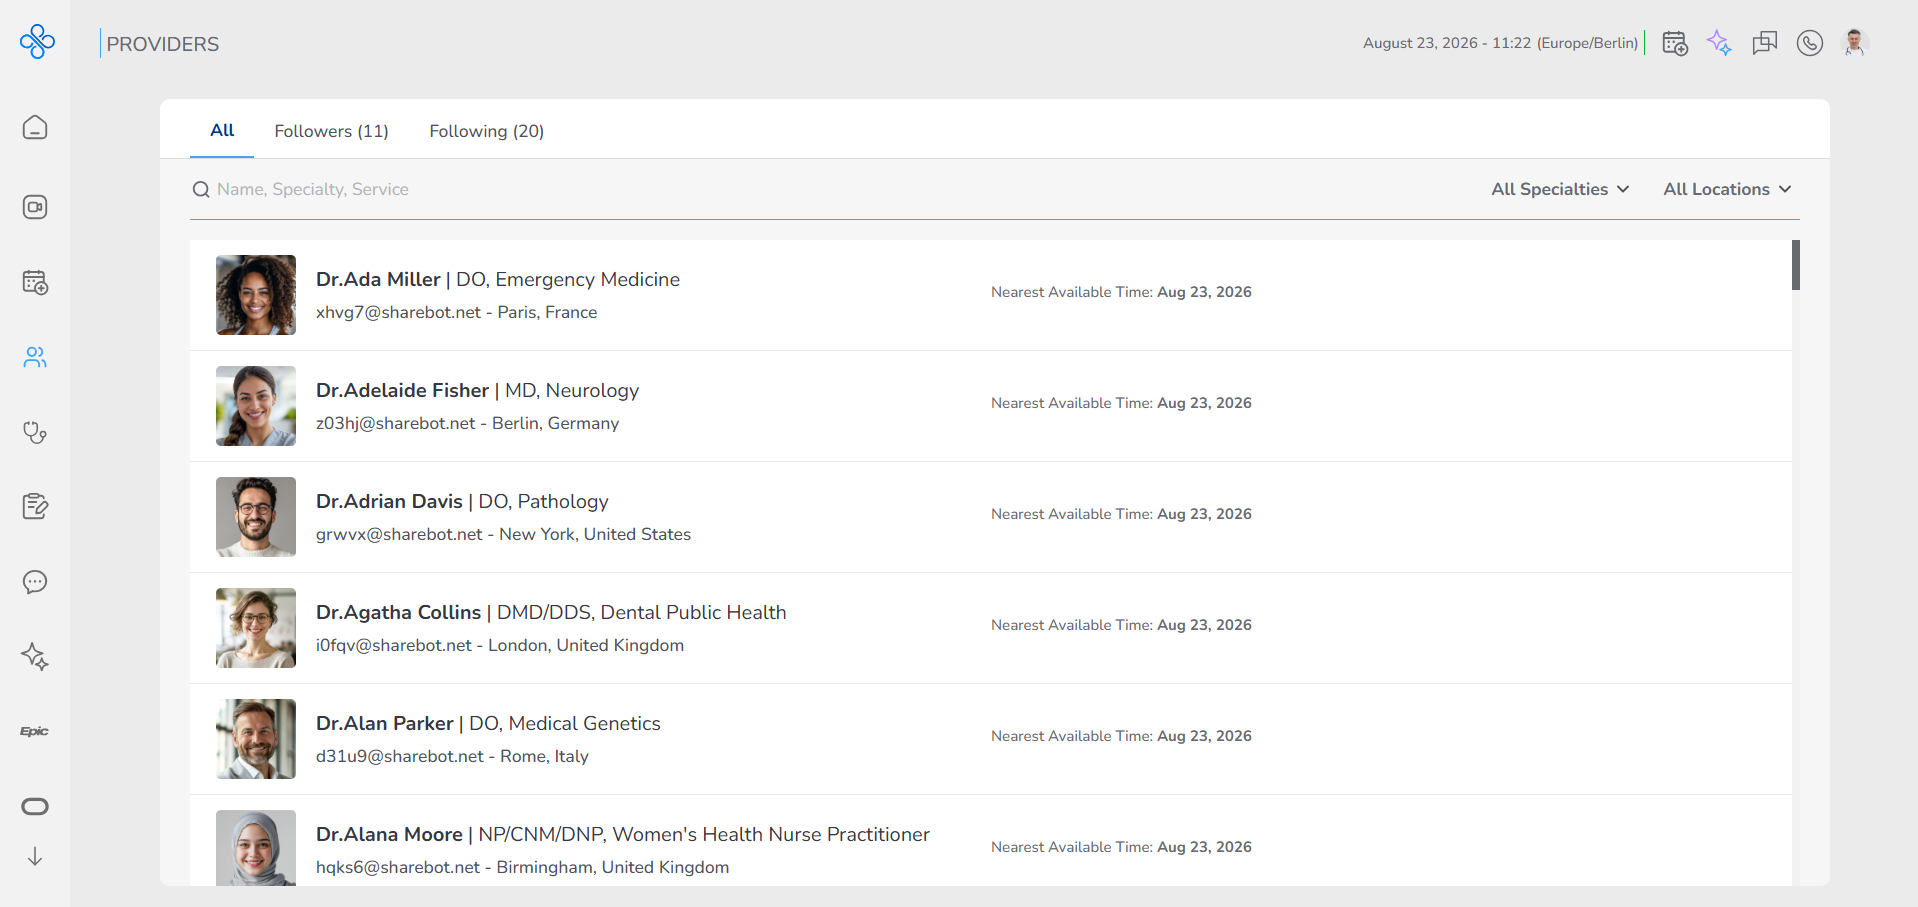
Each provider is shown in a row with simple and useful information:
- Provider name
- Specialty
- Location
- Nearest available appointment time This means you can quickly scan the list and decide without opening each profile.
Quick availability
When you move your mouse over a provider row: Available time slots will appear right away For example, you might see times like 16:30 or 17:00.
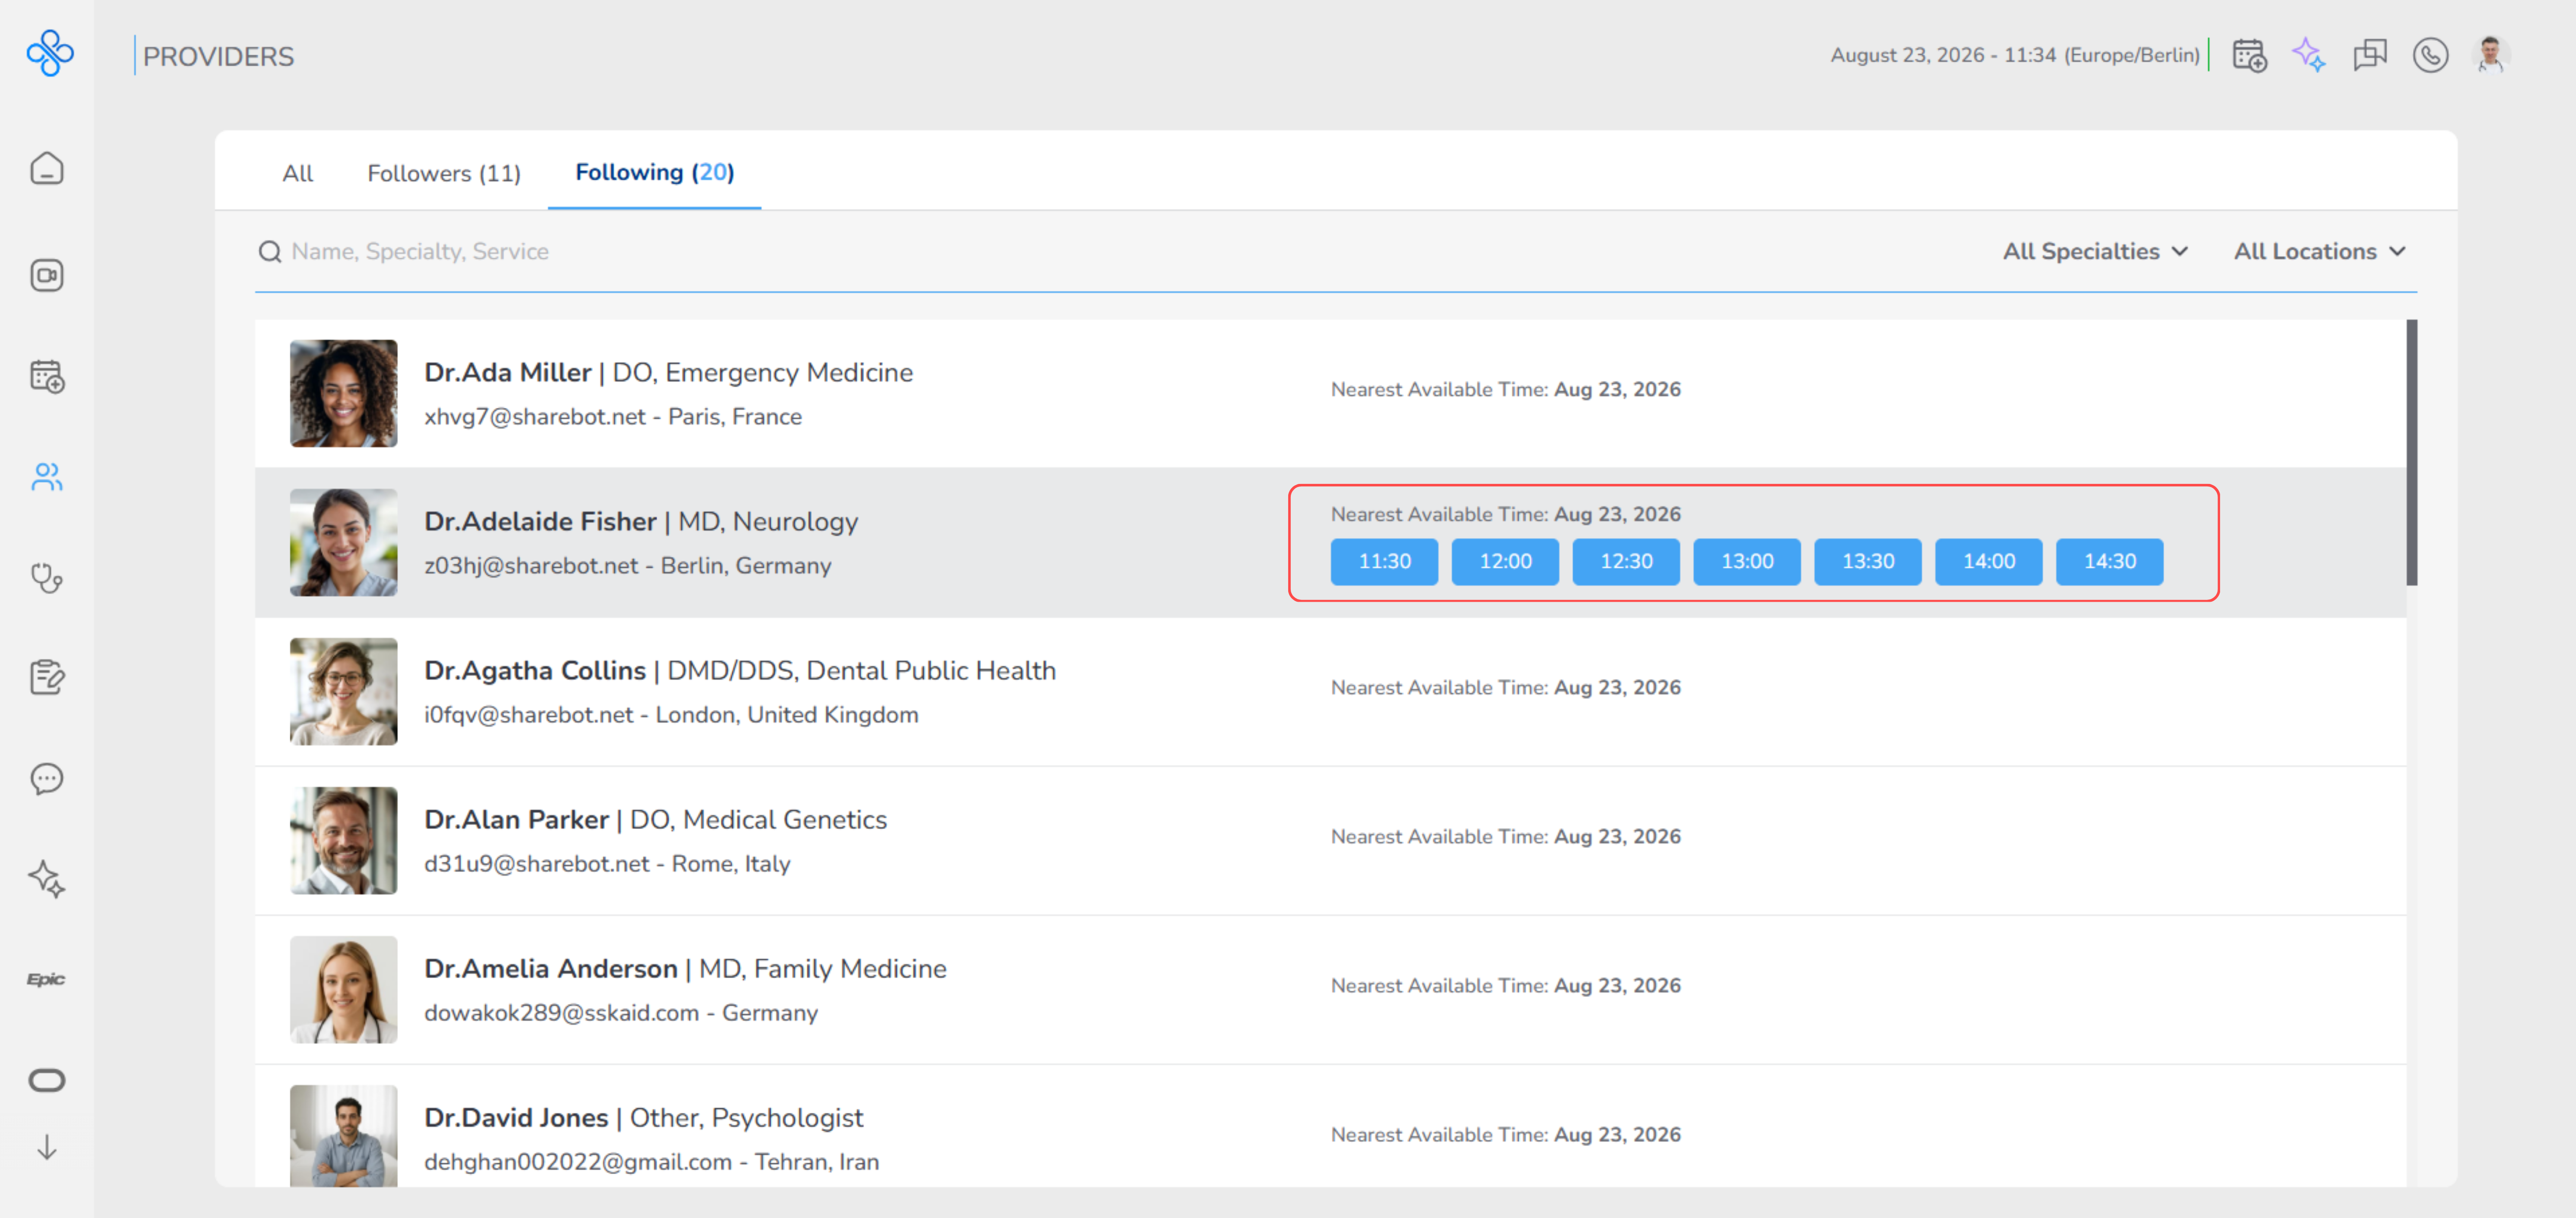
This allows you to:
- Quickly check availability
- Choose a time
- Start booking immediately You do not need to open the provider profile just to see available times. This makes the process faster and easier, especially when you are comparing multiple providers.
Steps (Main actions you can take)
This section explains the most common things you will do on the Providers page. If you follow these steps, you can easily find a provider, check availability, and start working with them.
Find a provider
When you open the page, you may see many providers. Instead of scrolling through the whole list, you can quickly narrow it down.
- Open the Providers page
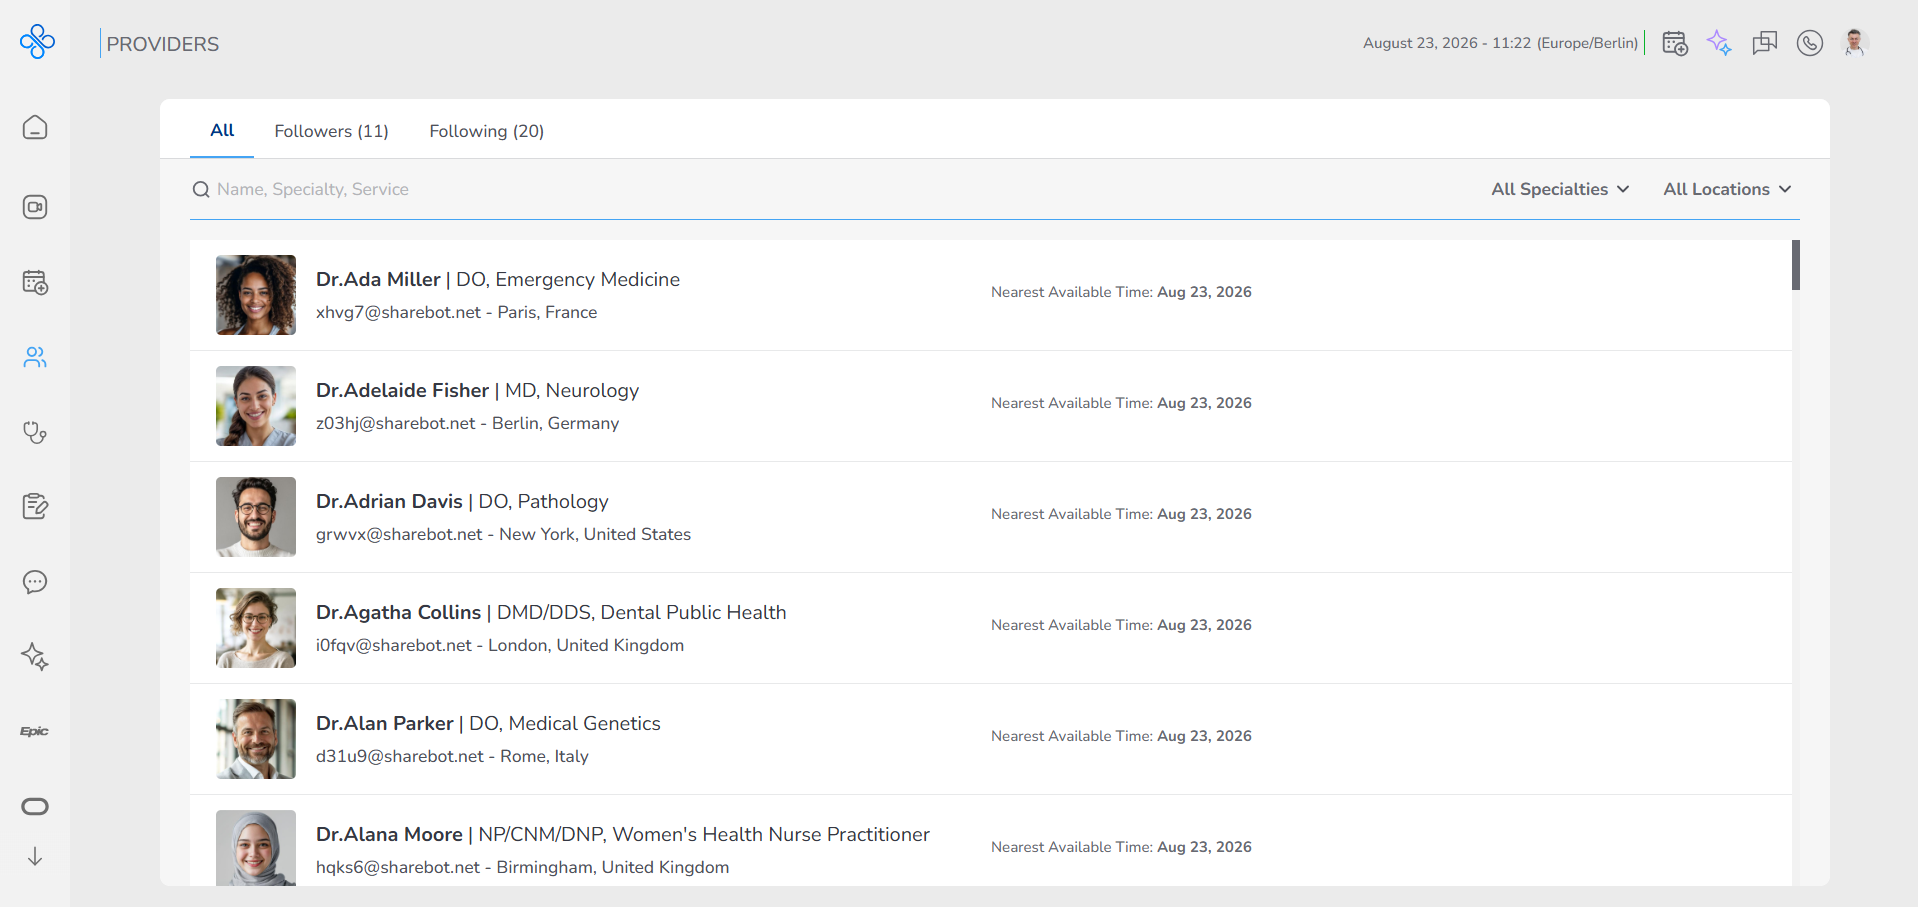
- Go to the search bar at the top
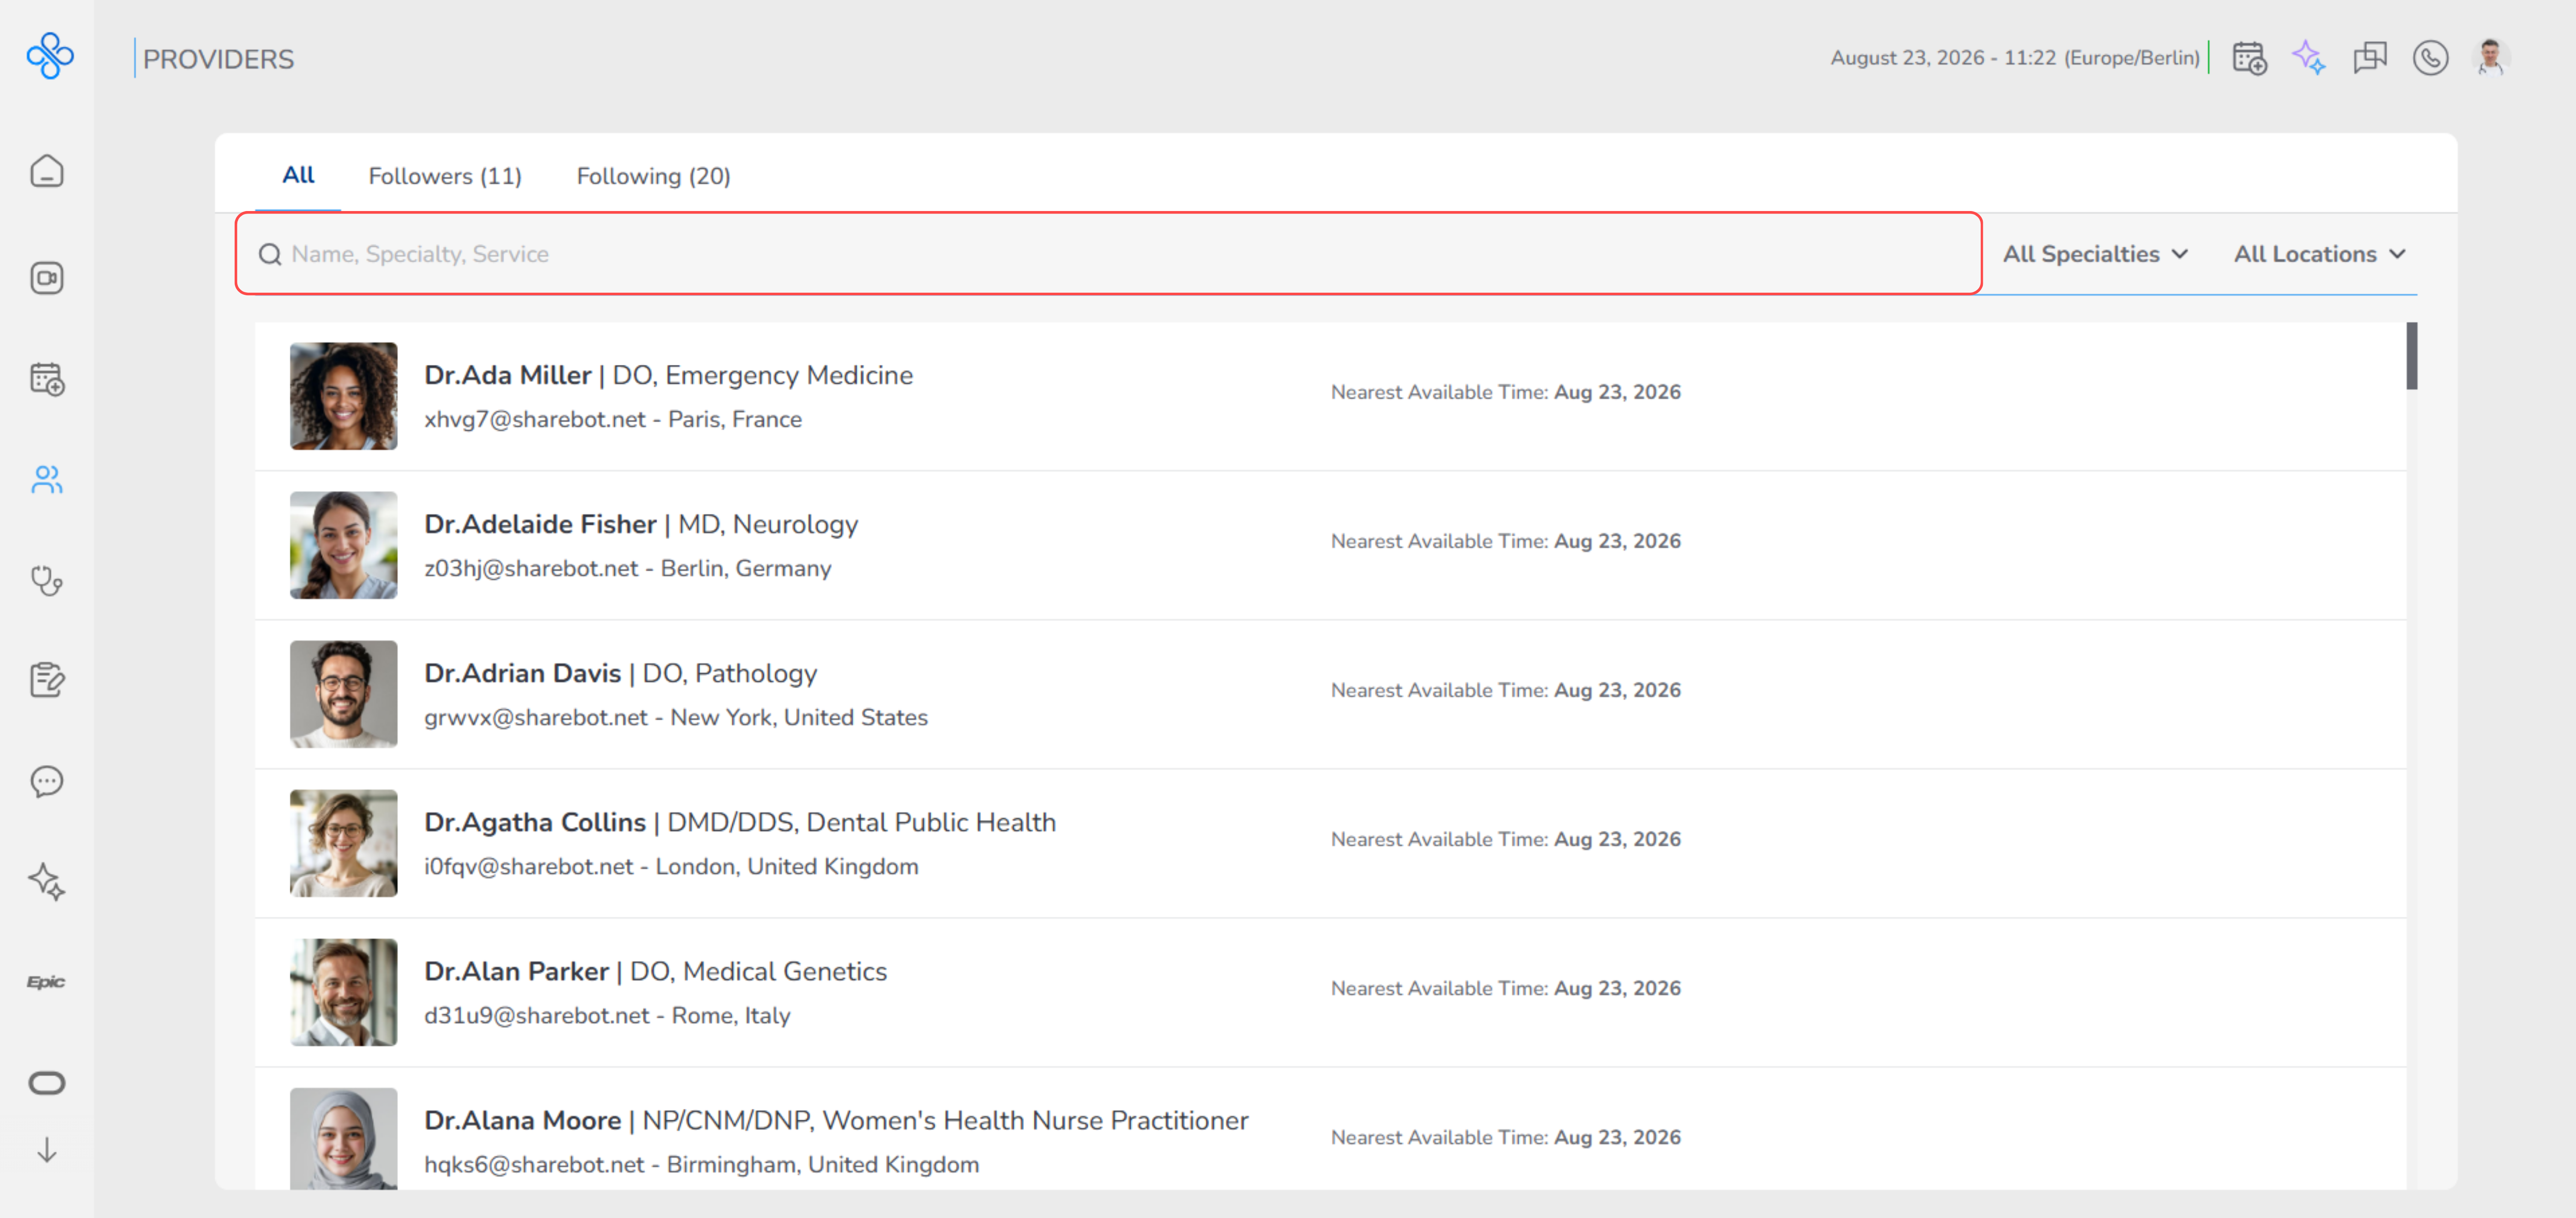
Type the provider’s name, specialty, or any related keyword
- If needed, use filters:
Select a specialty to limit results to a specific field
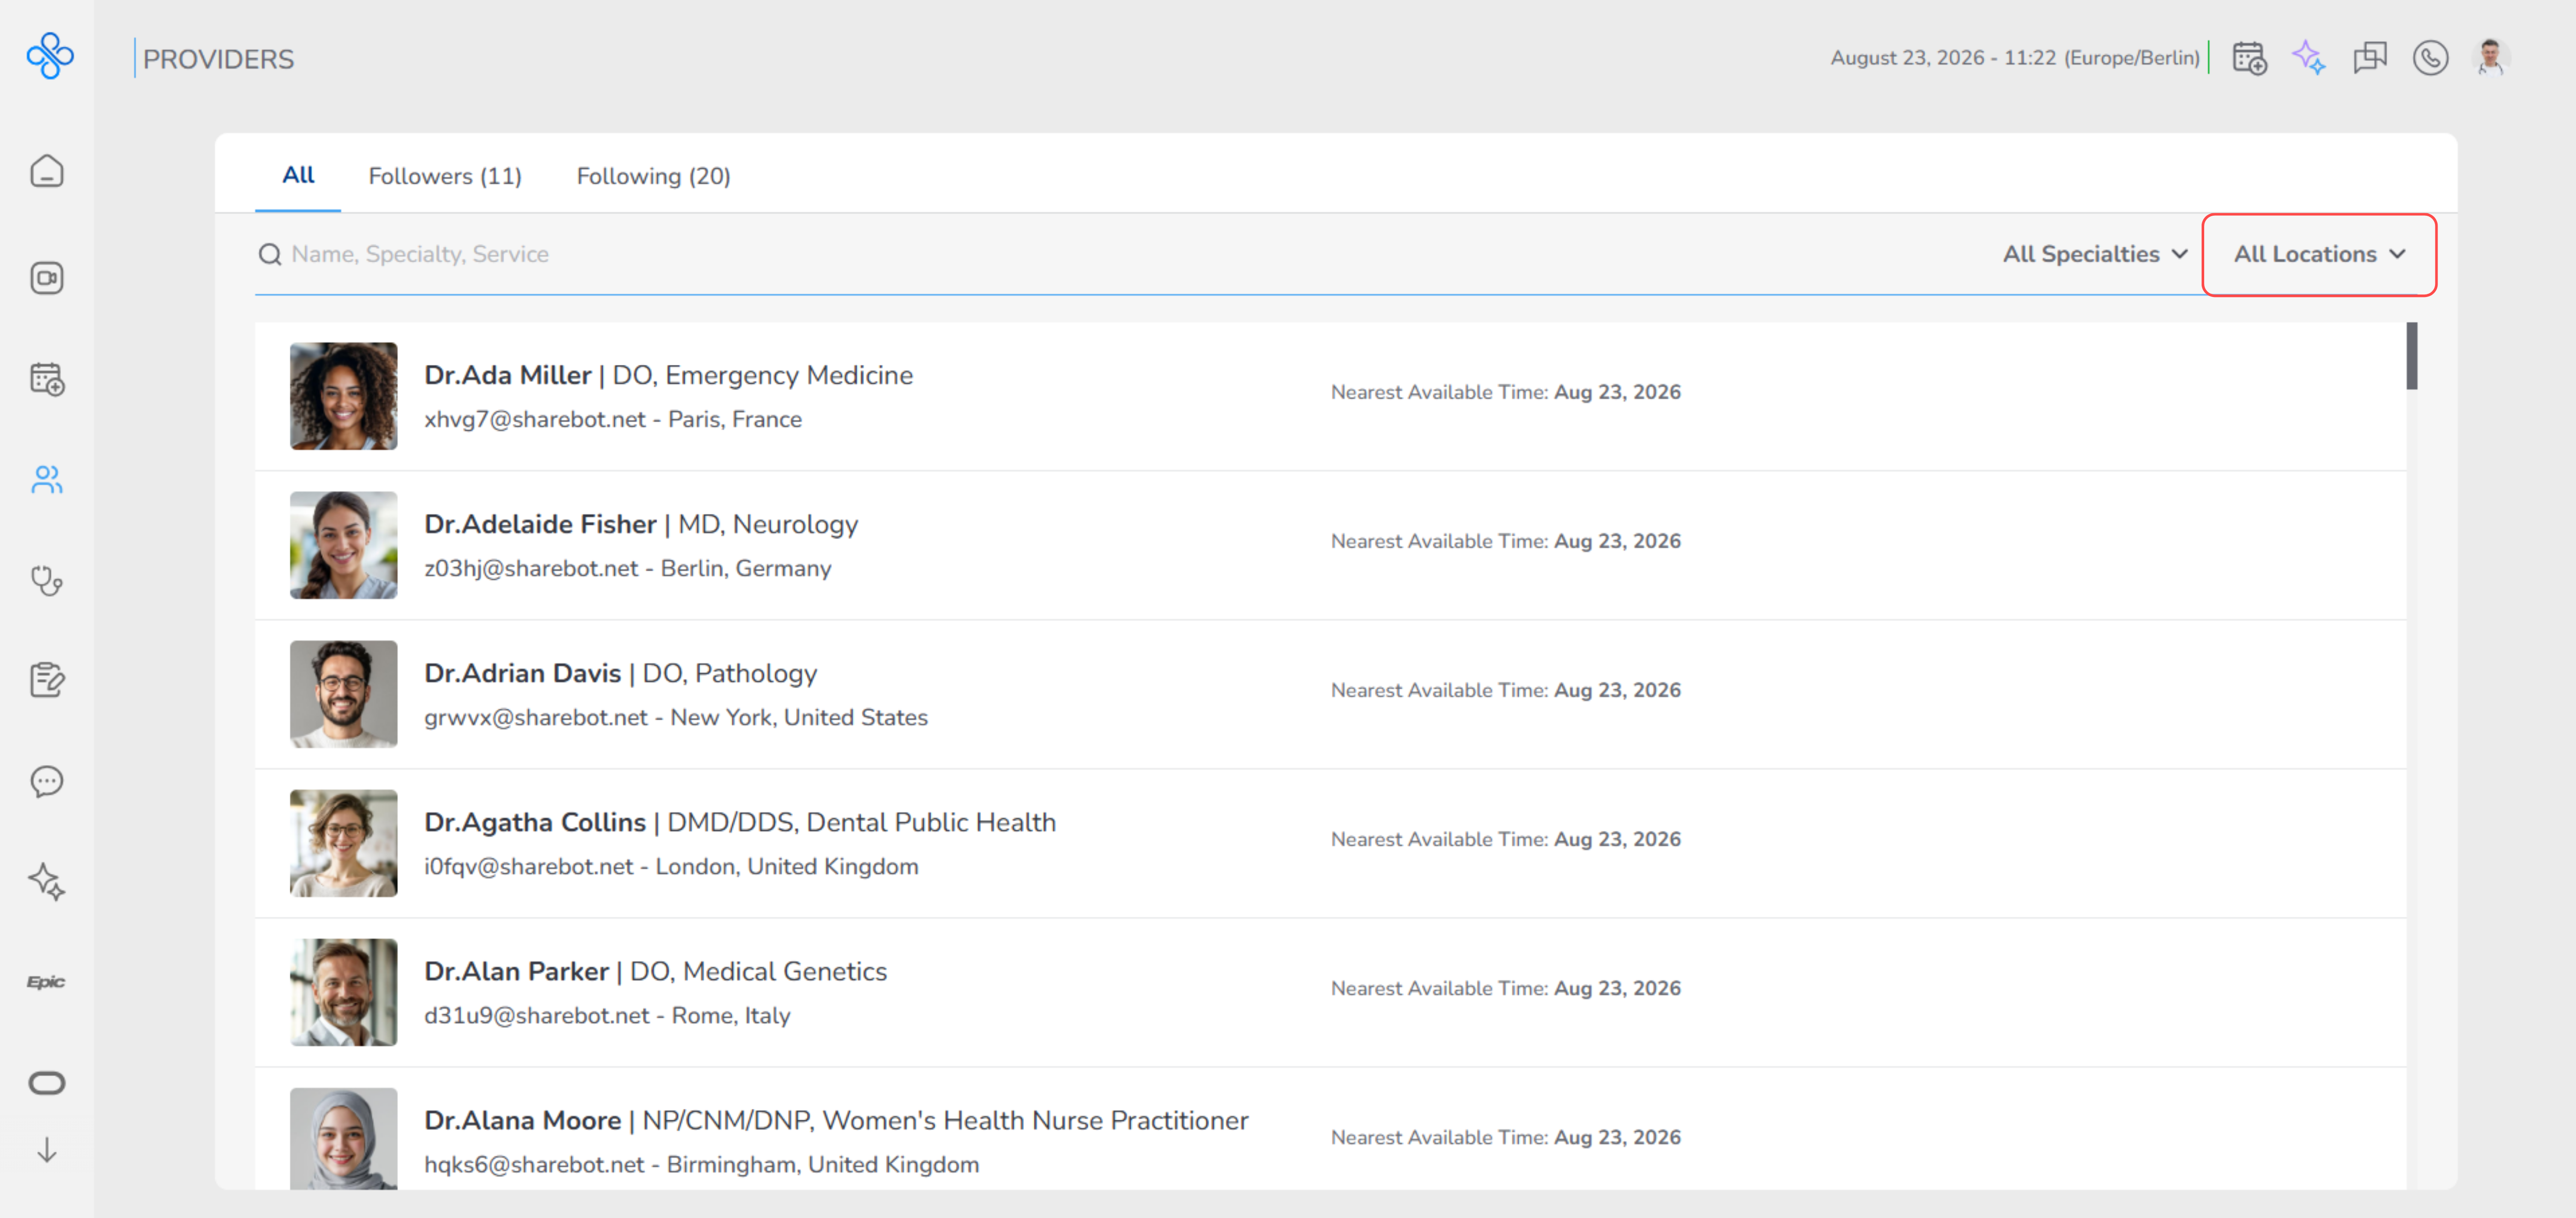
Select a location to focus on a specific area
- Watch the list update automatically as you type or change filters
You do not need to click anything to apply the search
The system filters results for you in real time
- Look through the updated list and find the provider you need
Book quickly from the list
If you already know which provider you want, you can book an appointment directly from the list without opening their profile.
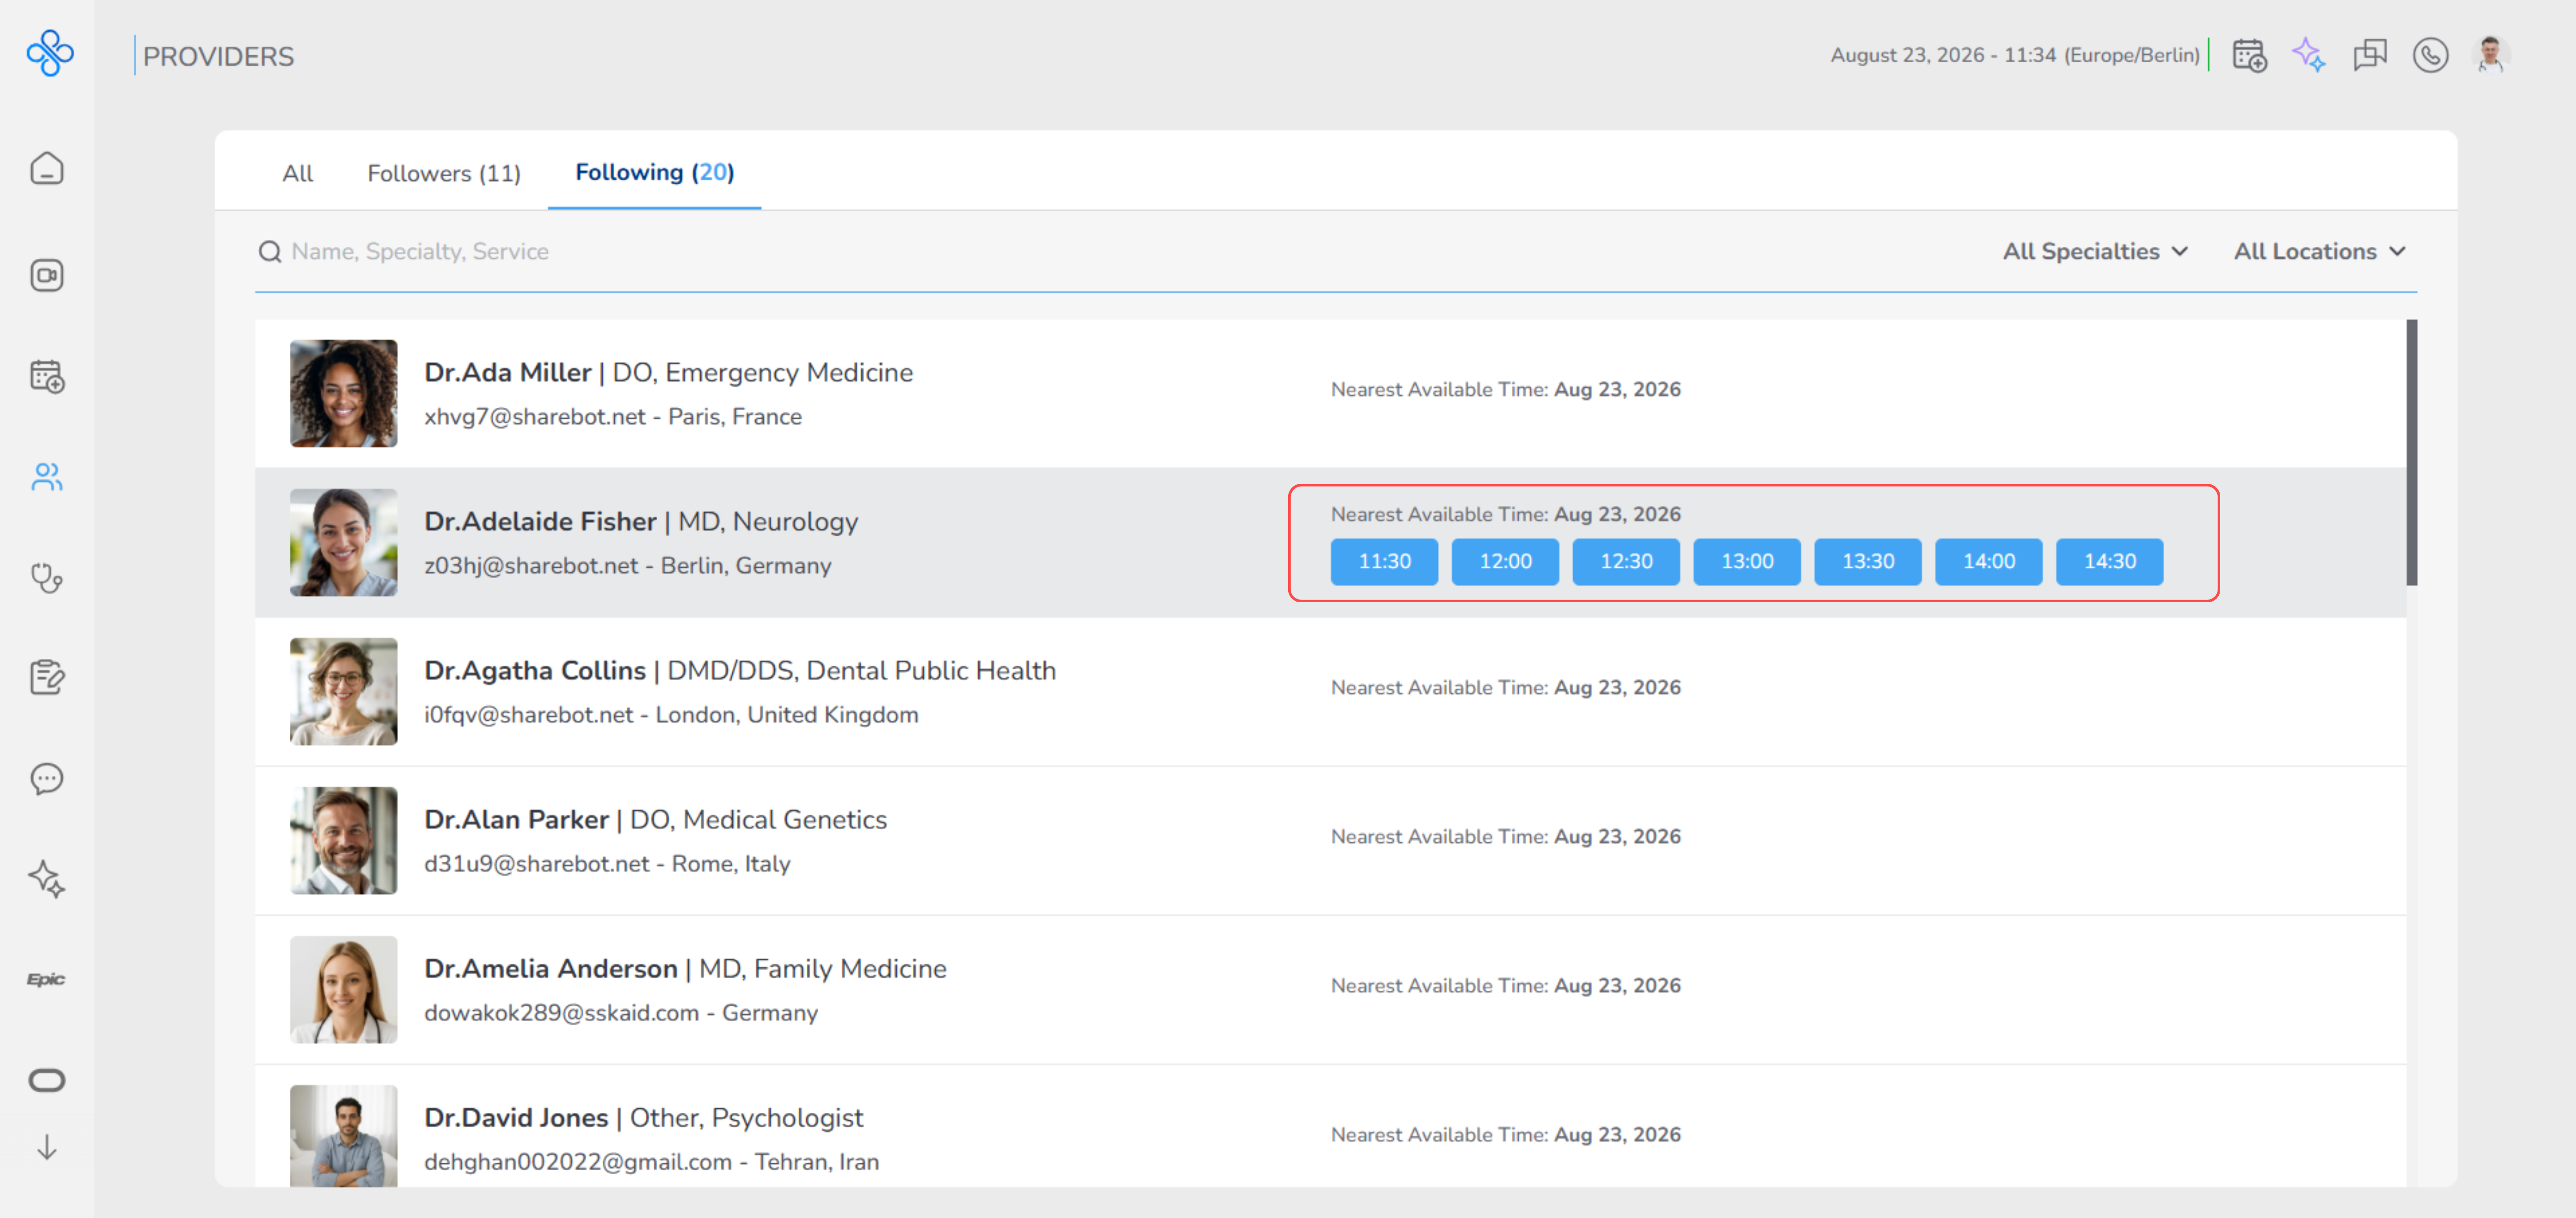
- Move your mouse over the provider row
- Wait for a moment
- Available time slots will appear under the provider
- Review the available times
- Click on the time that works for you As soon as you click a time: The appointment creation modal opens automatically
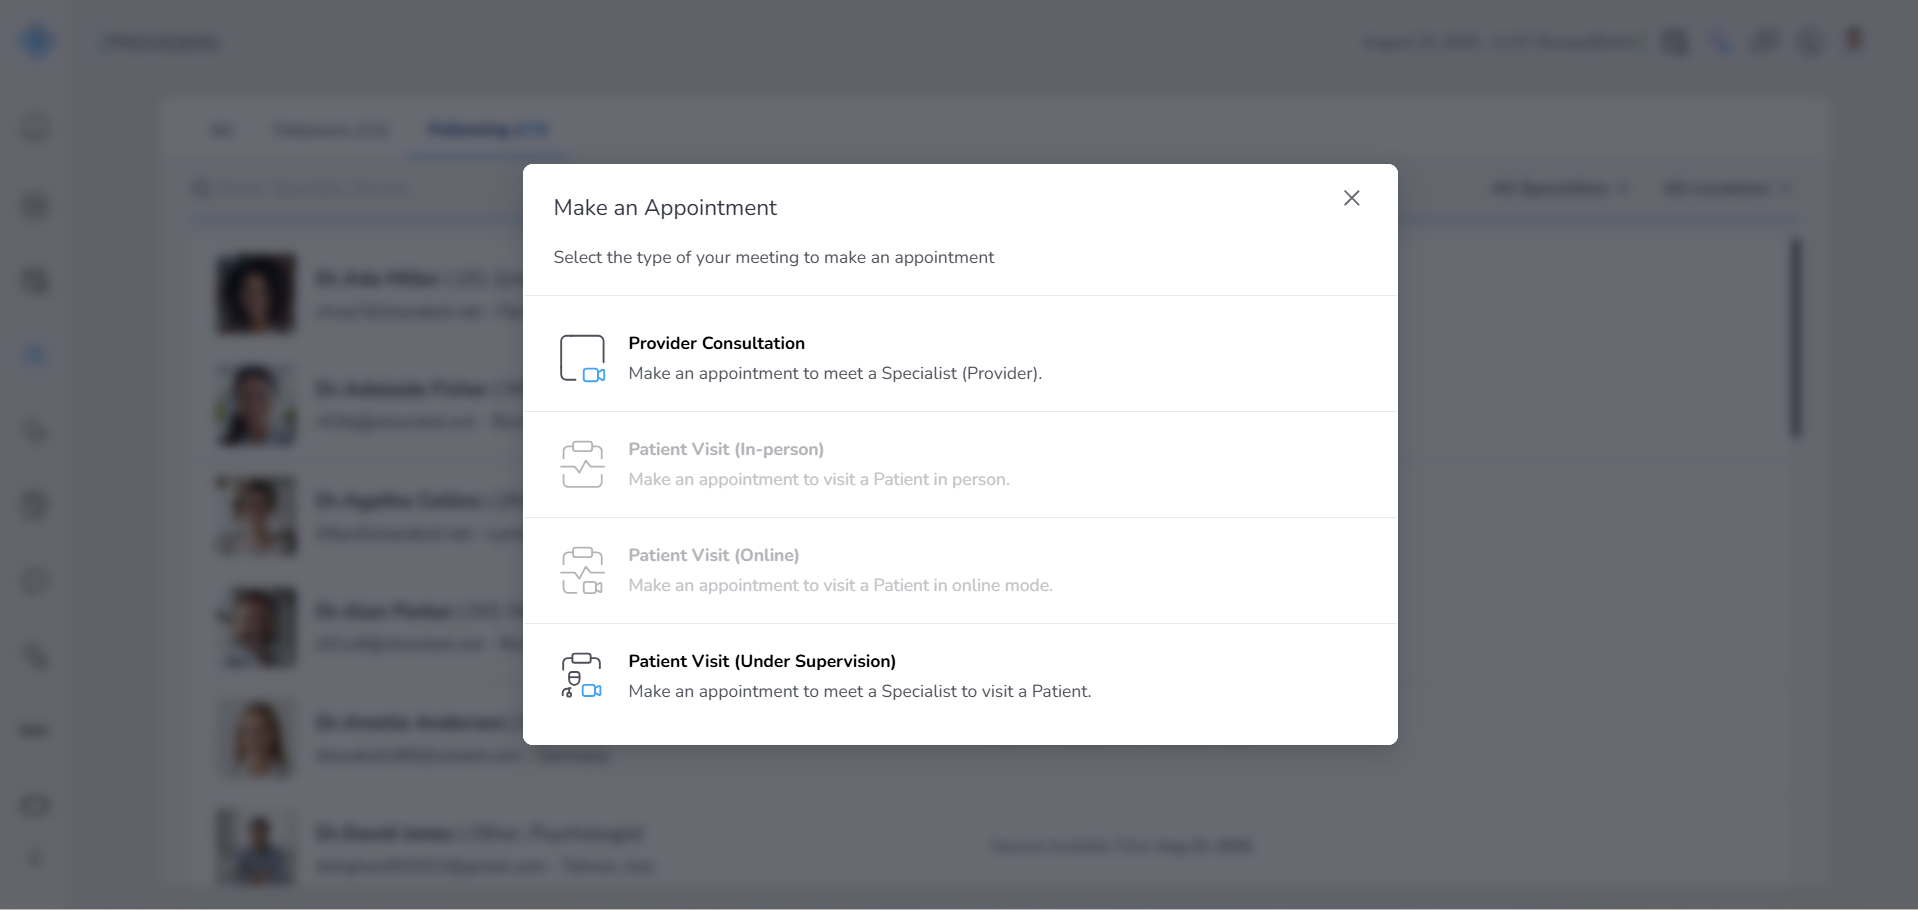
The selected date and time are already filled in This saves time because you do not need to enter these details manually (For more details about appointment booking, please refer to the Private (https://app.clickup.com/9015704788/docs/8cp1f6m-2395/8cp1f6m-2635)a user guide.)
Open provider profile
If you want more details before taking action, you can open the full provider profile.
- Click on the provider’s name or anywhere on their card
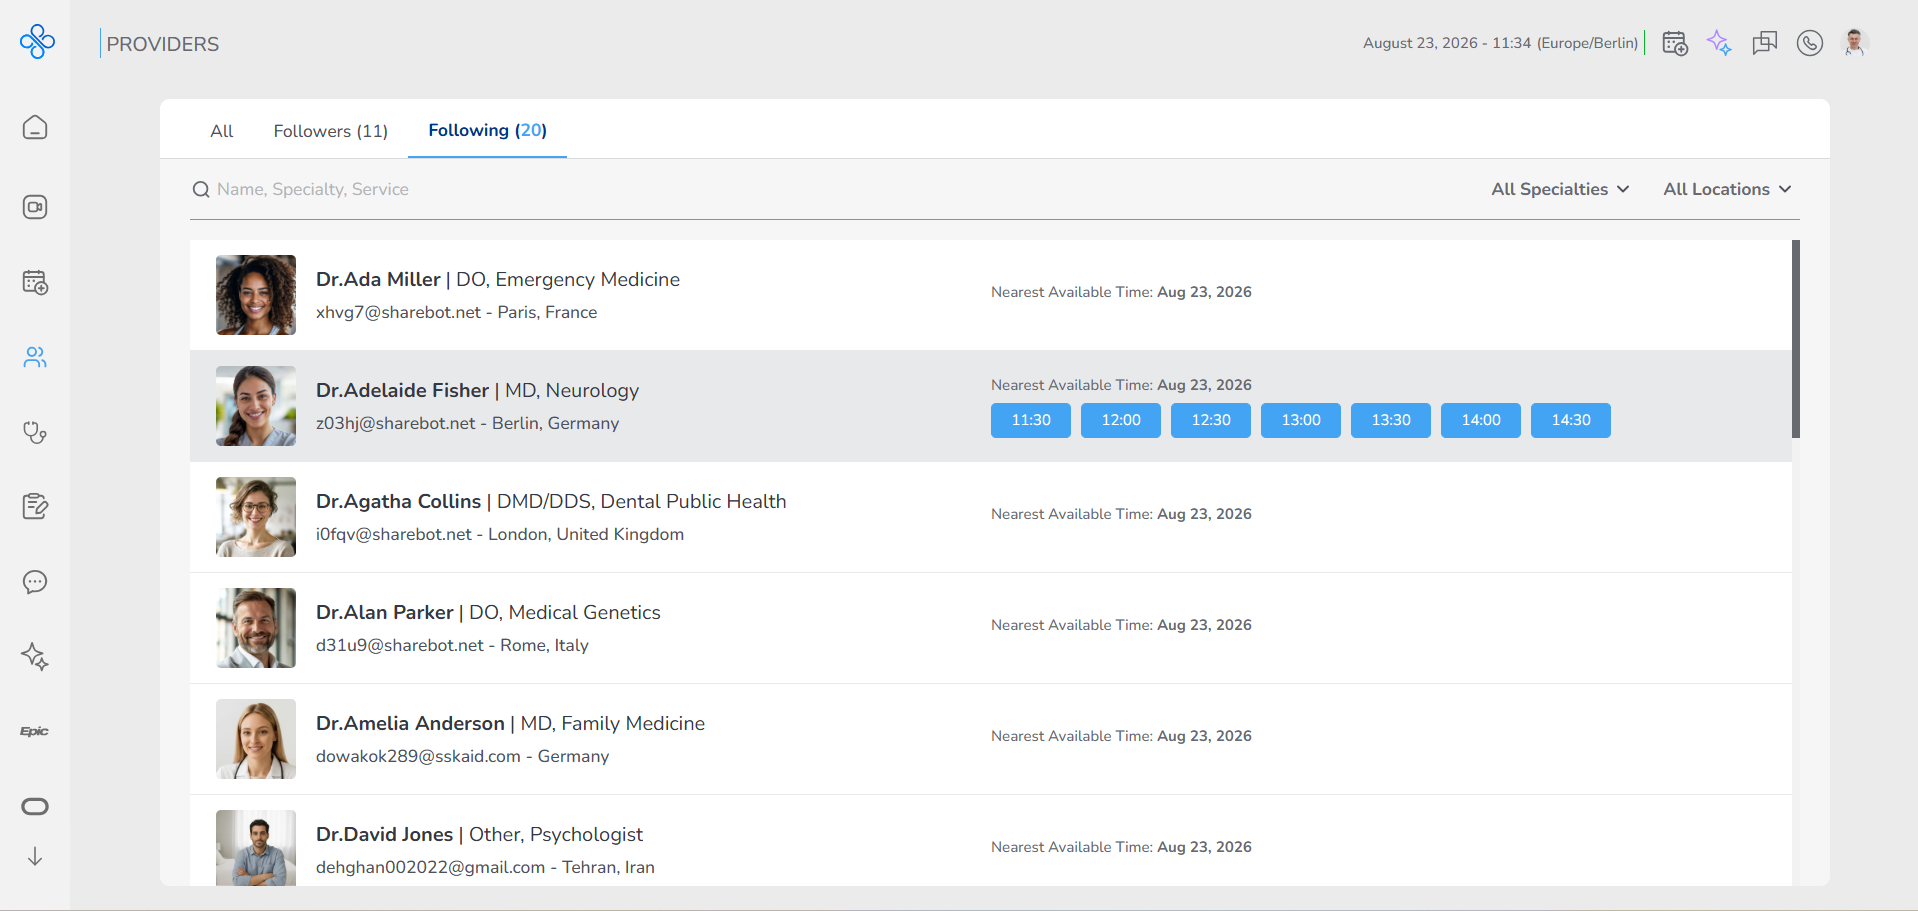
The provider profile page will open When the profile opens:
- It starts on the Info tab by default
- You can review full details such as experience, education, and contact information
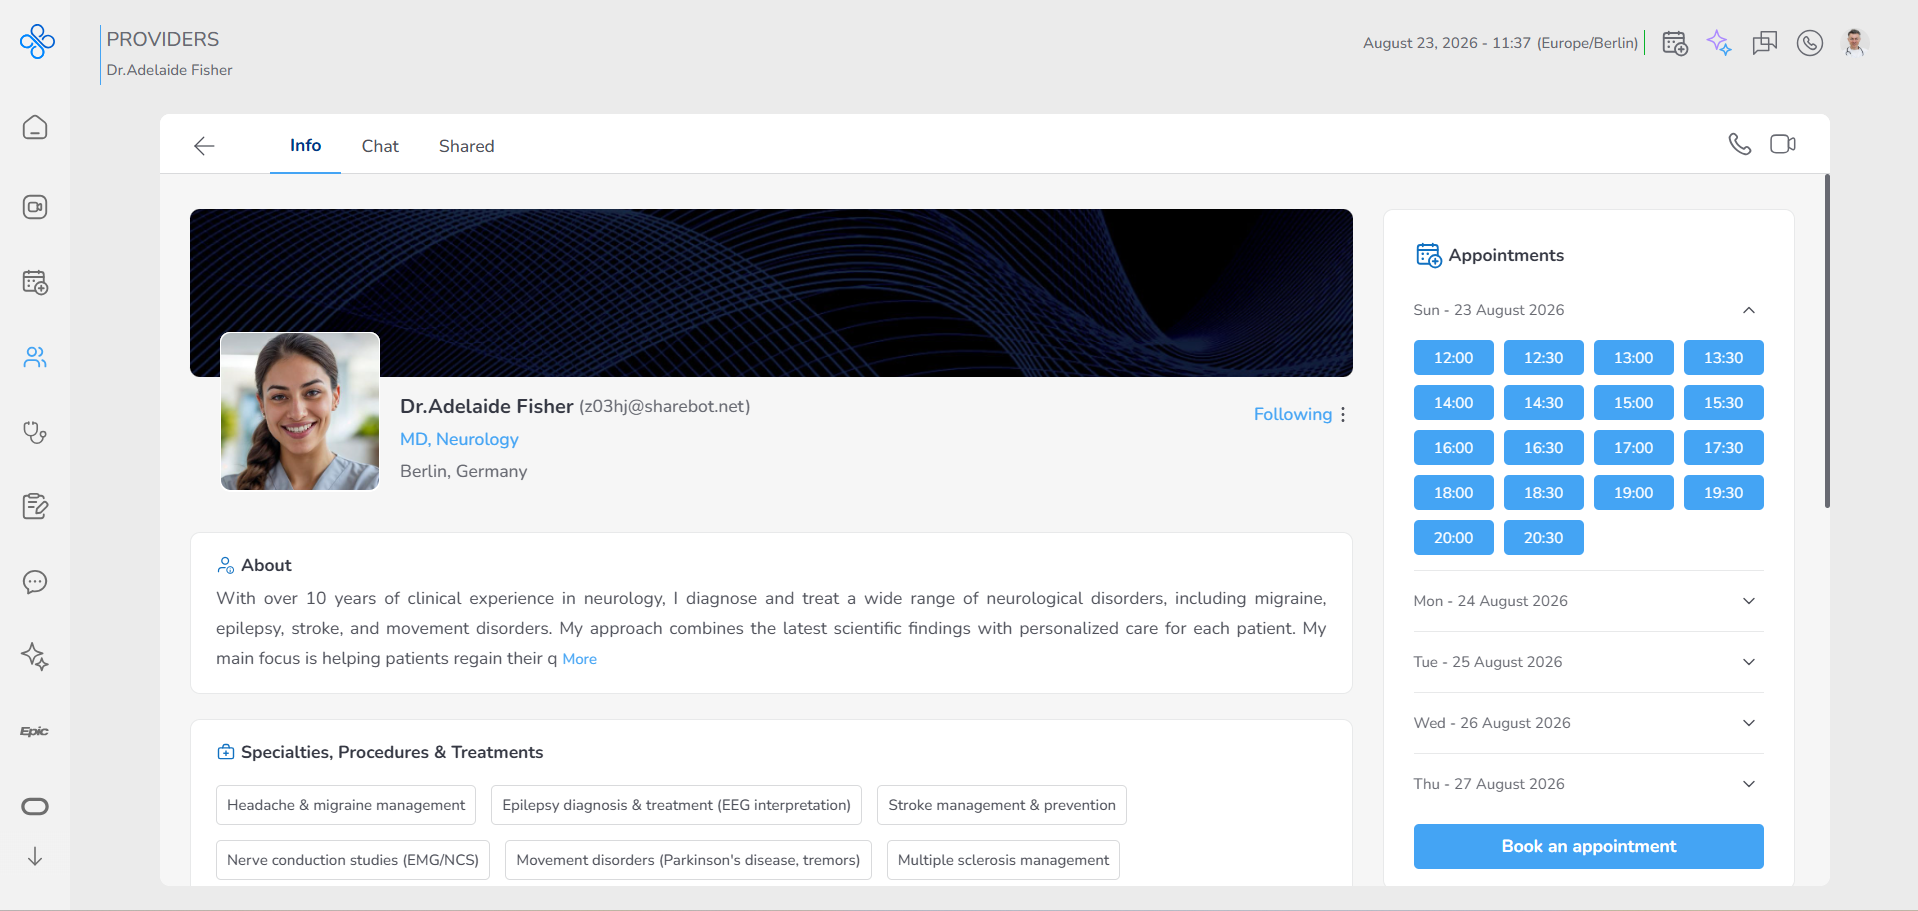
From there, you can:
- Follow the provider
- Book an appointment
- Start a call
- Go to Chat or Shared tabs for communication and files Use this option when you need more information before making a decision or starting interaction
Provider Profile – Info Tab
When you open a provider profile, you will land on the Info tab by default.
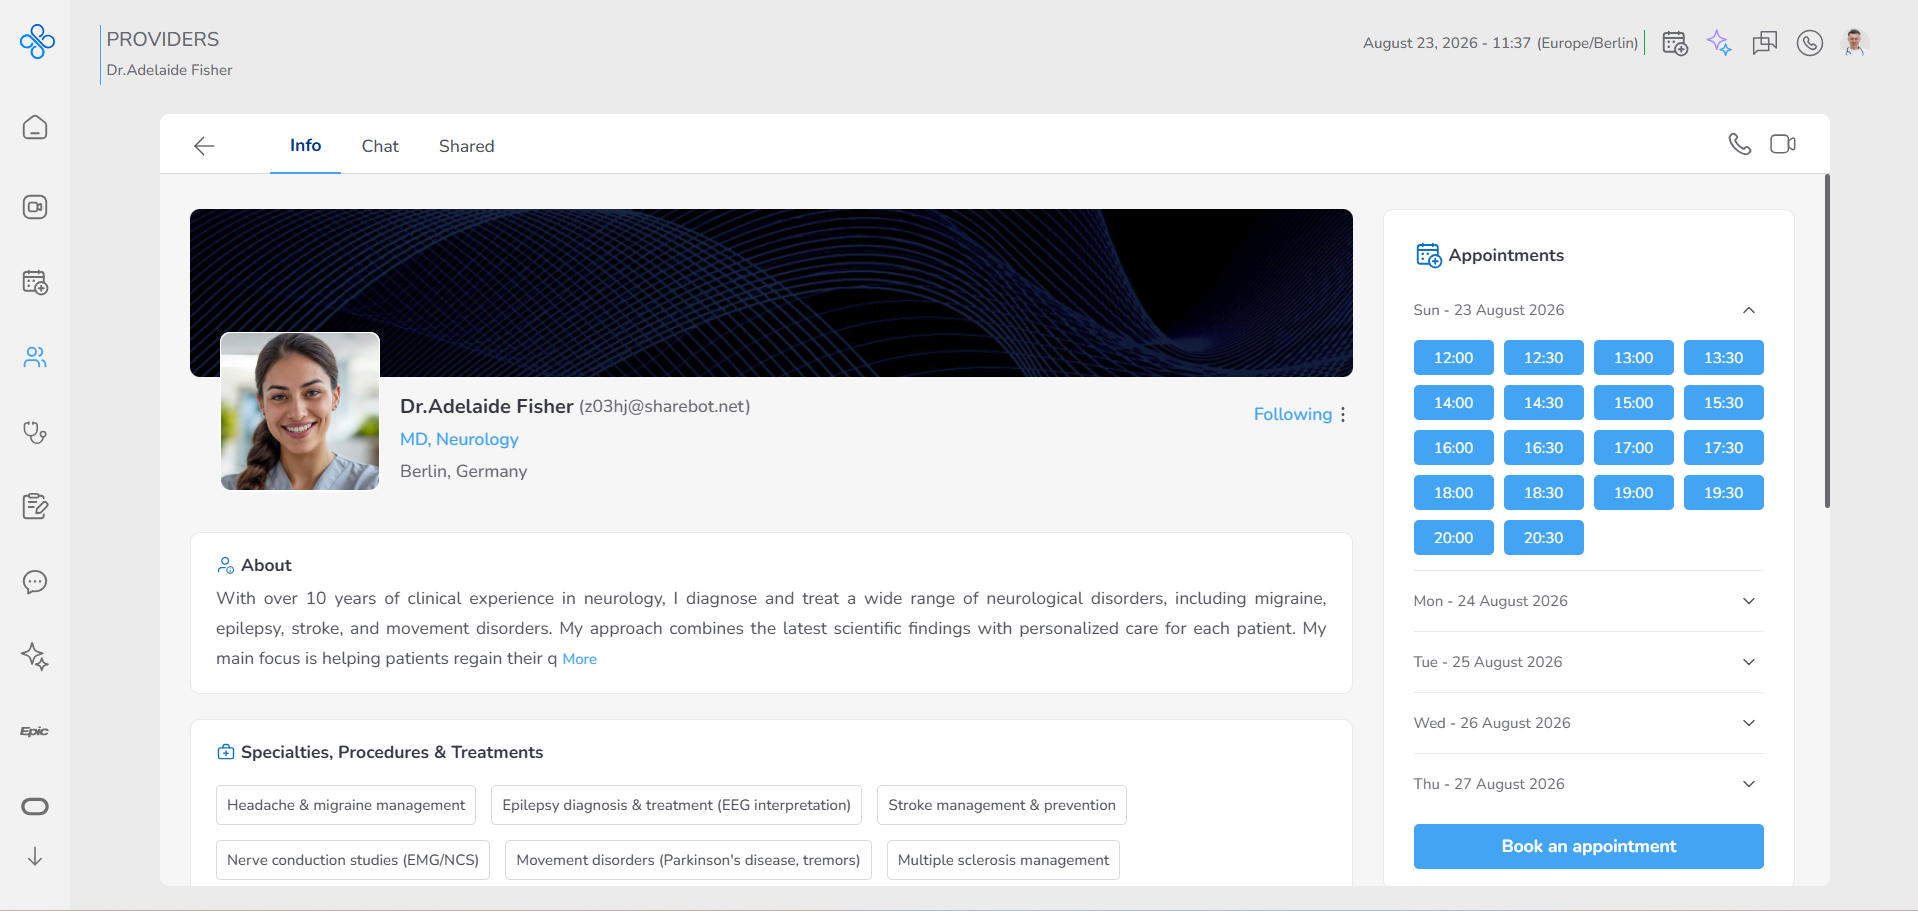
This is the most important section where you review the provider and decide what to do next. Think of this tab as your main decision page. Here you understand who the provider is and take actions like follow, book, or start communication.
Step 1: Review provider information
In this tab, you see all general information about the provider.
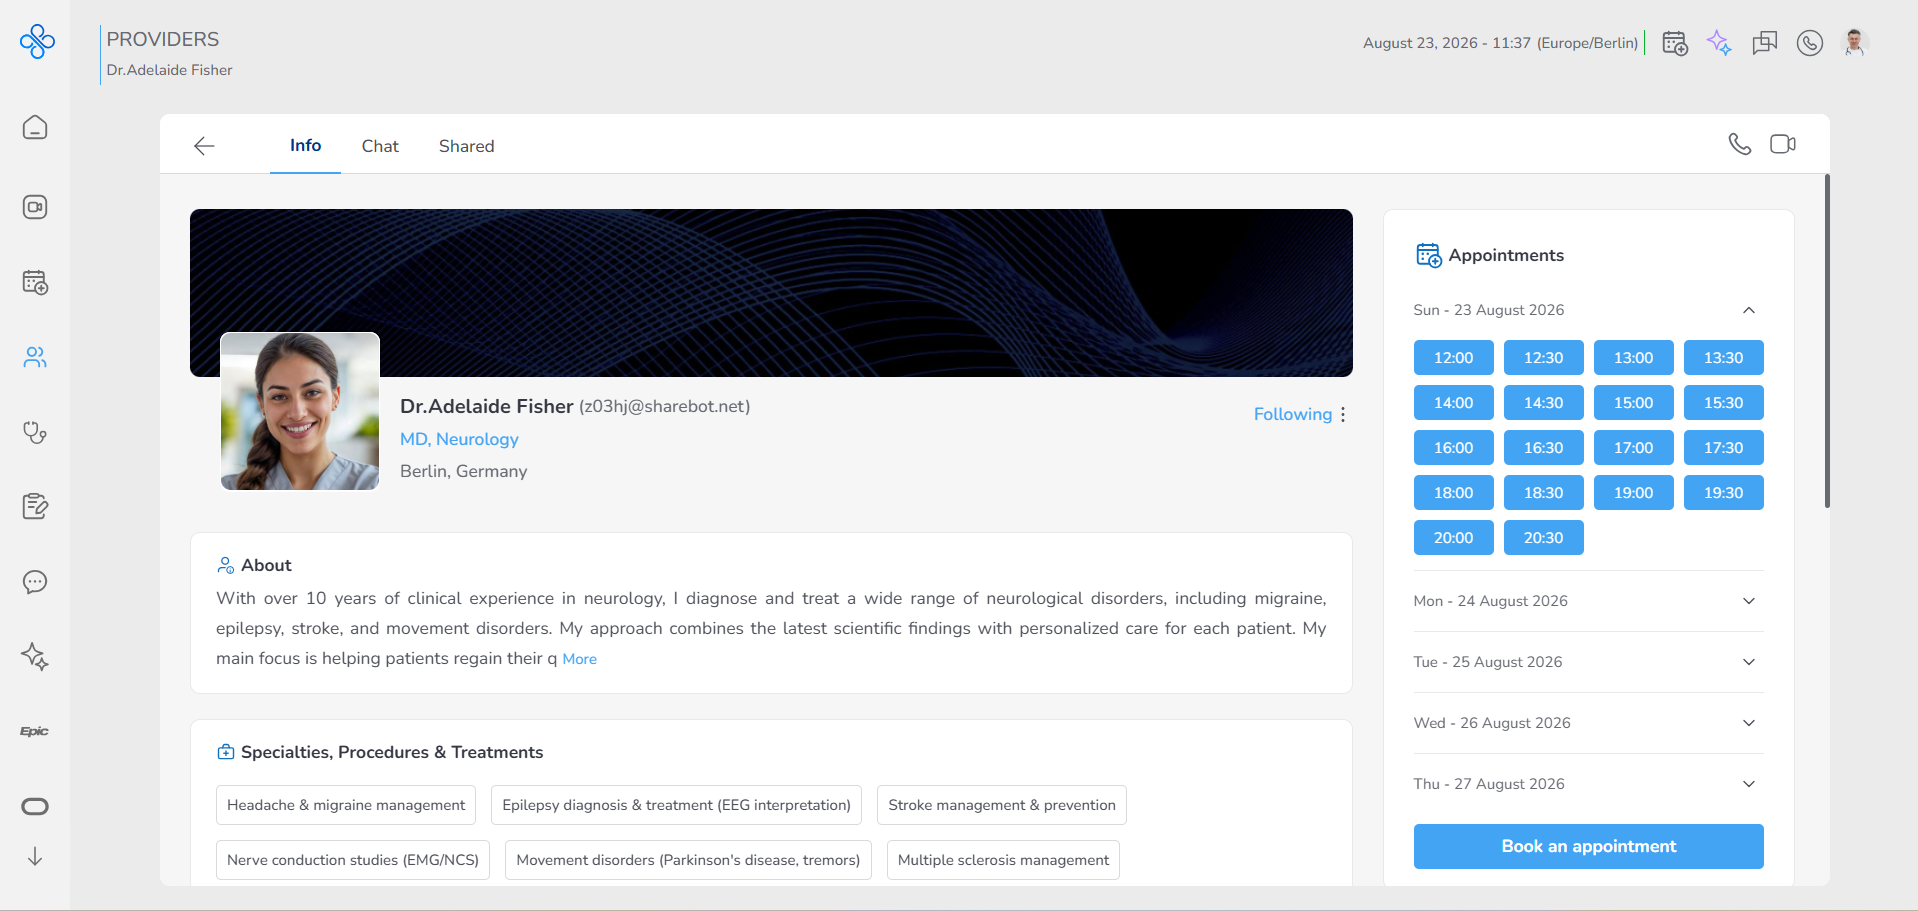
Start from top and move down:
- Profile image and banner
- Provider name and specialty
- Location Then continue scrolling:
- About section (short description about the provider)
- Specialties, procedures, and treatments
- Experience (work history)
- Education
- Memberships
- Contact info (contact details such as email, phone number, and address)
- Spoken languages This side is only for reading and understanding the provider You do not perform actions here 💡 Use this section when you want to decide: “Is this the right provider for me?”
Step 2: Check availability and choose a time
On the right side, you will see available dates.
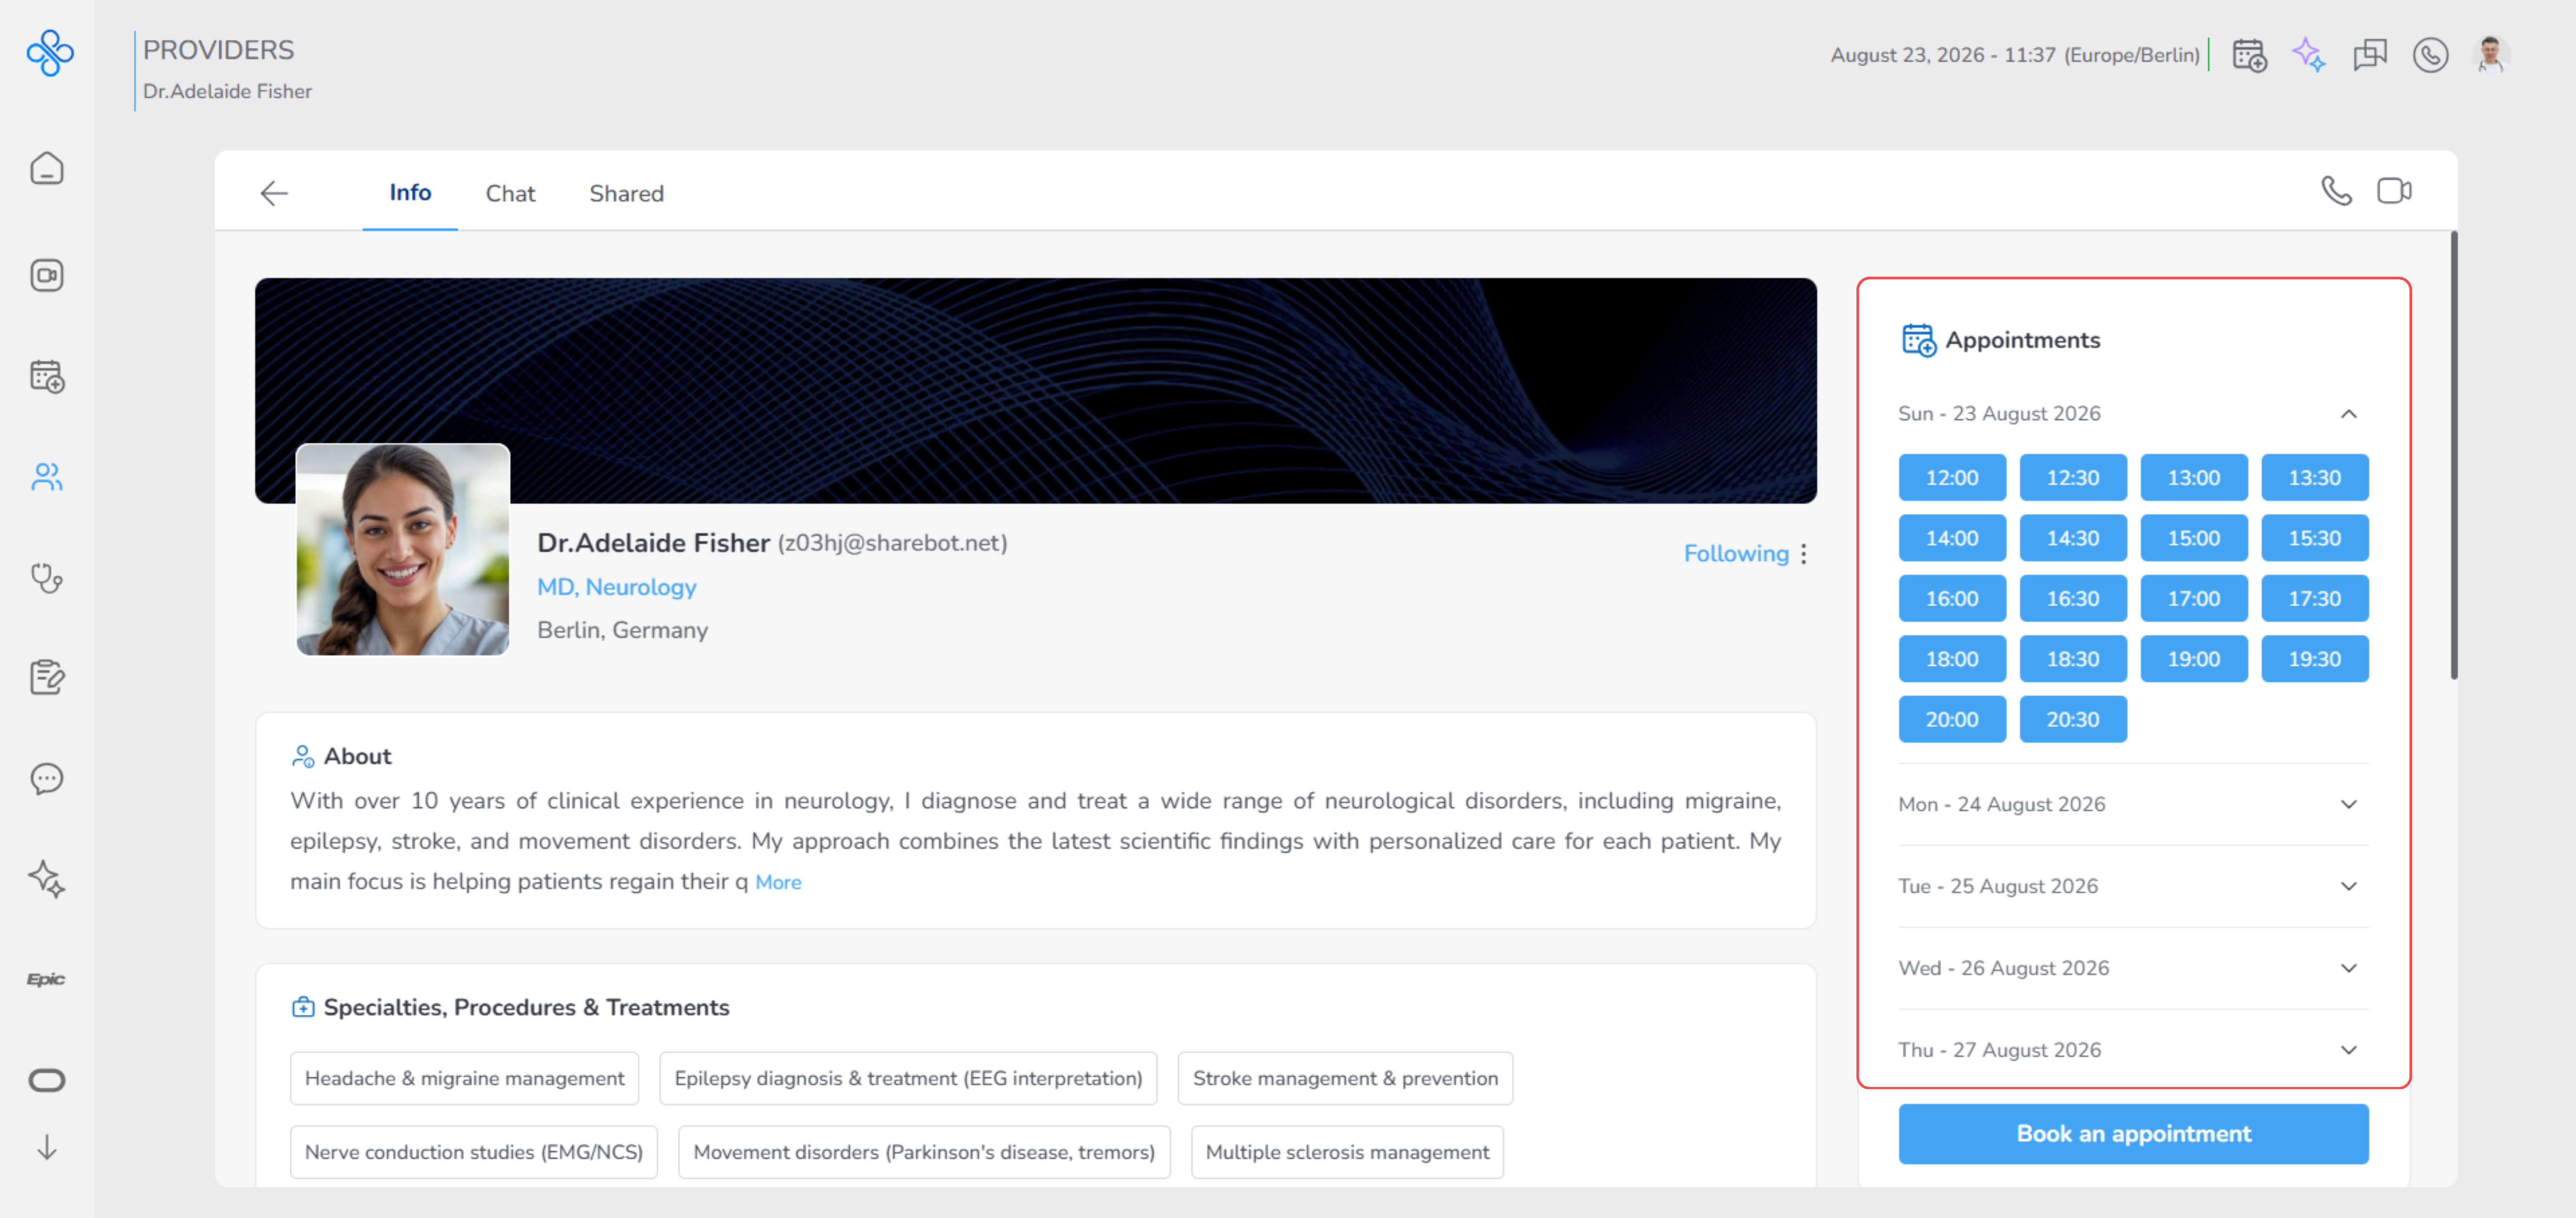
- Move your mouse over a date
- Available time slots will appear
- Review the times carefully
- Click on the time that works for you As soon as you click a time: The booking modal opens automatically
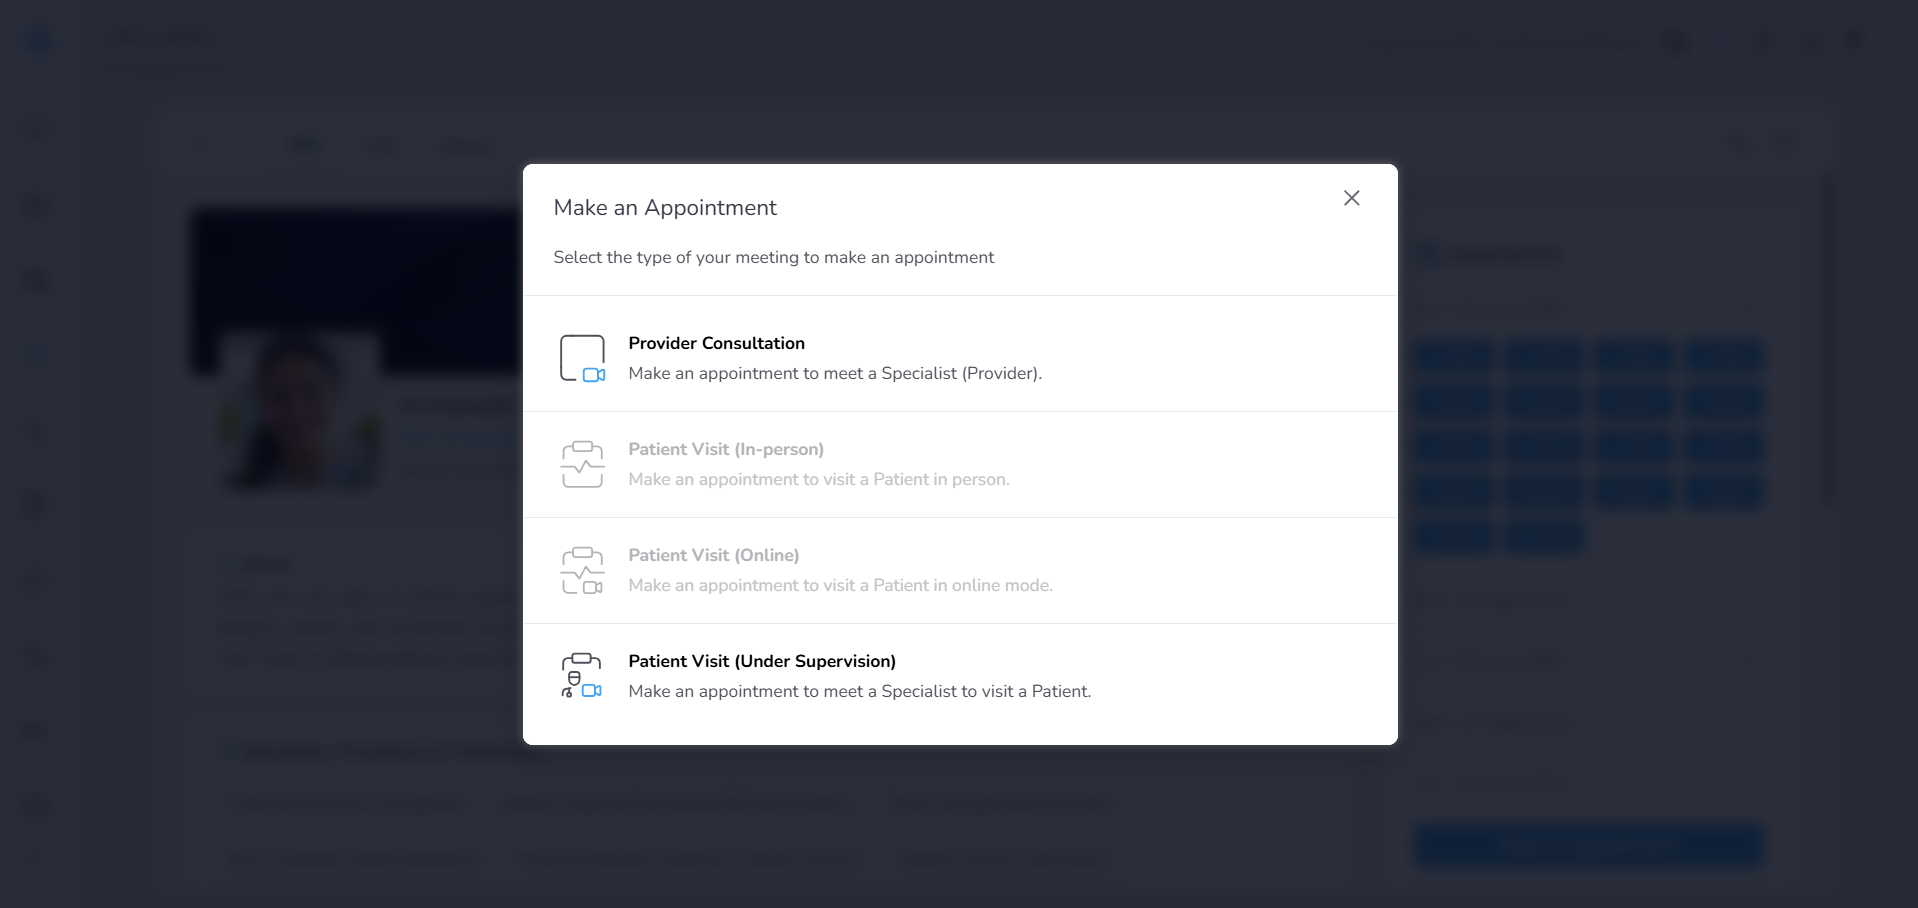
The selected date and time are already filled in This makes booking fast and avoids manual input (For more details about appointment booking, please refer to the Private (https://app.clickup.com/9015704788/docs/8cp1f6m-2395/8cp1f6m-2635)a user guide.)
Step 3: Book an appointment
You can also book directly using the booking option.
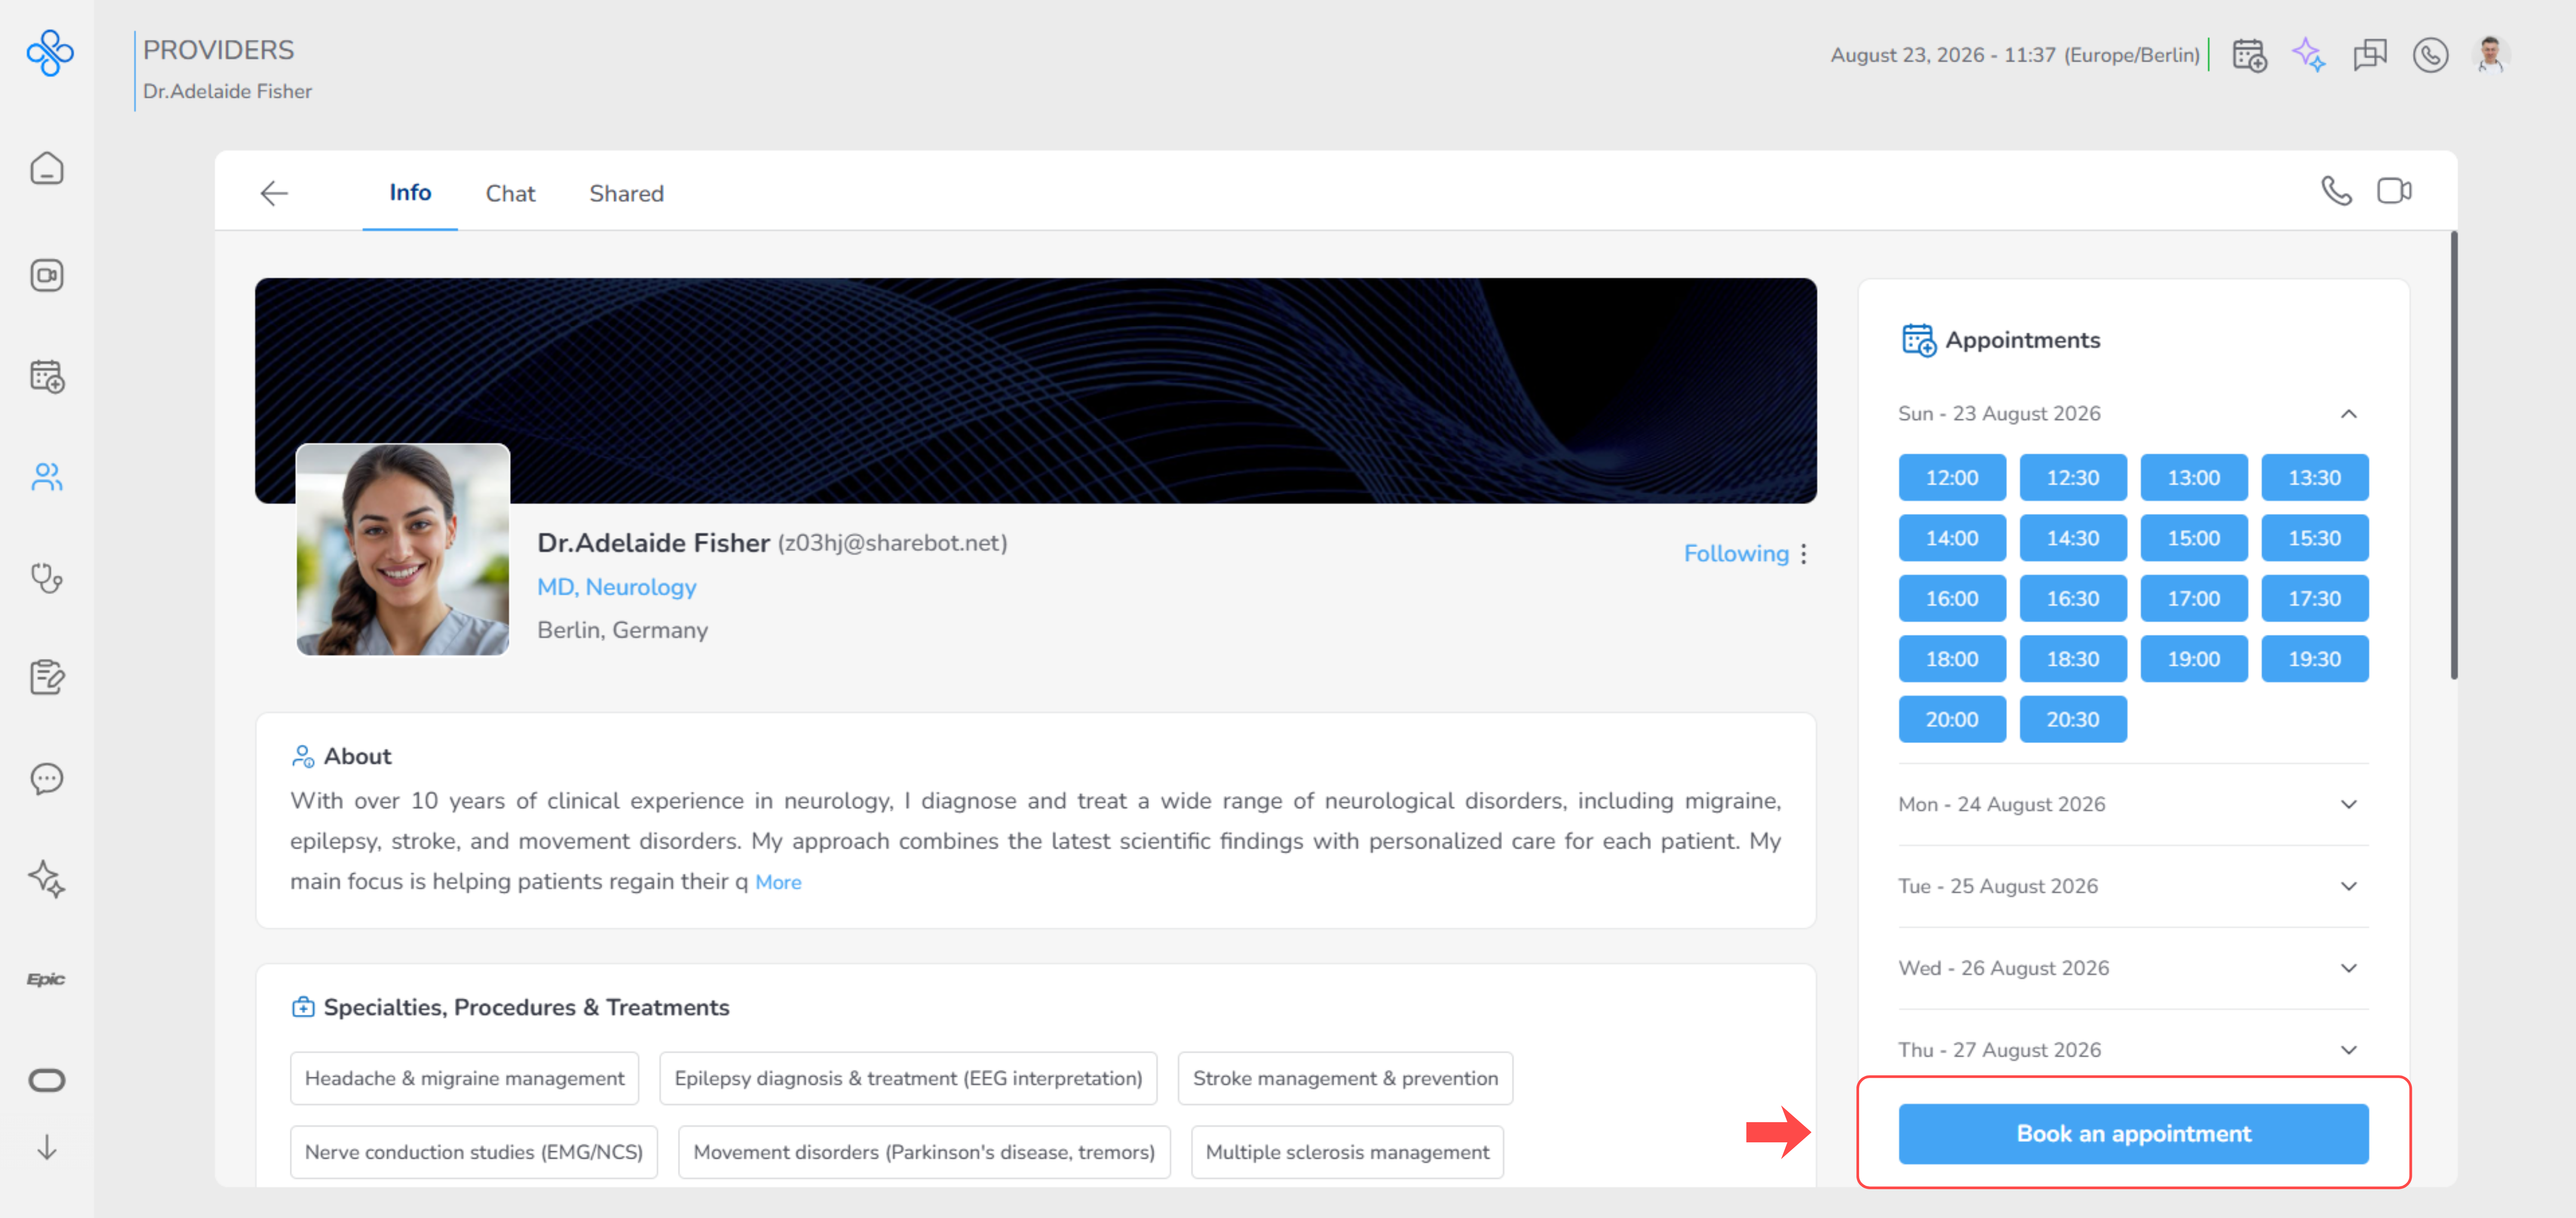
- Click on Book Appointment
- Choose the type of appointment:
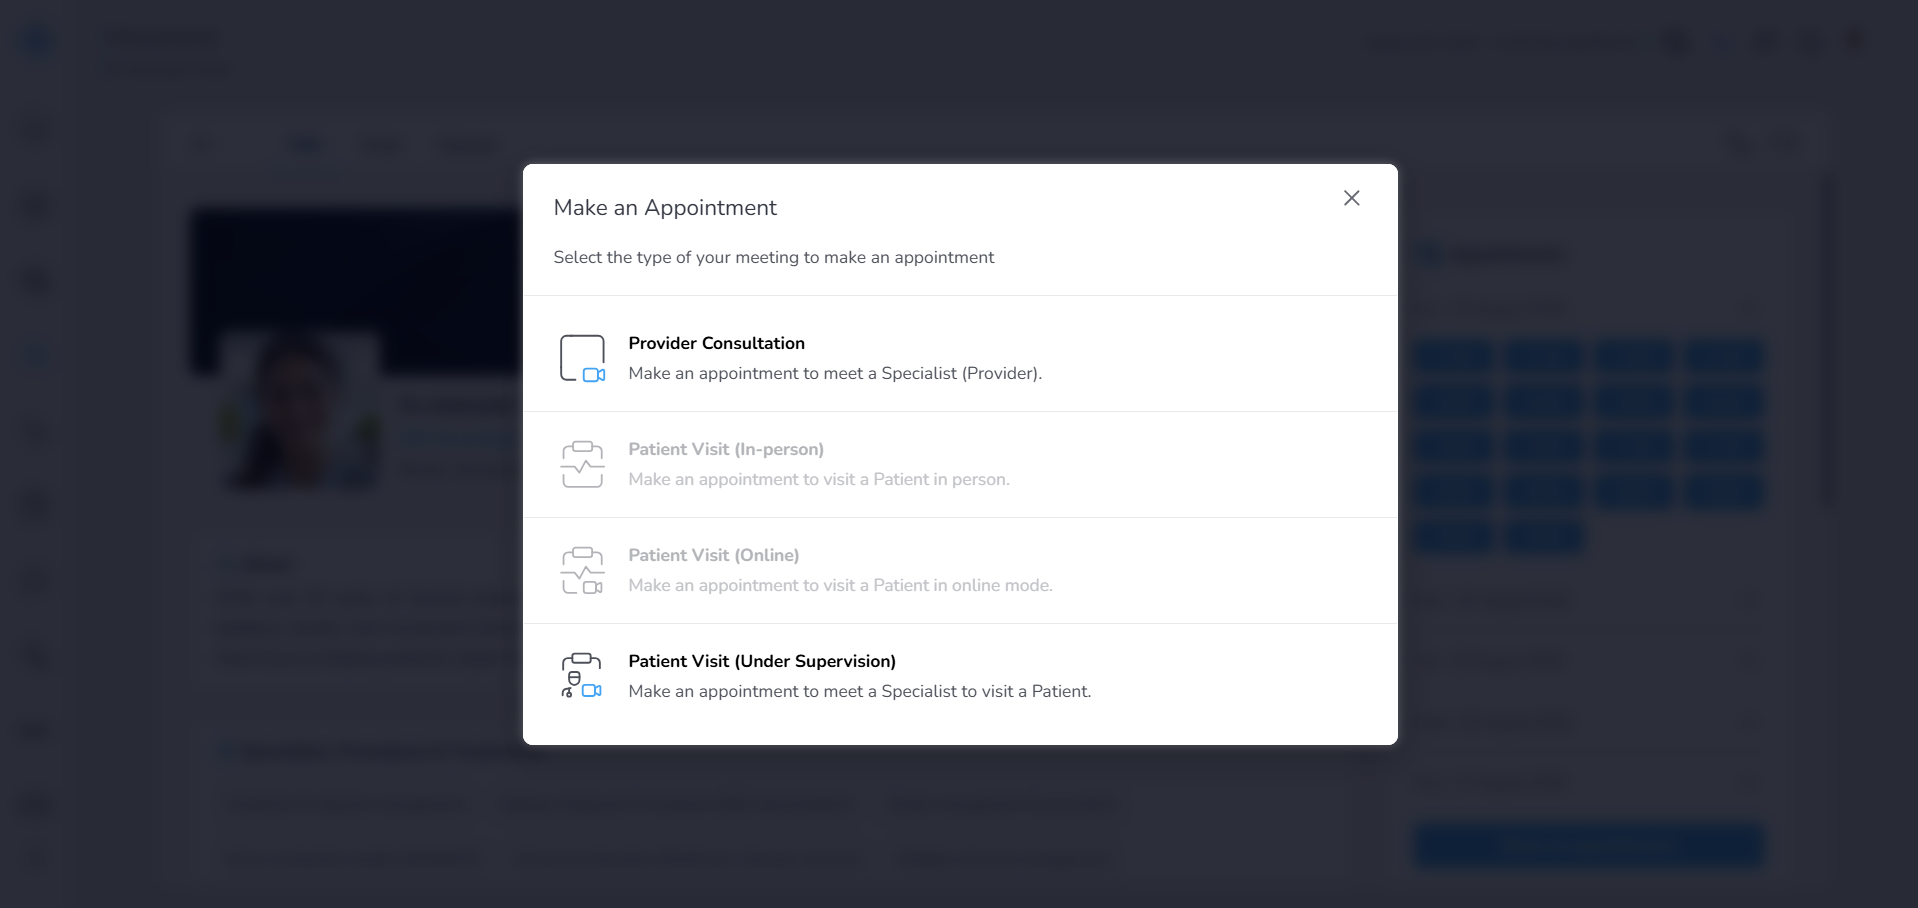
- Provider Consultation
- Patient Visit (Under Supervision)
- Complete the booking process Use this option if you want to go through the full booking flow instead of selecting a quick time (For more details about appointment booking, please refer to the Private (https://app.clickup.com/9015704788/docs/8cp1f6m-2395/8cp1f6m-2635)a user guide.)
Step 4: Follow the provider (important)
If you plan to work with this provider, you should follow them.
- Click the Follow button
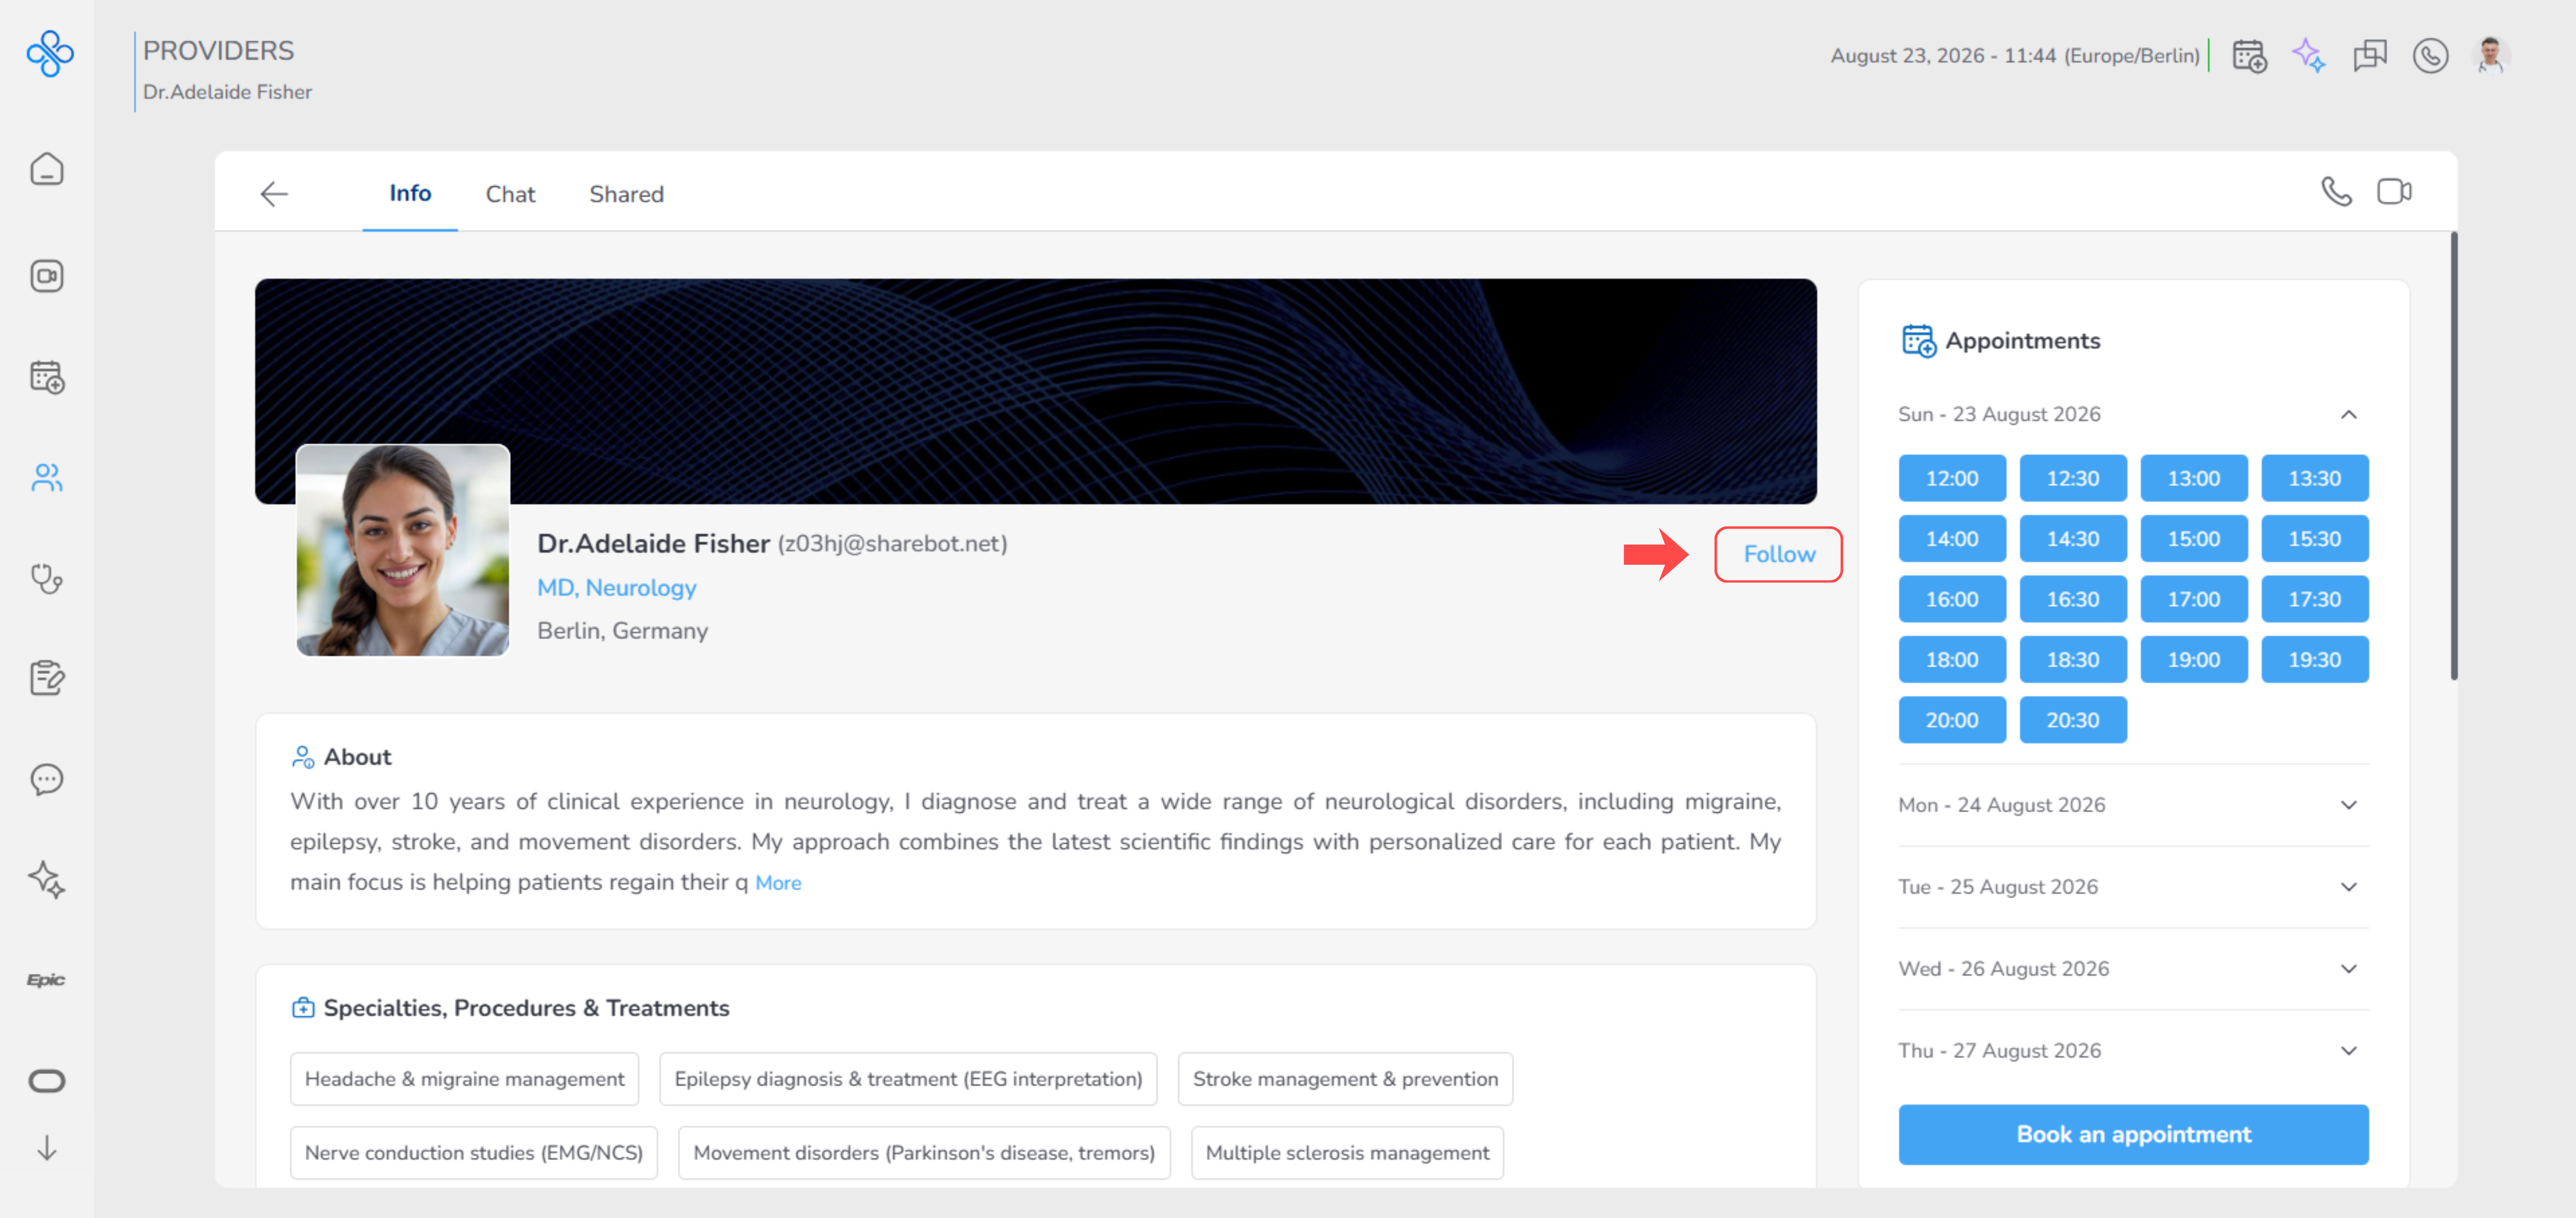
After clicking:
- The button changes to Following
- A More Actions (⋮) button appears
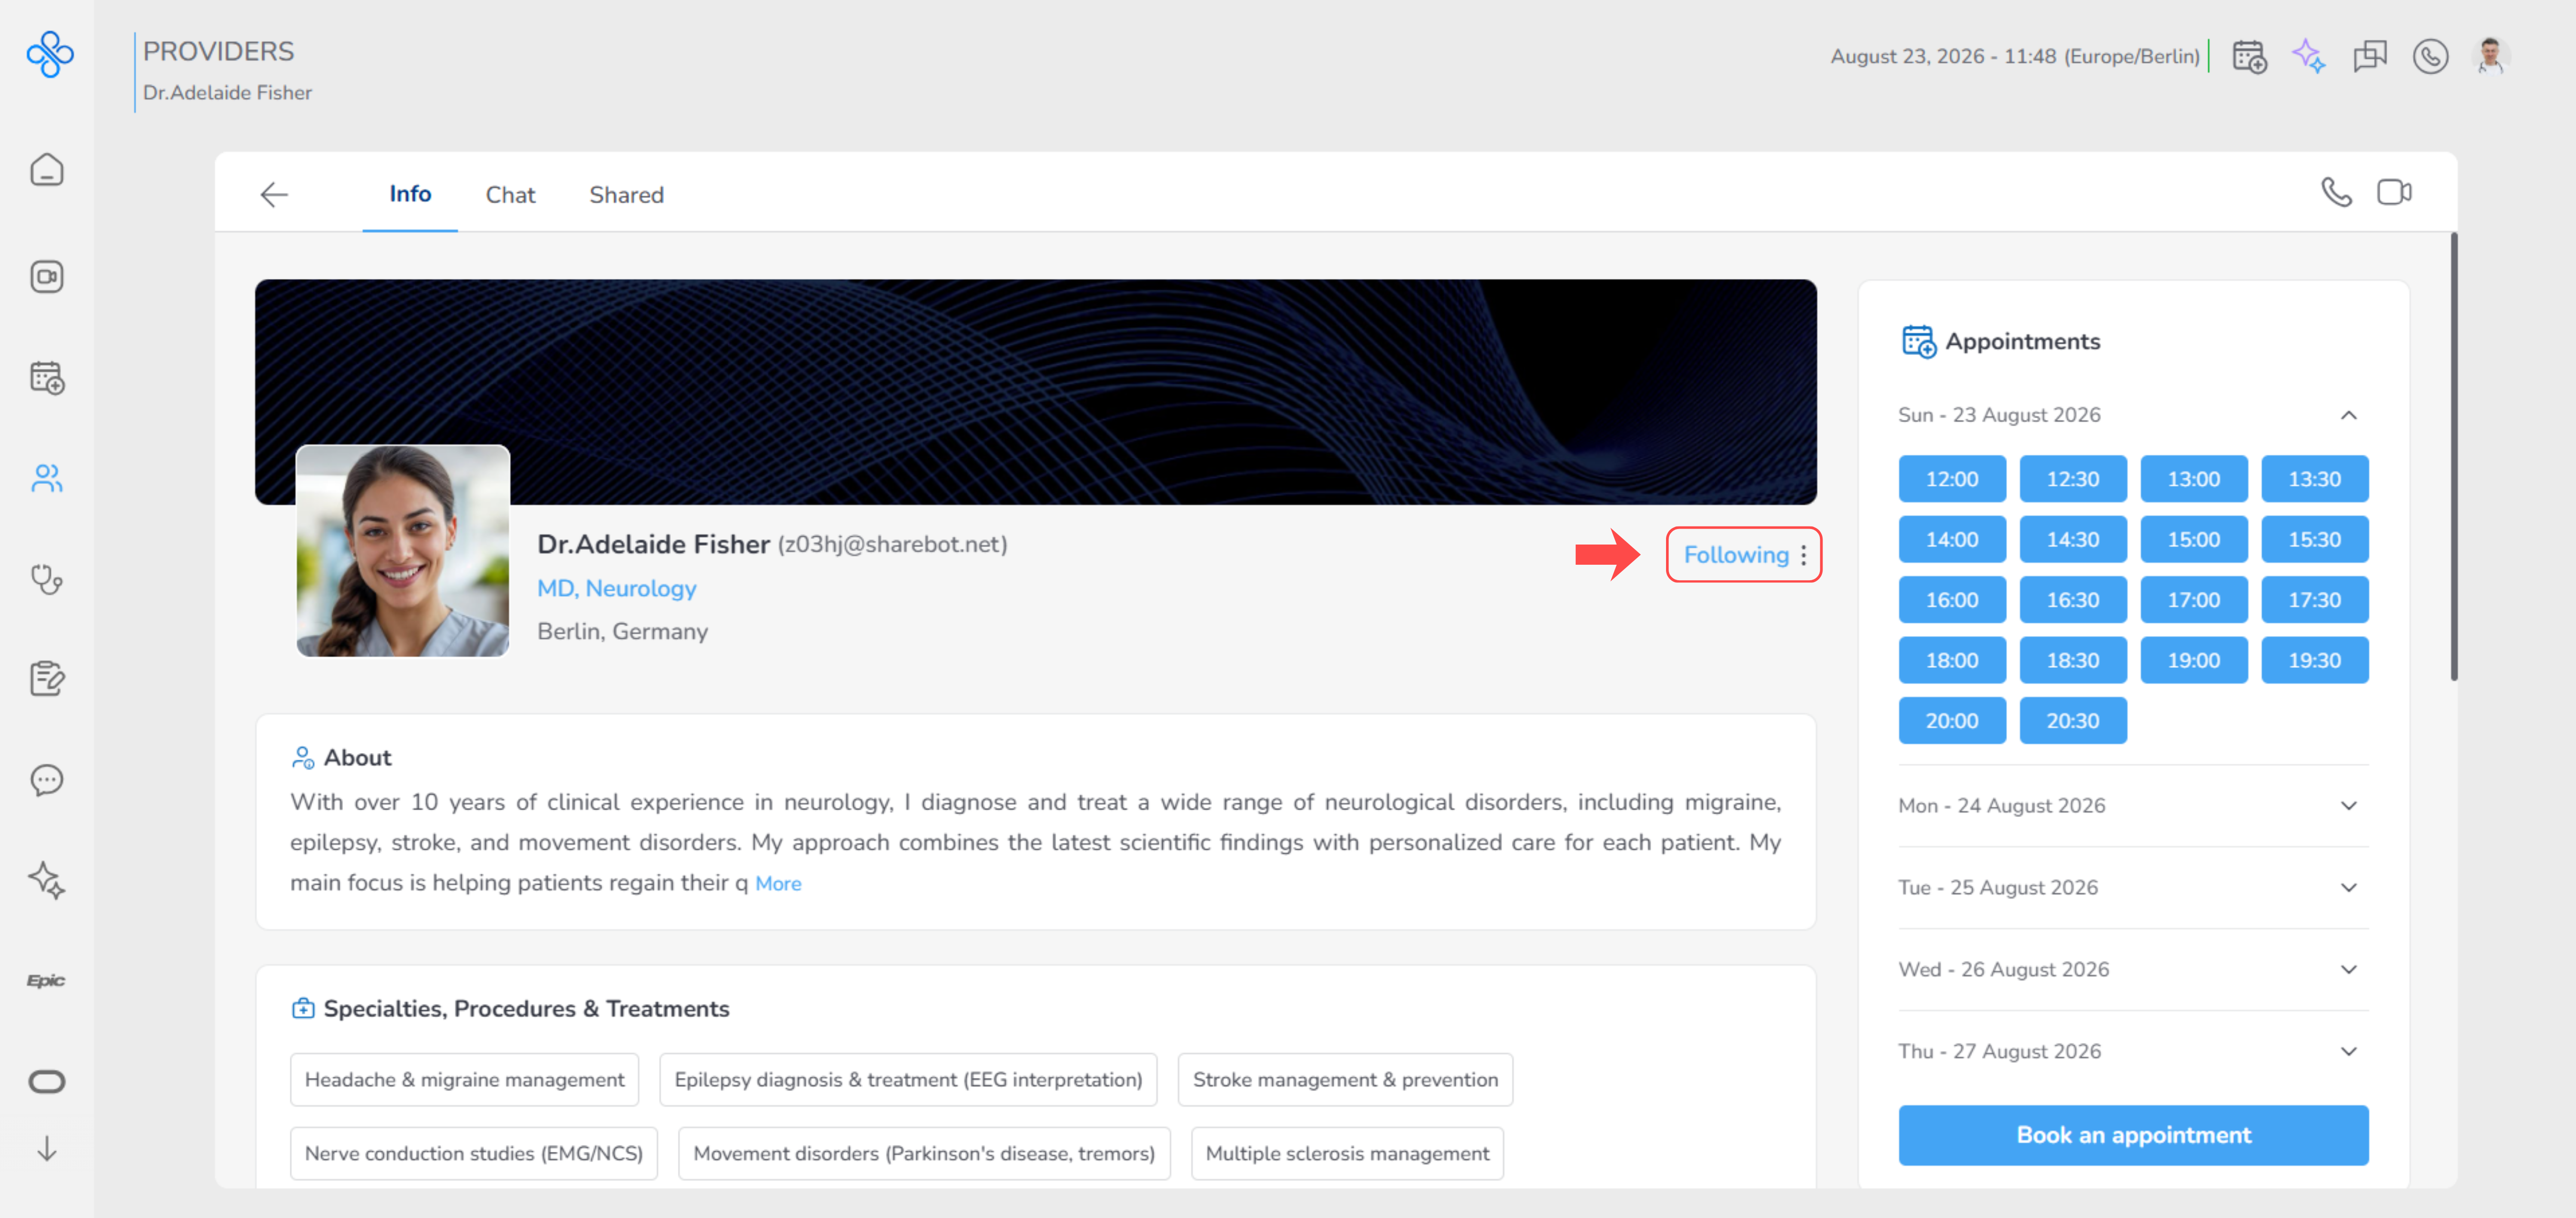
Following a provider allows you to:
- Use the Chat and share tabs
- Stay connected for future interactions
Step 5: Manage provider actions
After following, you can access more options. Click the More Actions (⋮) button
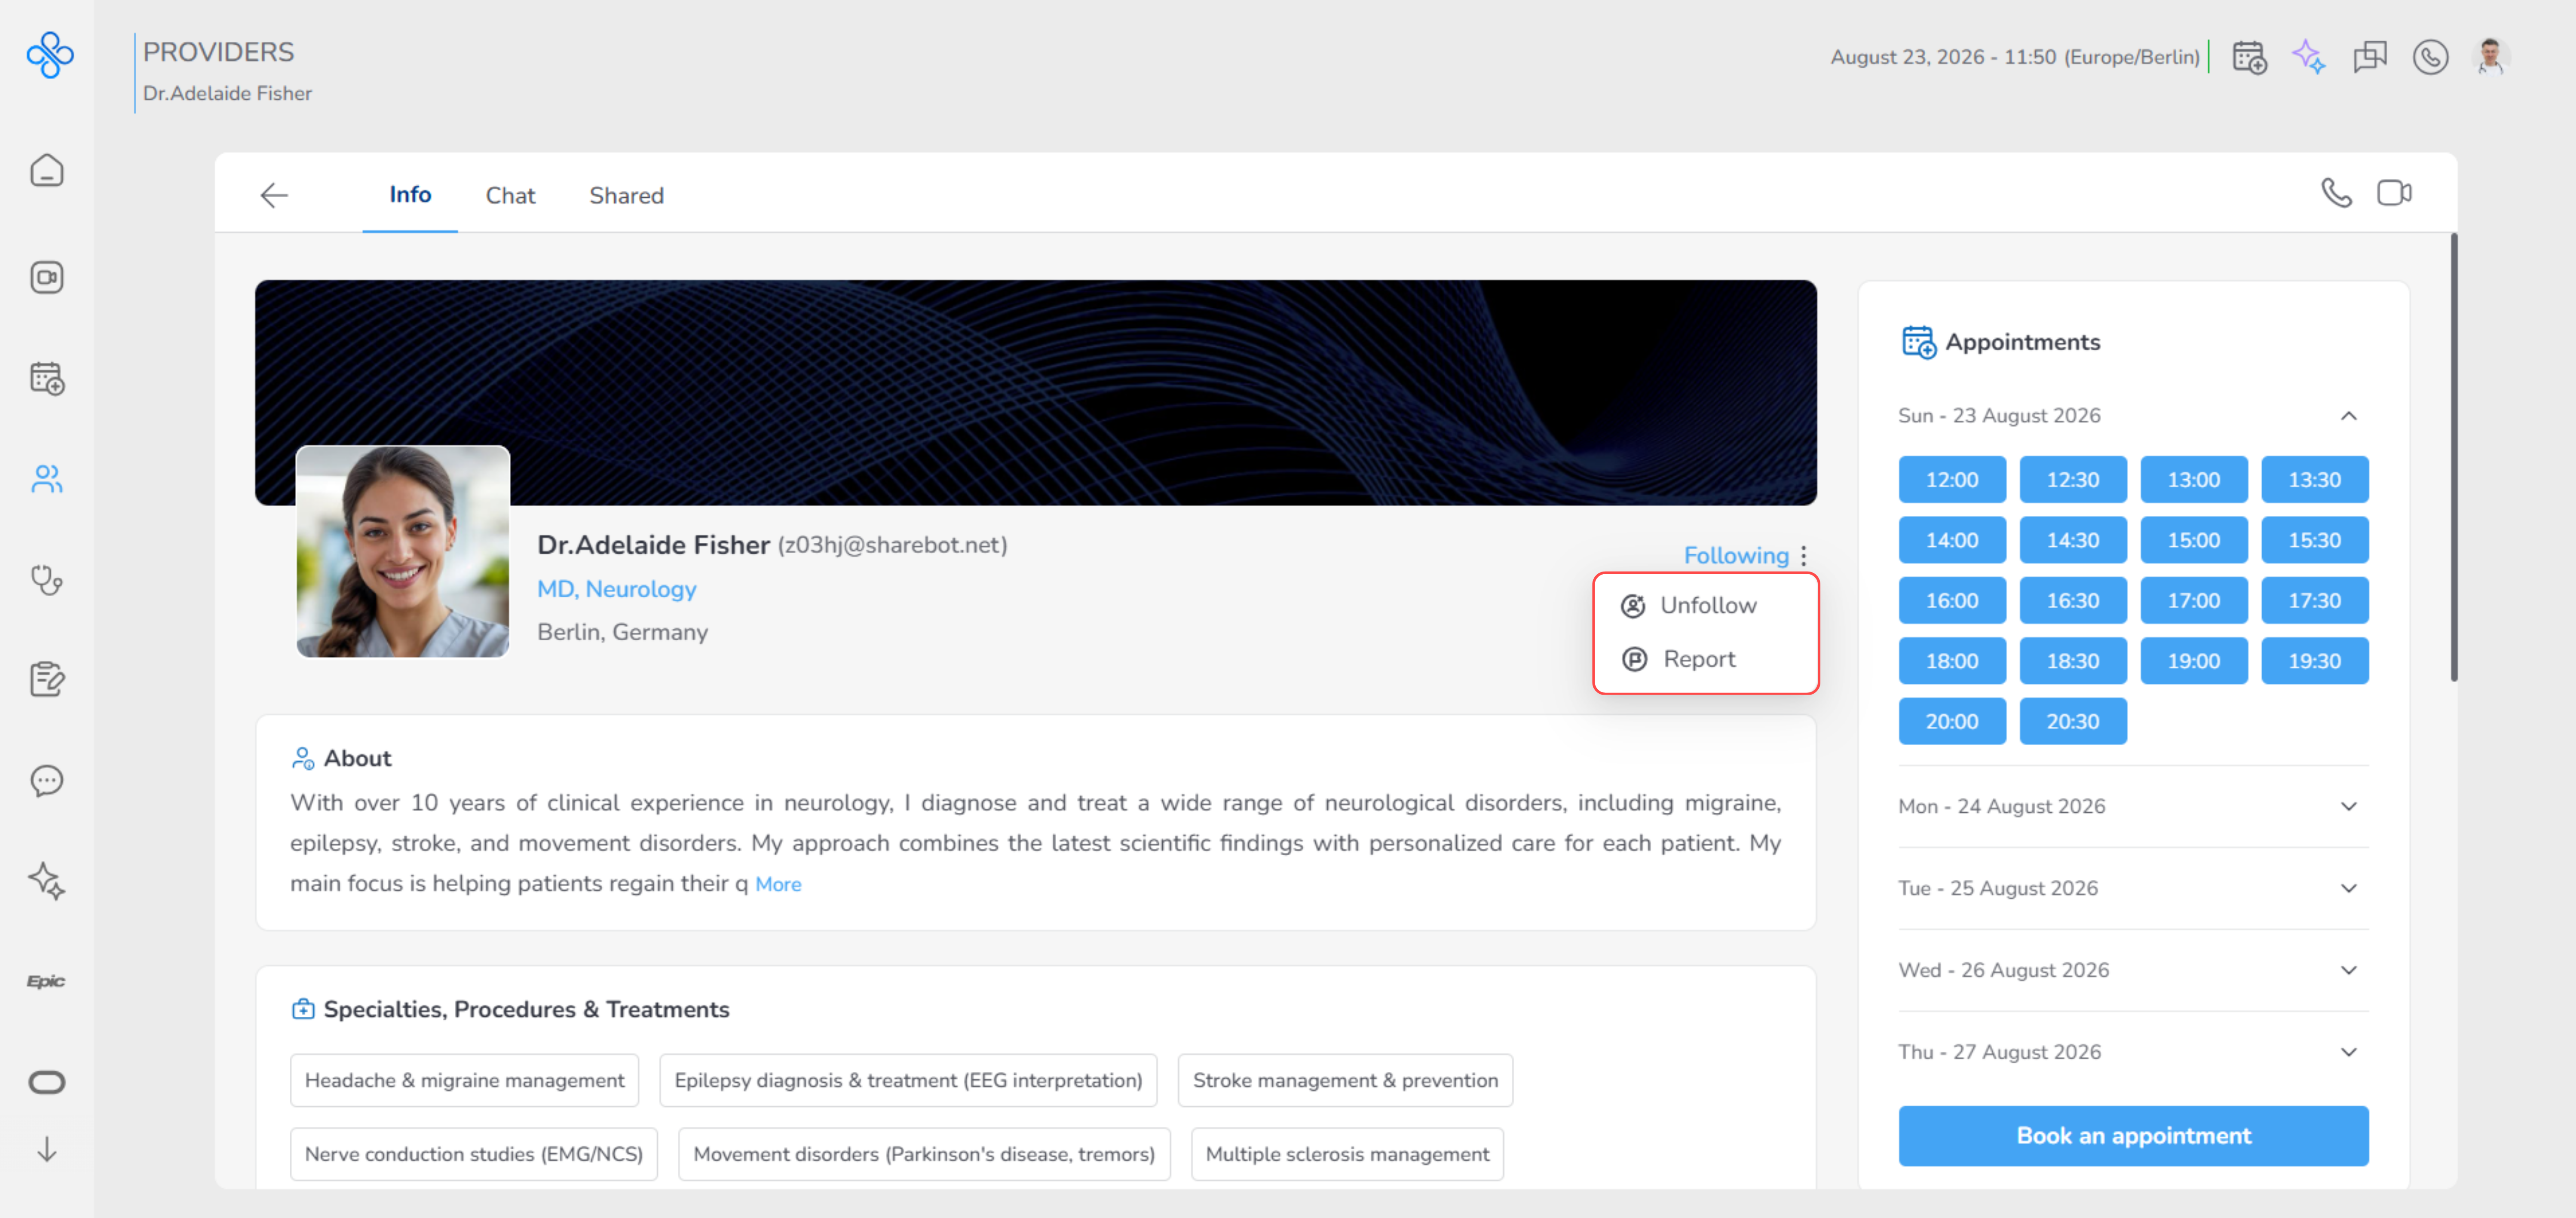
You will see options like:
- Unfollow
- Report
Unfollow
- Click Unfollow
- A confirmation modal will appear
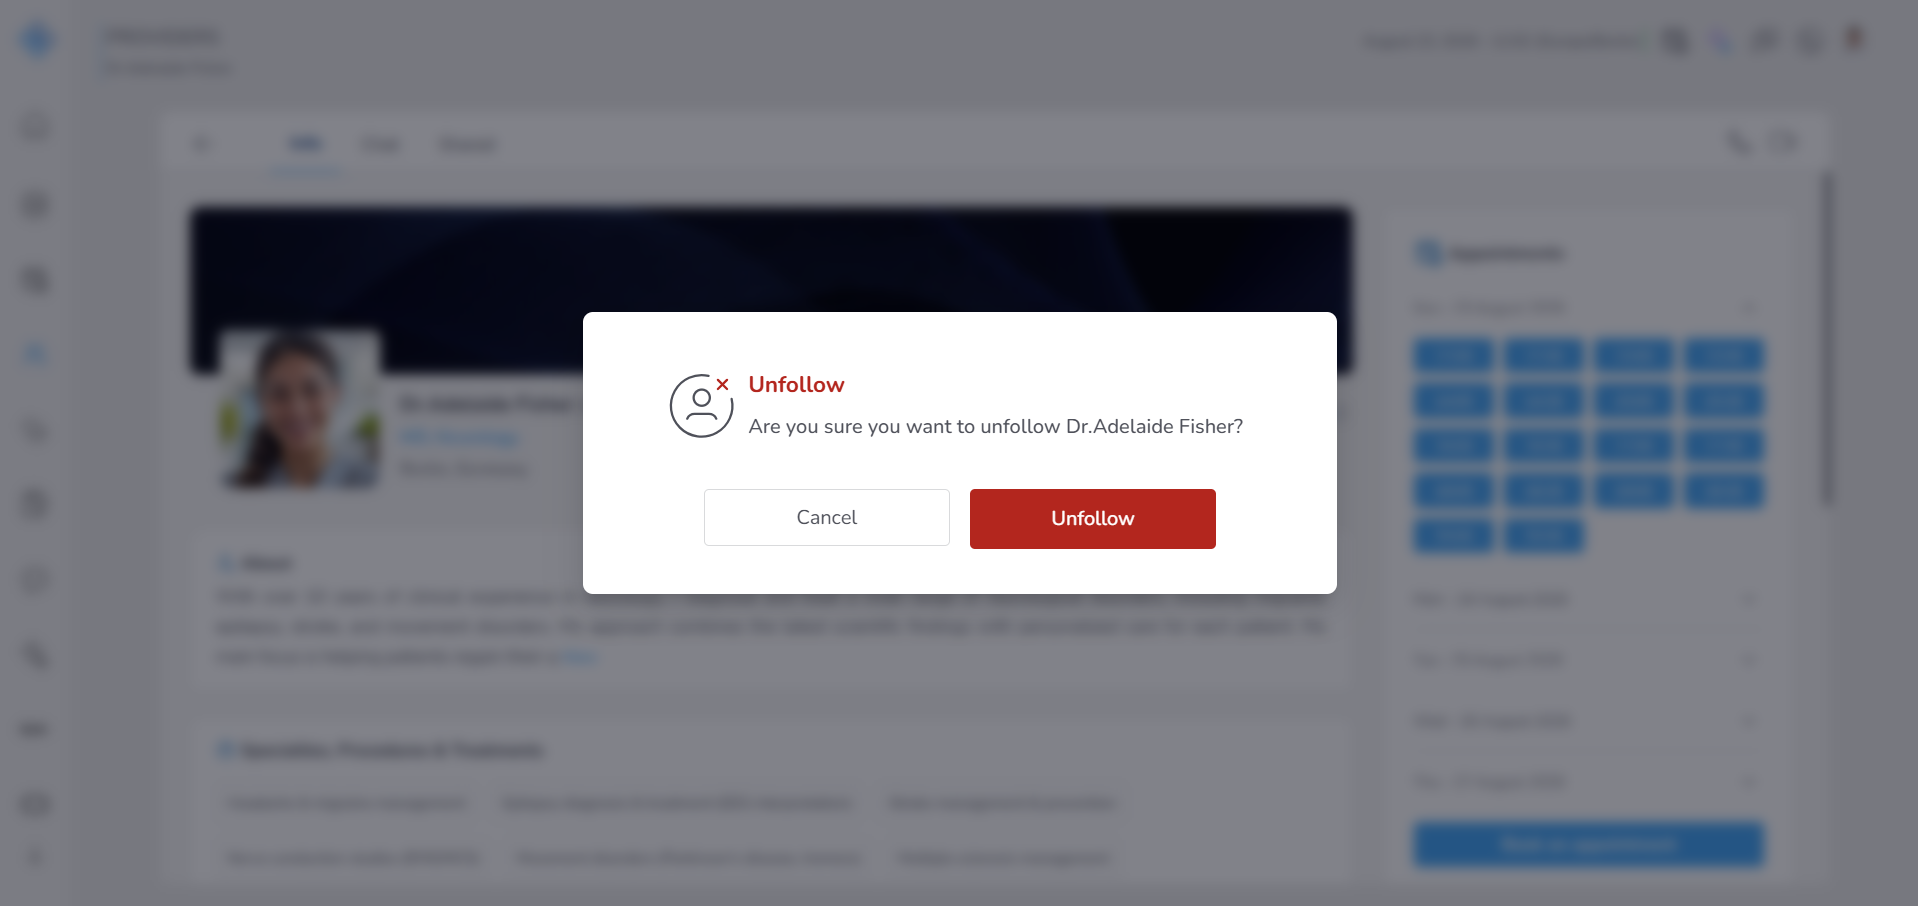
- Click Unfollow again to confirm
After unfollowing:
- The provider is removed from your Following list
Report
Use this only if there is an issue with the provider.
- Click Report
- A modal will open
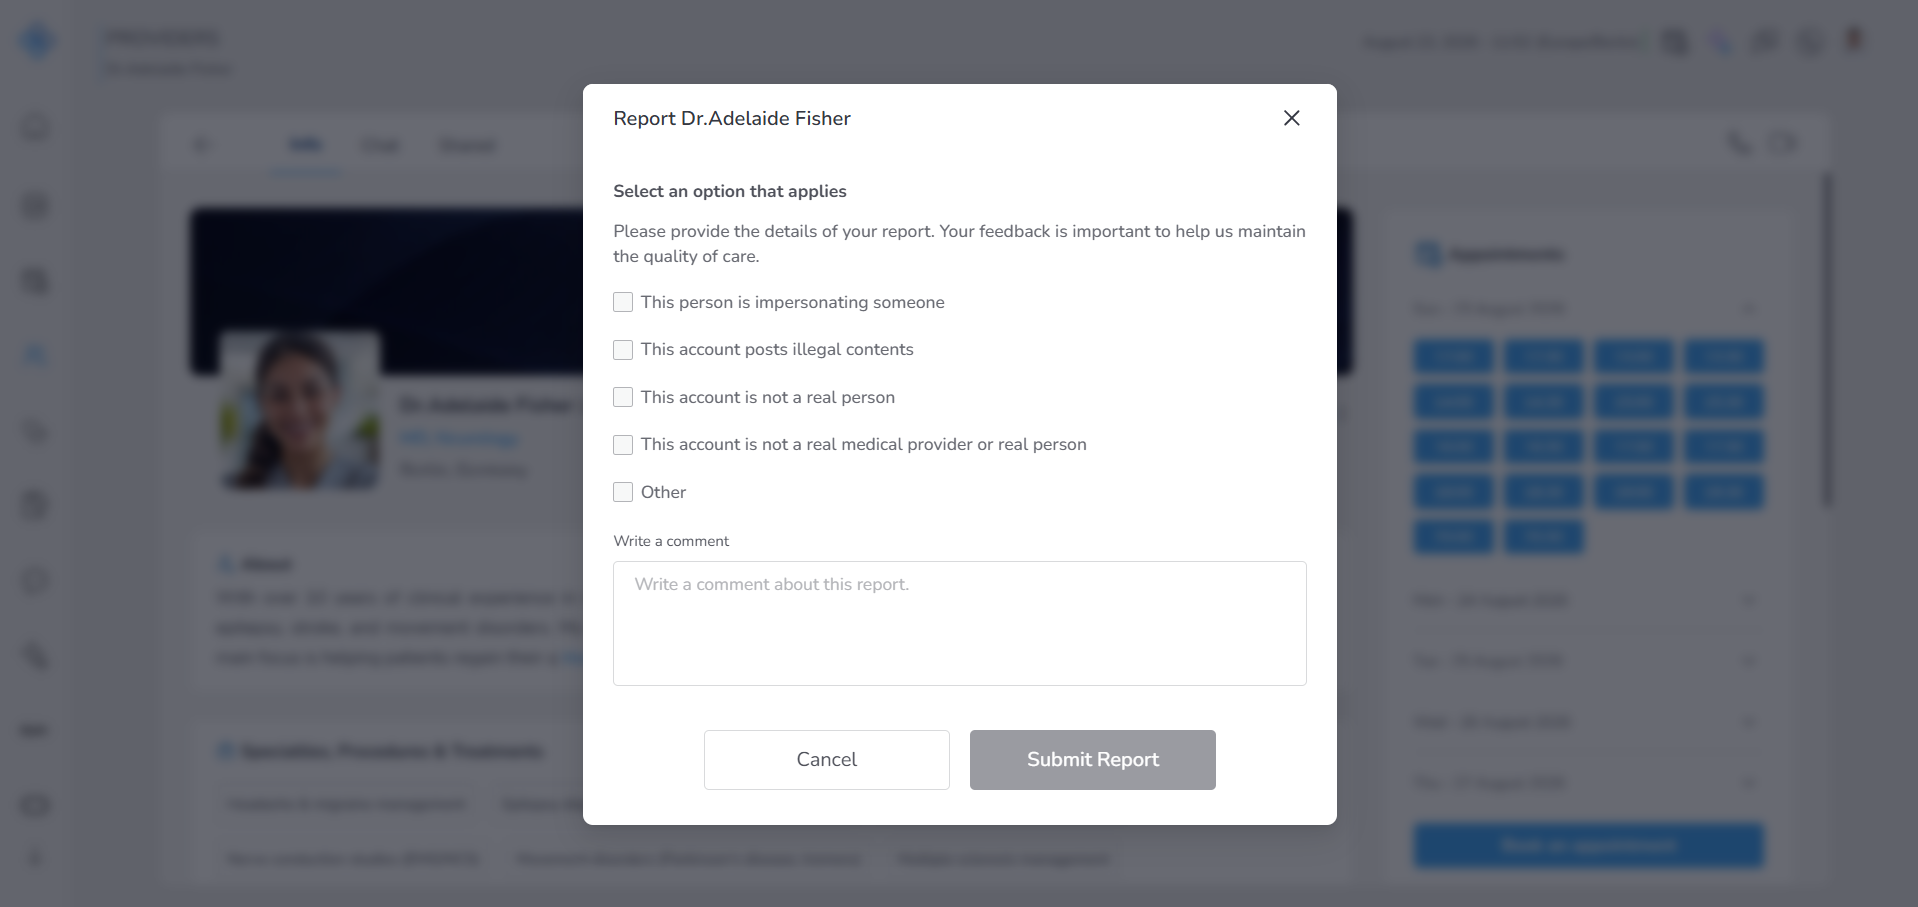
- Select a reason or write a comment
- Click Submit Report This sends a report for review
Step 6: Start communication (Call)
At the top right of the page, you will see call buttons.
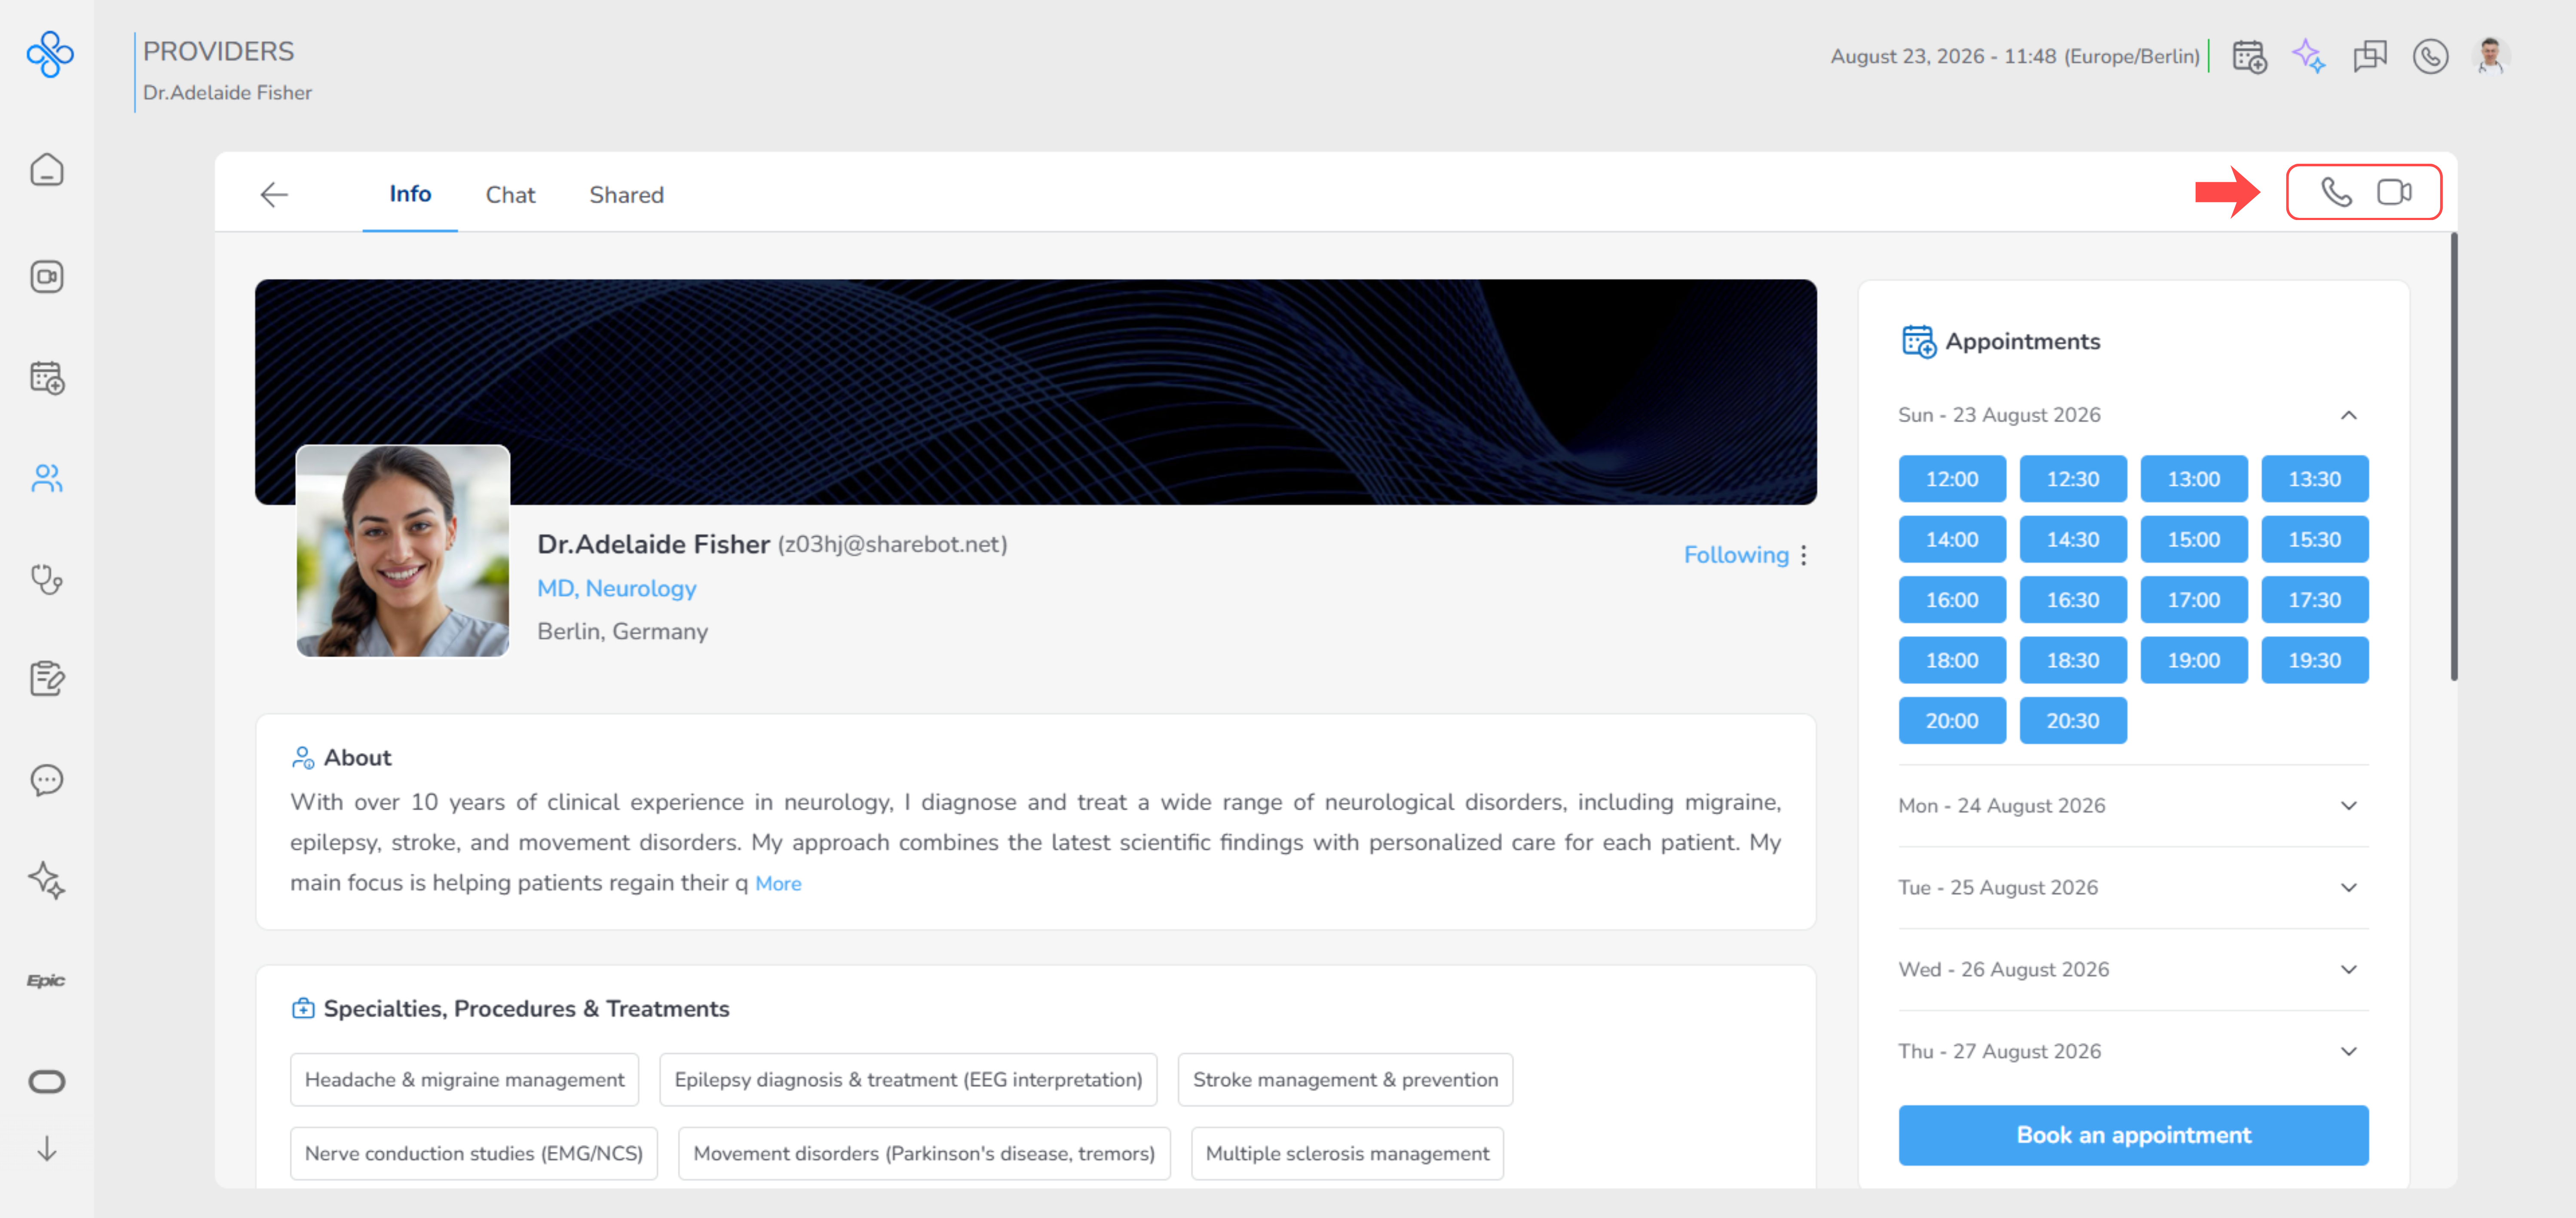
You can:
- Start a voice call
- Start a video call Click one of these buttons to begin communication immediately
When should you use this tab?
Use the Info tab when you want to:
- Understand who the provider is
- Check their background and experience
- See available times
- Book an appointment
- Start communication
- Decide if you want to follow them
Simple flow to remember
If you are not sure what to do, follow this:
- Open profile
- Review details
- Check available time
- Follow provider
- Book or start communication This will cover most of your daily use.
Provider Profile – Chat Tab
The Chat tab is where you communicate directly with the provider.
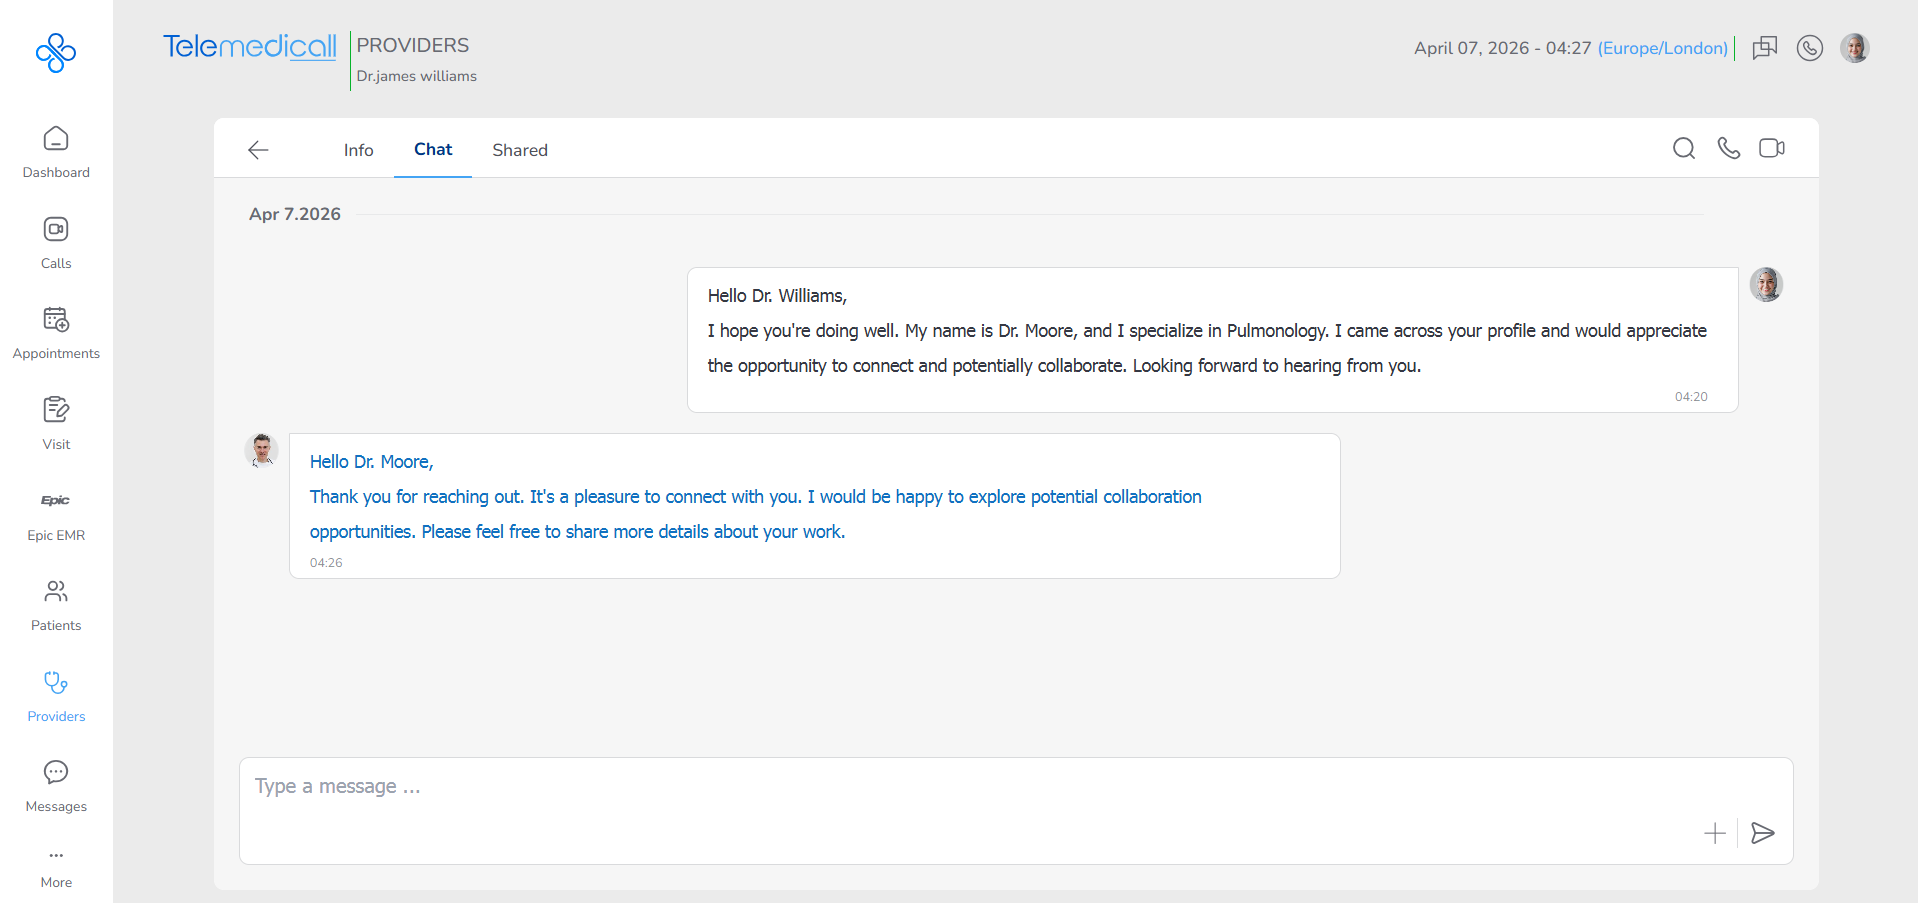
You can send messages, share files, and stay in touch without leaving the system. This works like a simple messaging app, but it is focused on patient and provider communication.
Before you start
You can only use the Chat tab if you follow the provider. If you do not see the chat or cannot send messages: 👉 Go to the Info tab and click Follow first
Step 1: Open the Chat tab
Click on the Chat tab inside the provider profile
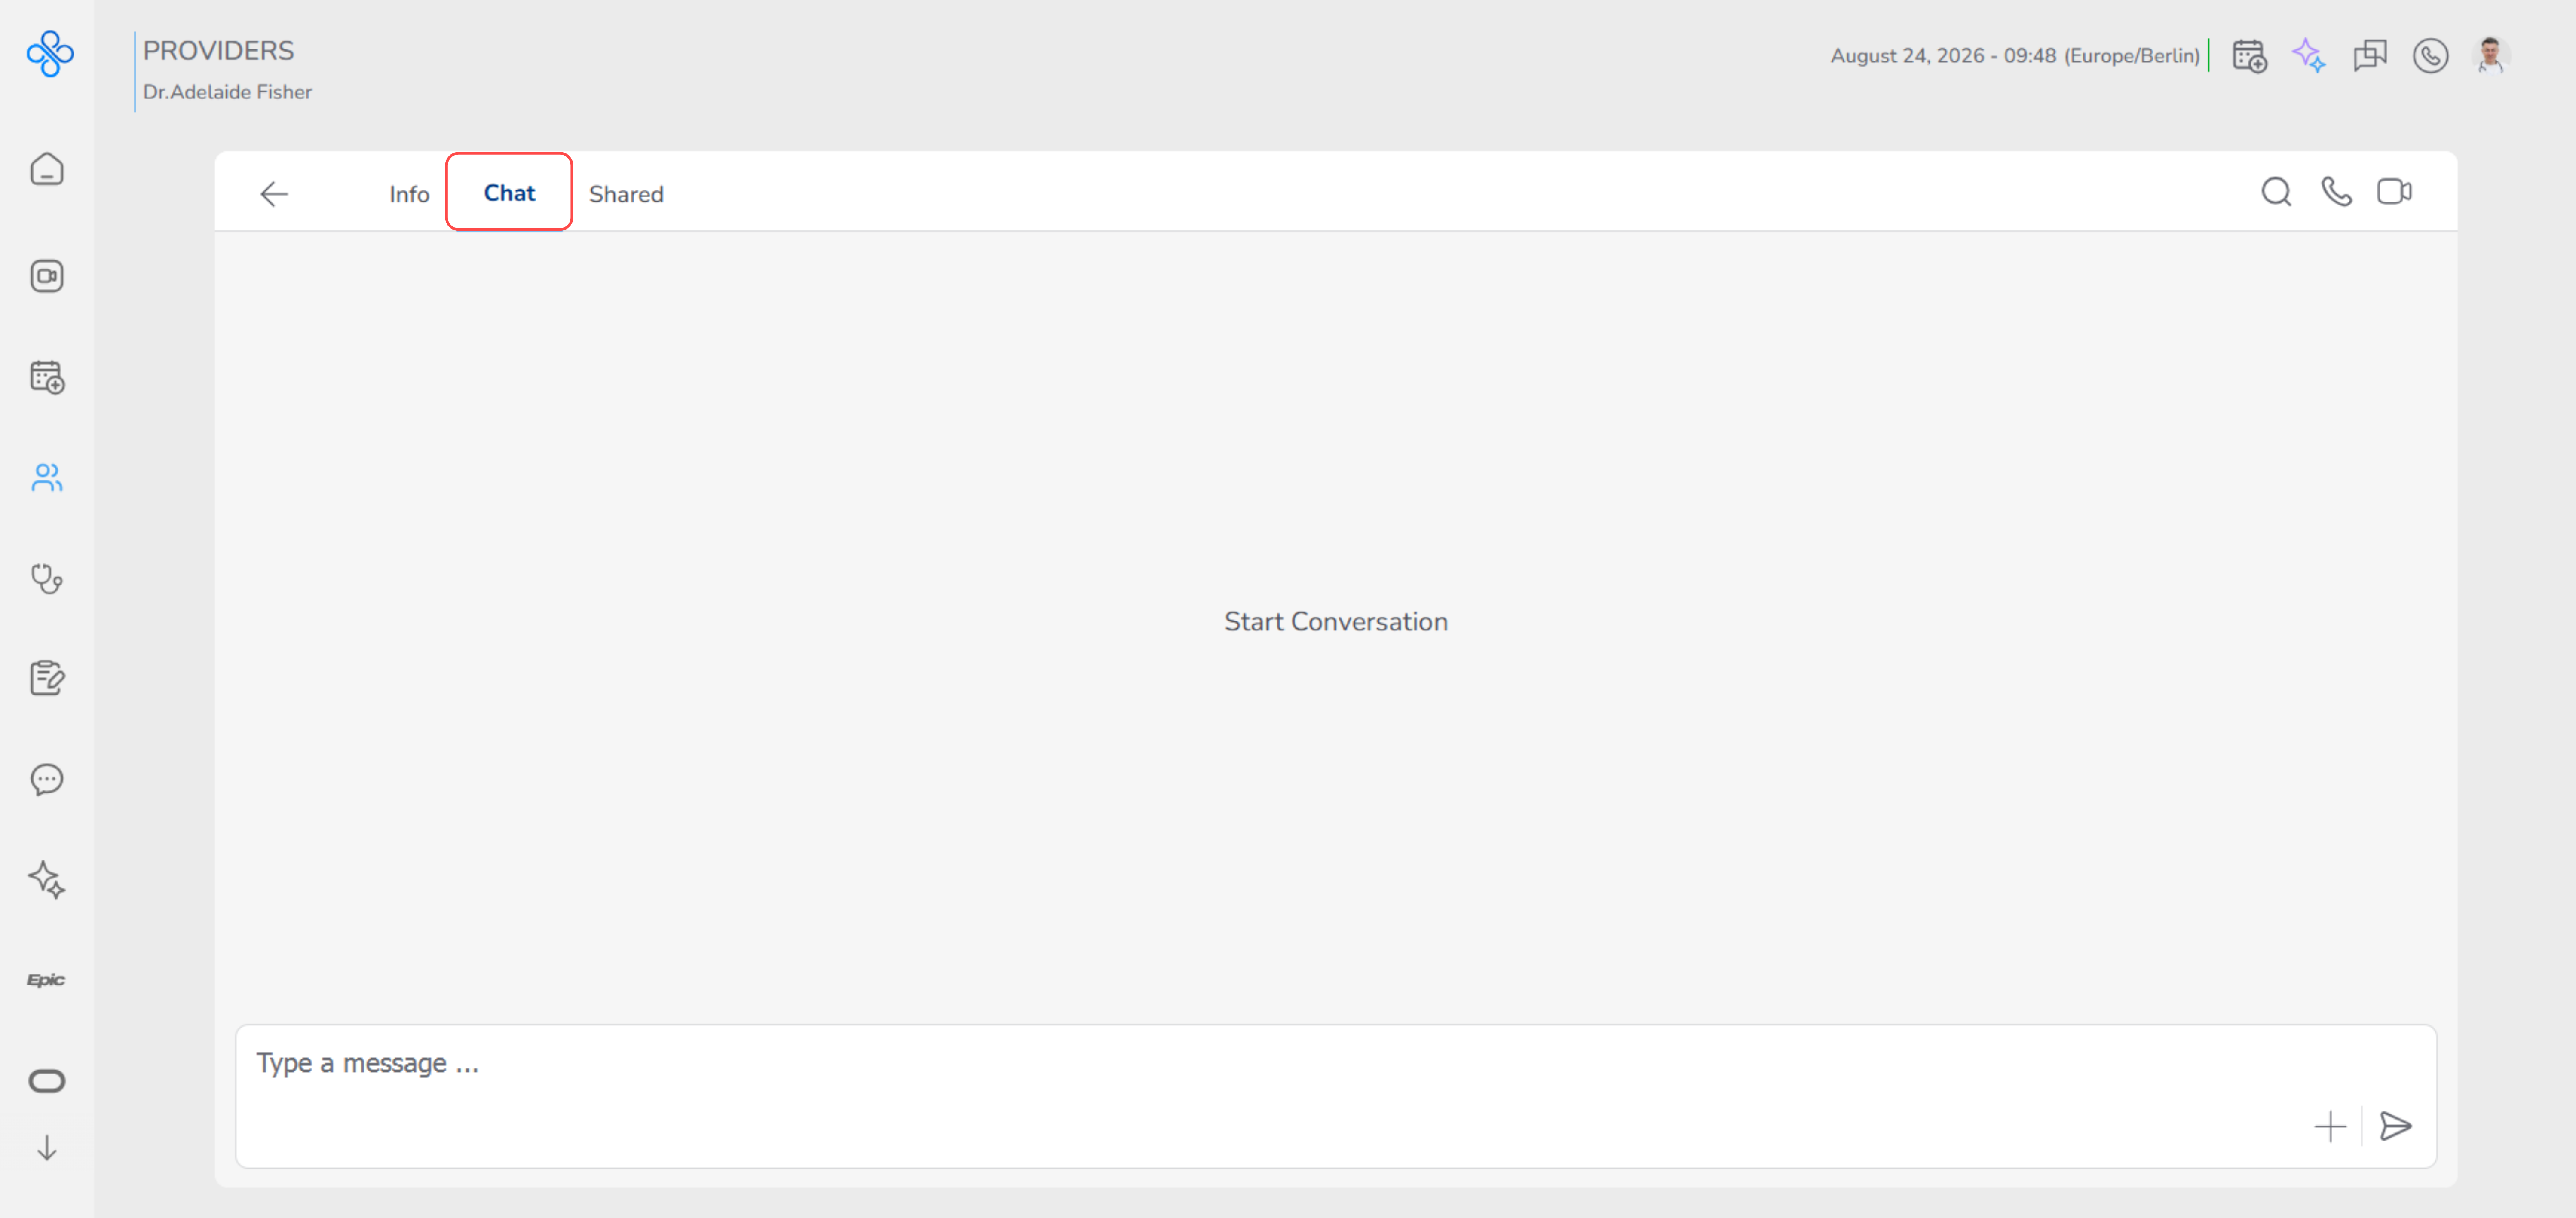
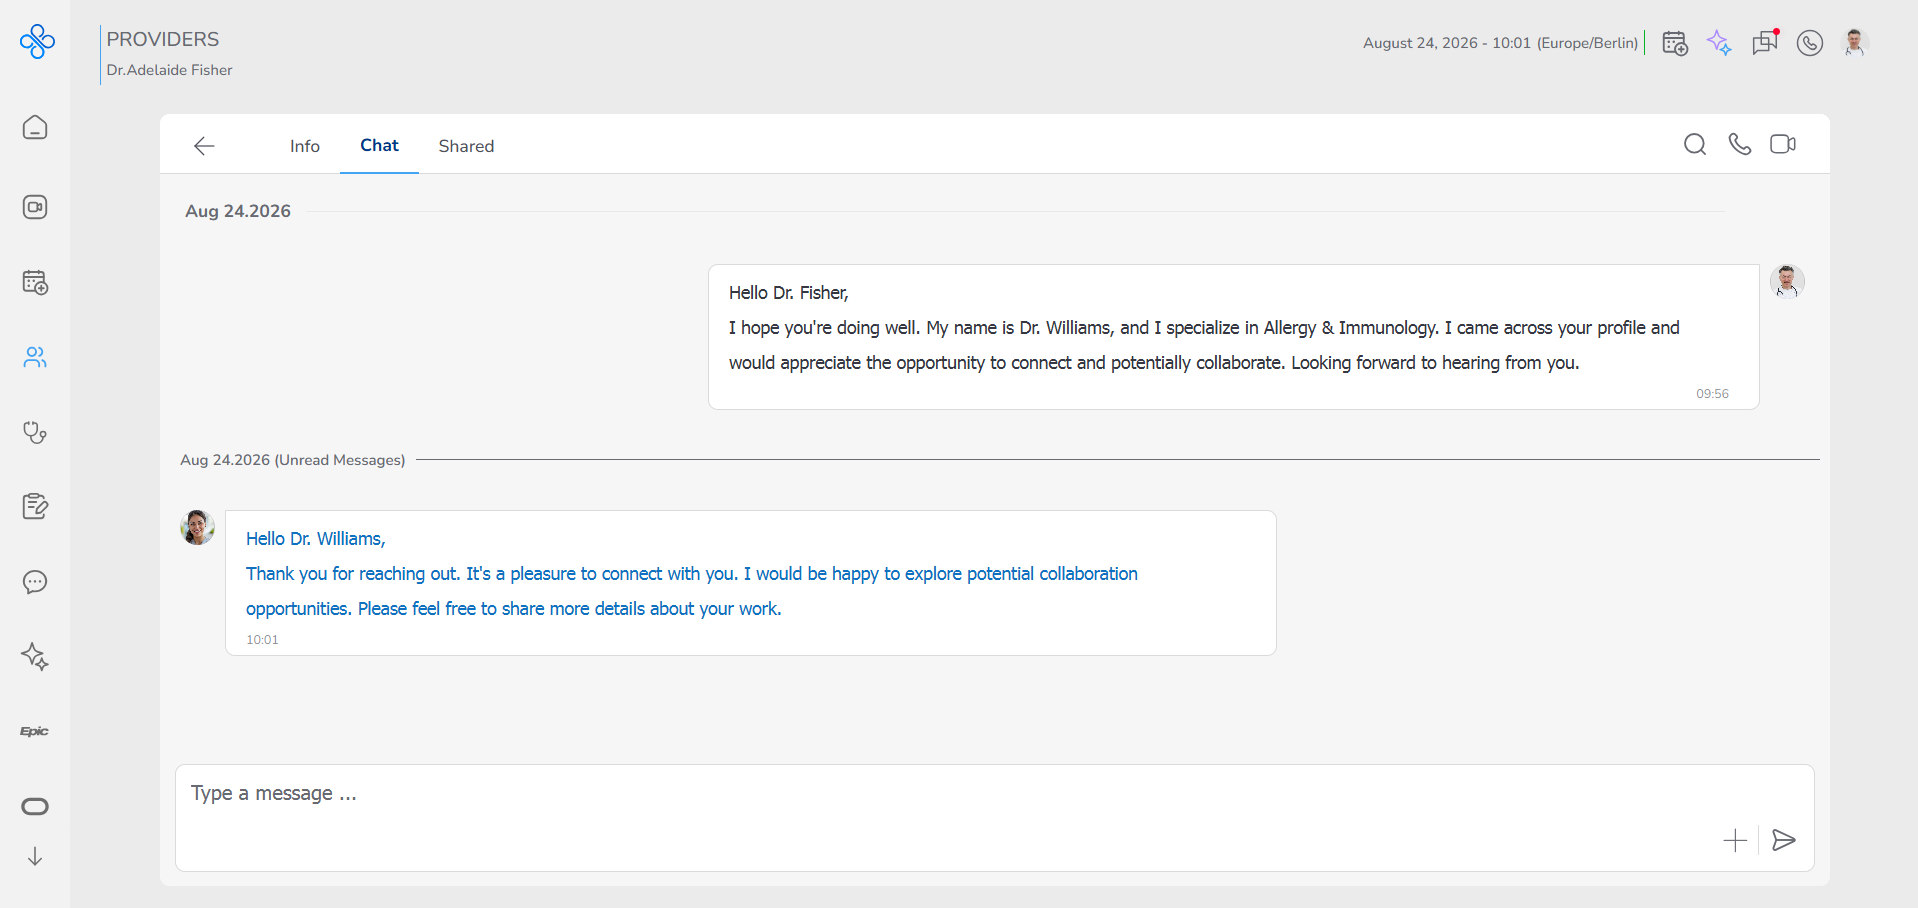
You will see the conversation screen:
- Messages appear in the center
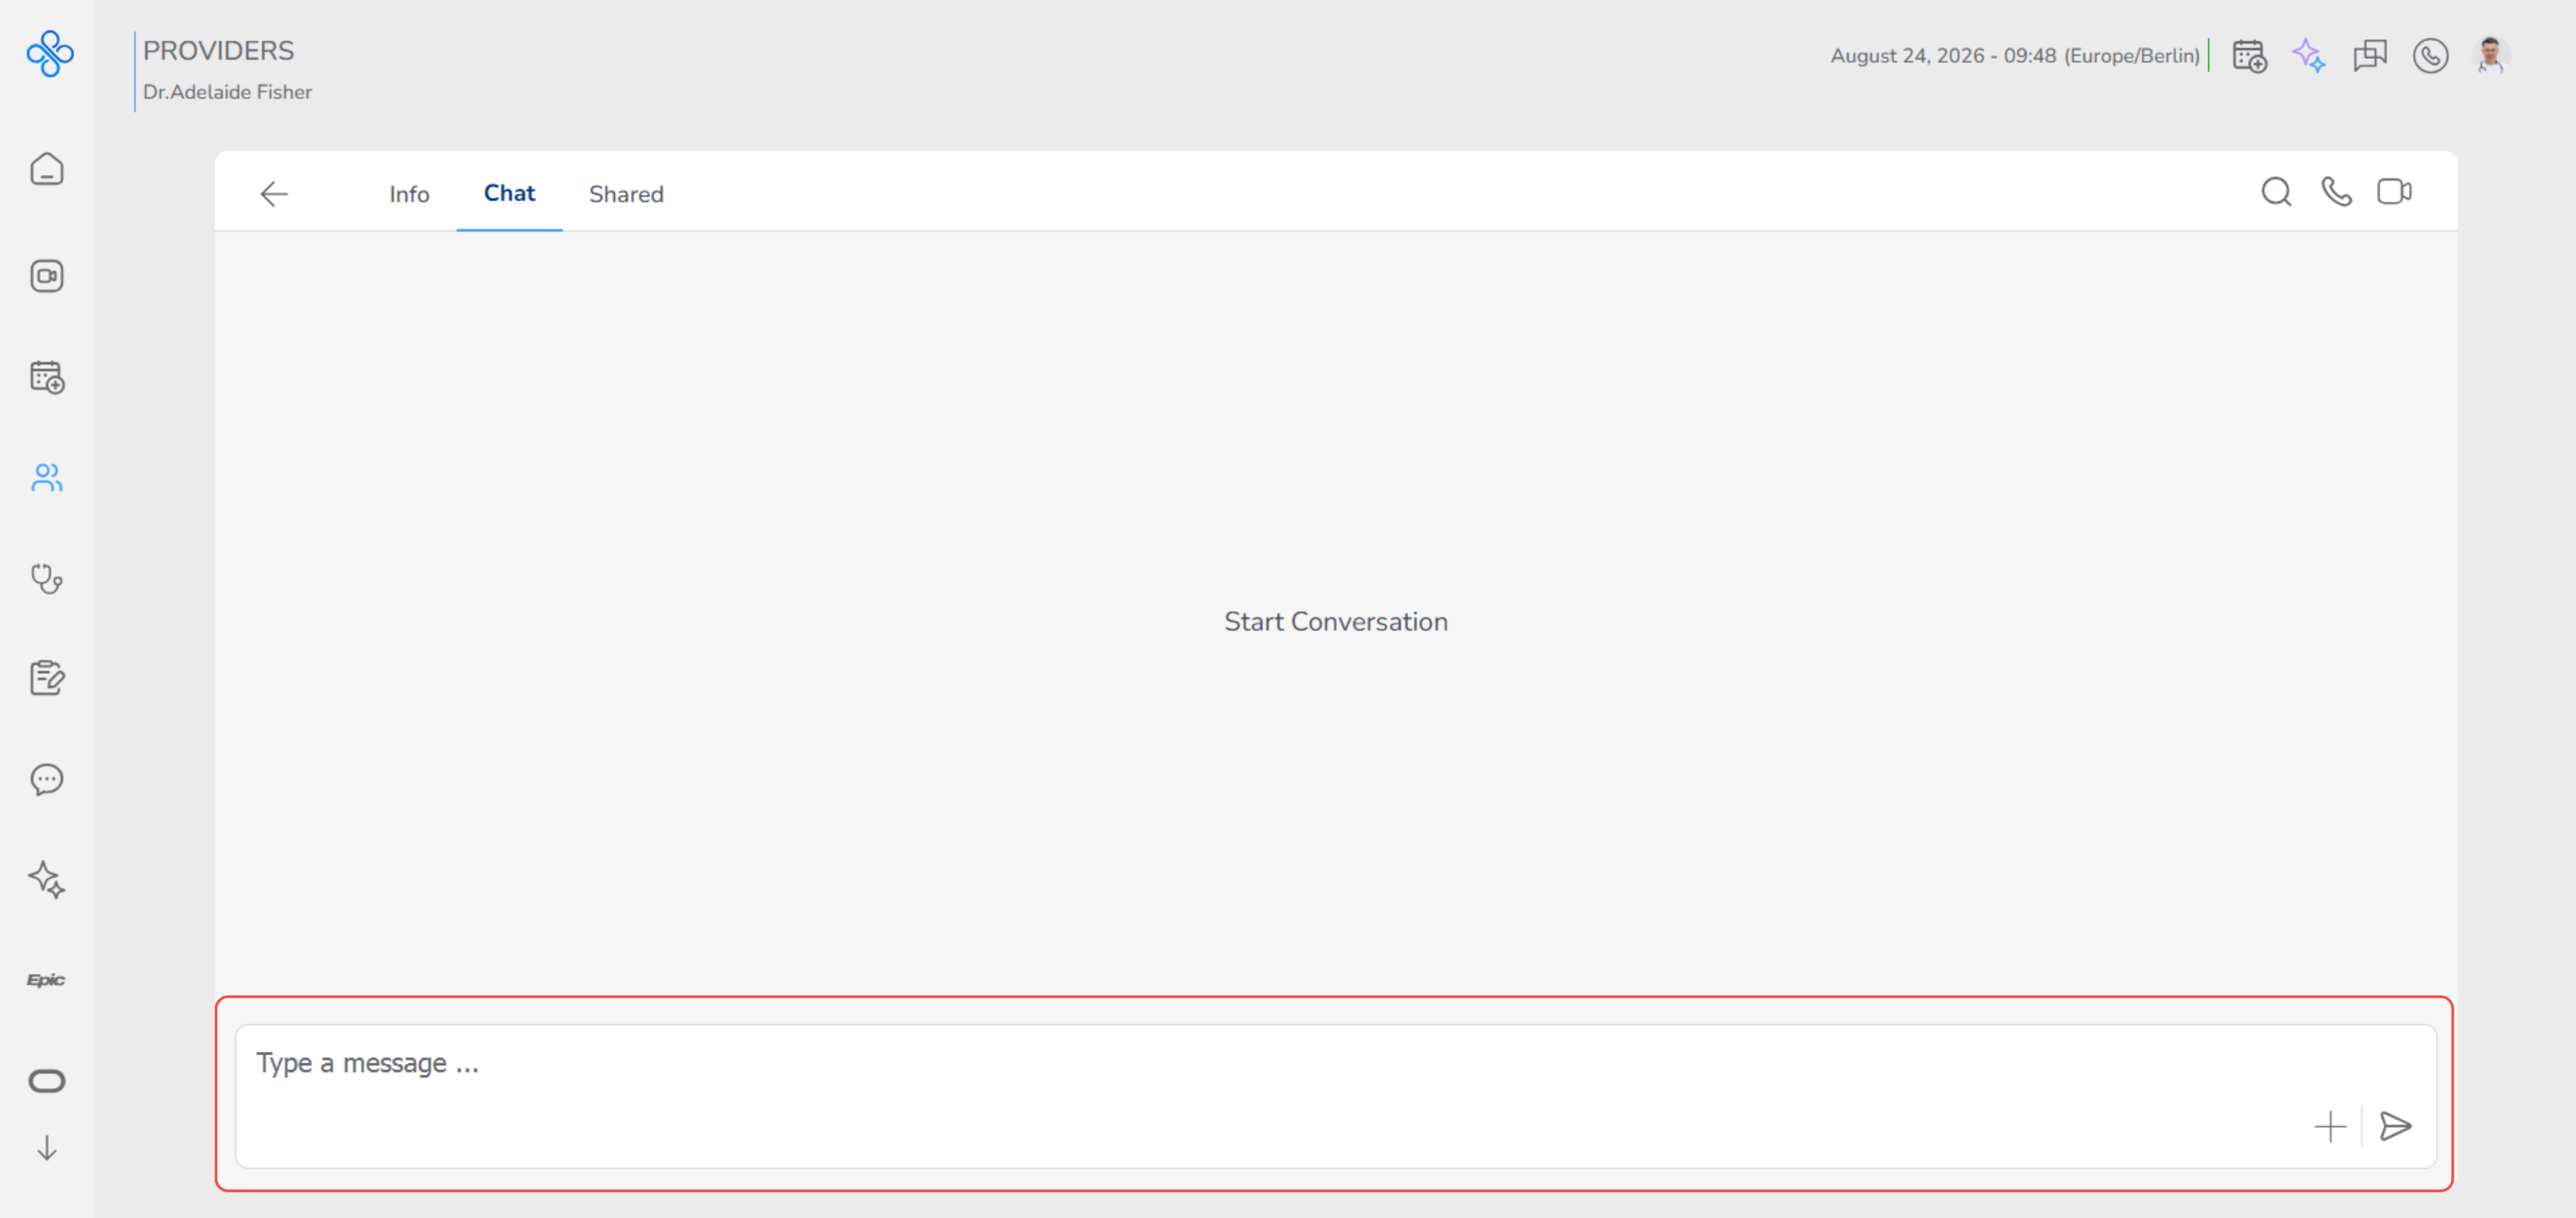
- Input box is at the bottom
- Call and search options are at the top
Step 2: Send a message
- Go to the message input box at the bottom
- Type your message
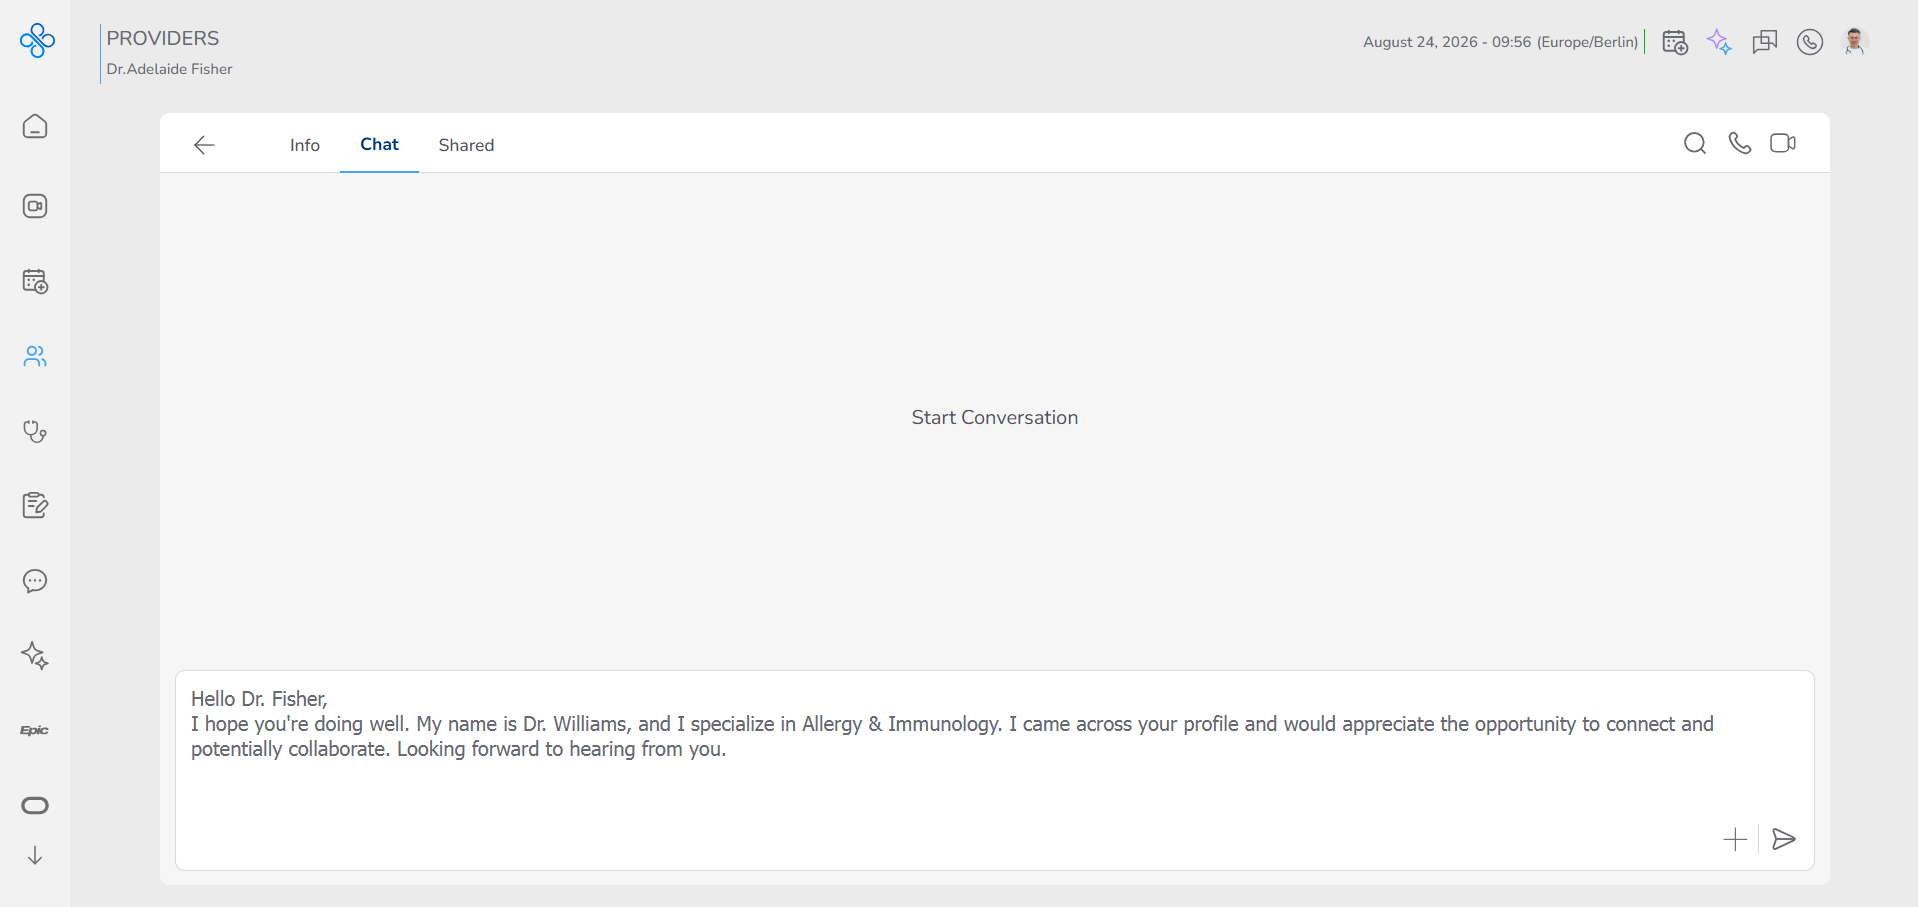
- Press Enter or click the Send button
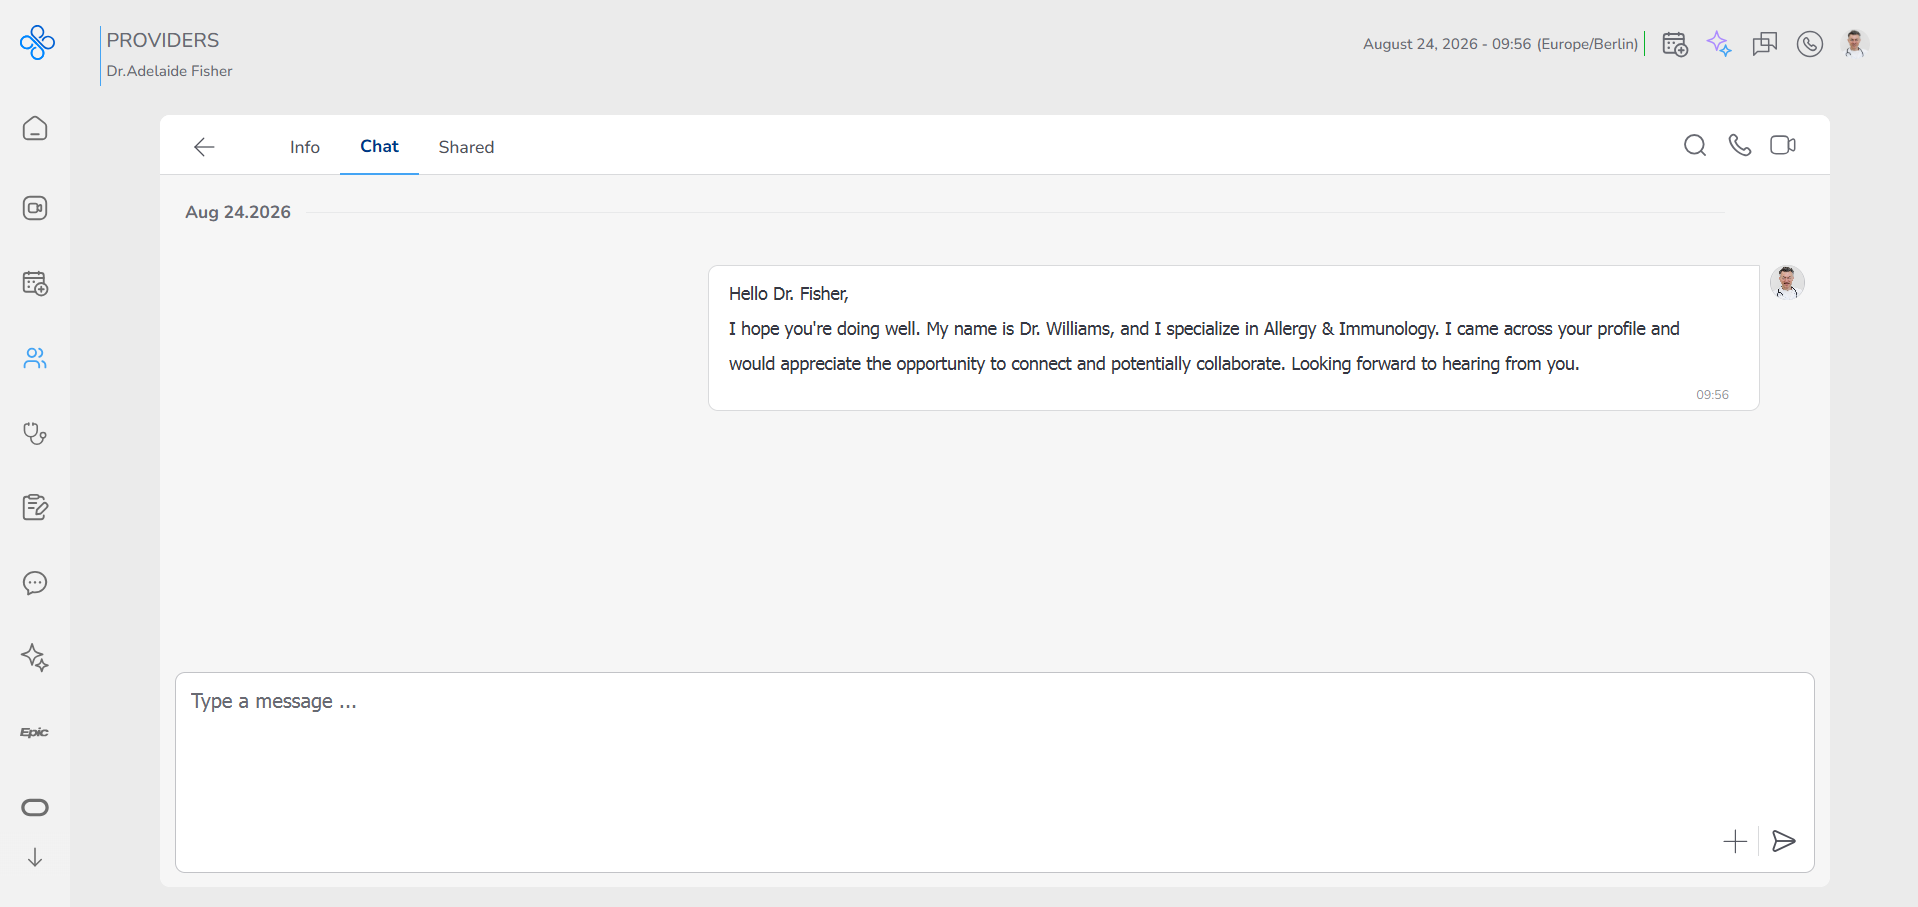
Your message appears immediately in the conversation If the provider is online, they may respond in real time
Step 3: Send a file
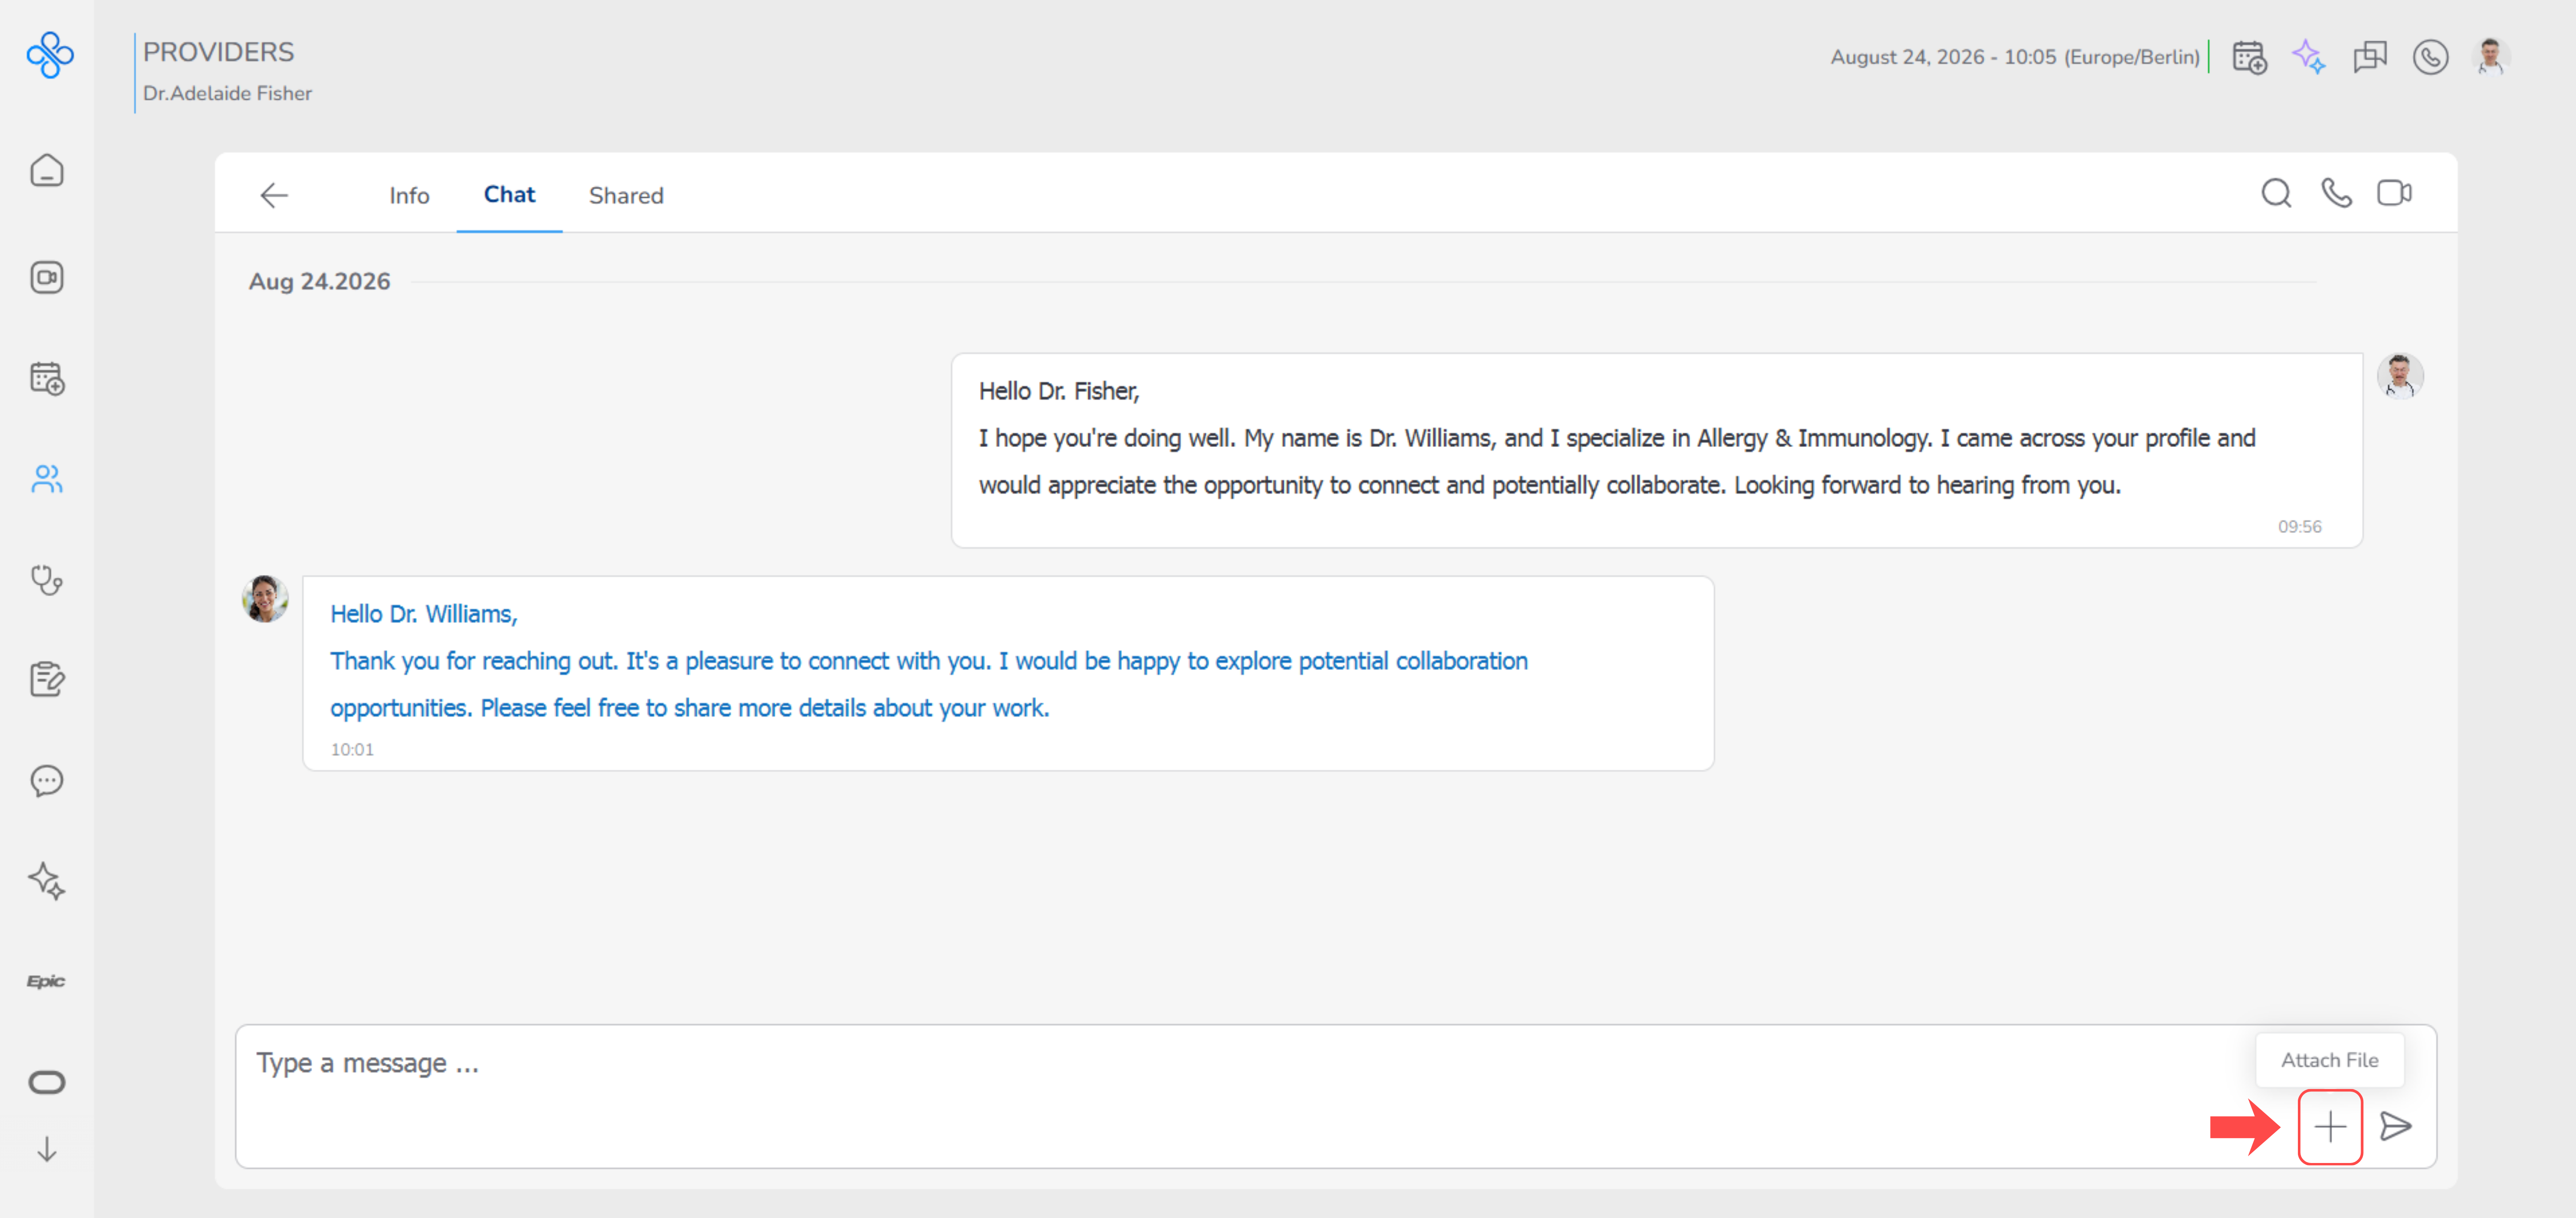
You can share documents or images directly in the chat.
- Click the attachment icon near the message box
- Select a file from your device
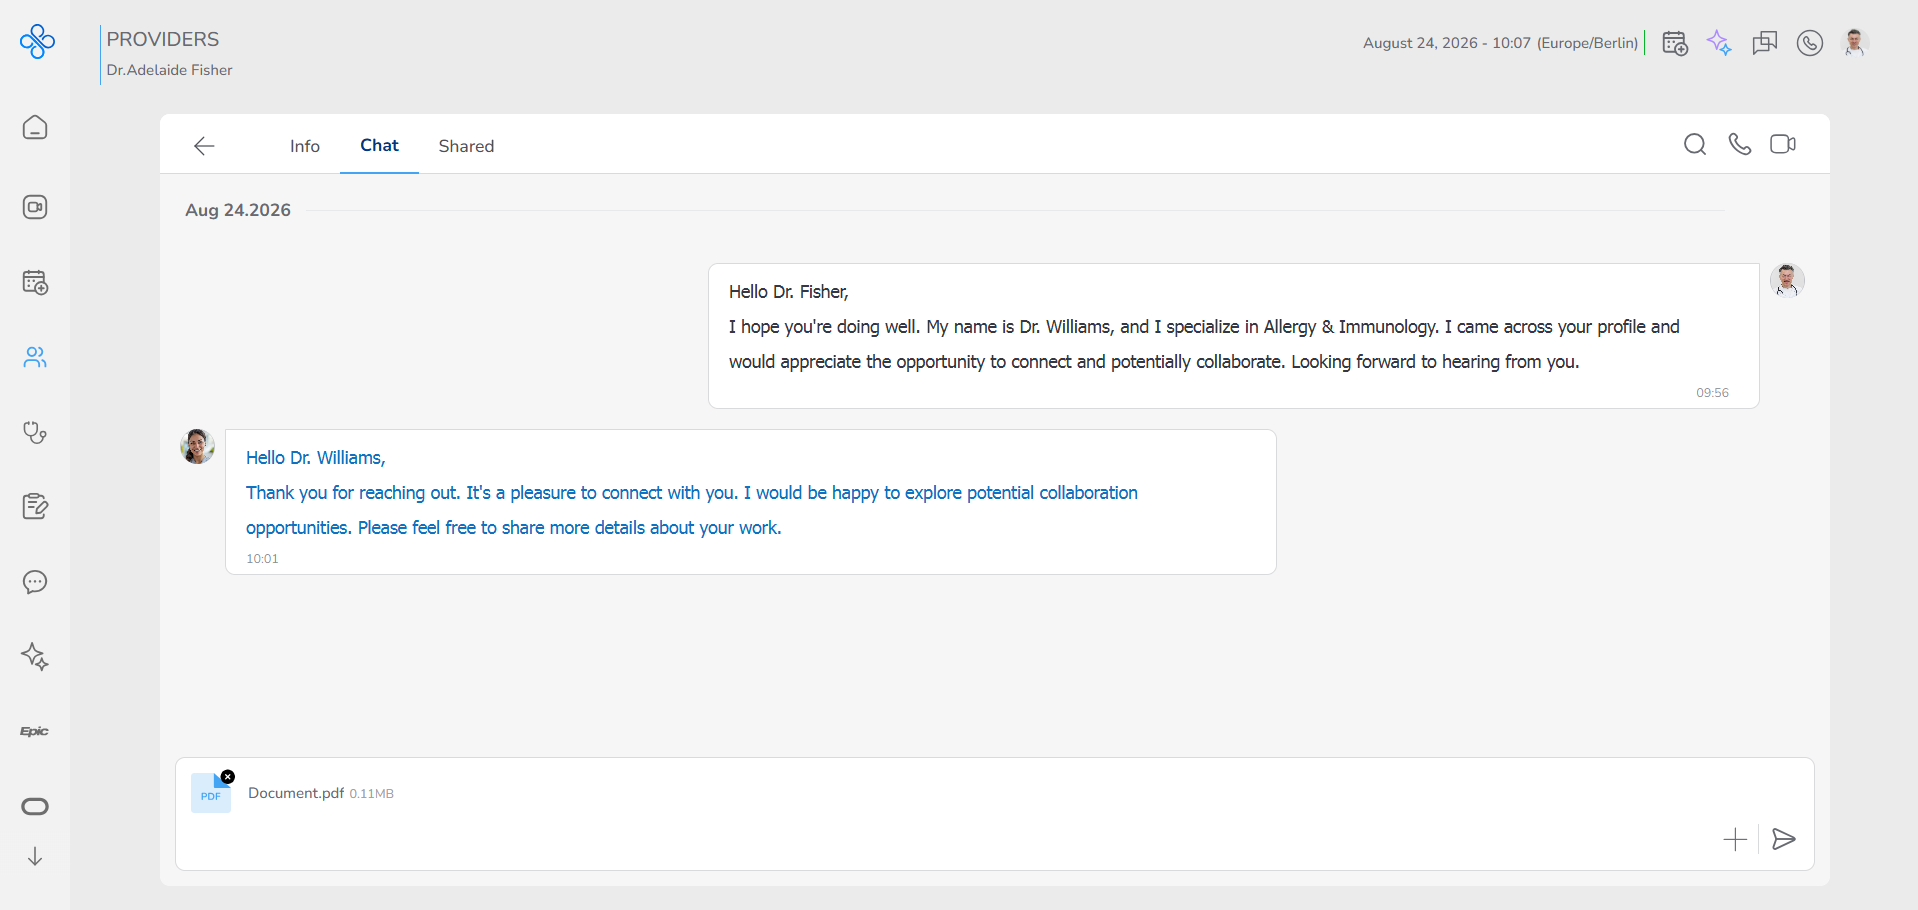
- Send the file
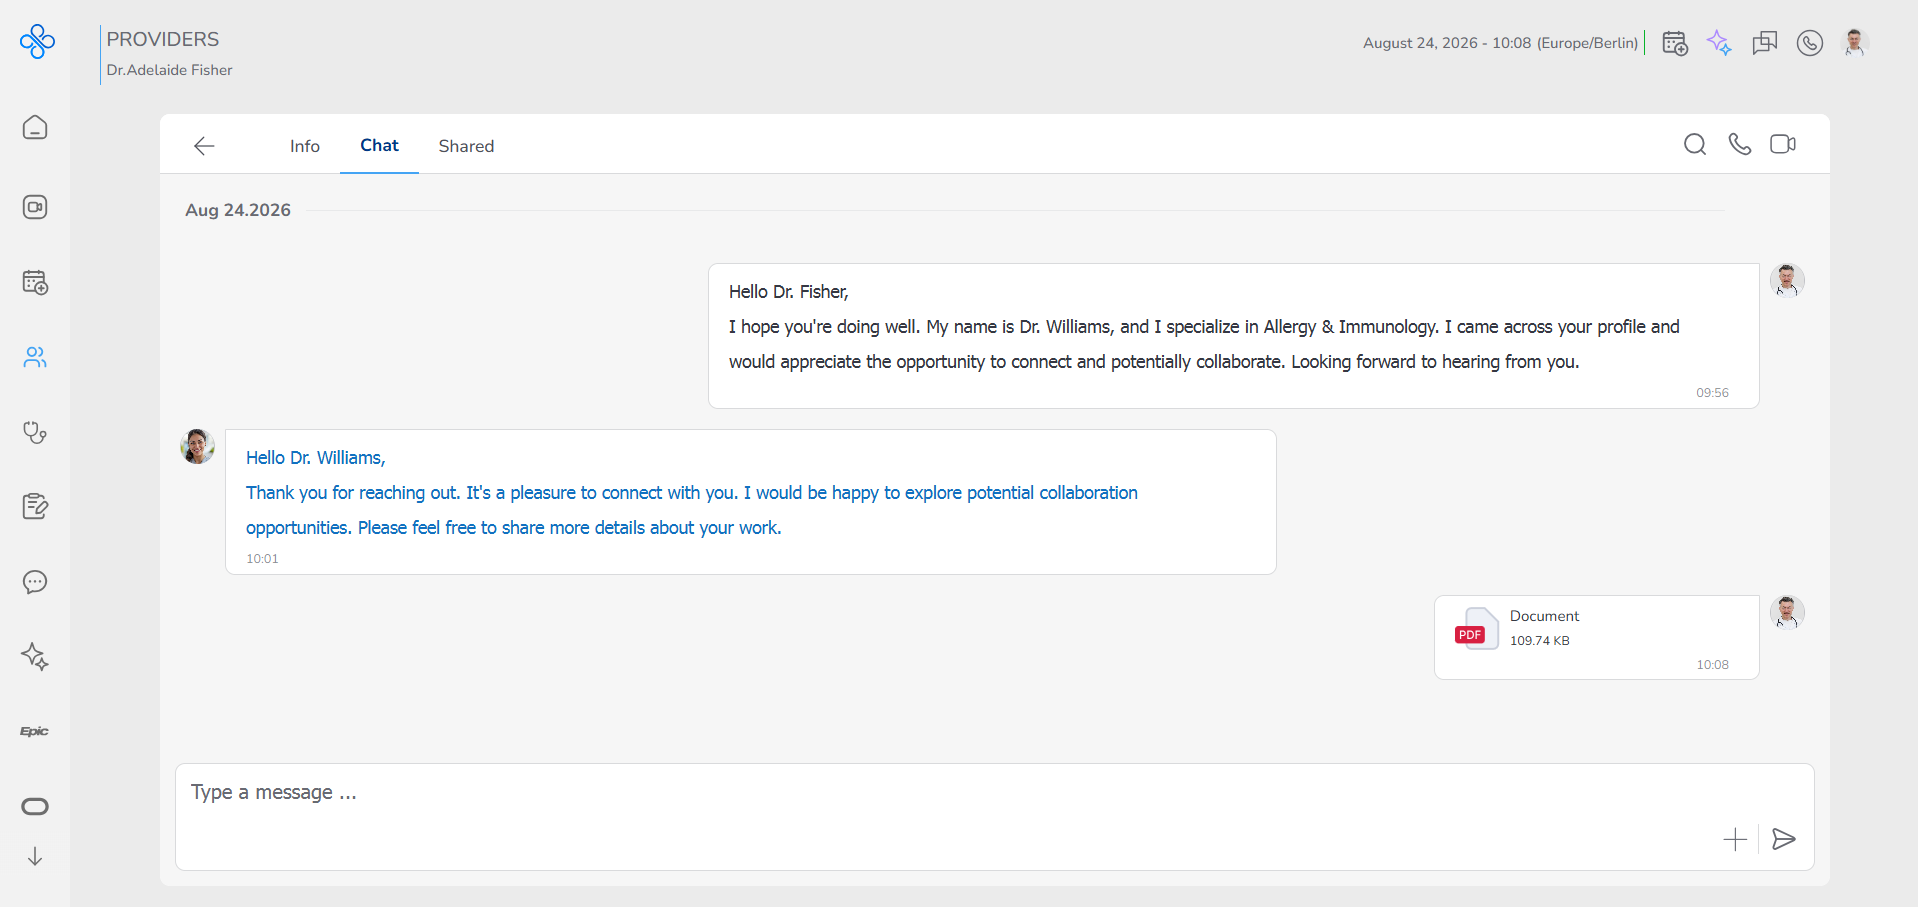
The file will appear in the chat as a clickable item You and the provider can open or download it anytime The same file will also be available in the Shared tab
Step 4: Search inside the conversation
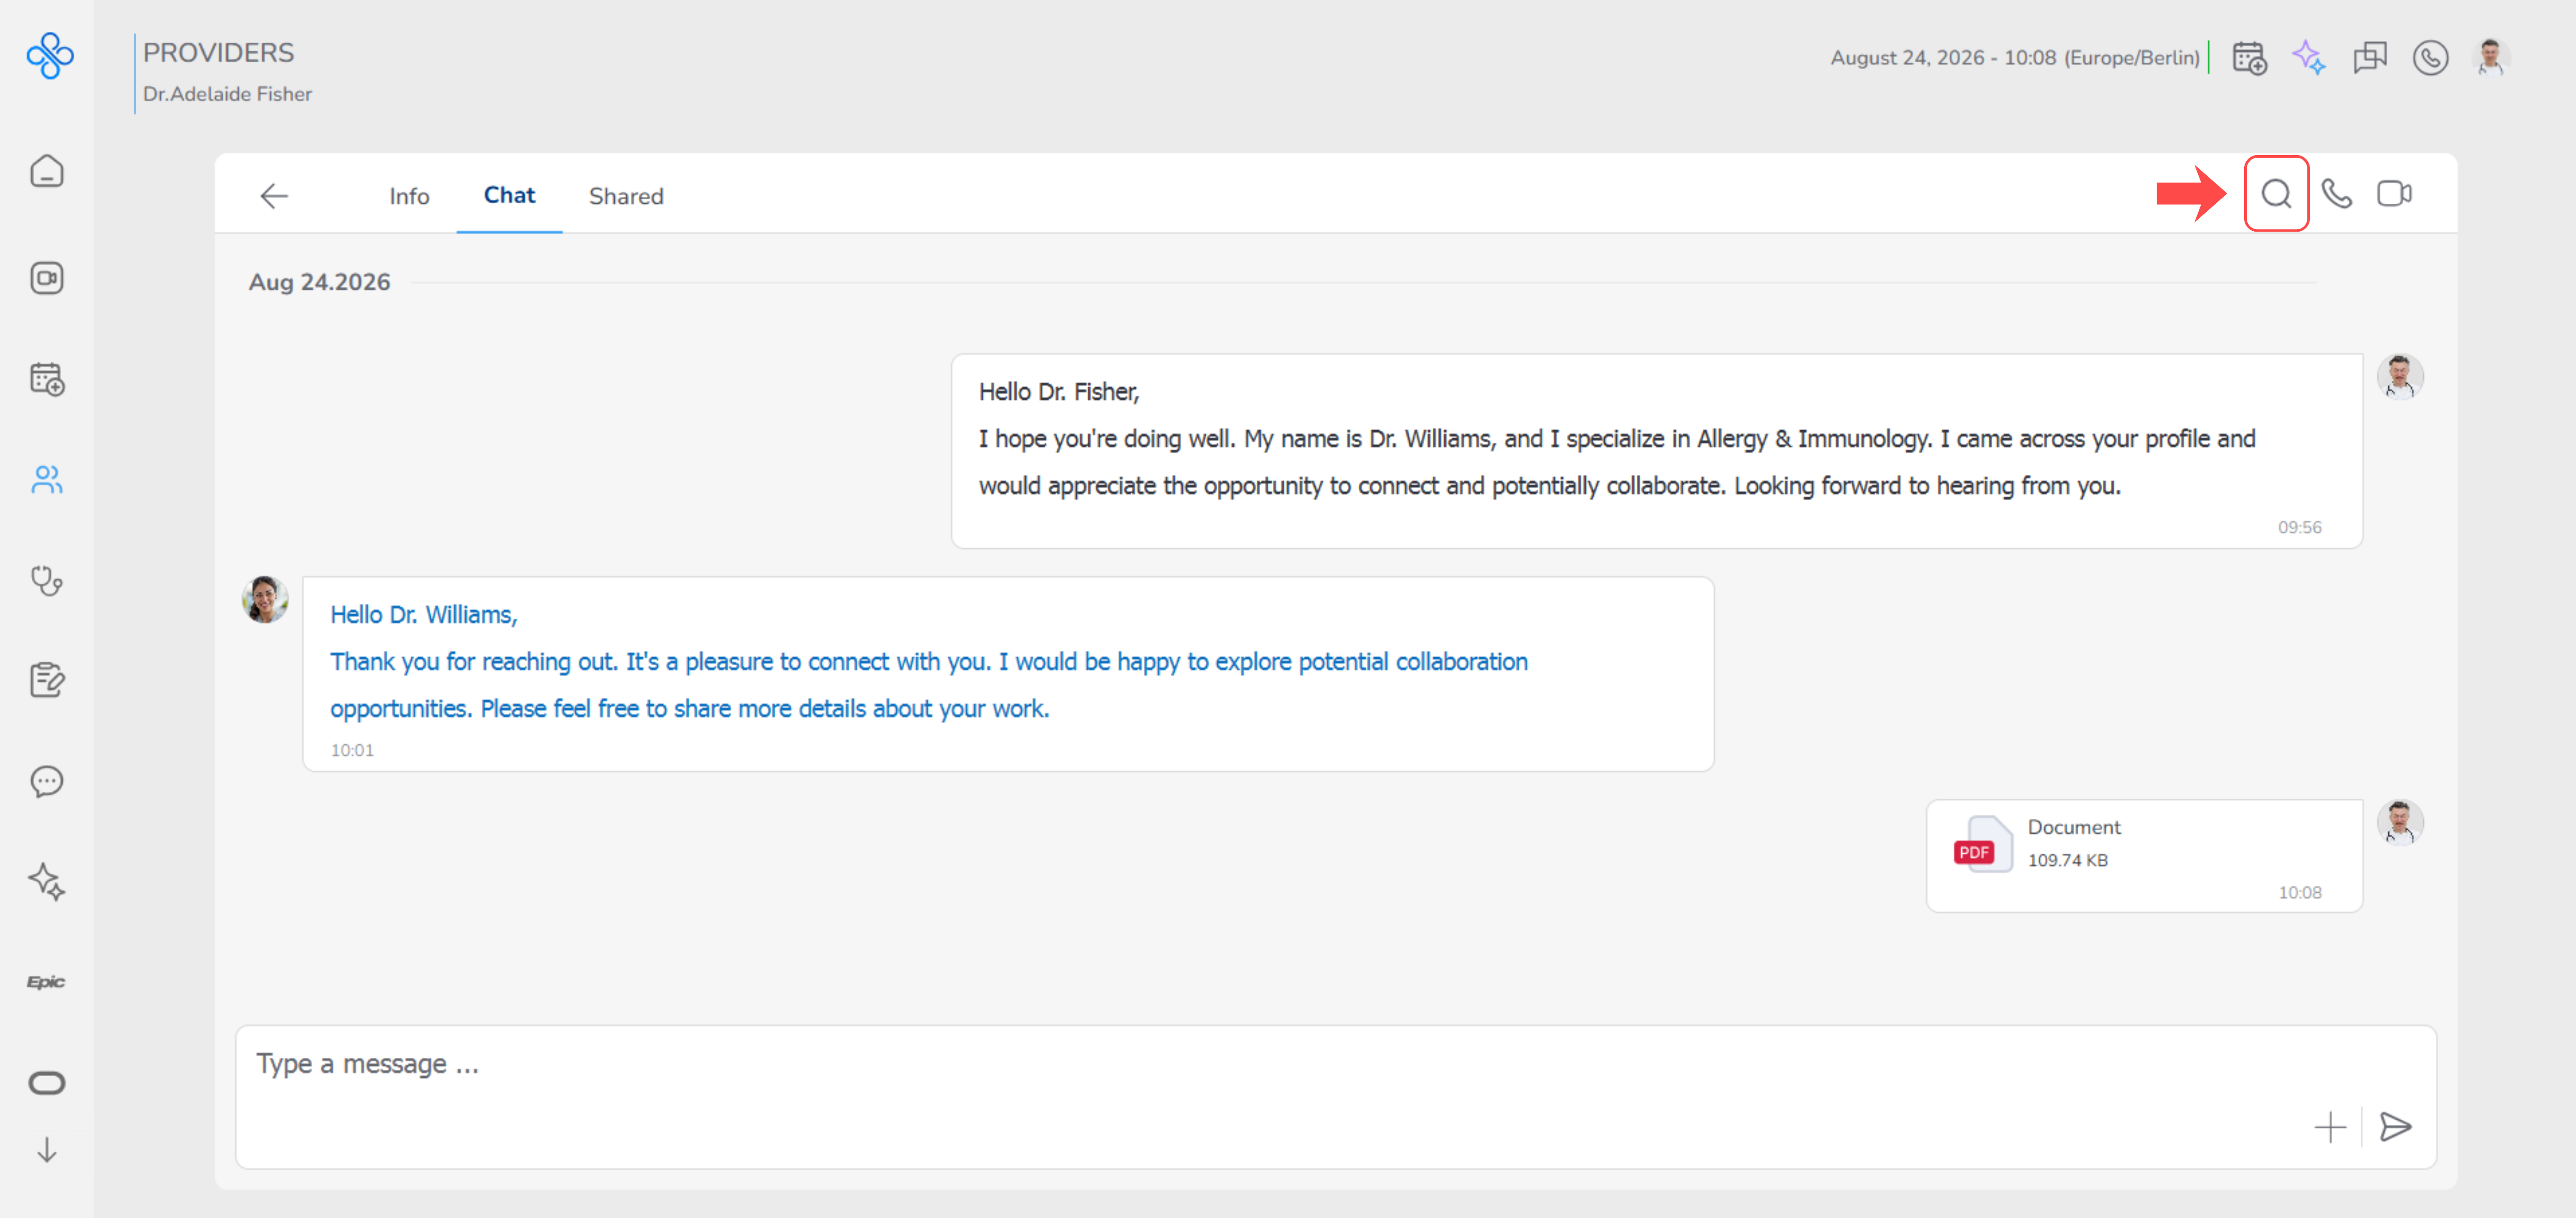
If the conversation becomes long, you can search in messages.
- Click the search icon at the top
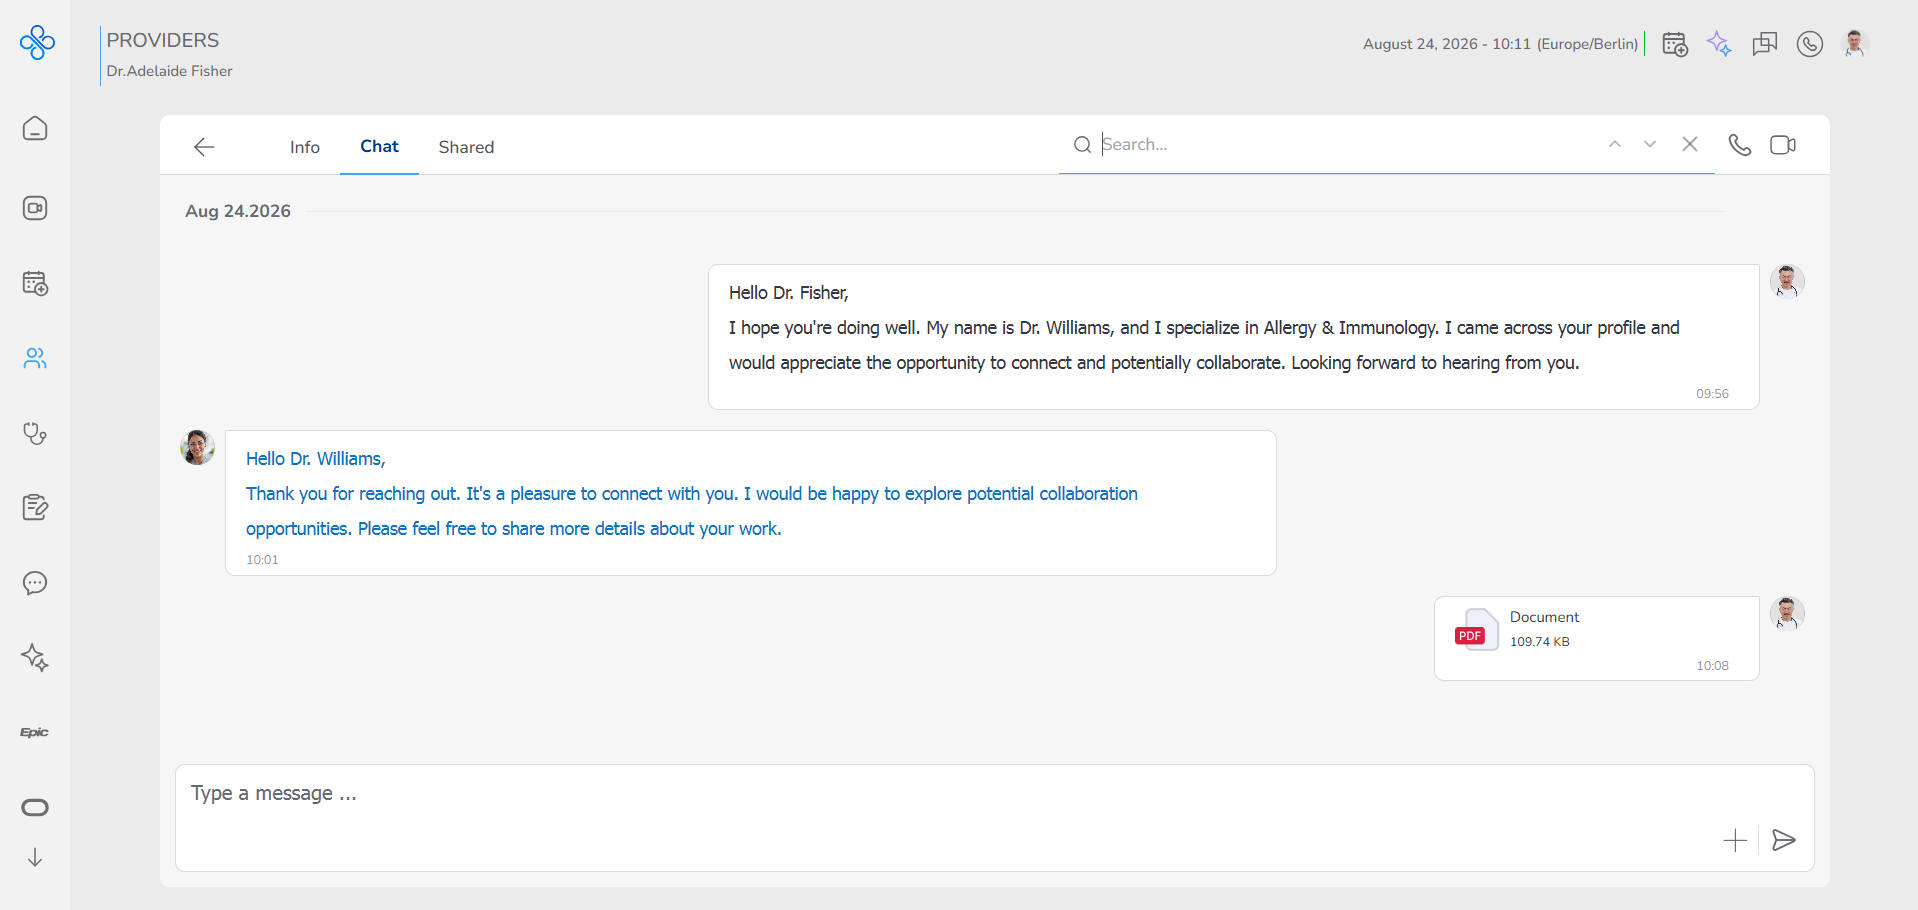
- Type a keyword
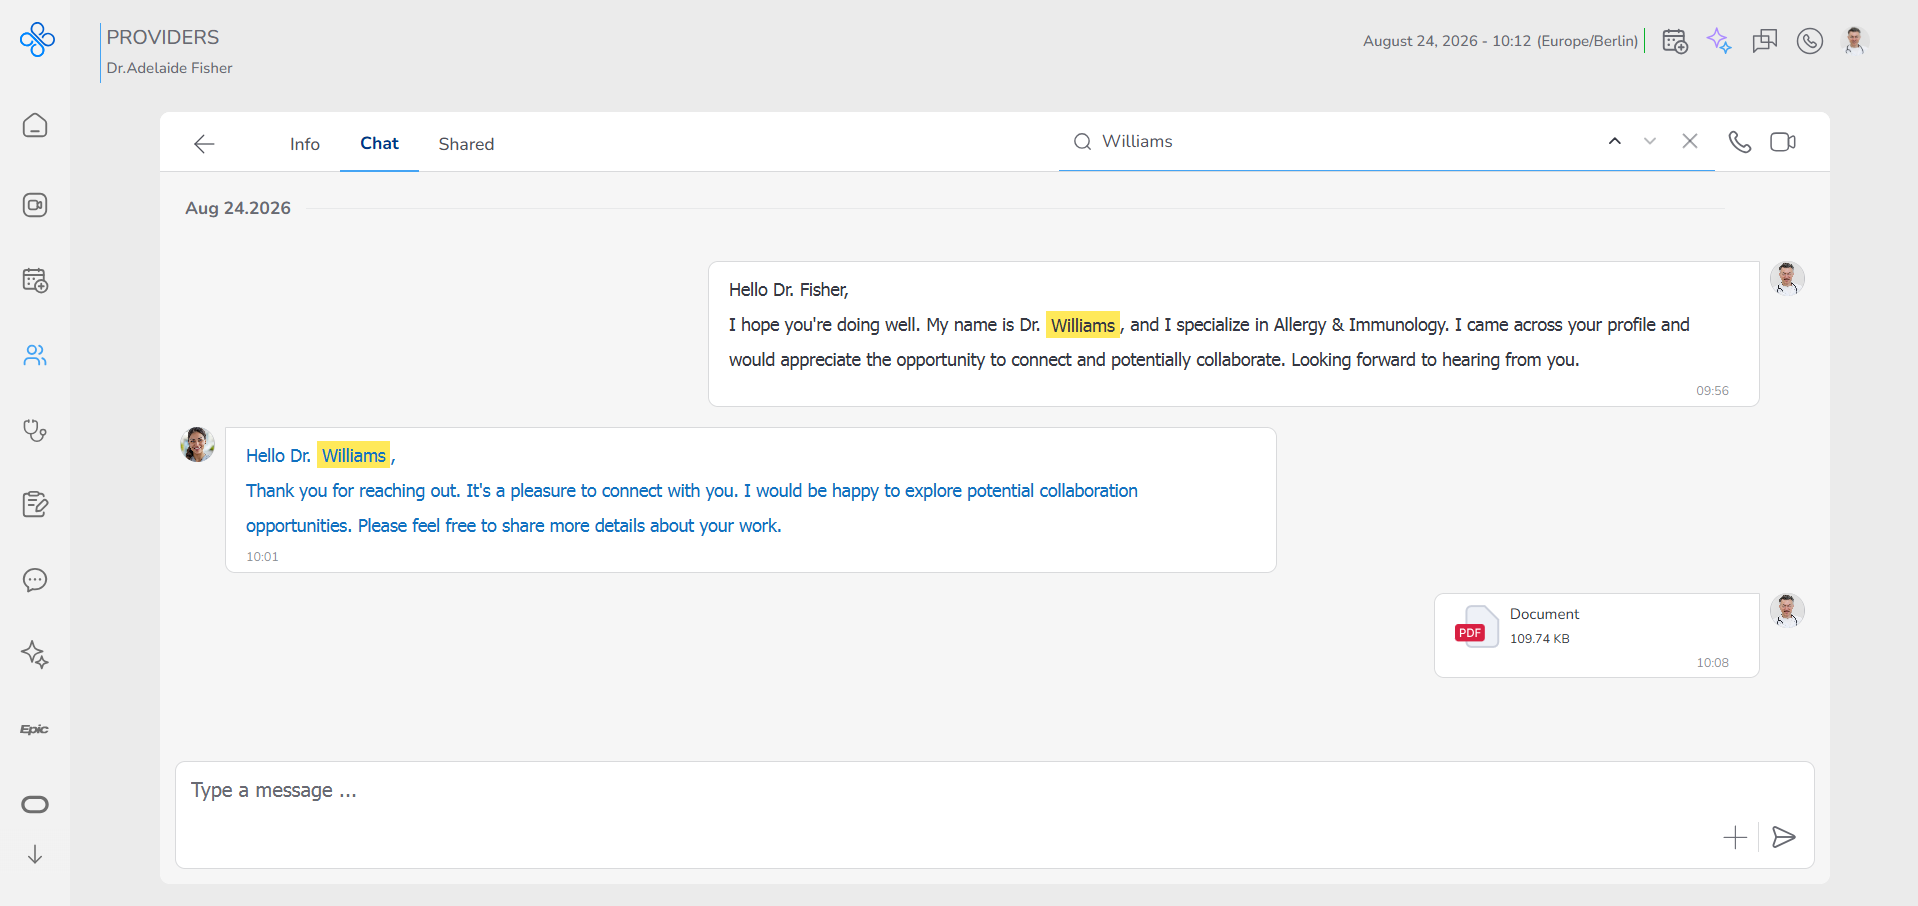
- Matching messages will be highlighted
- Use the arrows to move between results
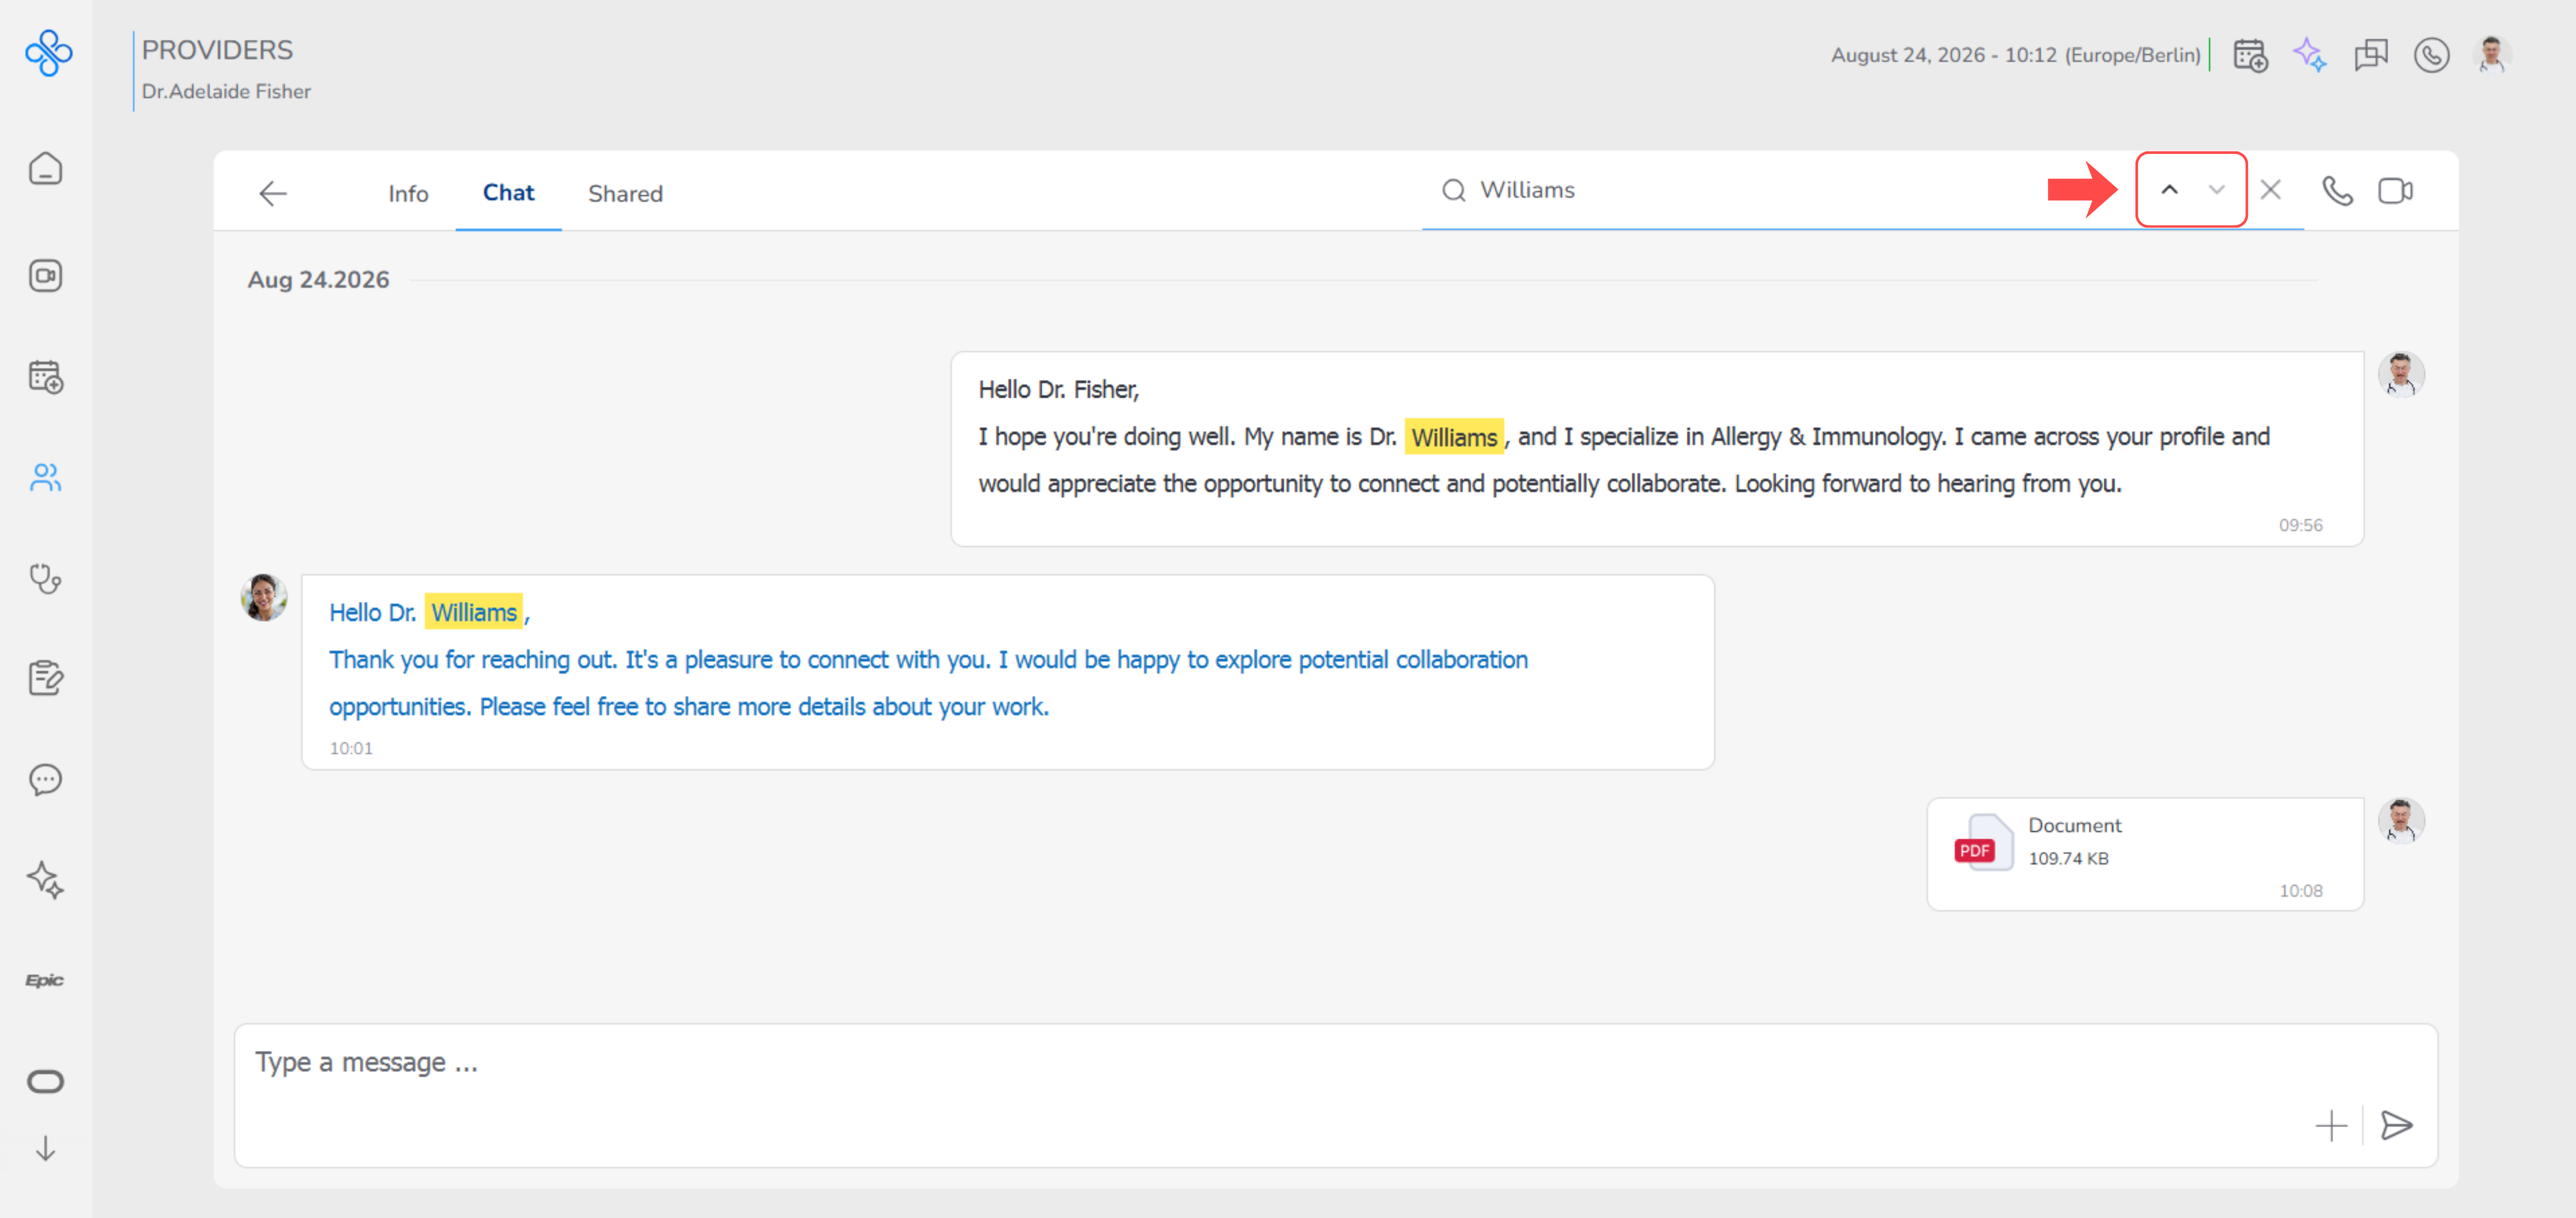
This helps you quickly find important information without scrolling
Step 5: Start a call
At the top of the chat, you will see call buttons.
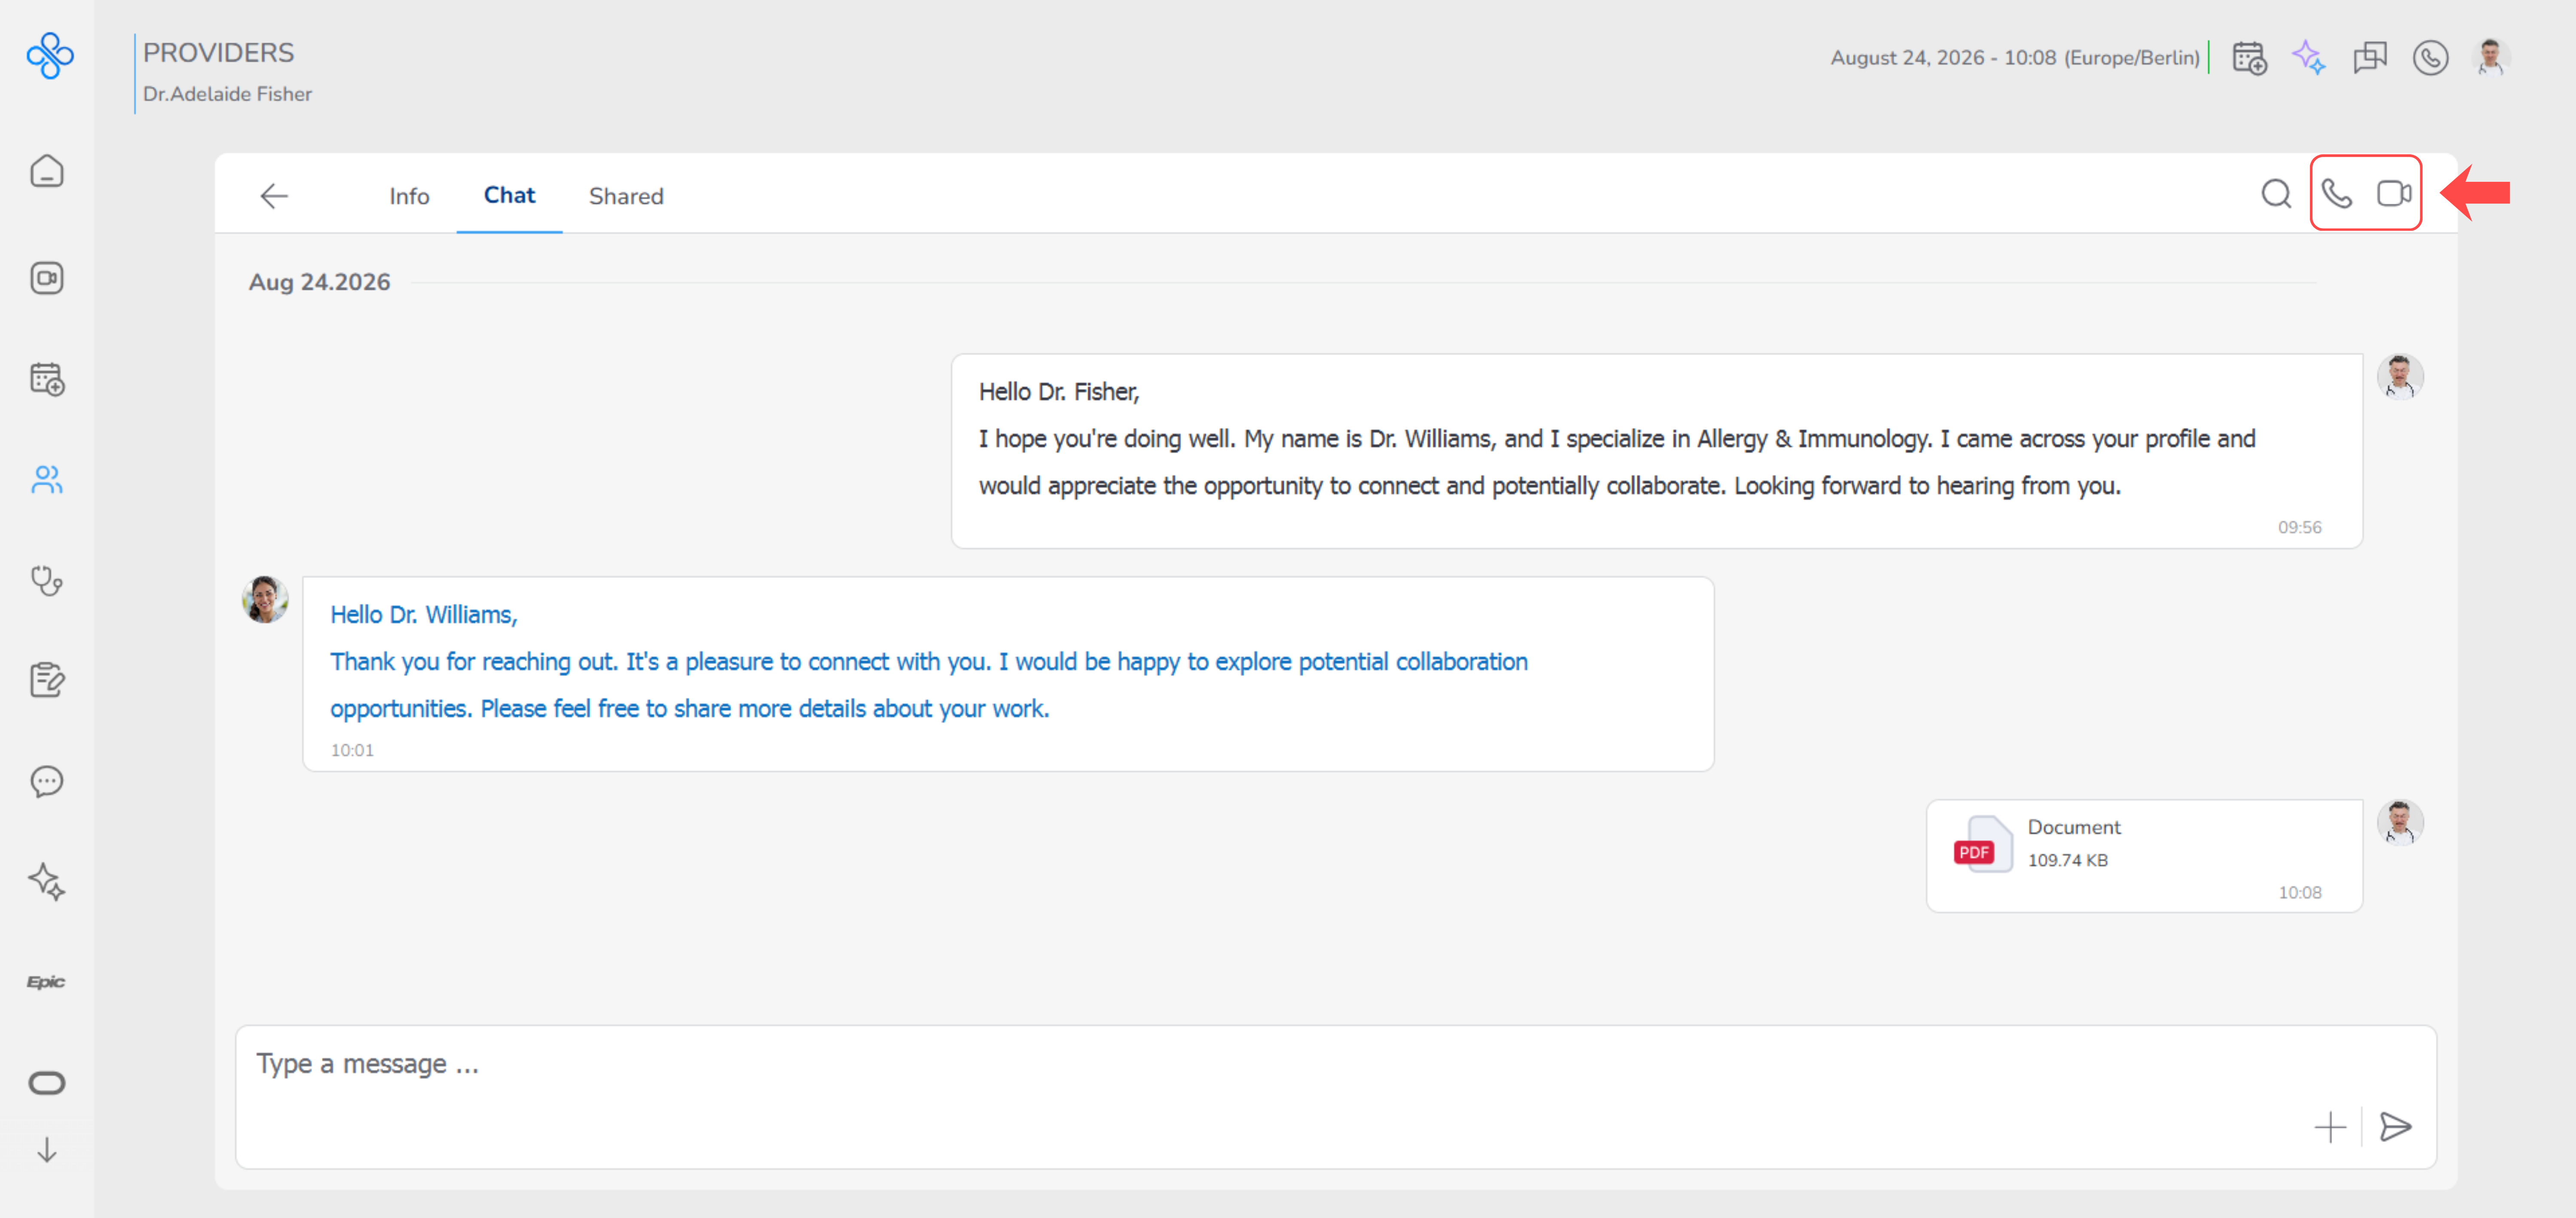
You can:
- Start a voice call
- Start a video call Click one of these to begin communication immediately
What happens when you use chat
- Messages are sent instantly after you send them
- Files appear immediately in the conversation
- Uploaded files are also saved in the Shared tab
- Search highlights matching words inside messages
Important behavior
If you unfollow the provider: The Chat tab will no longer be available You will not be able to send messages
When should you use this tab
Use the Chat tab when you want to:
- Ask questions
- Share patient related information
- Send documents
- Follow up with the provider
- Start a quick call
Simple flow to remember
- Follow provider
- Open Chat tab
- Send message or file
- Continue communication or start a call This is the easiest way to stay connected with a provider.
Provider Profile – Shared Tab
The Shared tab is where you can see and manage all files exchanged between you and the provider.
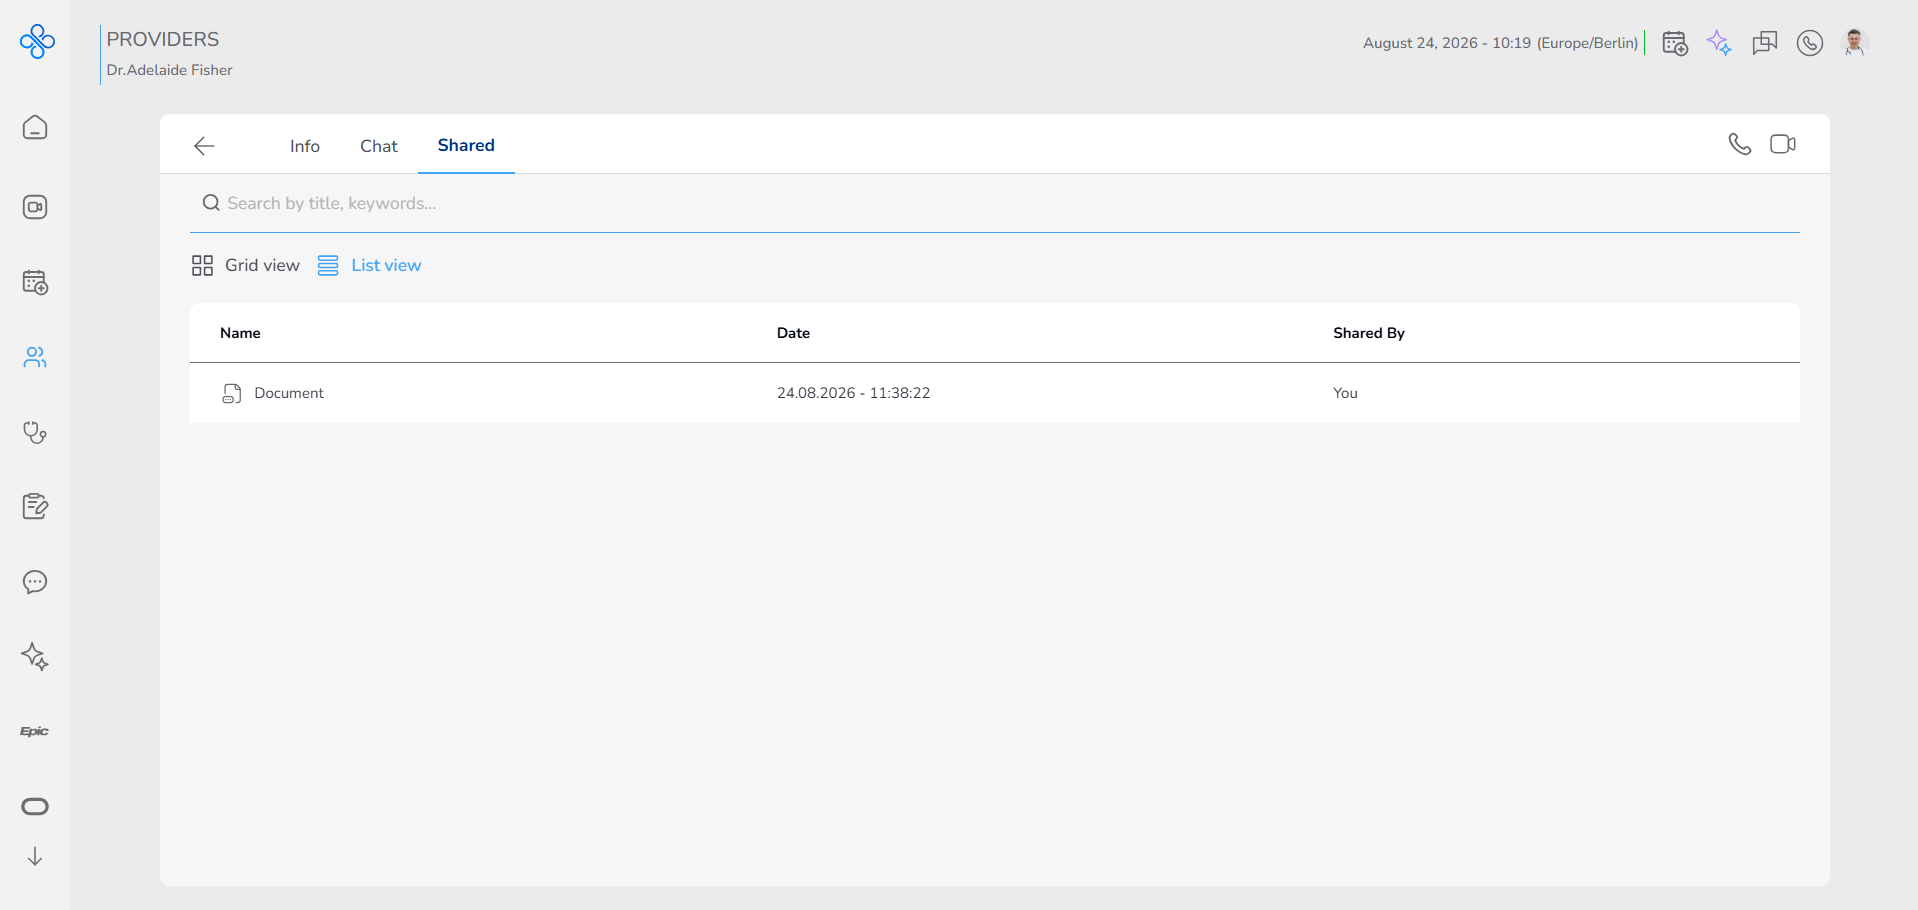
Instead of searching through chat messages, everything is collected here in one clear list. You can use this tab to quickly find, download, or remove files when needed.
Step 1: Open the Shared tab
Go to the provider profile Click on the Shared tab
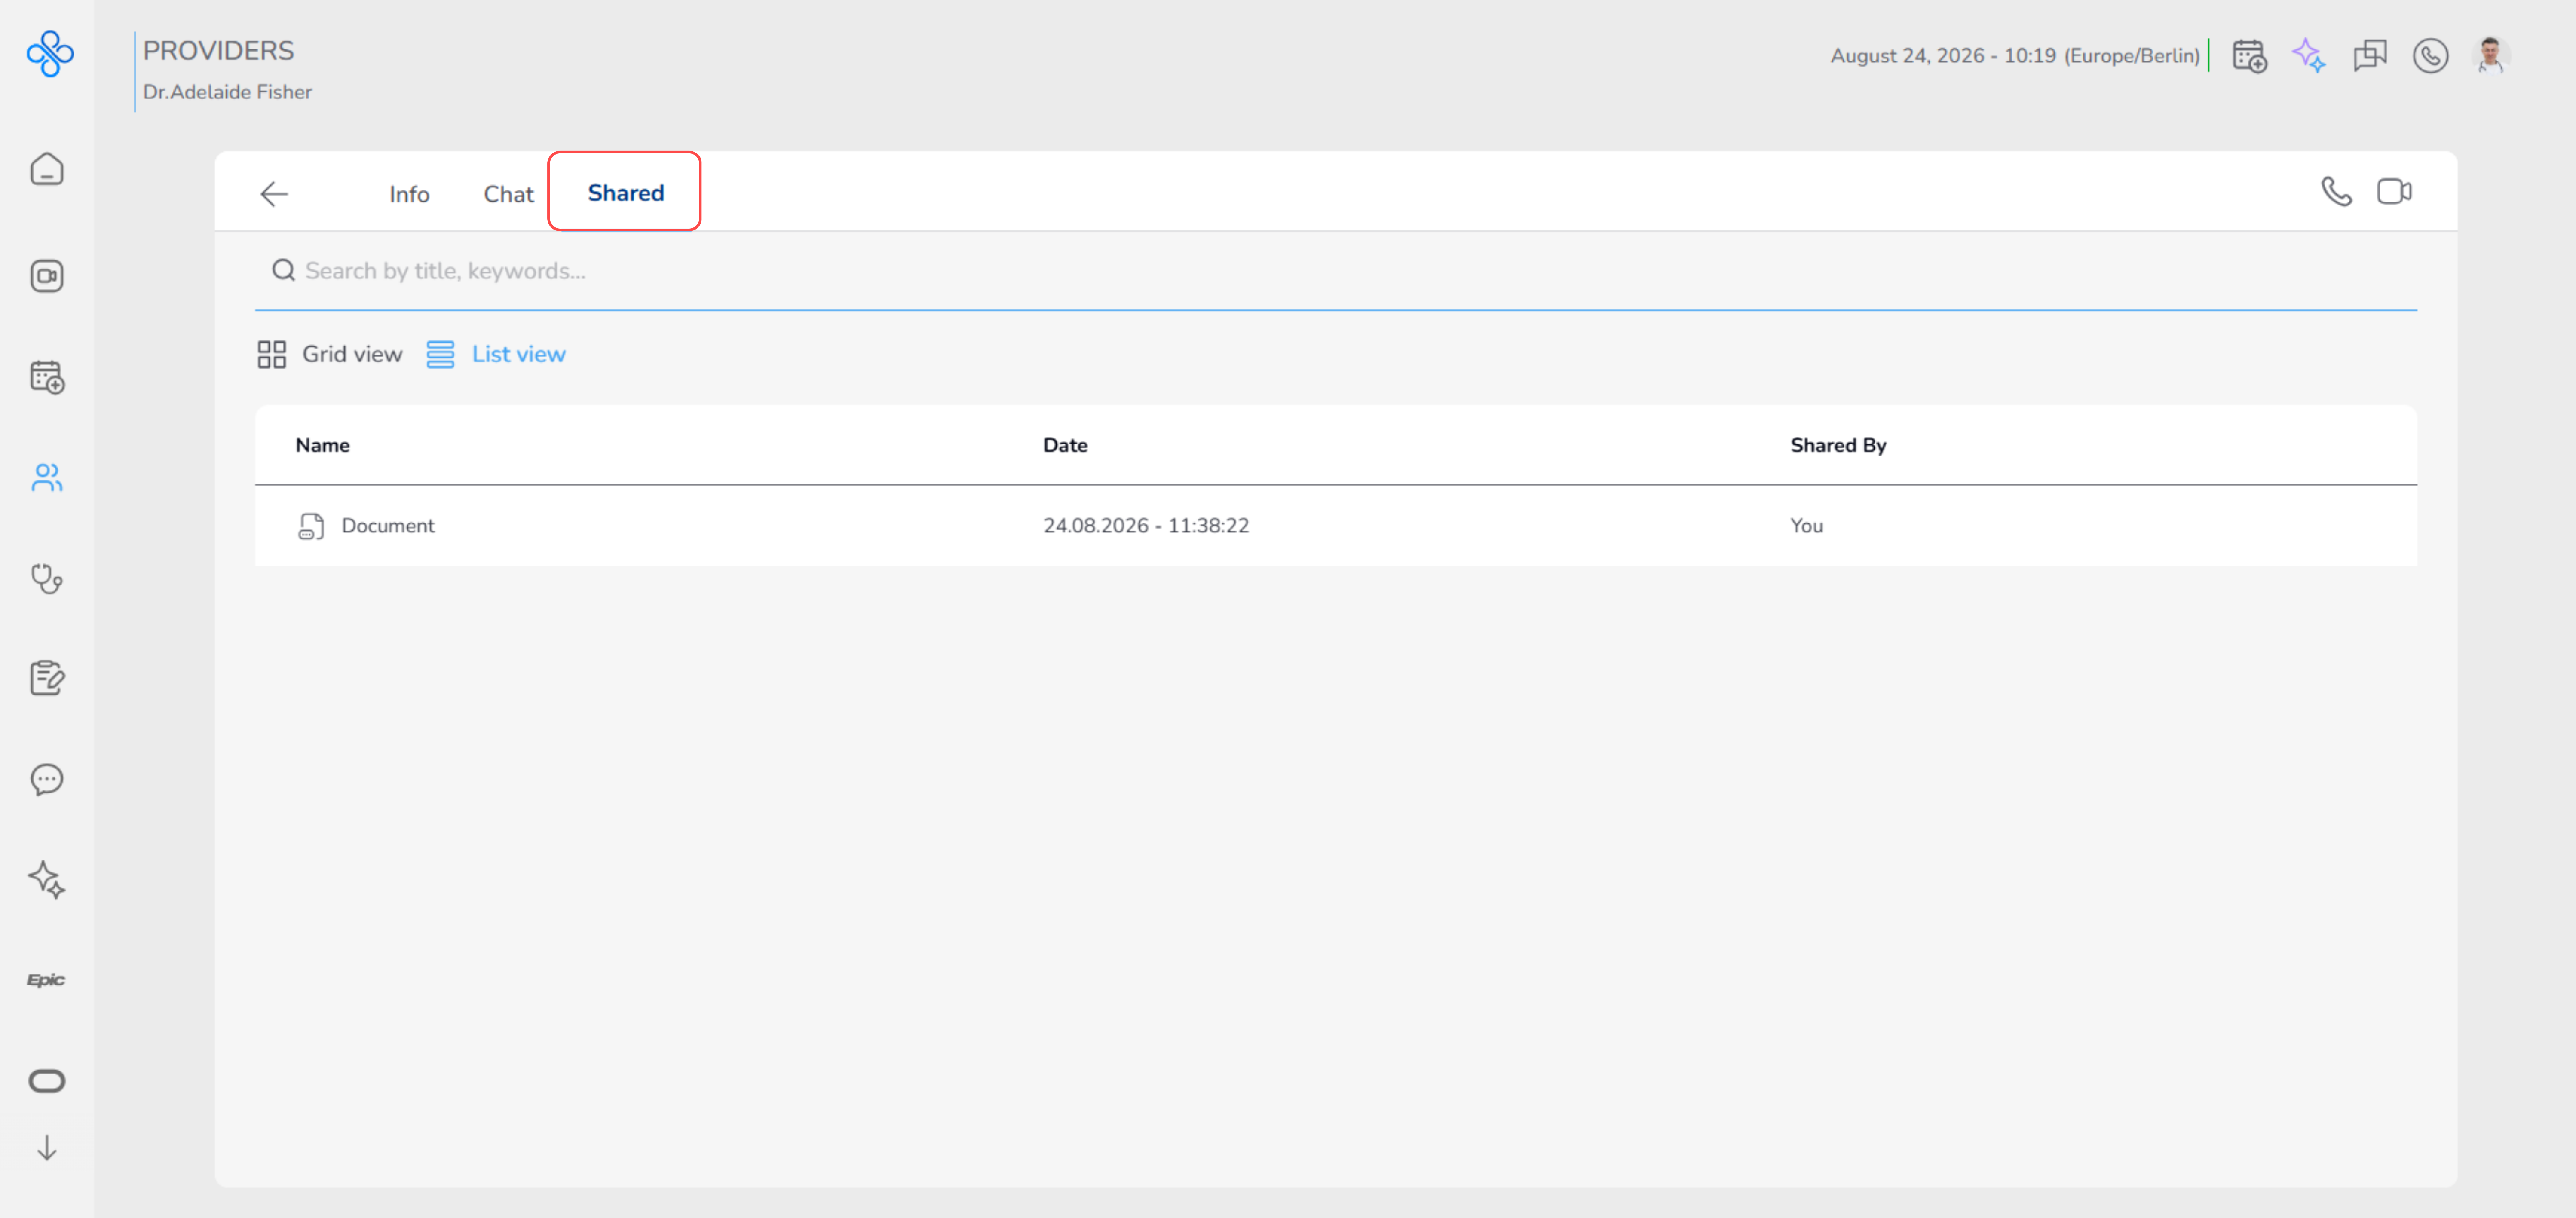
You will see a list of all shared files Each file includes details like name, date, and who shared it
Step 2: Change file view (Grid / List)
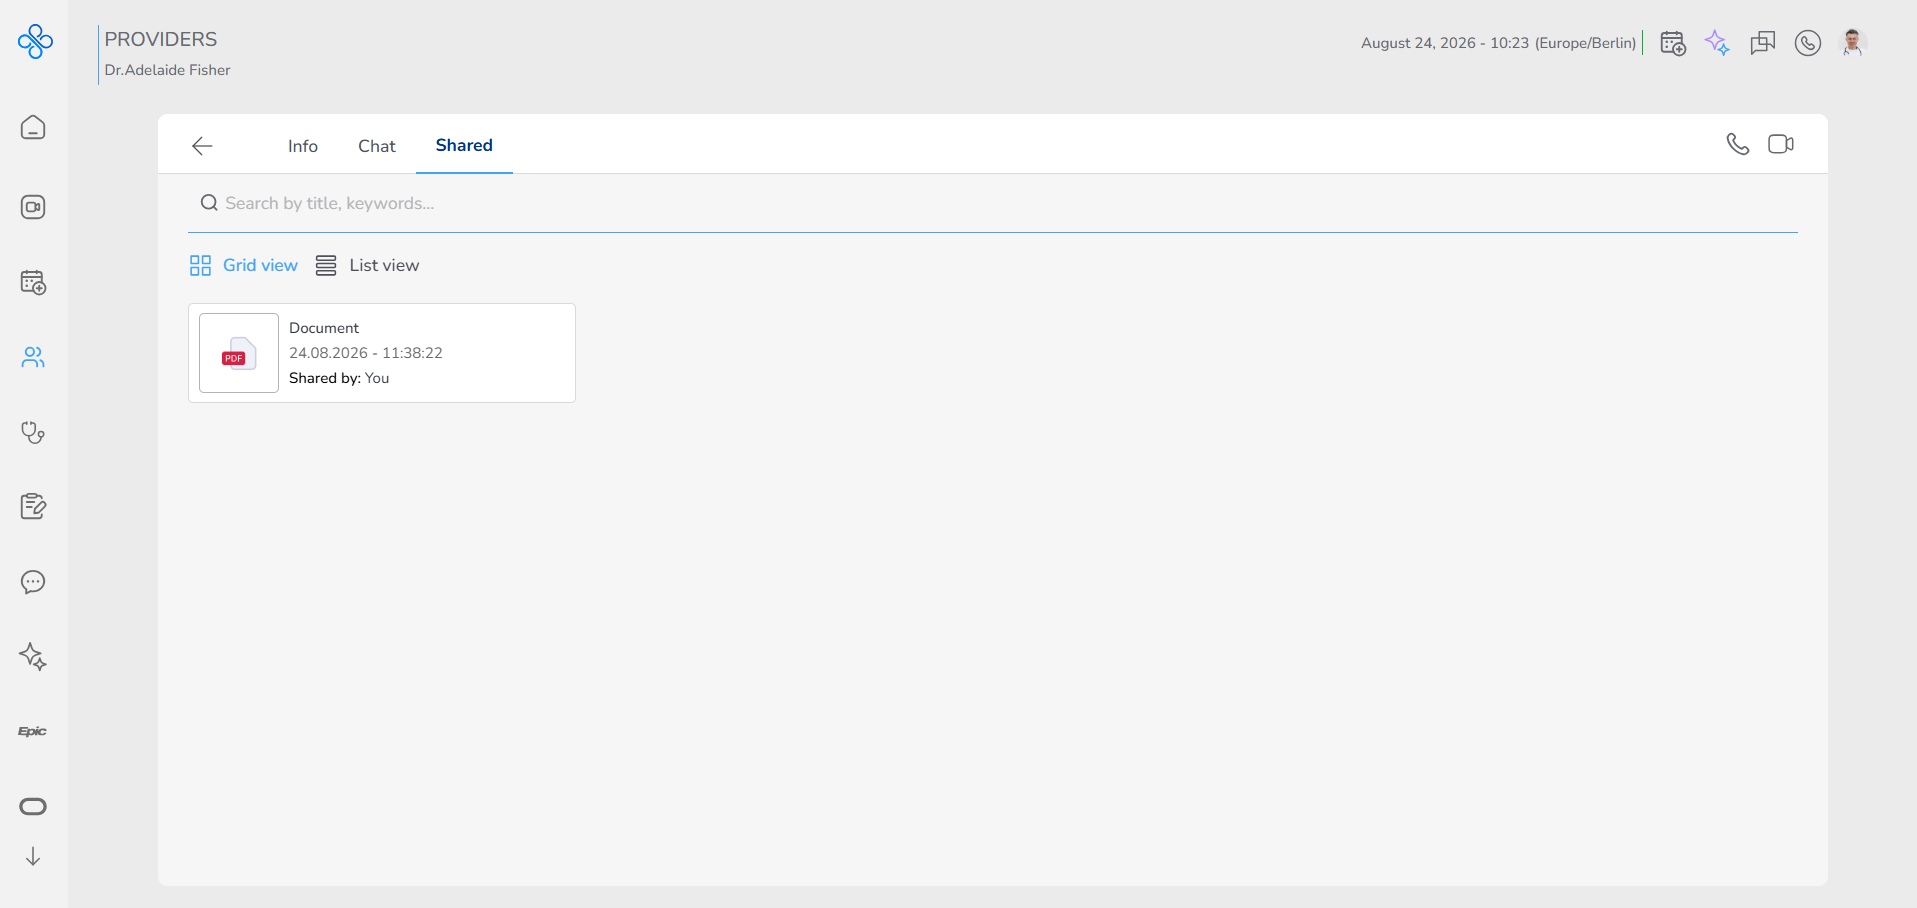
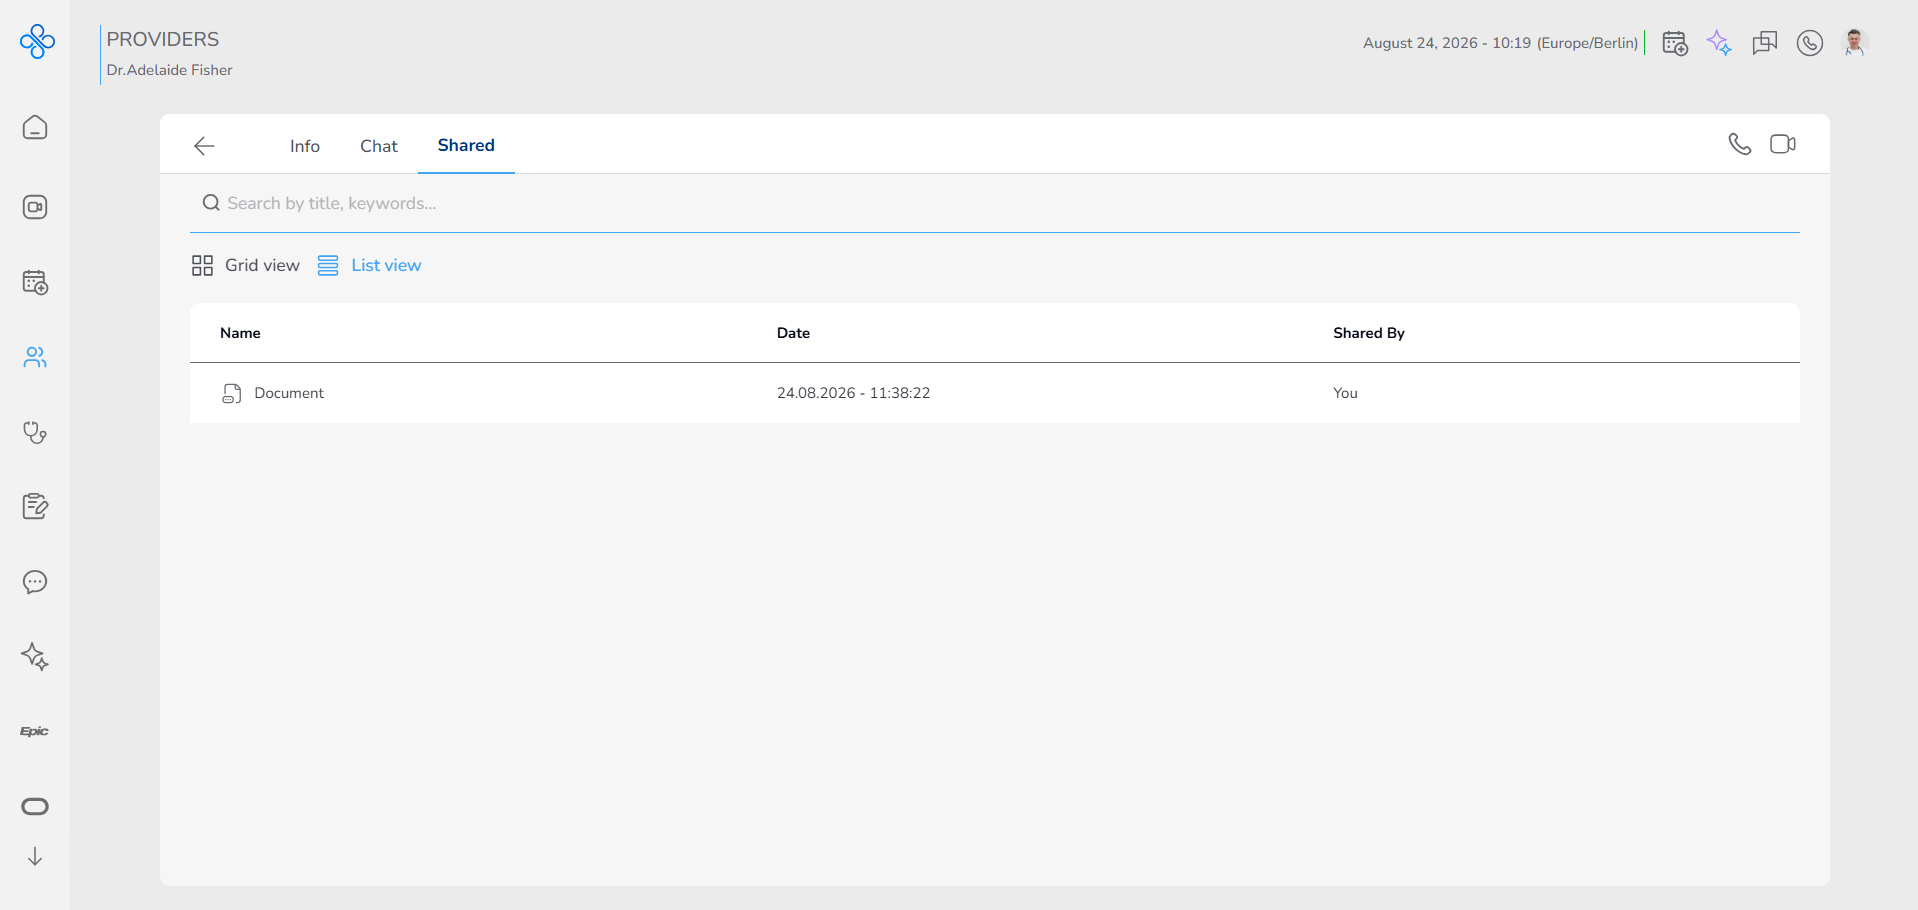
At the top left of the file list, you will see two buttons.
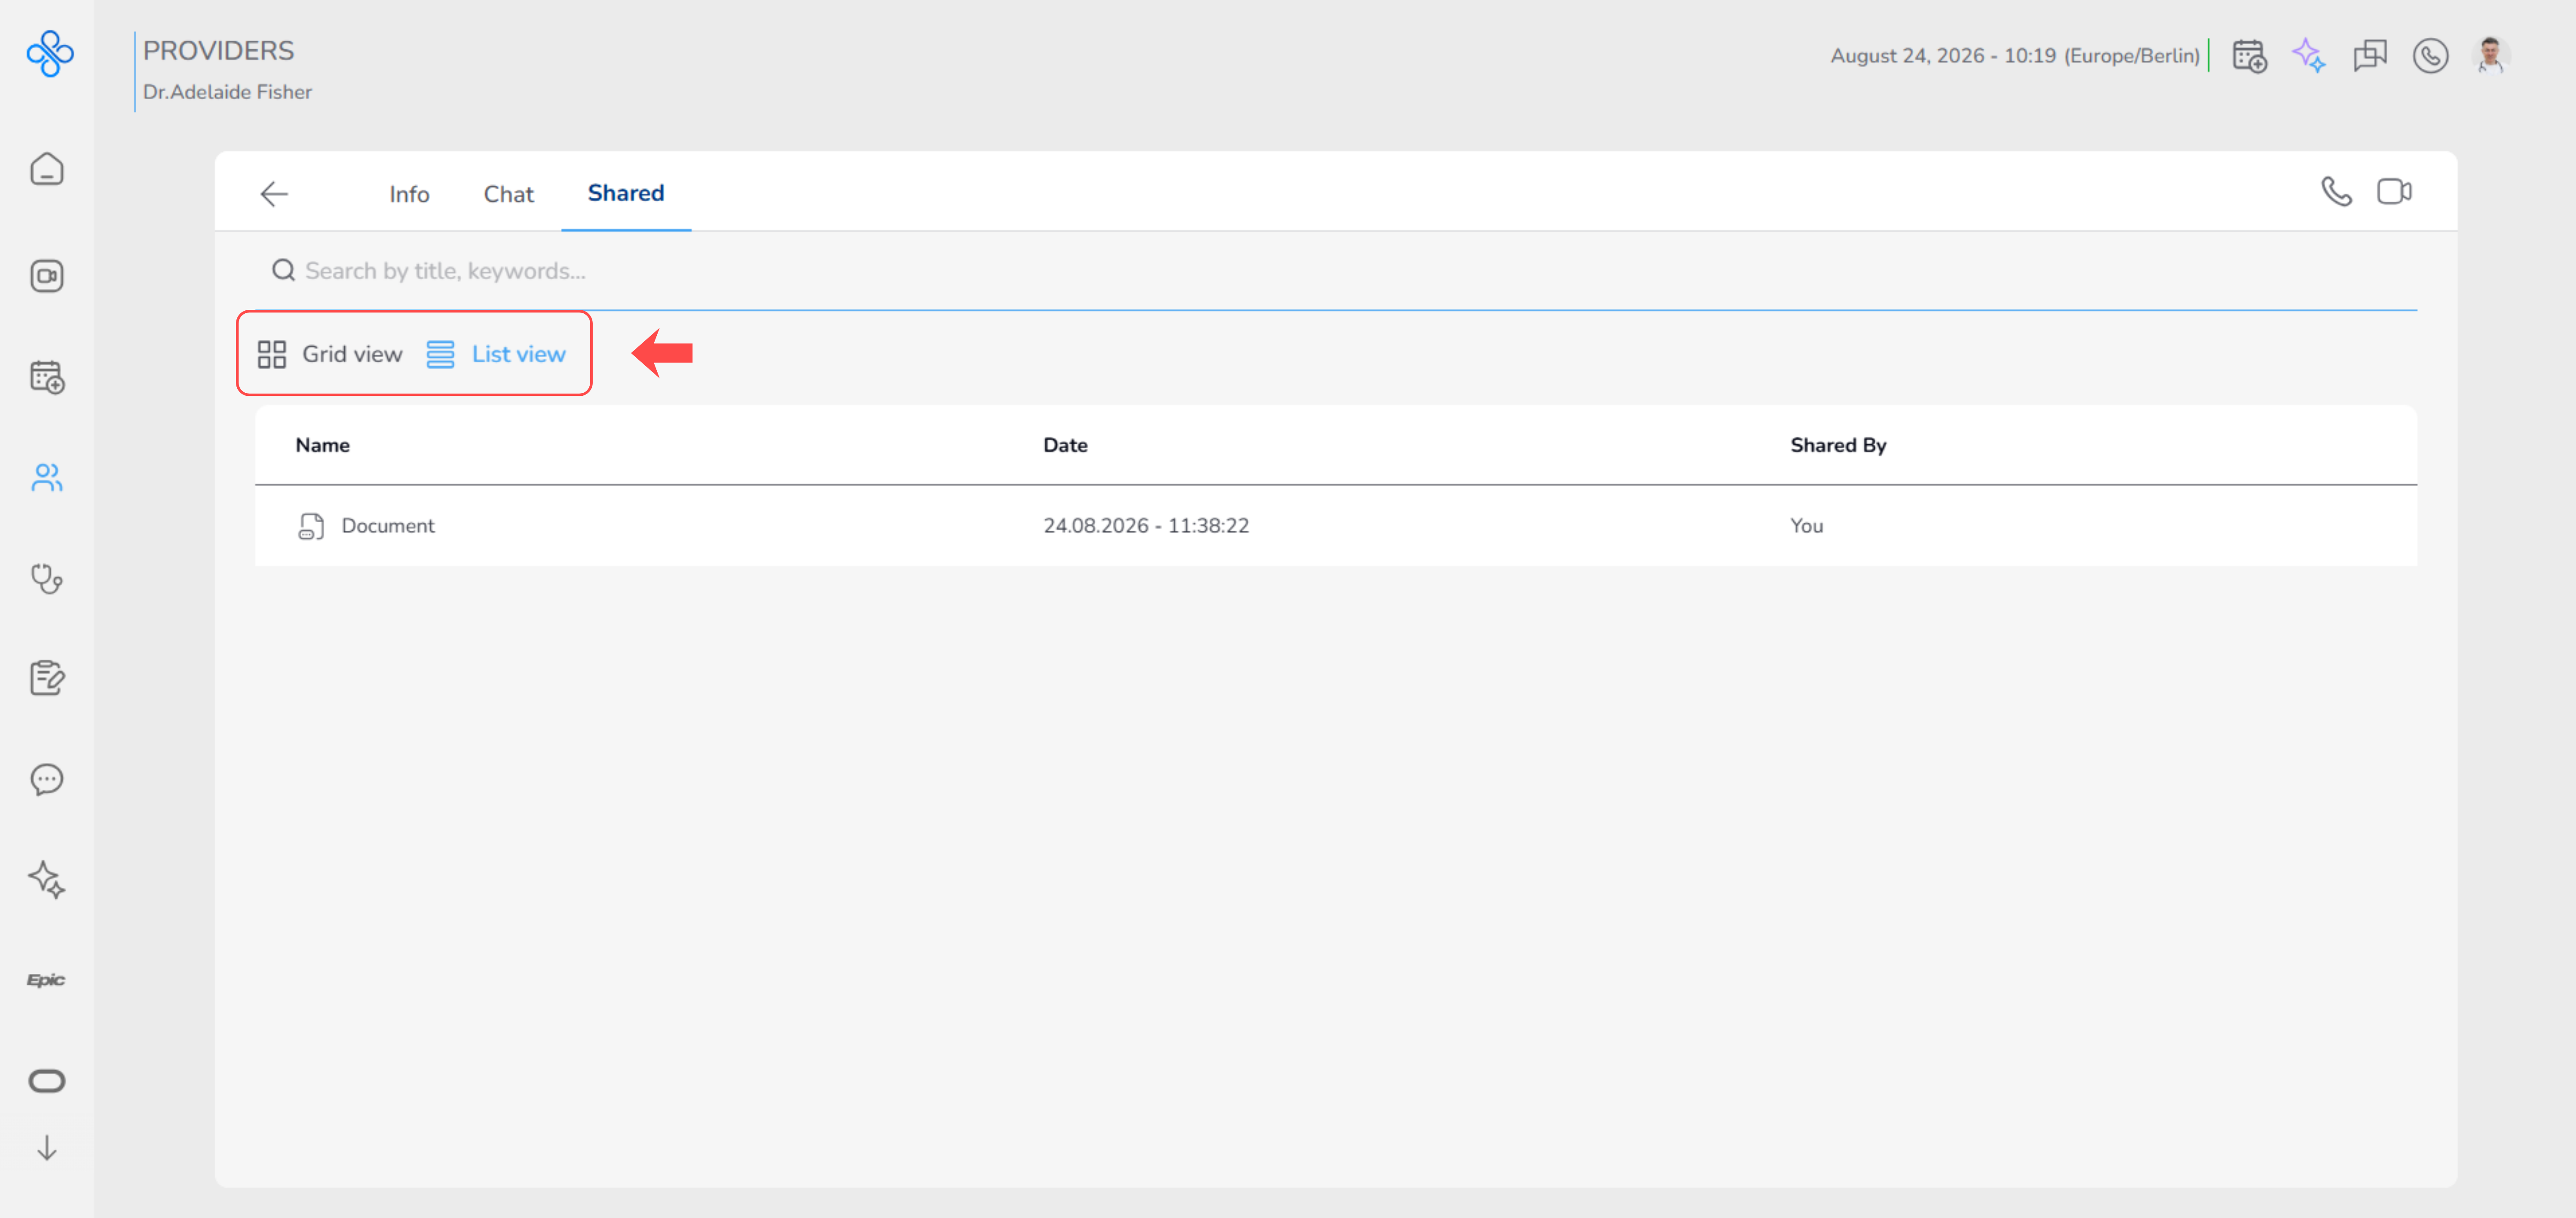
👉 These buttons control how files are displayed:
- Grid view → shows files as cards (larger preview)
- List view → shows files in rows (more compact with details)
Step 3: Find a file
If the list is long, you do not need to scroll. Use the search bar at the top:
- Click on the search field
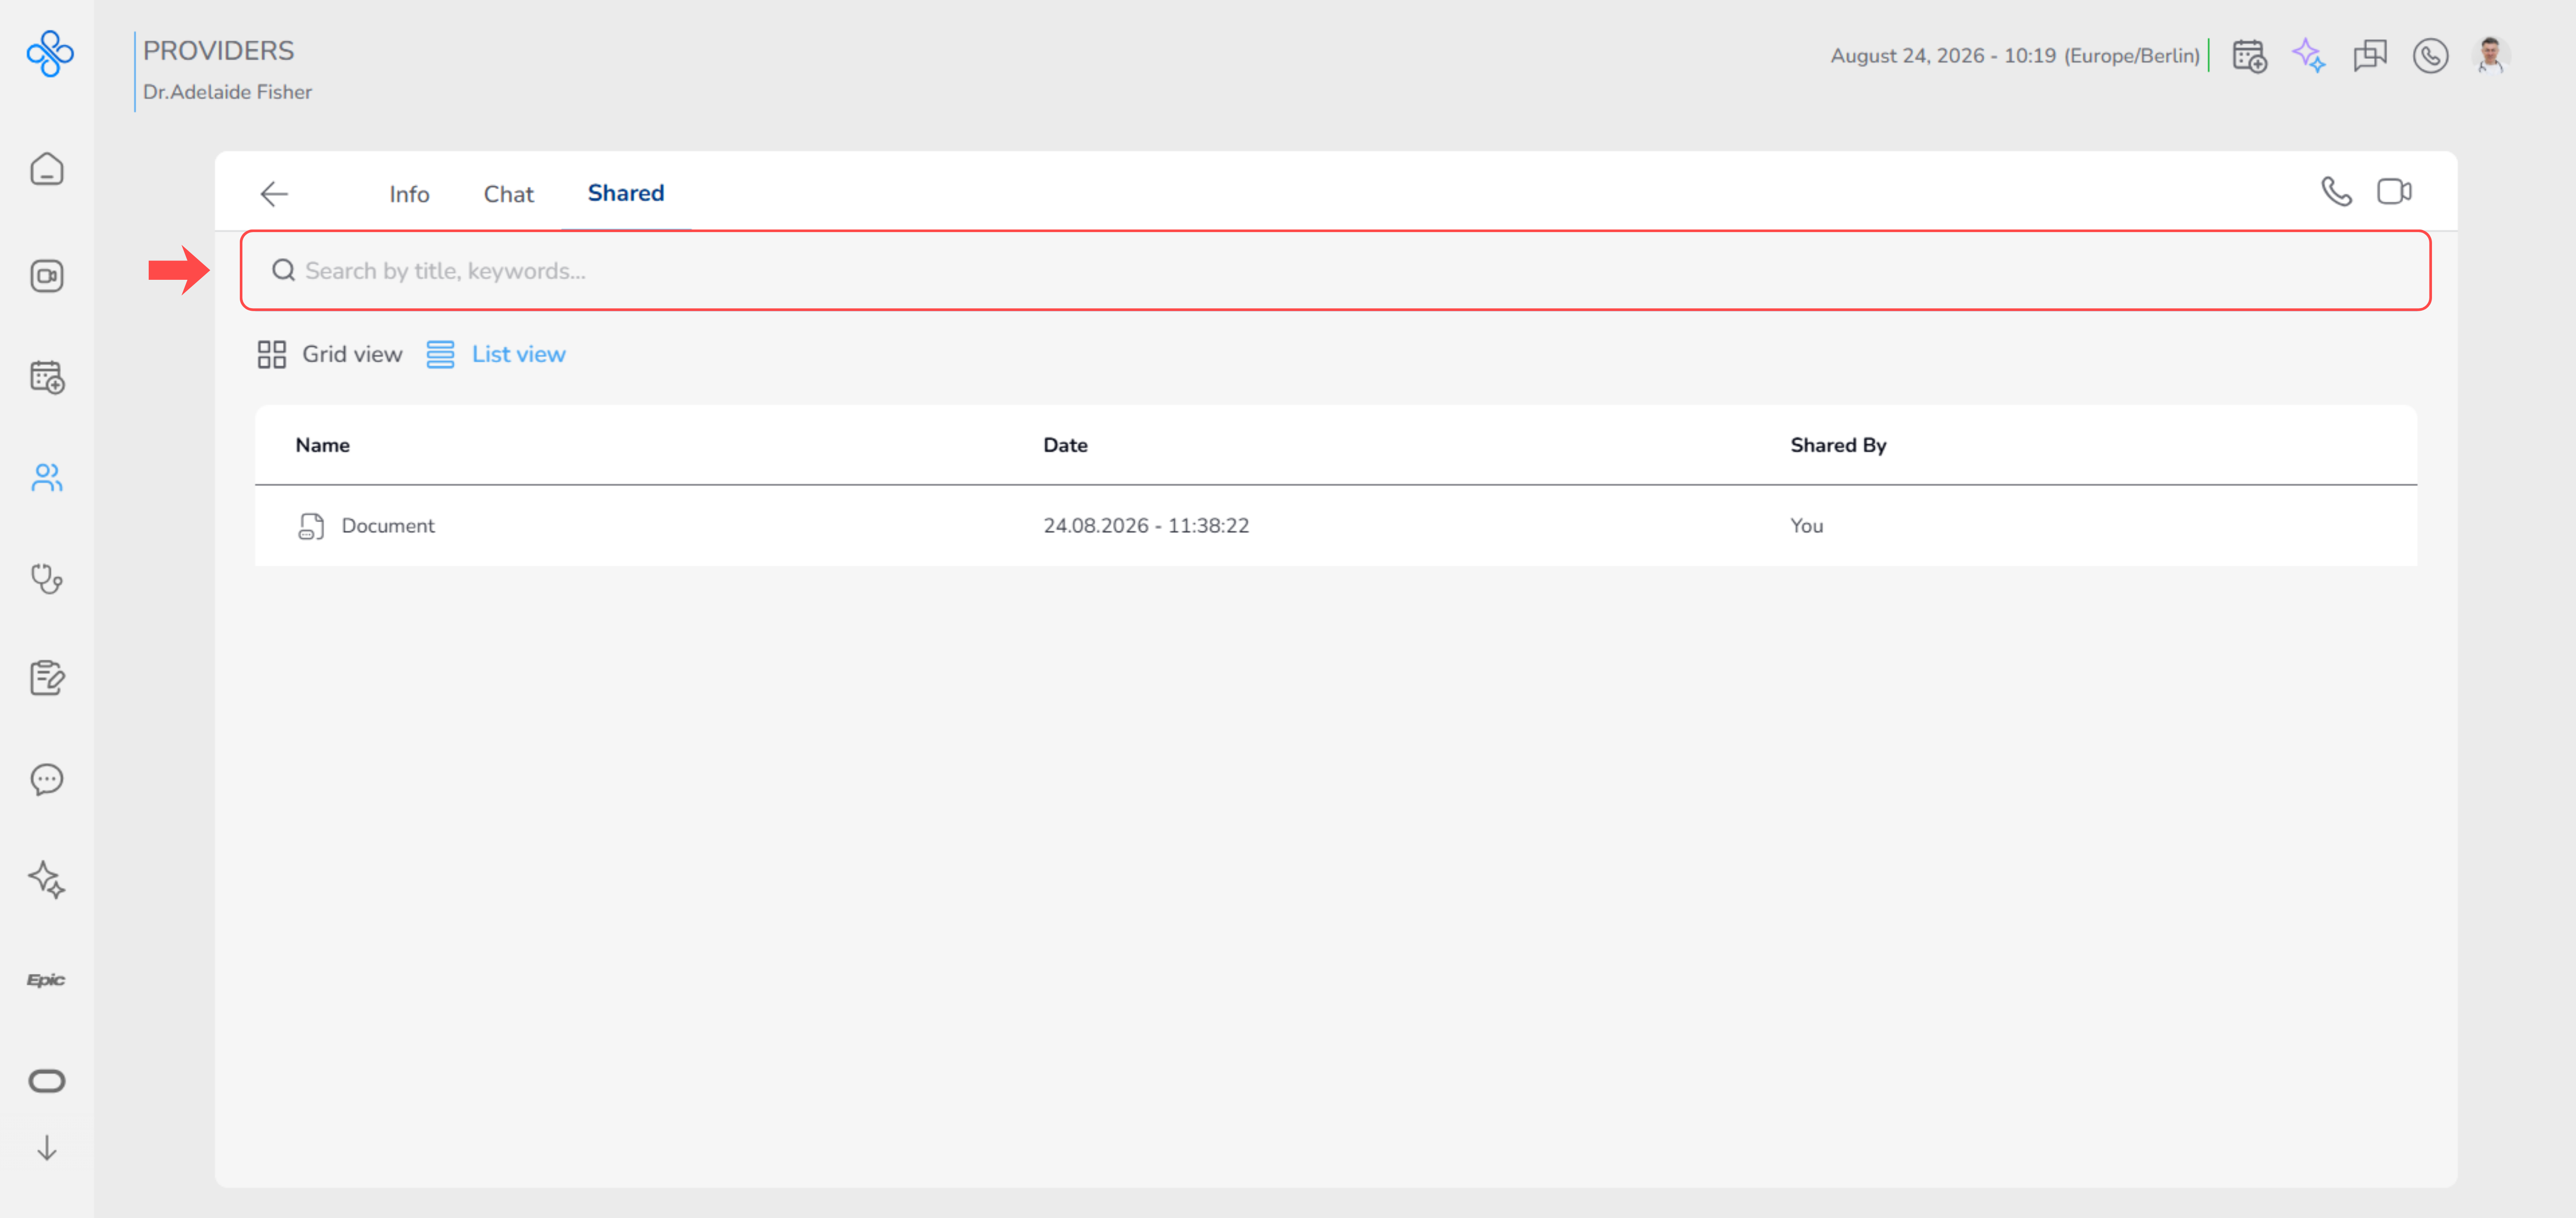
- Start typing a file name or keyword The list updates instantly as you type Only matching files will remain visible
Step 4: Sort the file list
You can organize files to find what you need faster.
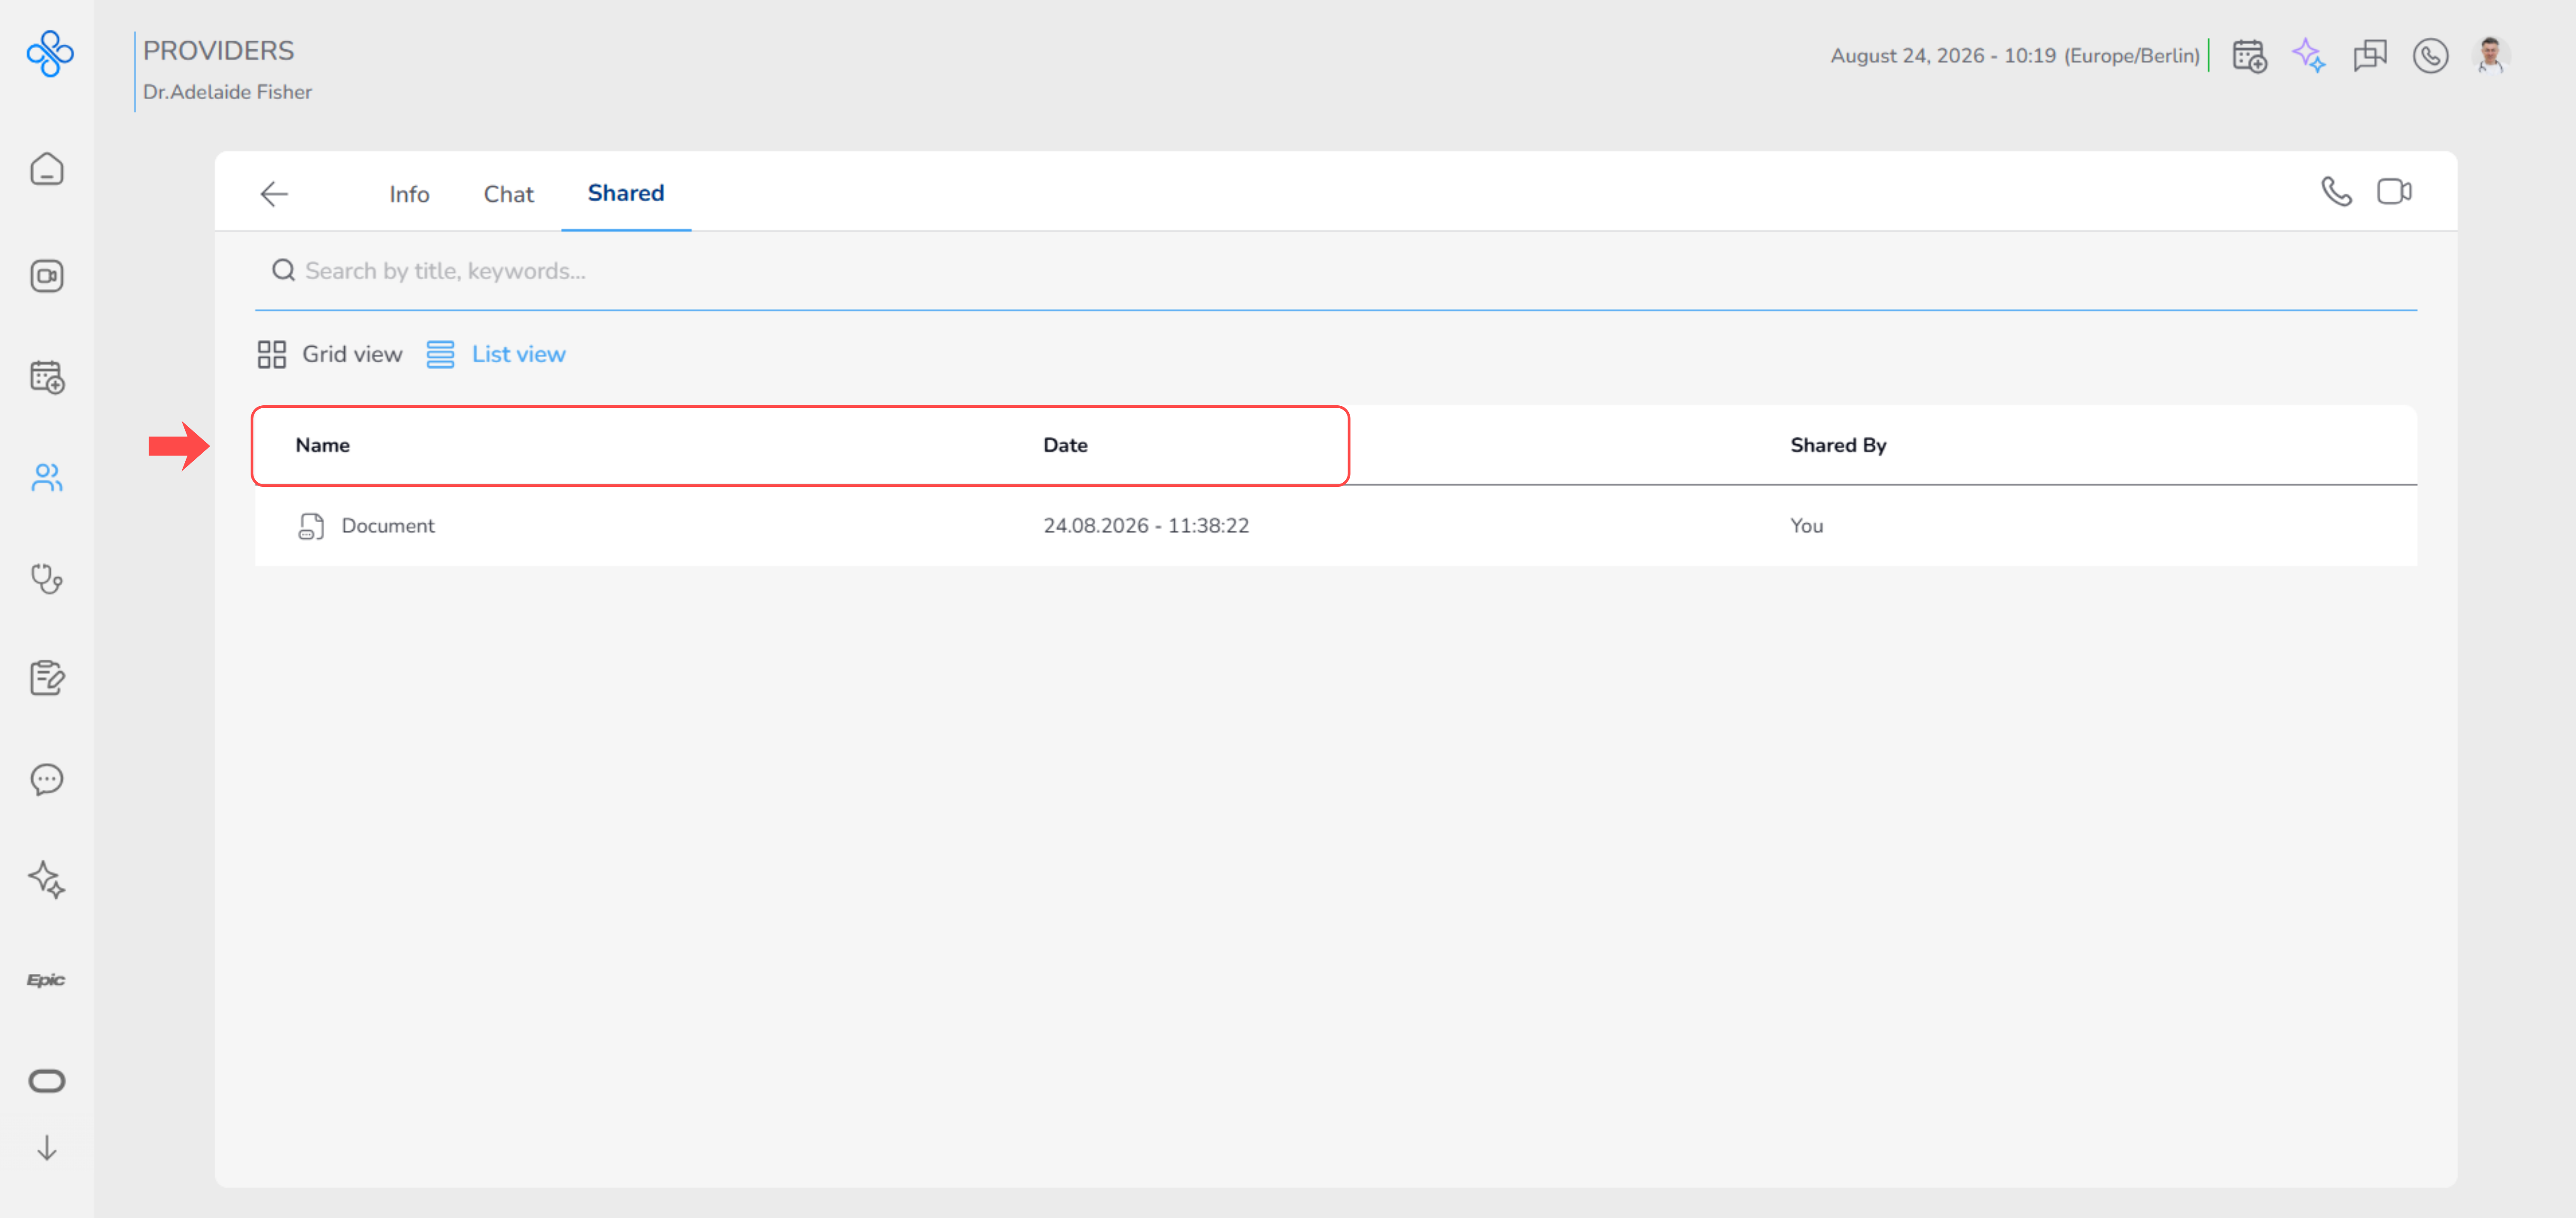
- Click on the Name column to sort alphabetically
- Click on the Date column to sort by newest or oldest Click again to switch between ascending and descending order
Step 5: Use file actions
For each file, you have additional options. Move your mouse over a file row
- A More Actions (⋮) button will appear Click on it to open available actions
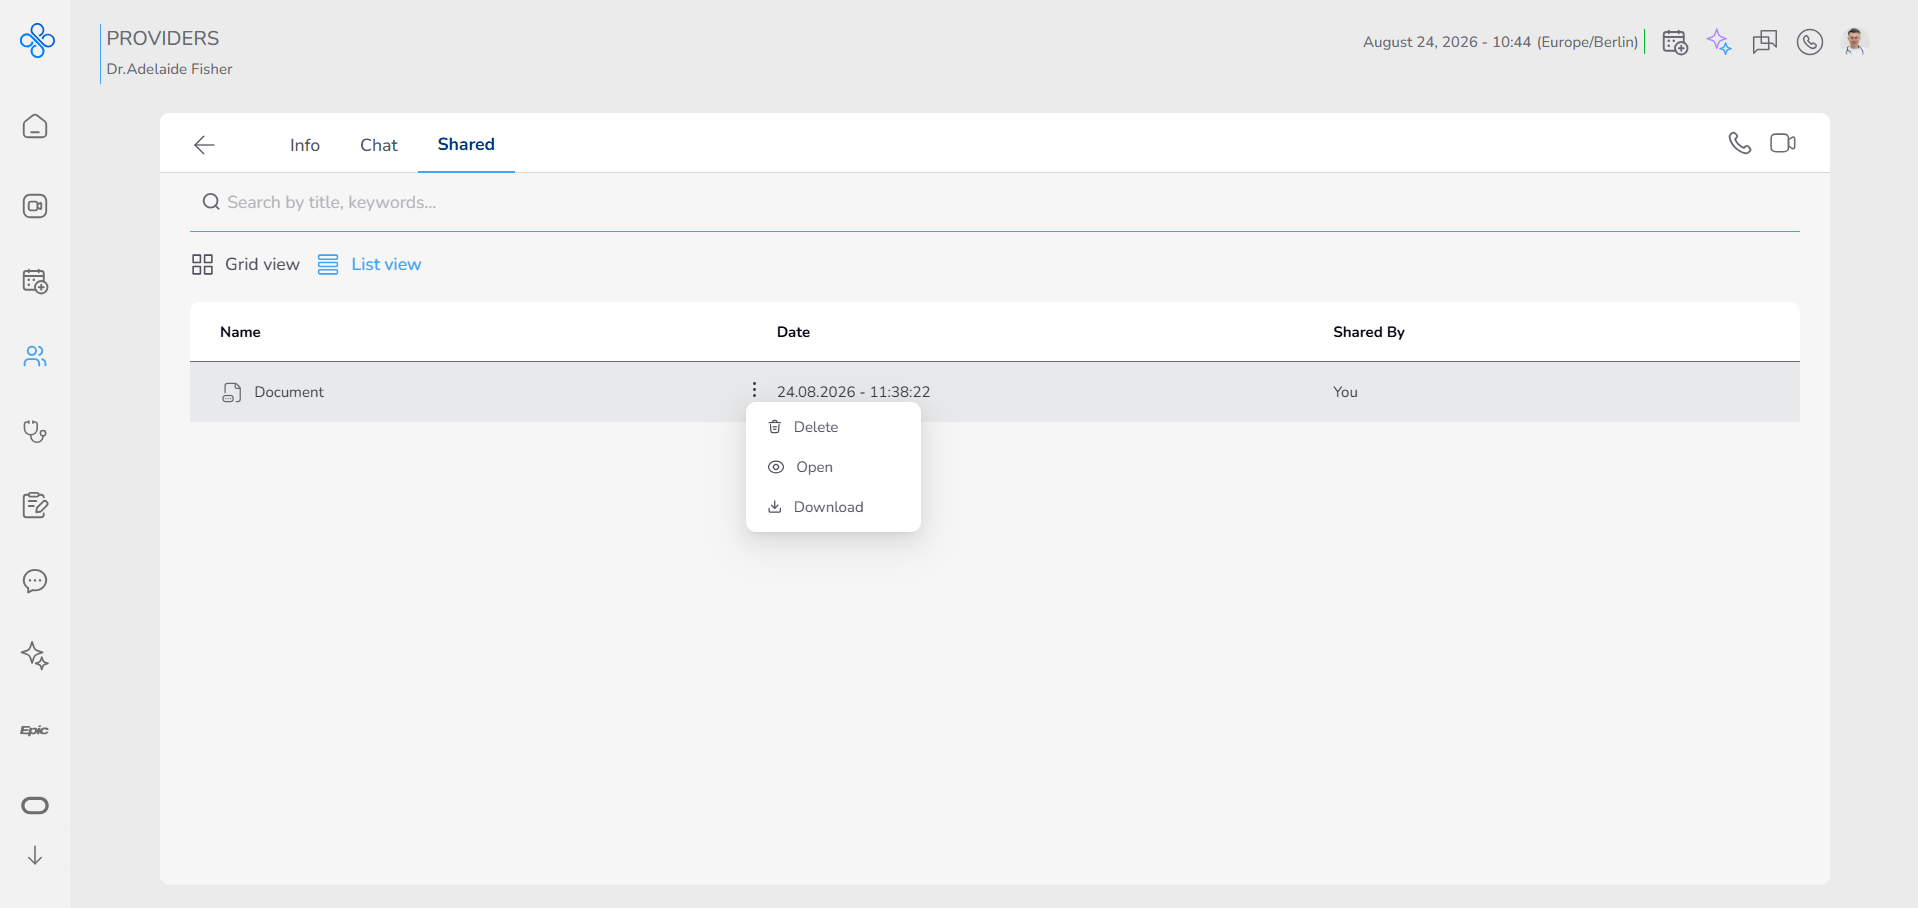
Delete file
- Click Delete
- A confirmation message will appear
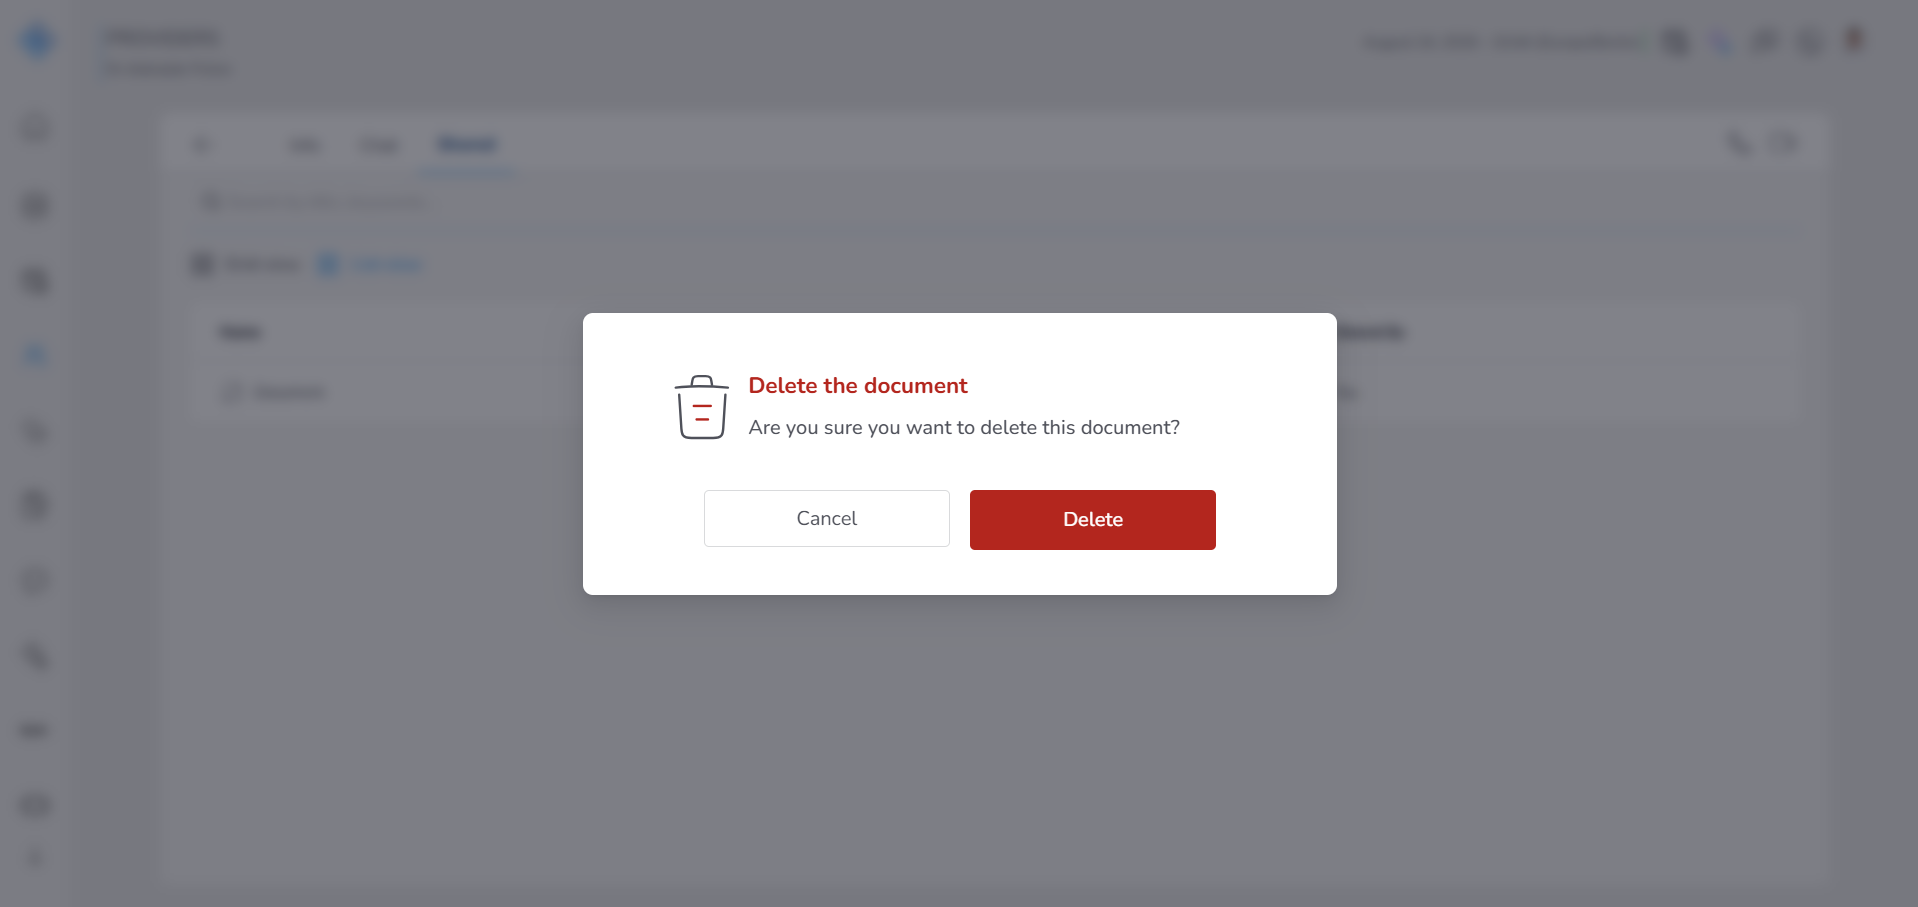
- Click Delete again to confirm The file will be permanently removed ⚠️ This action cannot be undone
Open file (Viewer)
- Click Open The file opens inside a built-in viewer
What you can do inside the viewer:
Depending on the file type (PDF, PNG, JPG), you can:
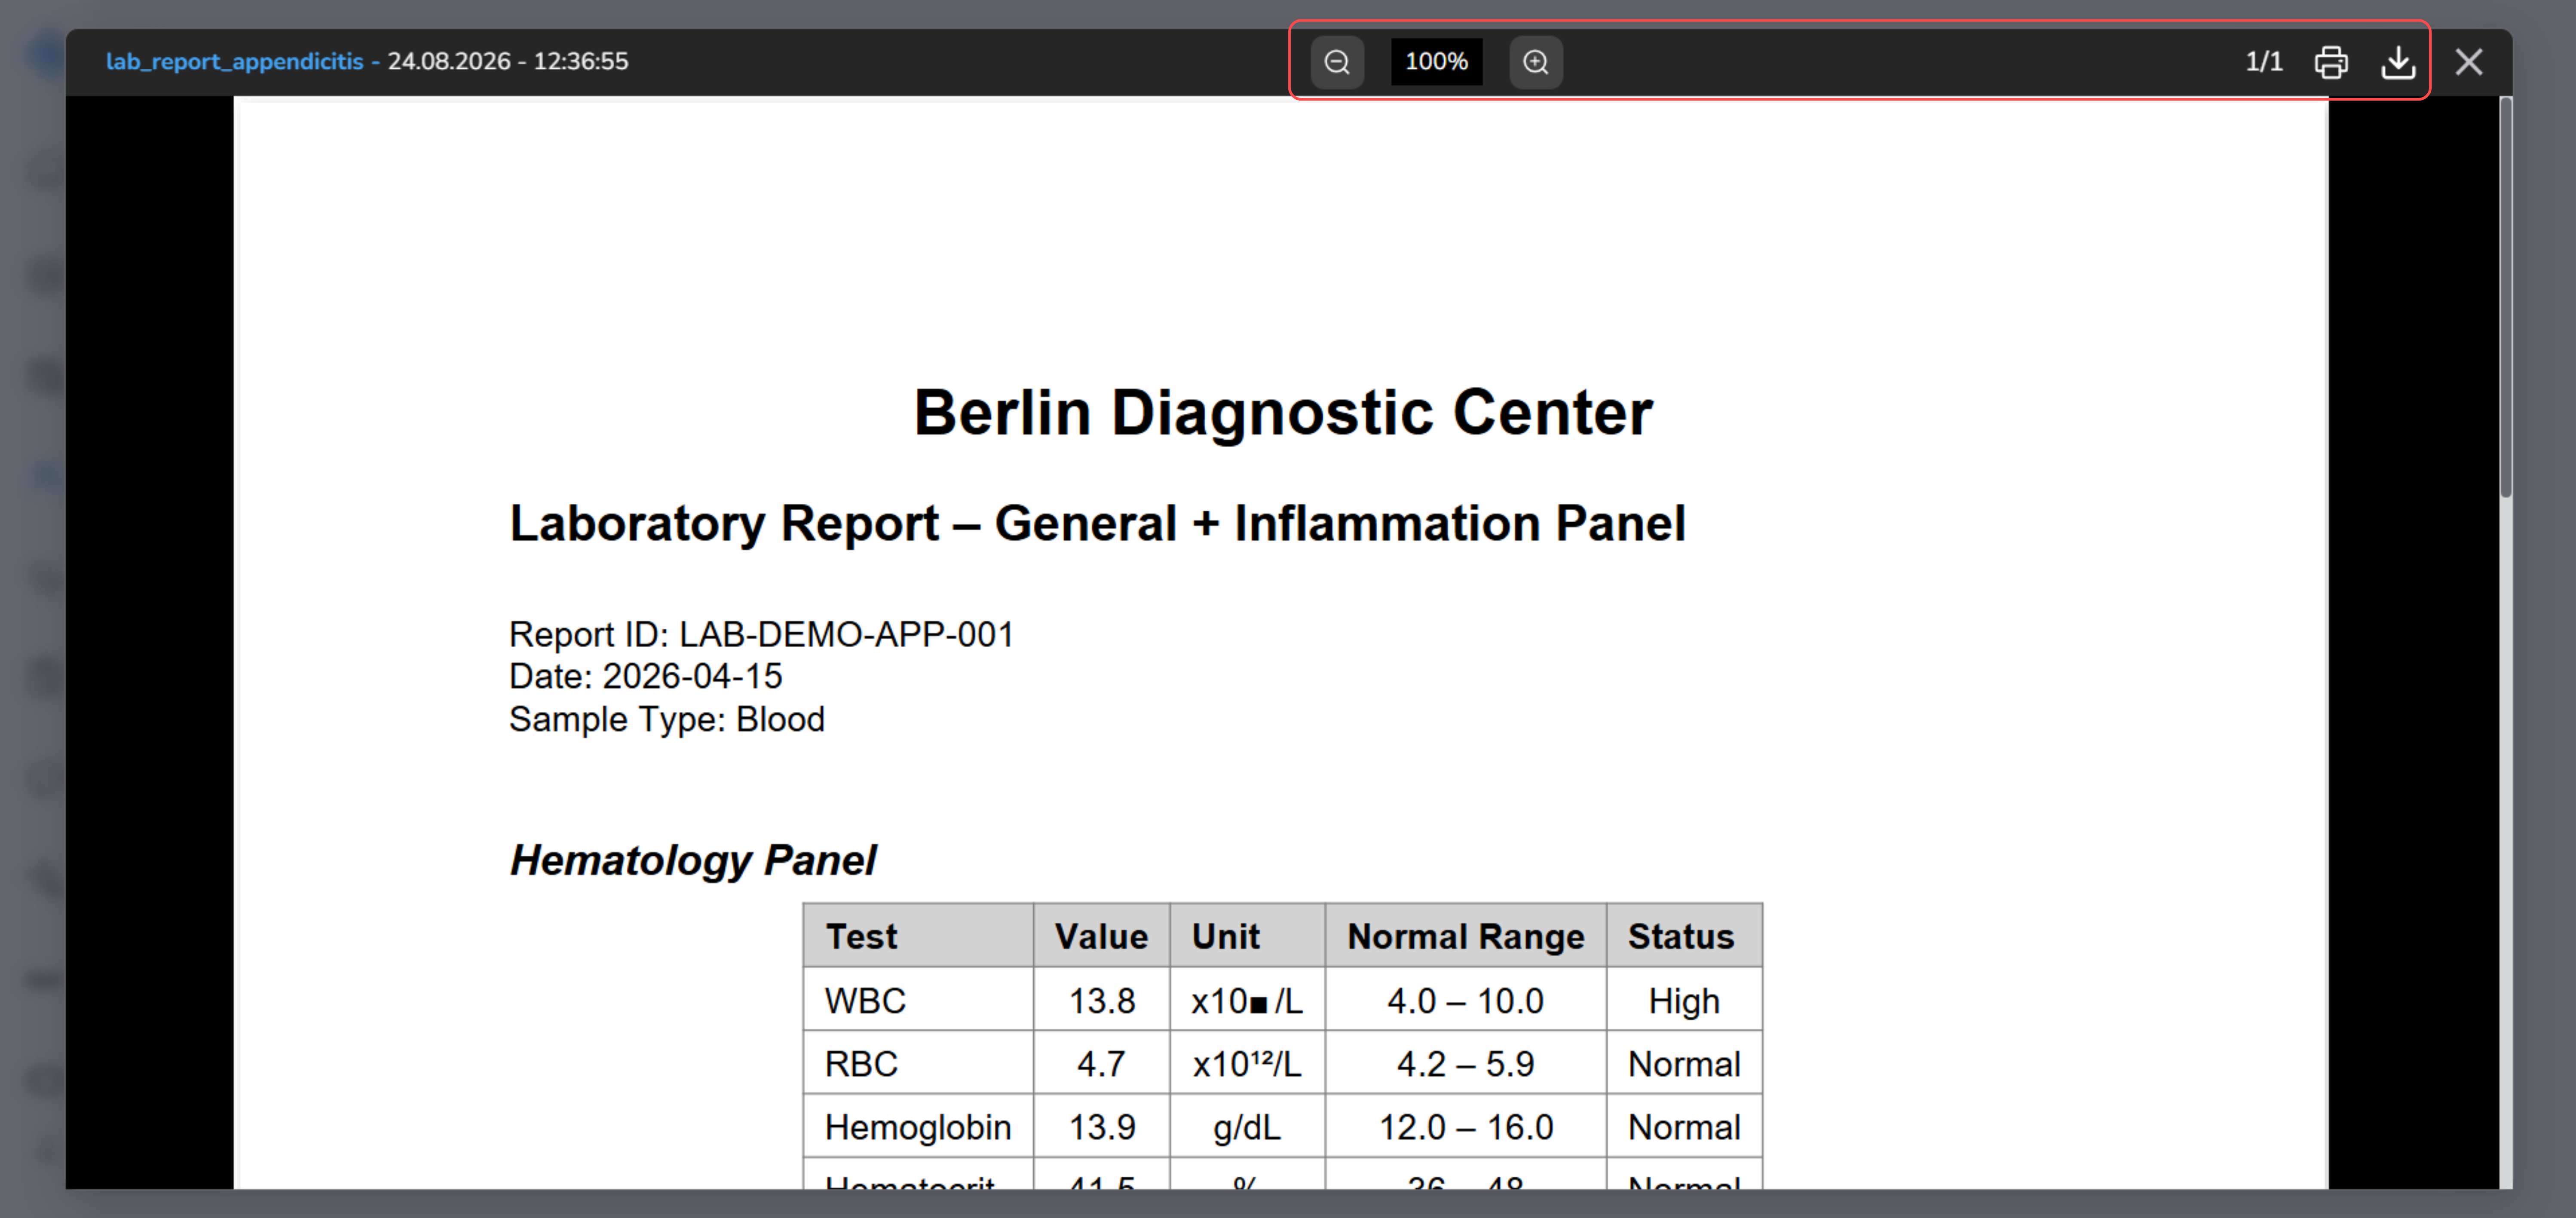
- 🔍 Zoom in and zoom out
- ⬇️ Download the file
- 🖨️ Print the file This works for:
- PDF documents
- Medical images (such as PNG and JPG) 💡 Use this option when you want to preview and review the file without downloading it
Download file
- Click Download The file will be saved directly to your device Use this when you need a local copy of the file
Step 6: Start communication
You can still communicate with the provider from this tab. At the top of the page, you will see:
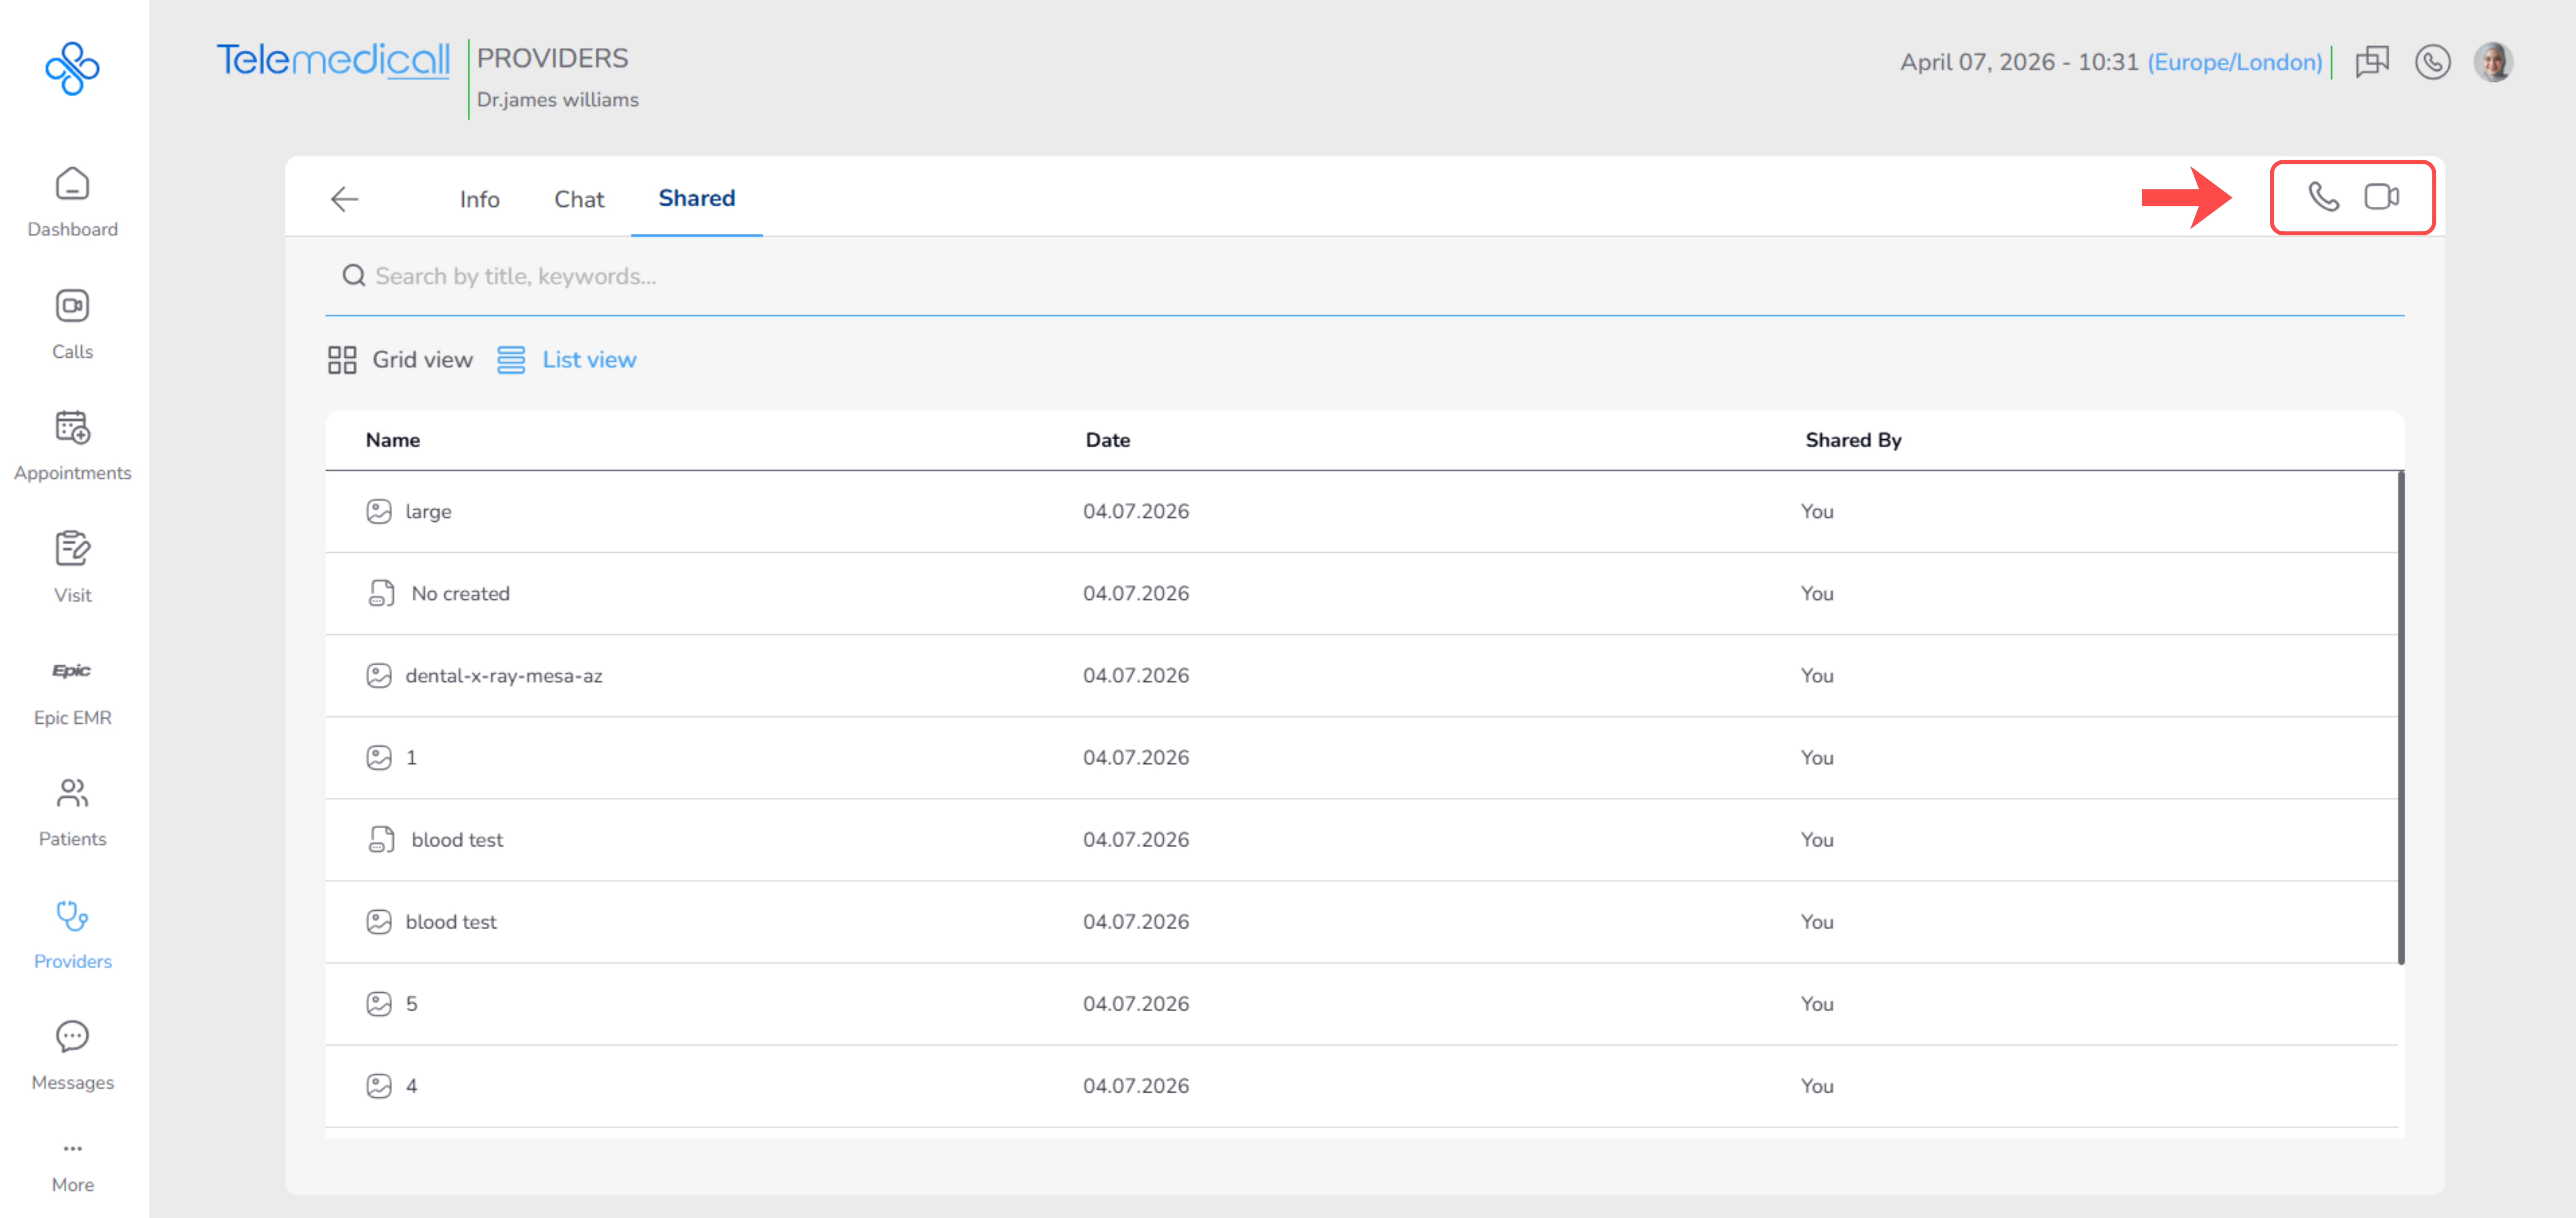
- Voice call button
- Video call button Click one of them to start a call without leaving this tab
What happens when you use this tab
- Files appear here automatically after being shared in chat
- Search filters results in real time
- Sorting helps you organize large file lists
- Open allows you to preview and review files inside the viewer
- Download saves files to your device instantly
- Delete removes files permanently after confirmation
When should you use this tab
Use the Shared tab when you want to:
- Quickly find a file
- Review previously shared documents
- Open and preview files without downloading
- Download files
- Clean up unnecessary files
Simple flow to remember
👉 Open Shared tab 👉 Search or sort files 👉 Use More Actions (⋮) 👉 Download or delete or open as needed This tab helps you manage files without going back to chat.
Fields (Field Descriptions)
| Field | Description |
|---|---|
| Search Bar | Filters providers by name |
| Specialty Filter | Narrows list by specialty |
| Location Filter | Narrows list by location |
| Tabs | Switch between All Followers Following |
| Availability Slots | Shows nearest appointment times |
| Follow Button | Establishes connection with provider |
| Report Action | Opens reporting workflow |
| Message Input | Sends chat messages |
| File Search | Filters shared documents |
| More Actions Menu | Provides file management options |
Behavior & Expected Outcome
- Search and filters update results instantly
- Switching tabs refreshes the list immediately
- Hovering over a provider shows time slots
- Selecting a time opens booking flow
- Opening a profile always starts on the Info tab
- Following a provider enables chat
- Messages appear instantly after sending
- Uploaded files appear in both Chat and Shared tabs
- Deleting a file permanently removes it after confirmation
- Calls redirect you into the call workflow
Common Errors + Fixes
| Issue | Cause | Fix |
|---|---|---|
| No providers found | Filters too narrow or no providers match. | Reset filters or adjust search terms. |
| Appointment time not available | Slot already booked. | Refresh the page to get updated slots. |
| Follow/Unfollow not working | Network/server issue. | Retry or check internet connection. |
| Report not submitted | Missing required details. | Select an option or add a comment before submitting. |
| Provider page not loading | Connection issue. | Refresh the page or try again later. |
| Chat is not available | Provider is not followed | Click Follow first |
| Shared tab is empty | No files shared yet | Send a file via Chat |