Dashboard
Overview
The Dashboard is the main landing page you see immediately after logging in.
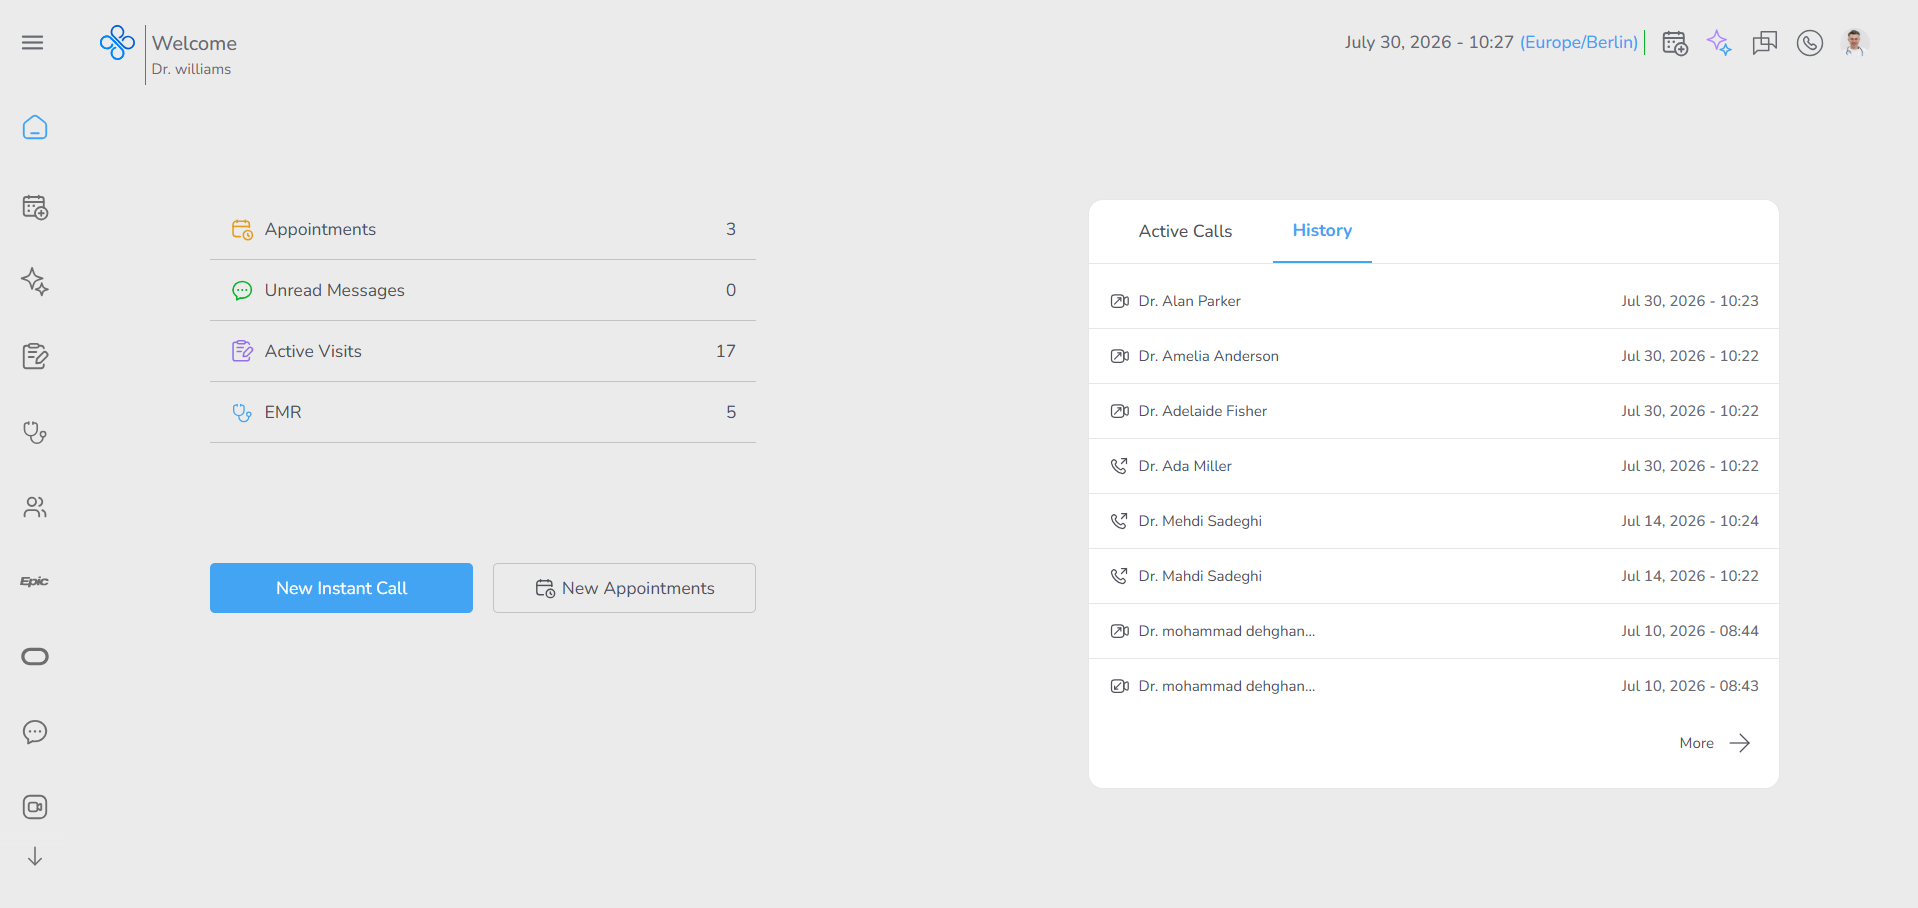
It acts as your central control panel, giving you quick access to your most important activities and real-time information. From the Dashboard, you can:
- Monitor appointments, visits, messages, and patients at a glance
- Manage calls and respond to incoming or active communications
- View and interact with your calendar and time slots
- Quickly start or create appointments
- Chat with the AI Assistant
- Access your profile, settings, notifications, and more
- You can always return to the Dashboard by clicking Dashboard from the sidebar.
Steps
1. Accessing the Dashboard
The Dashboard is the main starting point of the platform and the first page you see after logging in. From here, you can access almost all core features and get a clear overview of your activity.
How you enter the Dashboard
- After login
- As soon as you successfully log in, the system automatically takes you to the Dashboard.
- No extra steps are required.
- From anywhere in the system
- If you navigate to other pages (such as Appointments, Messages, or Profile), you can always return to the Dashboard.
- Simply click Dashboard in the sidebar to come back.
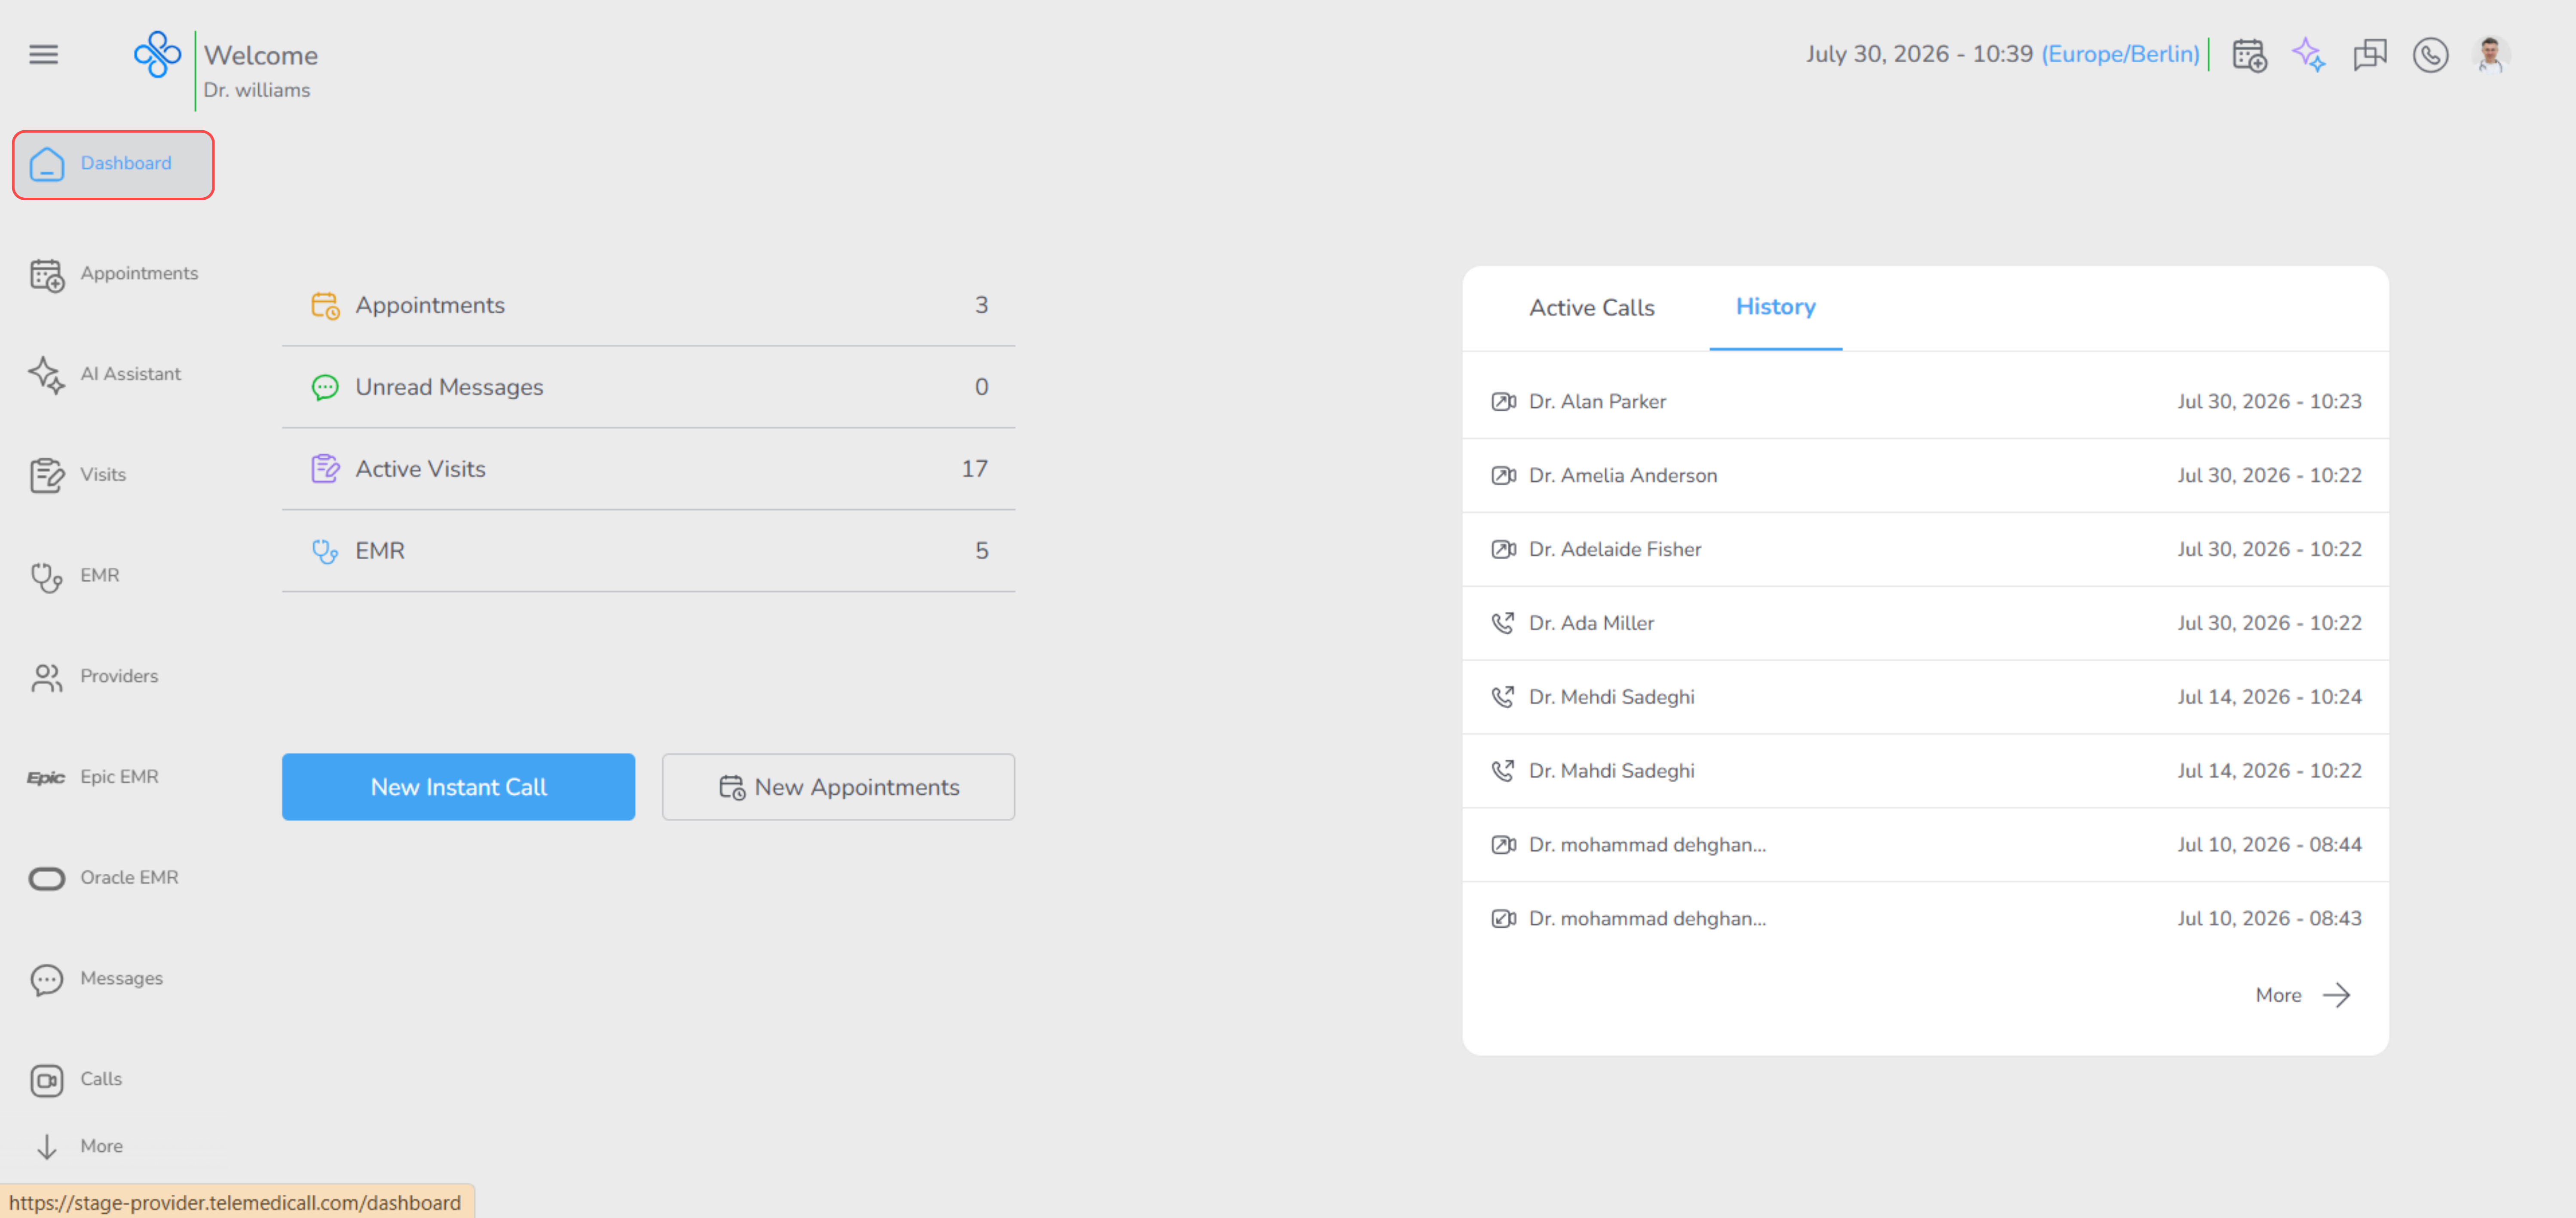
Why the Dashboard matters
- It acts as a central hub for your daily work.
- From this page, you can:
- Check upcoming appointments and active visits.
- Monitor calls and messages in real time.
- Access quick shortcuts to key sections like Patients, Appointments, and AI Assistant.
- View your calendar and manage time slots without leaving the page.
The Dashboard is designed to save time by putting everything you need in one place, so you can quickly understand your current status and decide your next action.
2. Header (Top Bar)
The Header is always visible at the top of the Dashboard and gives you quick access to essential actions and system information, no matter where you are on the platform.
What you can see and do from the Header
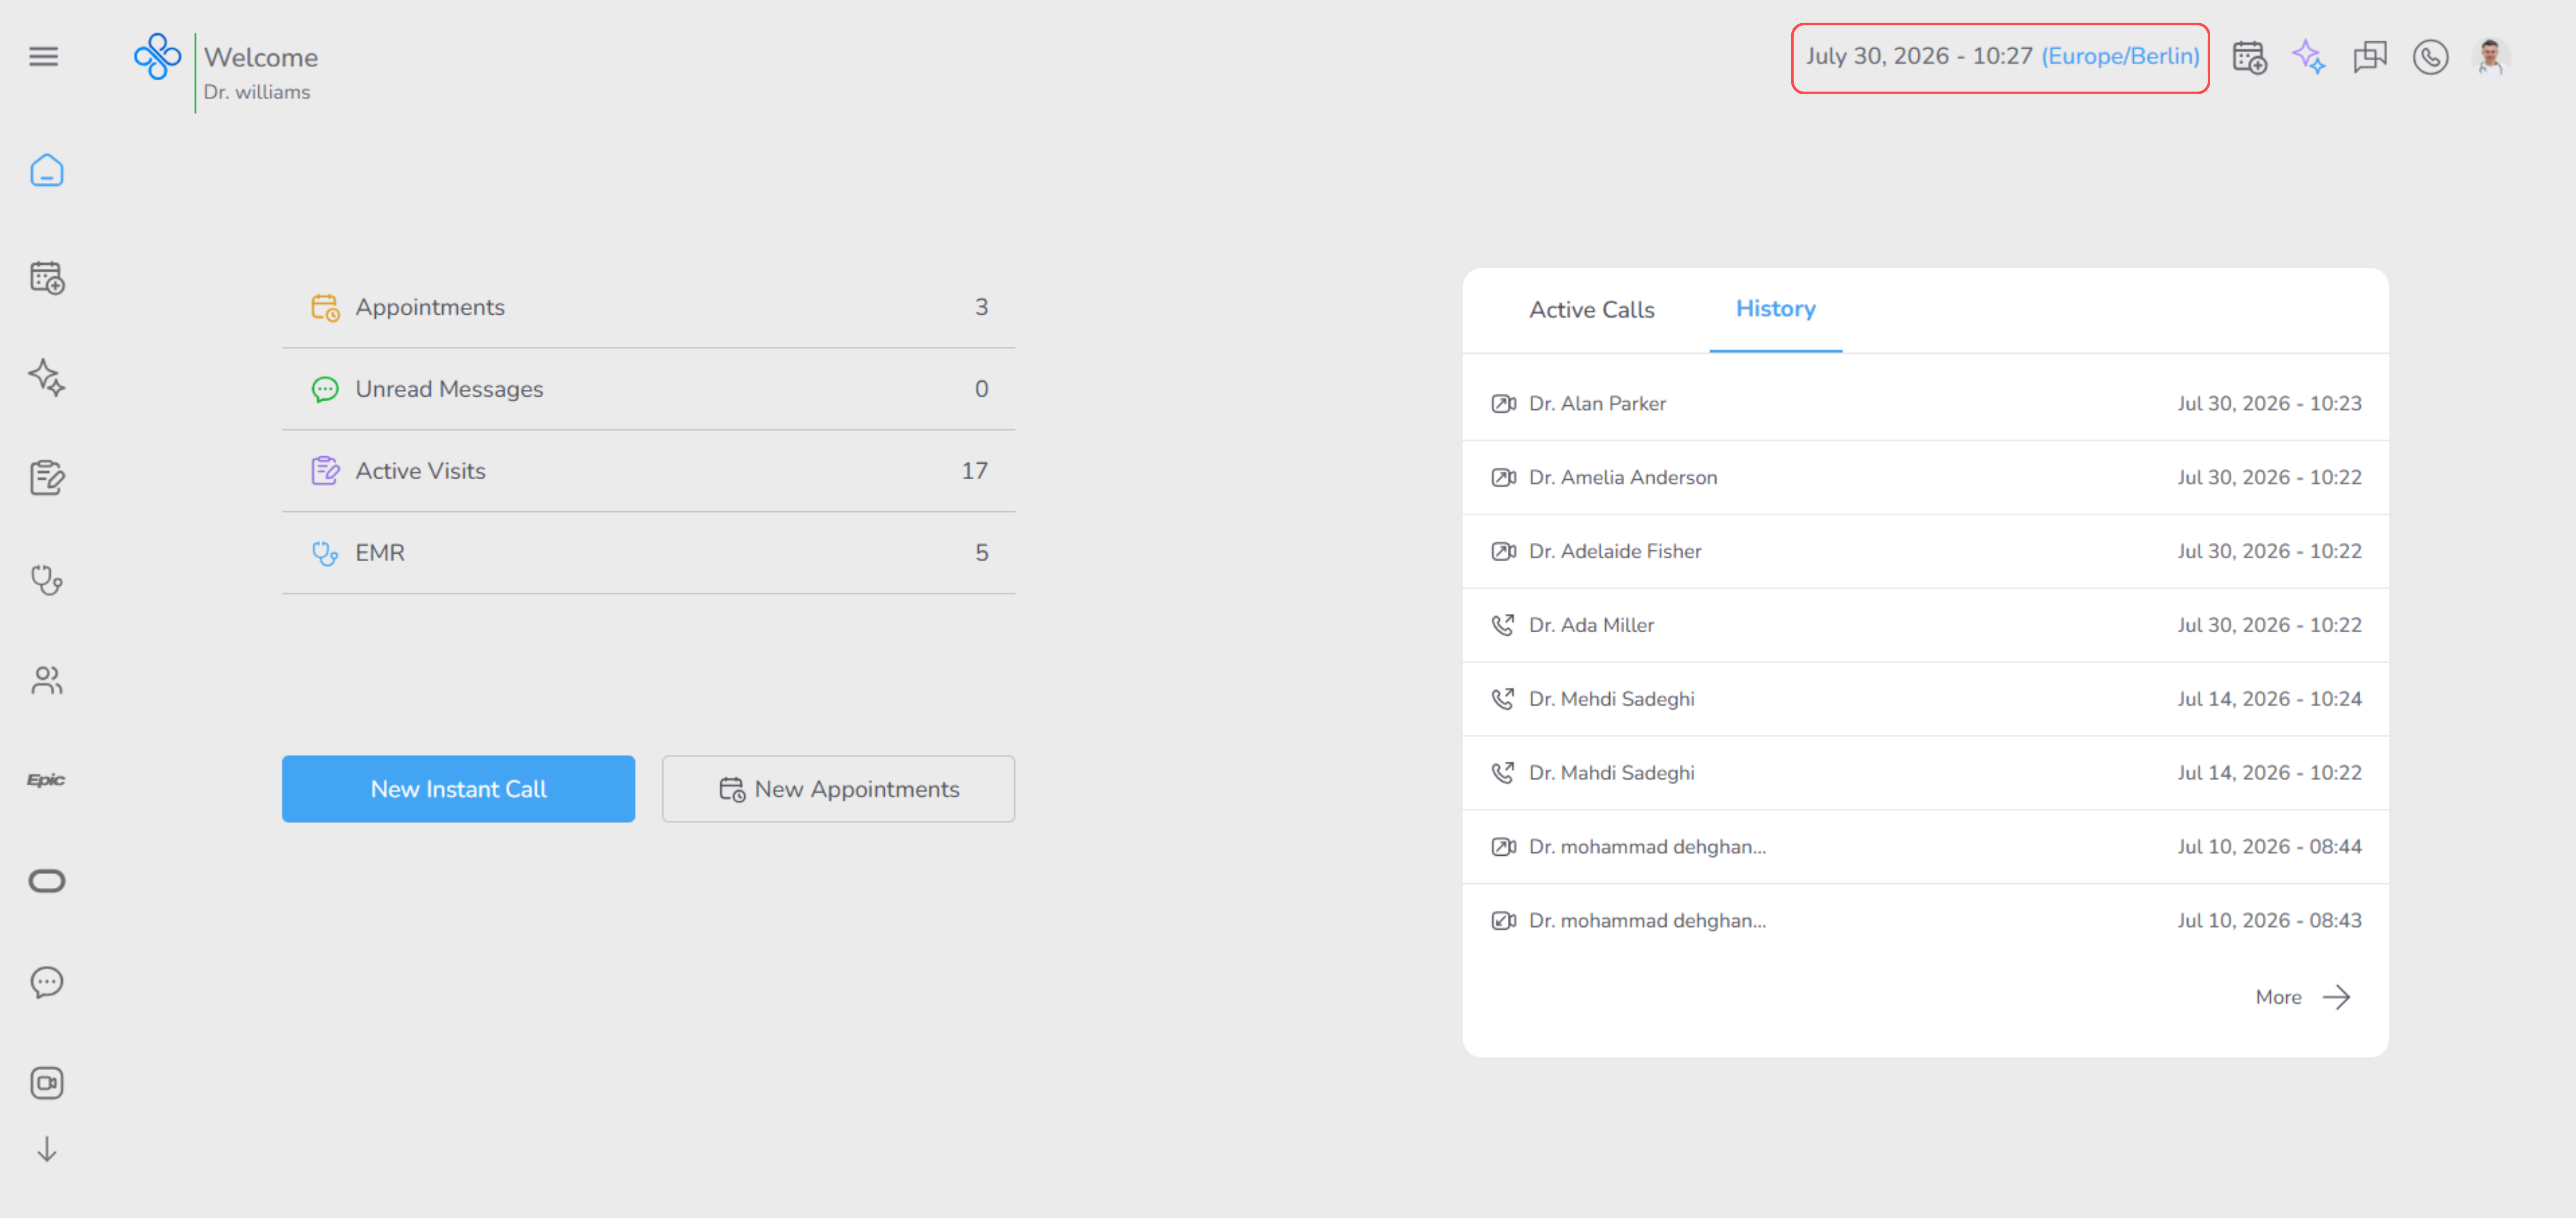
1. Date, Time, and Time Zone
- On the right side, you can always see the current date and time.
- The time zone is shown next to it and is based on your device settings until you manually update it in your profile settings.
- This helps you clearly understand appointment times, calls, and schedules without confusion.
2. Profile Menu
- Clicking on your profile avatar opens a dropdown menu.
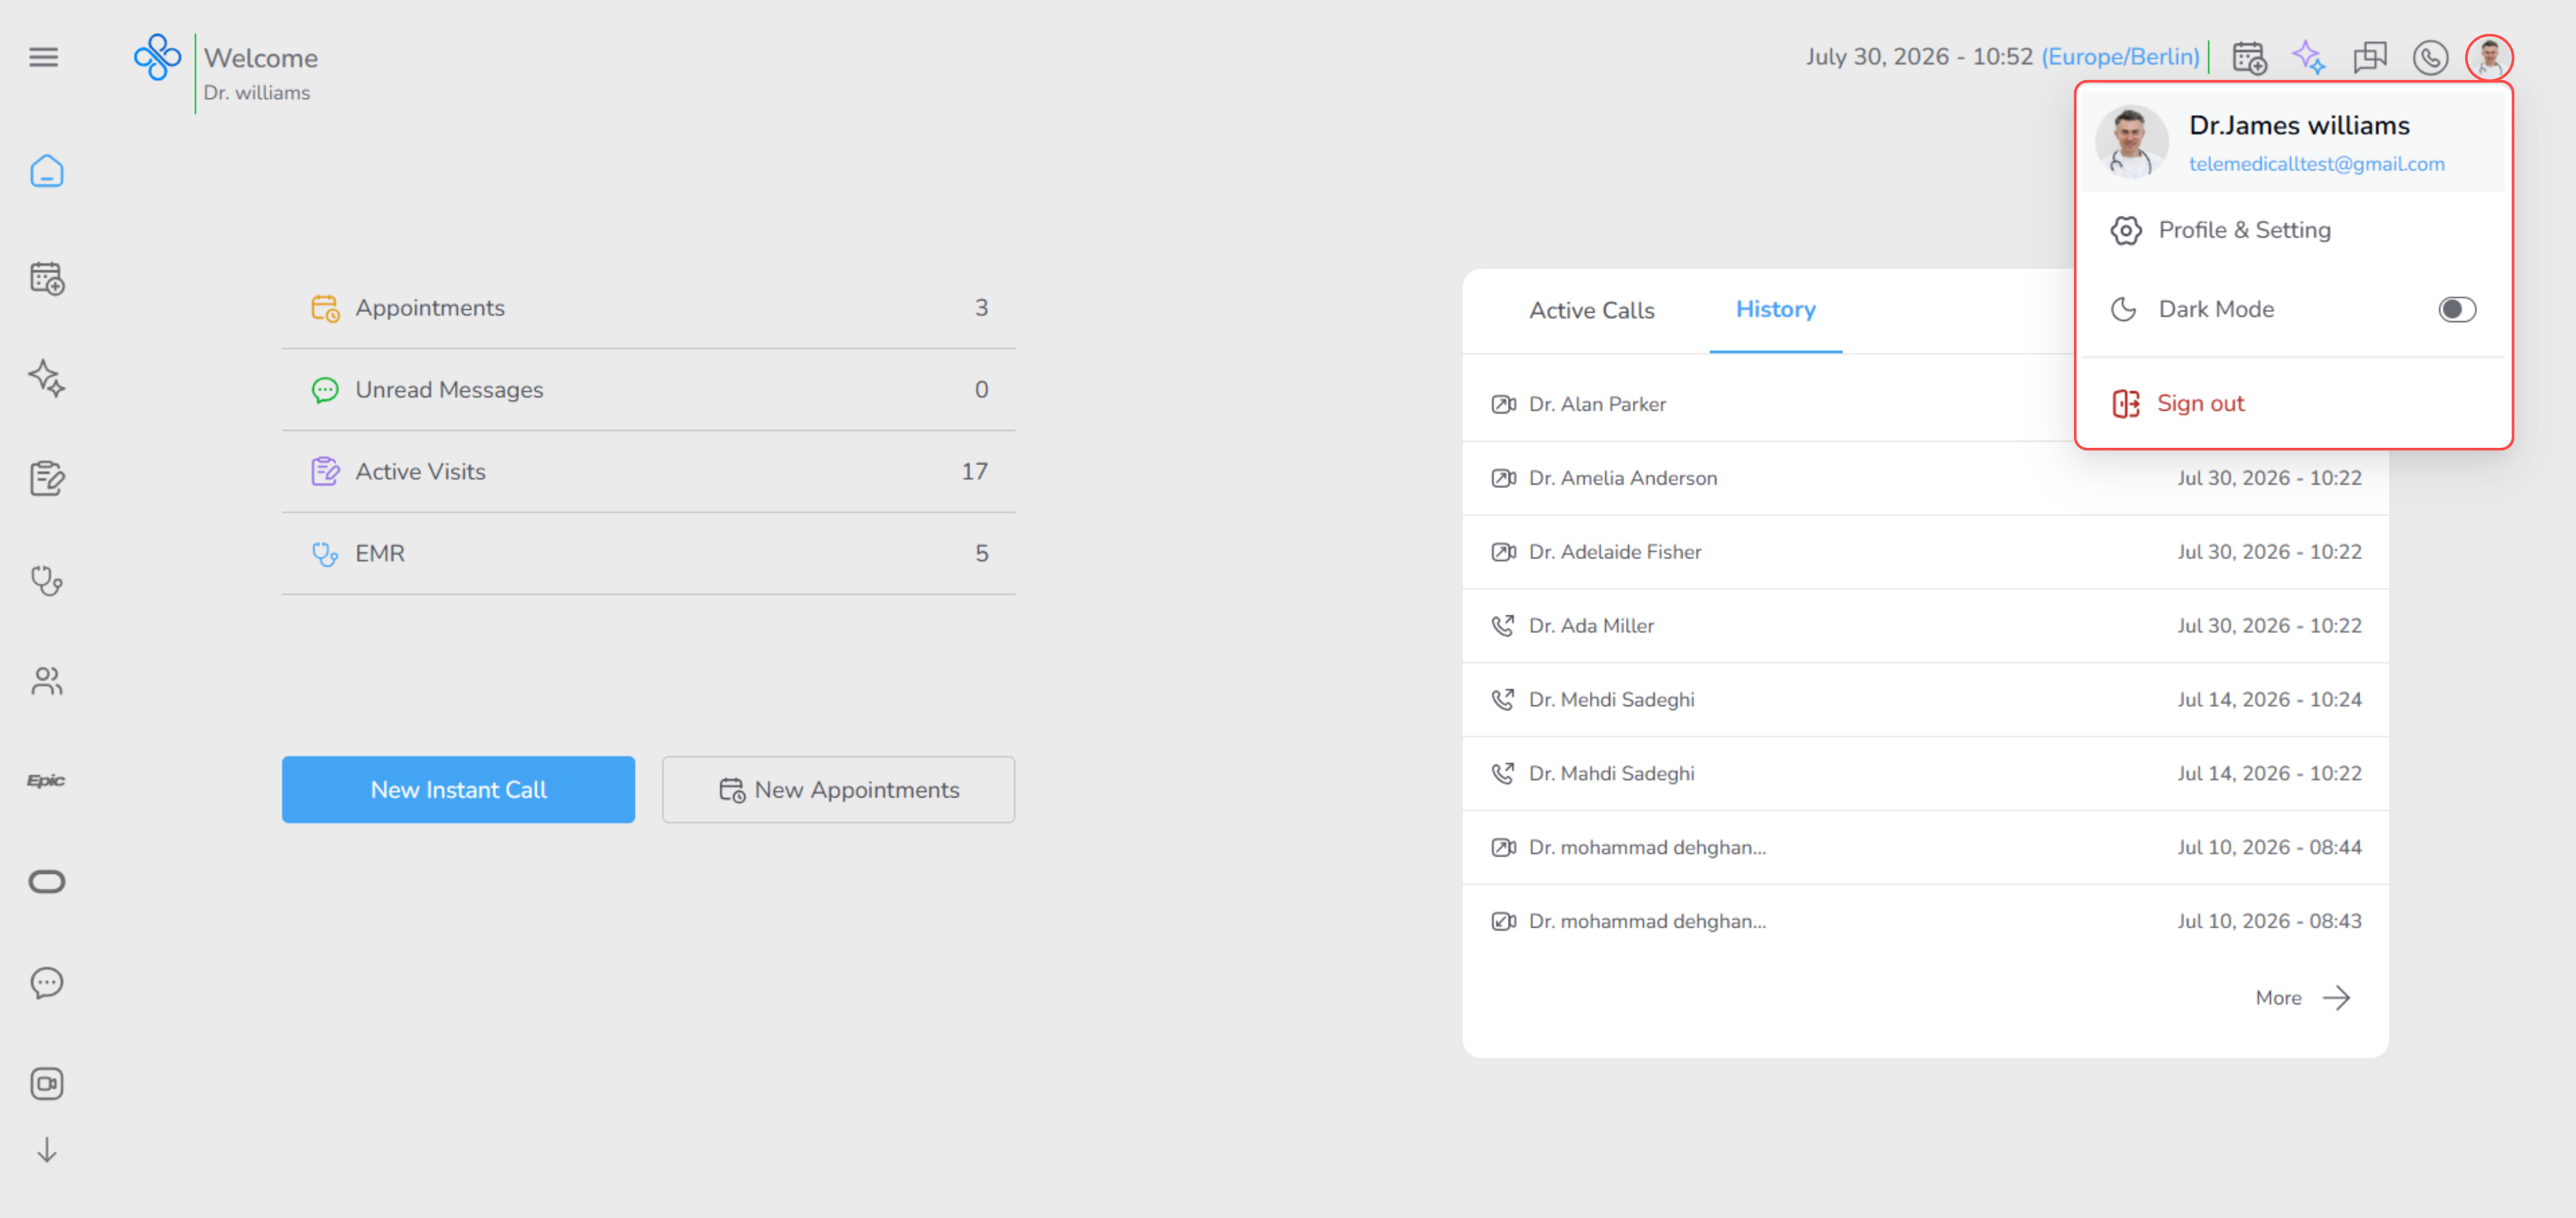
- From here, you can:
- Go to Profile & Settings to manage your account.
- Switch between Light Mode and Dark Mode.
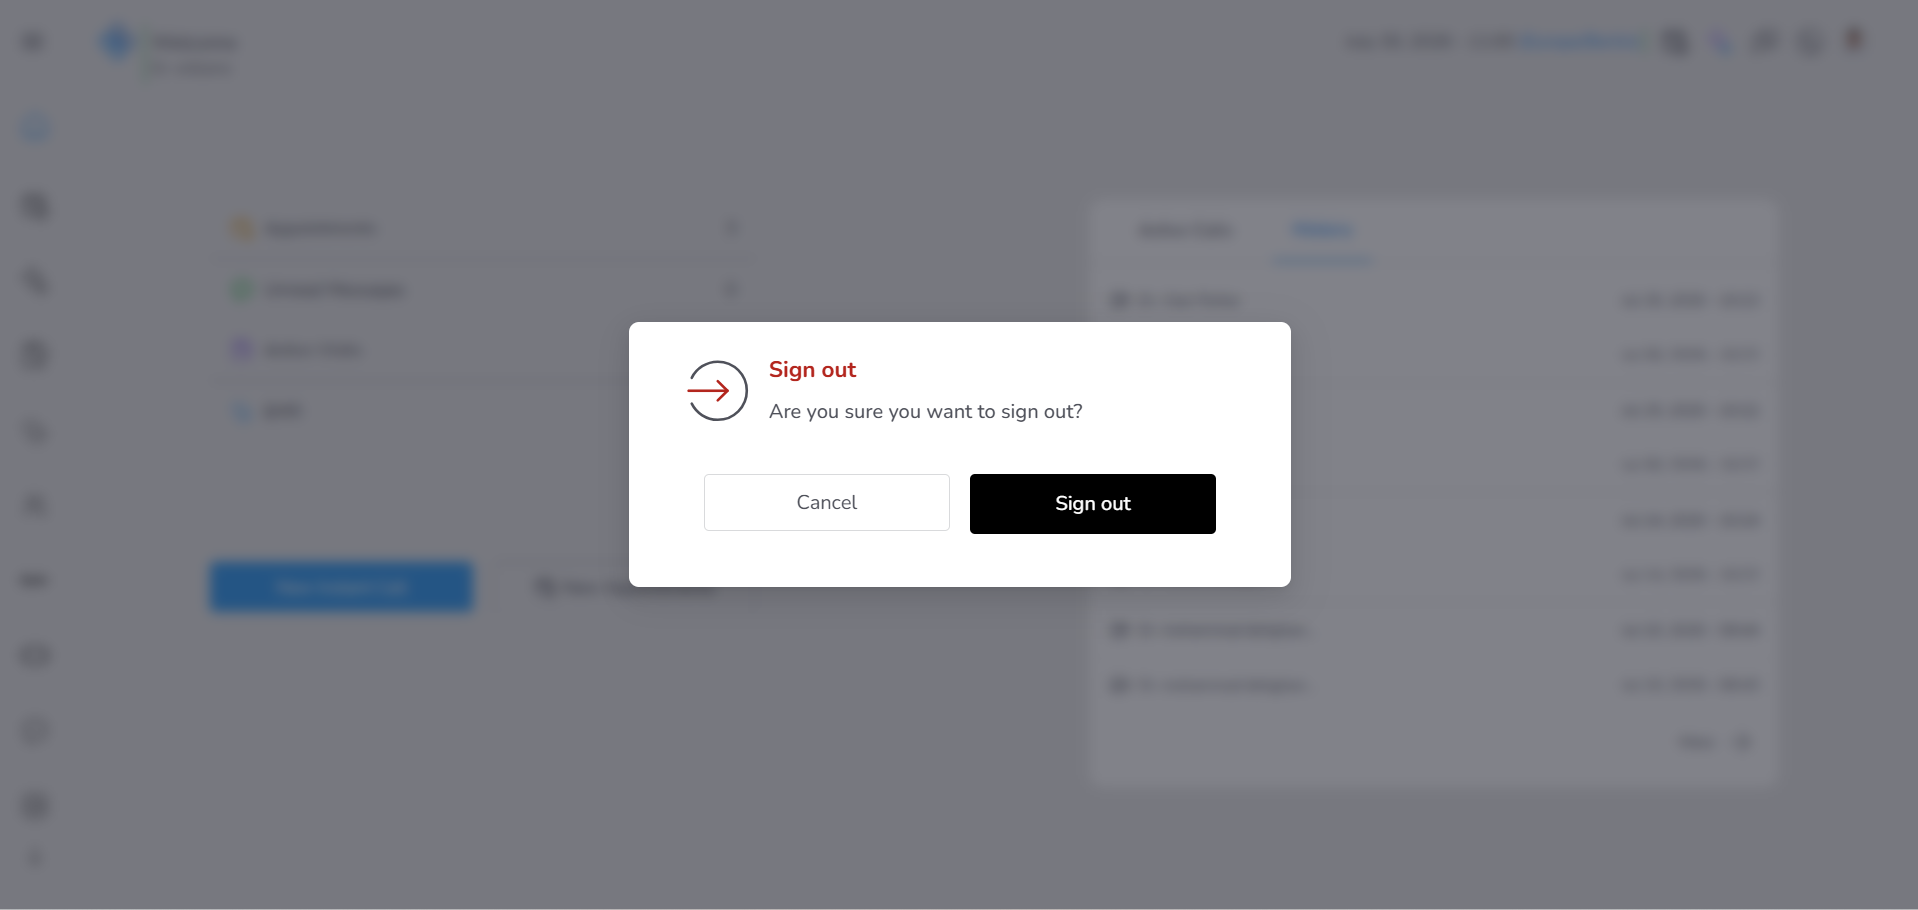
- Sign out of your account.
- When you choose Sign out, a confirmation modal appears asking:
- “Are you sure you want to sign out?”
- You can confirm or cancel safely.
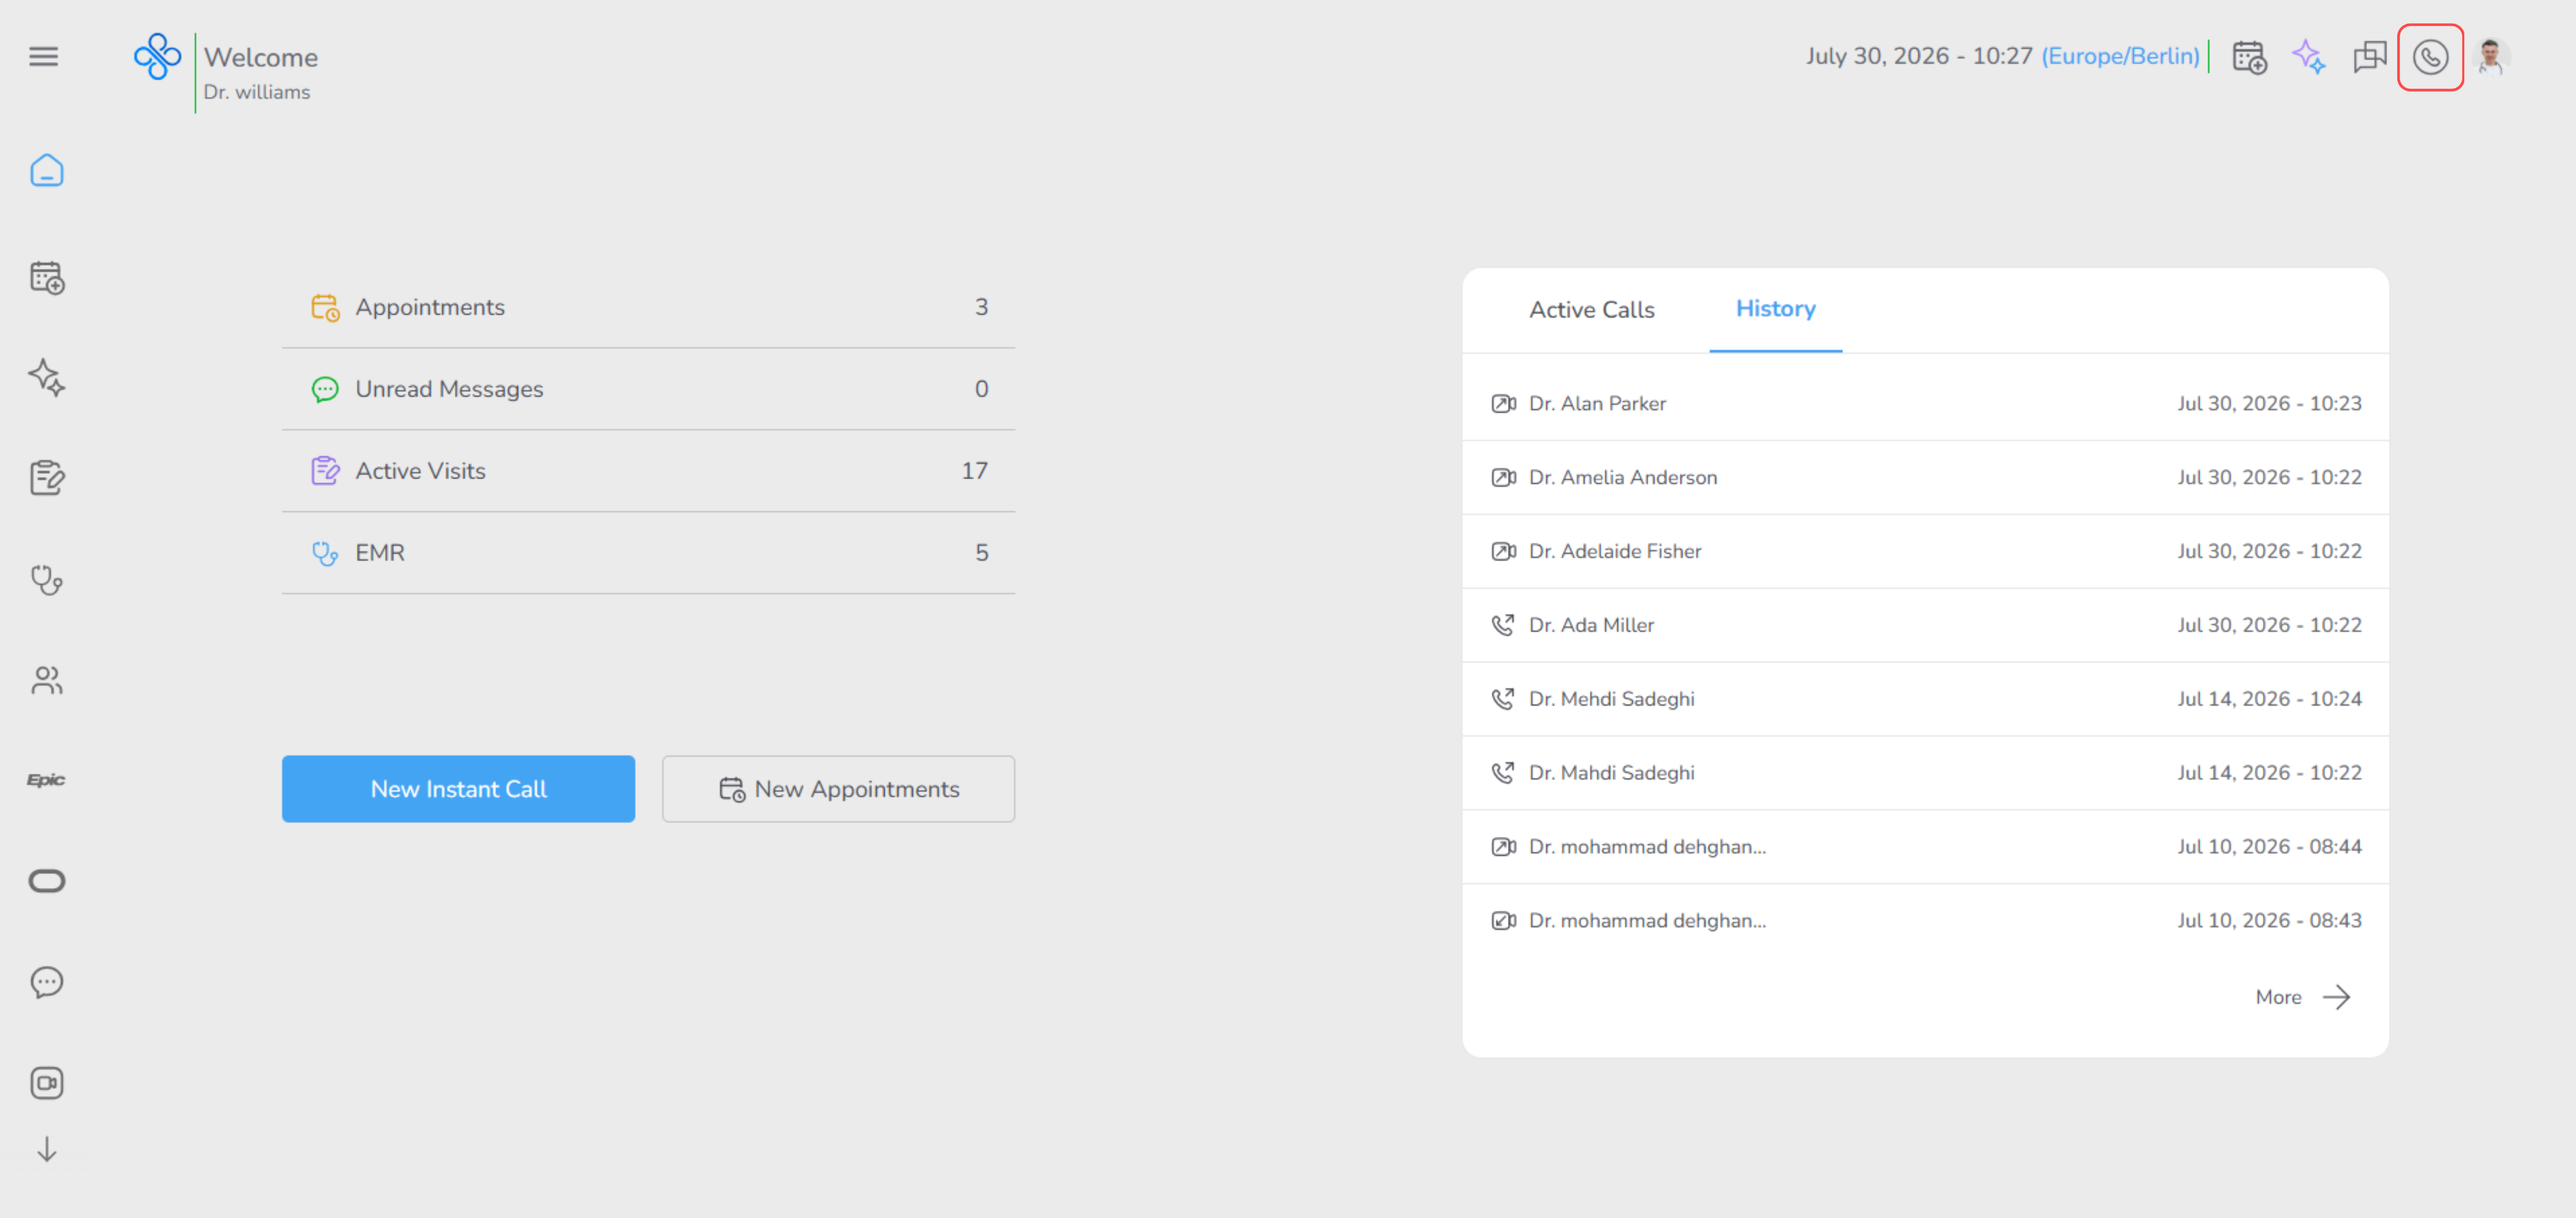
3. Call Icon
- The Call icon changes color based on call status:
- Yellow → You have a waiting (incoming) call or an appointment-related call

- Green → You are in an active call

- Yellow → You have a waiting (incoming) call or an appointment-related call
- Clicking it:
- If there is a waiting or active call → opens the call preview
- If no active call → opens the Calls page
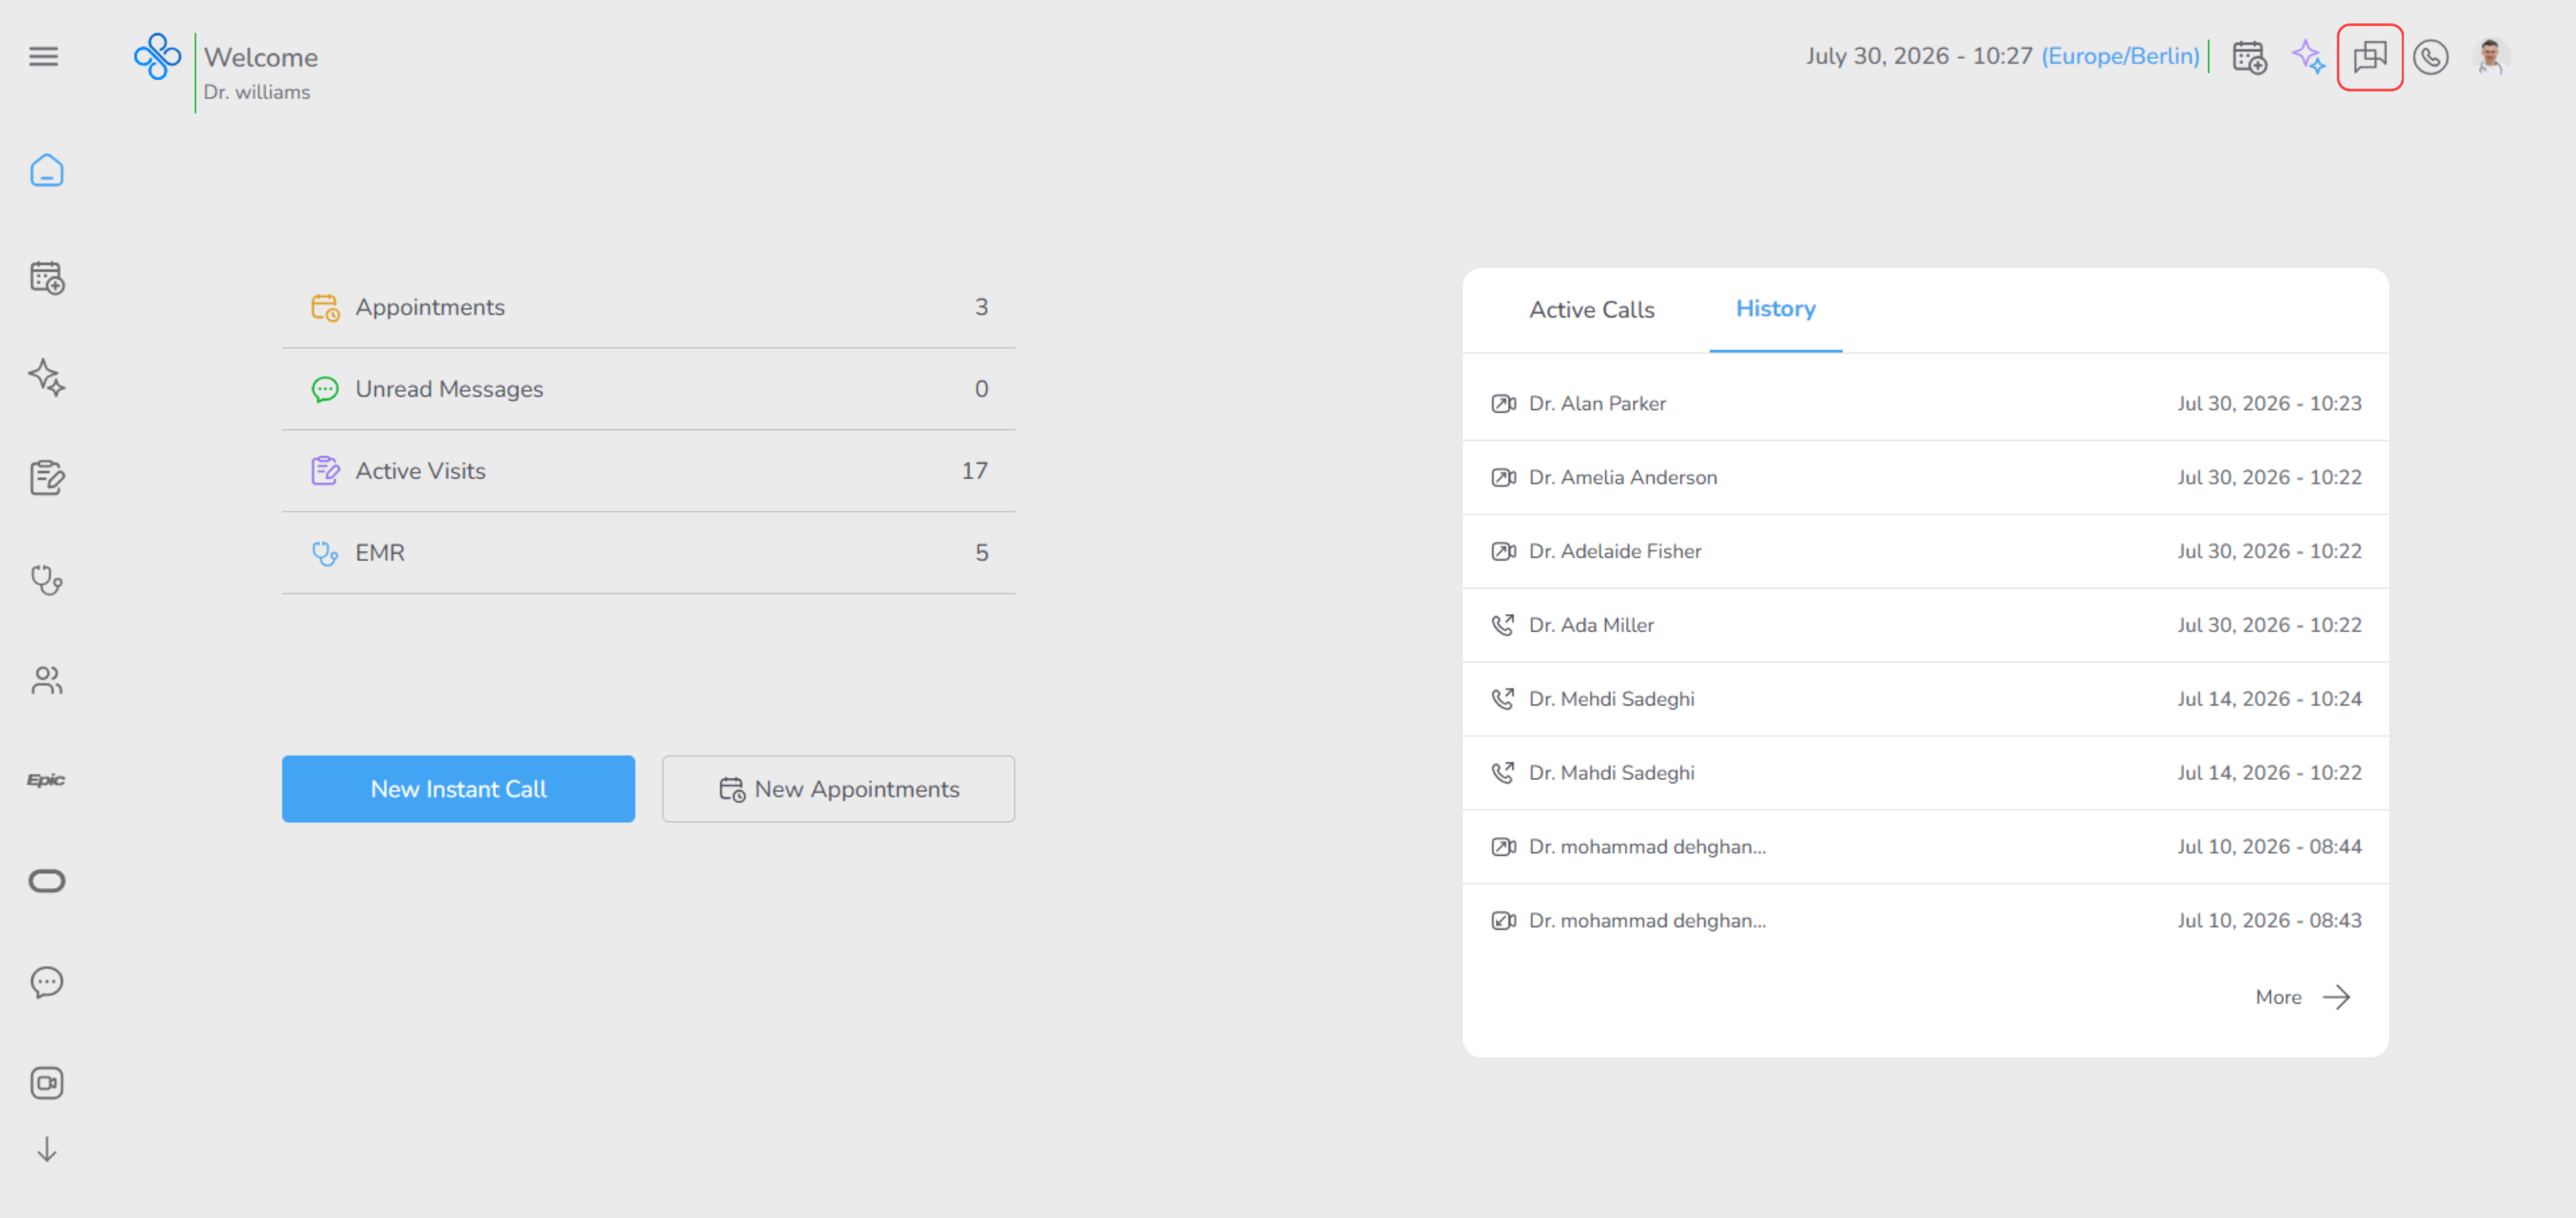
4. Chat Icon
- Clicking the chat icon opens the Messages page.
- Shows an indicator when there are unread messages.
5. Medi (AI Assist)
Click the Medi (AI Assist) icon in the top-right corner of the Dashboard to open the Medi panel.
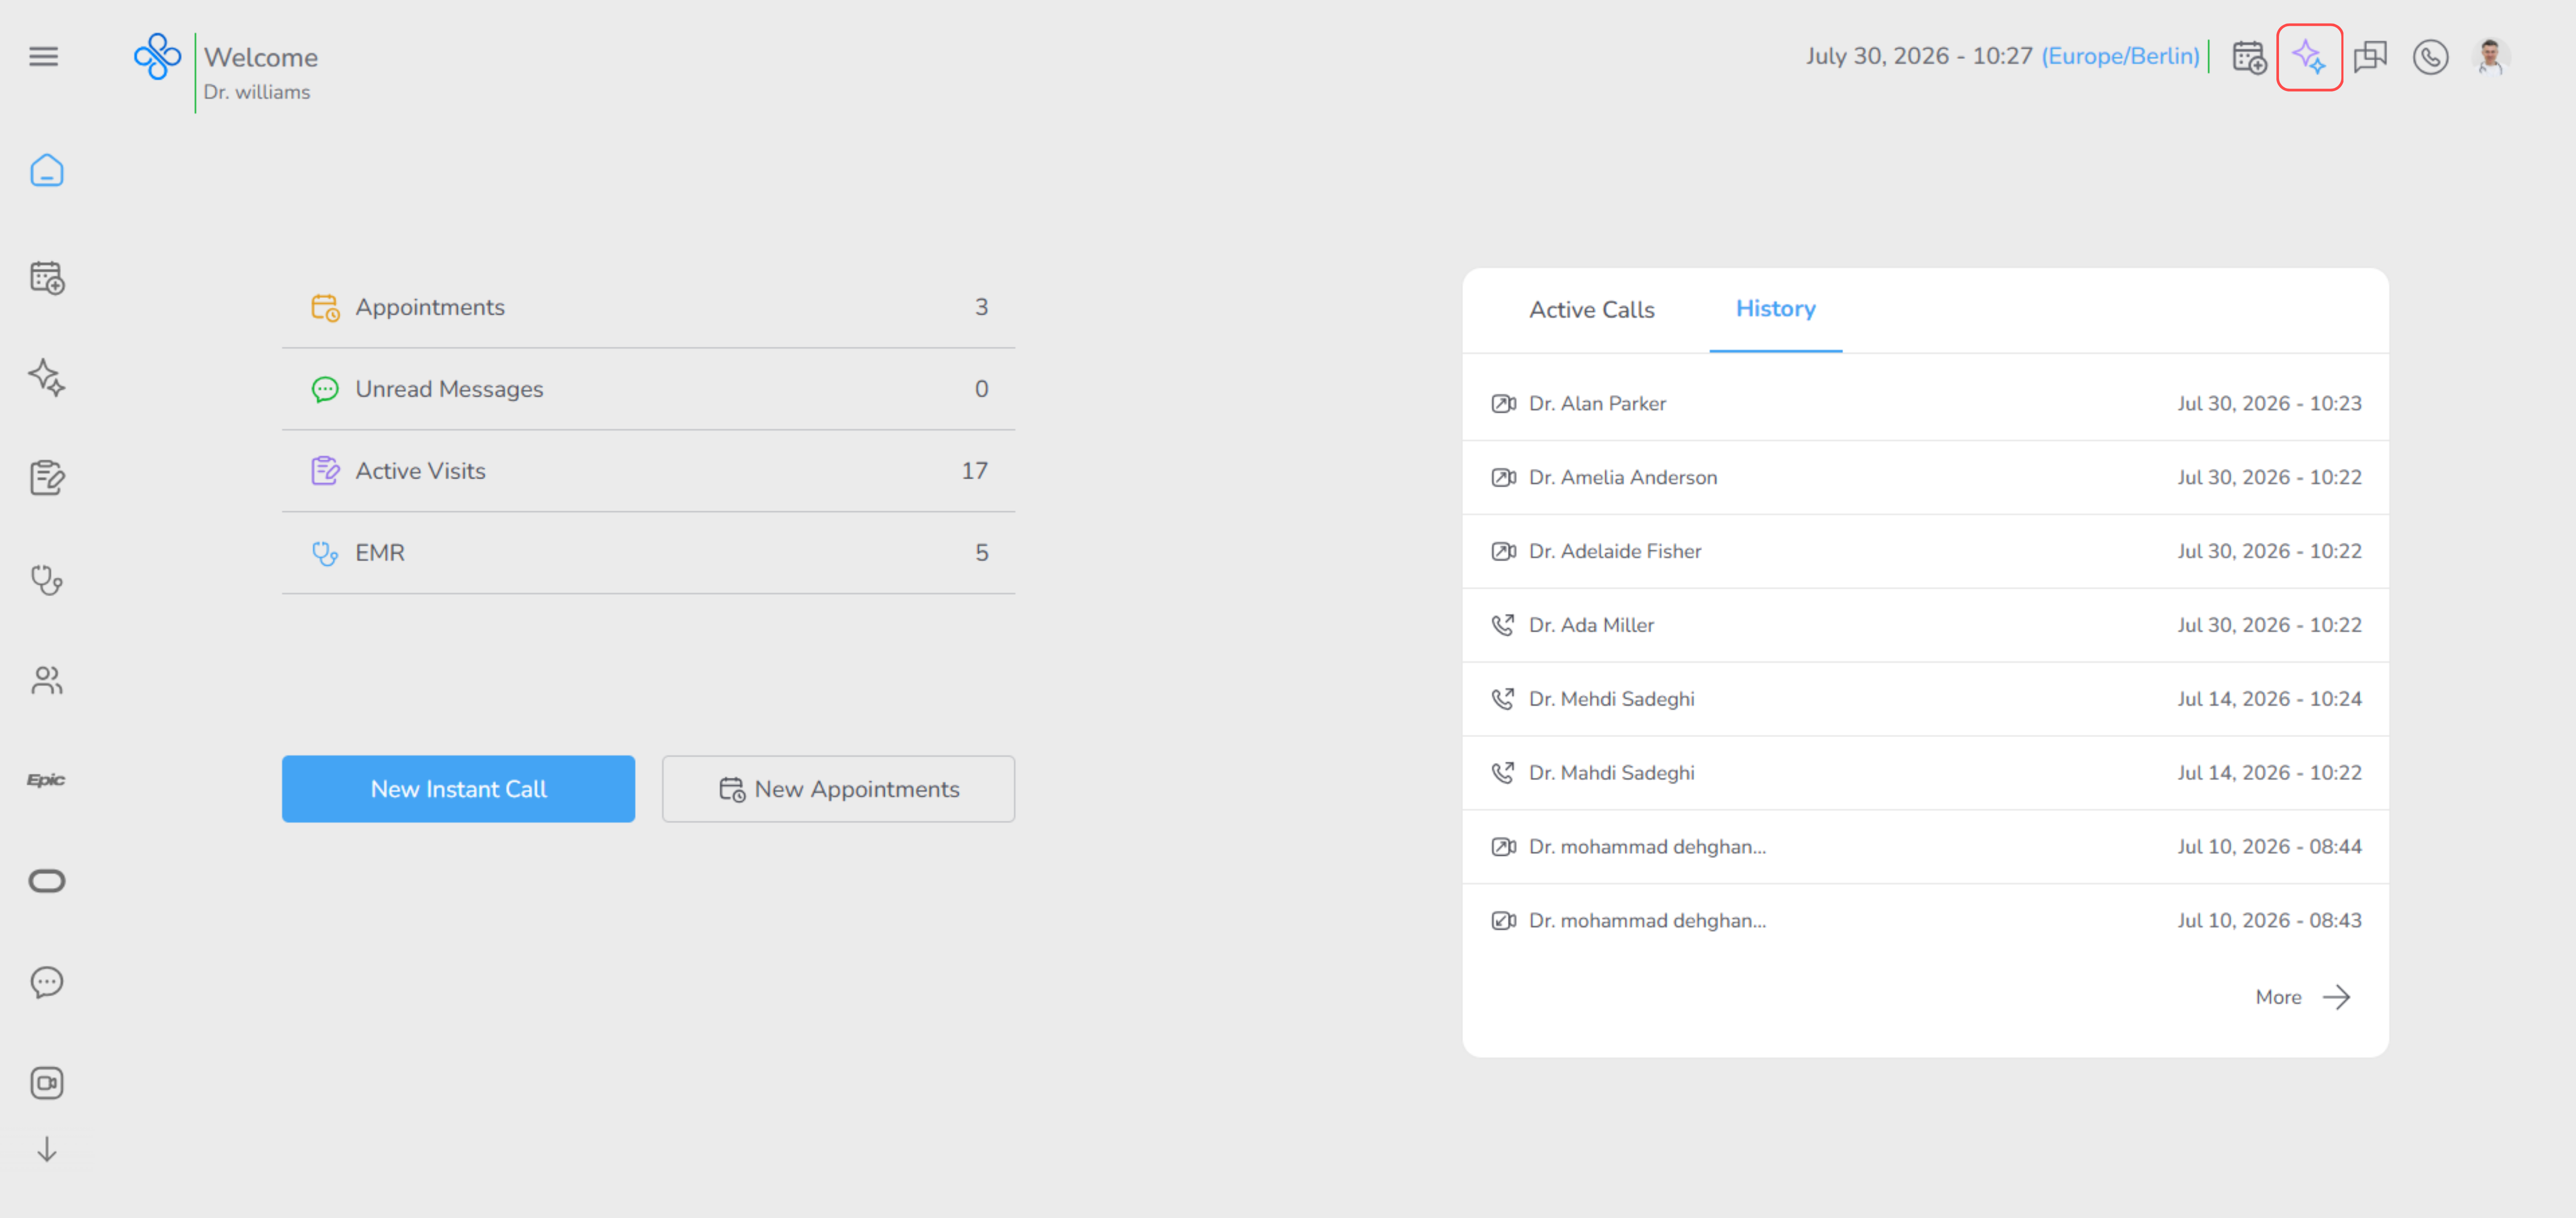
Medi allows you to quickly interact with the AI Assistant without leaving the page you are currently working on. This makes it easy to ask questions, review previous conversations or continue an existing discussion while staying focused on your current workflow.
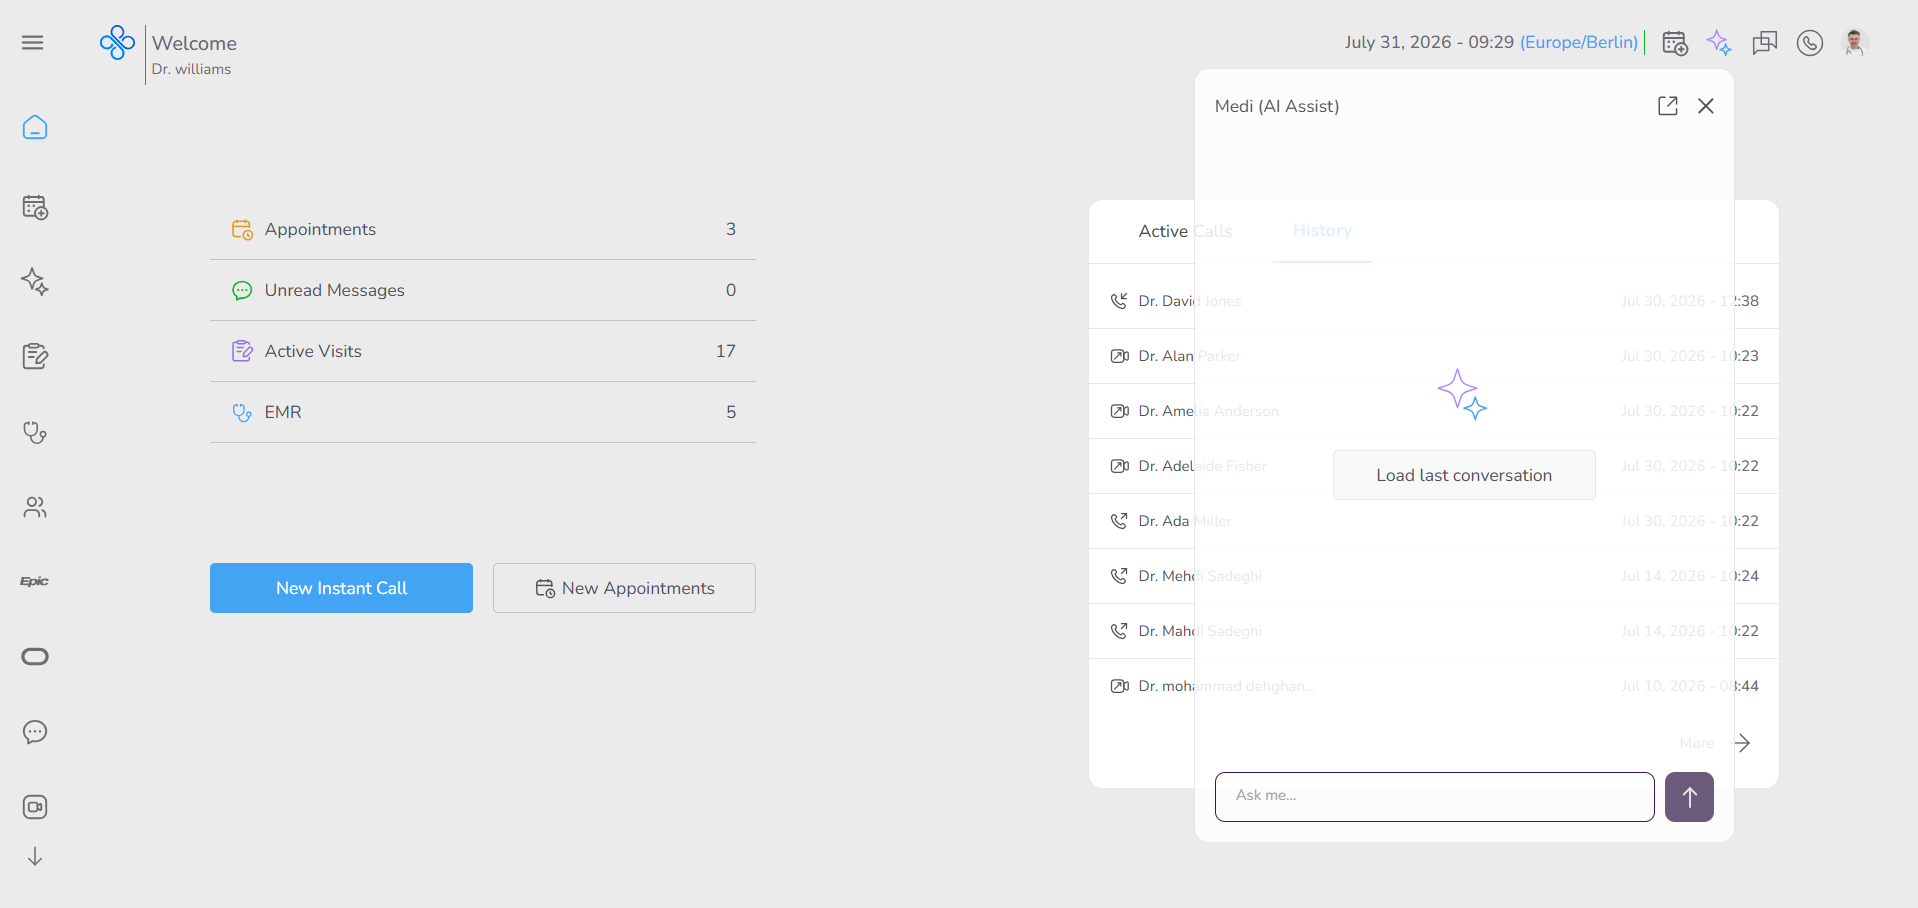
What You Can See
When the Medi panel opens, you will find the following sections:
- History tab for viewing your previous AI conversations.
- A message input field at the bottom where you can type a new question.
- A Send button to submit your message.
- An Open in Full Screen button that opens the complete Medi workspace.
- A Close button to dismiss the panel.
If you have previous AI conversations but have not started a new conversation in the current session, a Load last conversation button appears in the center of the panel.
Clicking this button opens your most recent conversation so you can continue where you left off.
How to Use Medi
Follow these steps to start using Medi:
- Click the Medi (AI Assist) icon in the Dashboard header.
- Type your question in the message input field.
- Press Enter or click the Send button.
- Wait while Medi processes your request.
- Review the response displayed in the conversation panel.
You can continue asking follow-up questions within the same conversation without losing context.
Examples of questions you can ask include:
- Clinical questions
- Medical guideline clarification
- Treatment recommendations
- Drug information
- General medical knowledge
- Questions about using the platform
Continue Previous Conversations
Select the History tab to view your previous AI conversations.
Choose any conversation to continue working from where you previously stopped.
If the panel displays the Load last conversation button, click it to instantly restore your latest conversation without searching through the history list.
Open the Ai Assistant Workspace
Click the Open in Full Screen button at the top of the panel to open the Ai Assistant workspace.
The full workspace provides additional space for longer conversations and allows you to:
- View all conversations.
- Continue previous chats.
- Start new conversations.
- Work comfortably with longer AI responses.
- Focus entirely on AI interactions.
For more information about all available AI features, refer to the Private (https://app.clickup.com/9015704788/docs/8cp1f6m-2455/8cp1f6m-1475) .
Why Use Medi from the Dashboard?
Using Medi directly from the Dashboard allows you to get AI assistance without interrupting your current workflow.
You can quickly:
- Verify clinical information.
- Ask medical questions.
- Continue previous AI discussions.
- Receive AI assistance while working with appointments, calls, visits or patient records
This helps you save time and access the information you need without leaving the Dashboard.
6. Calendar
Click the Calendar icon in the top-right corner of the Dashboard to open the calendar panel.
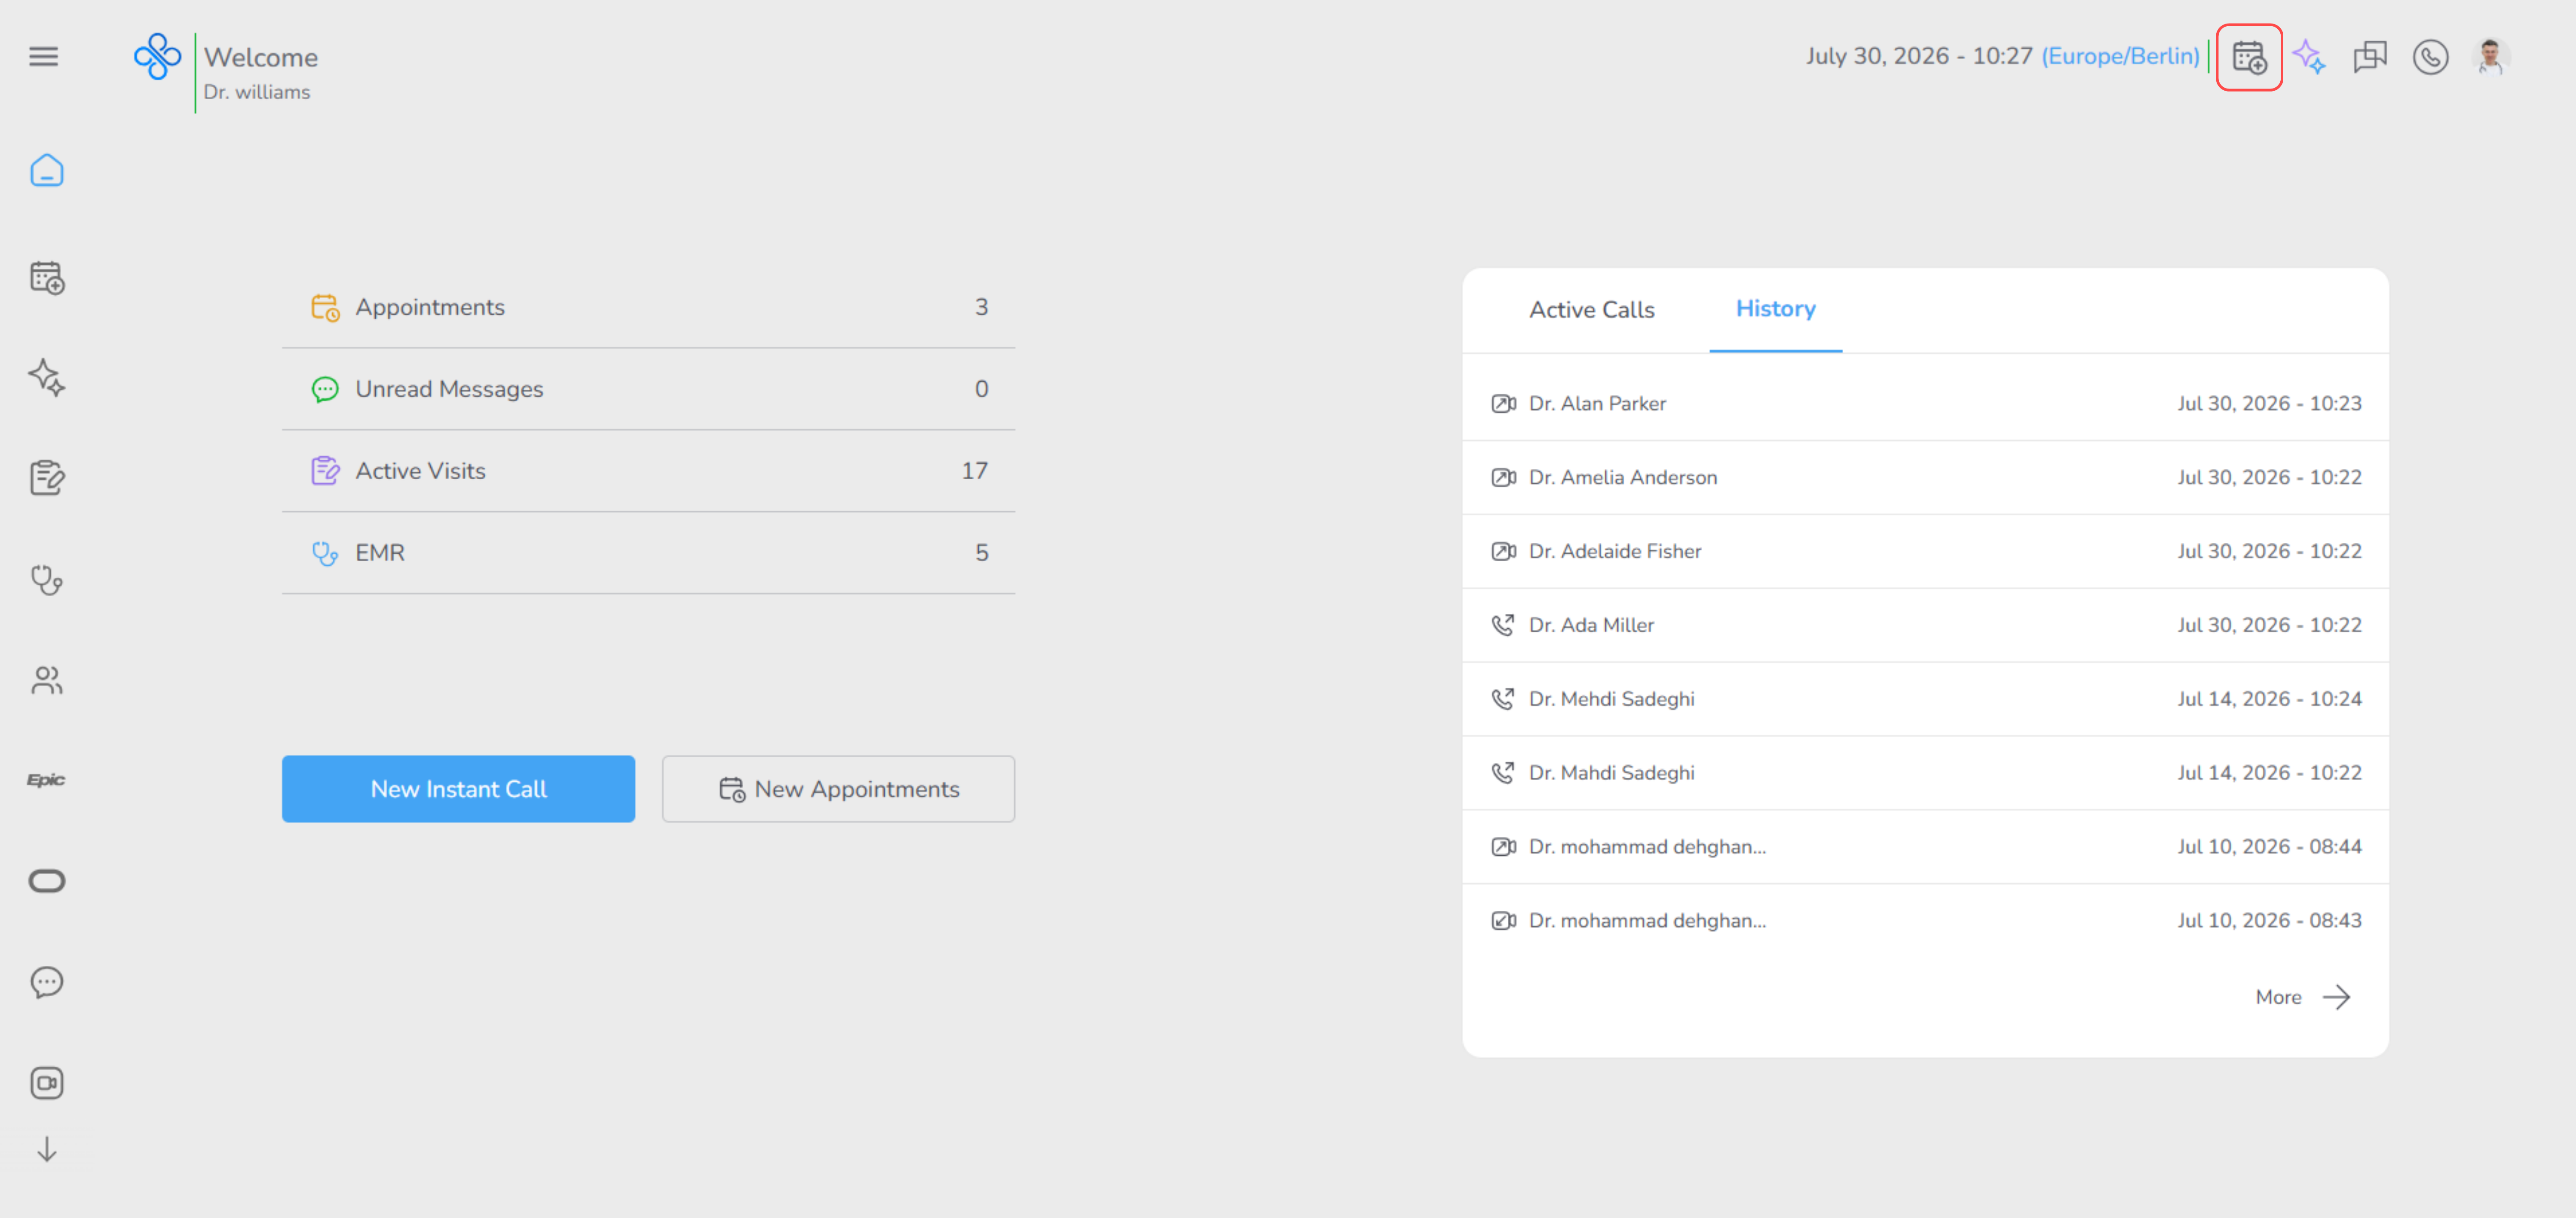
The calendar panel gives you quick access to your schedule without leaving the page you are currently working on. You can review your appointments, check available time slots and start creating new appointments directly from this panel.
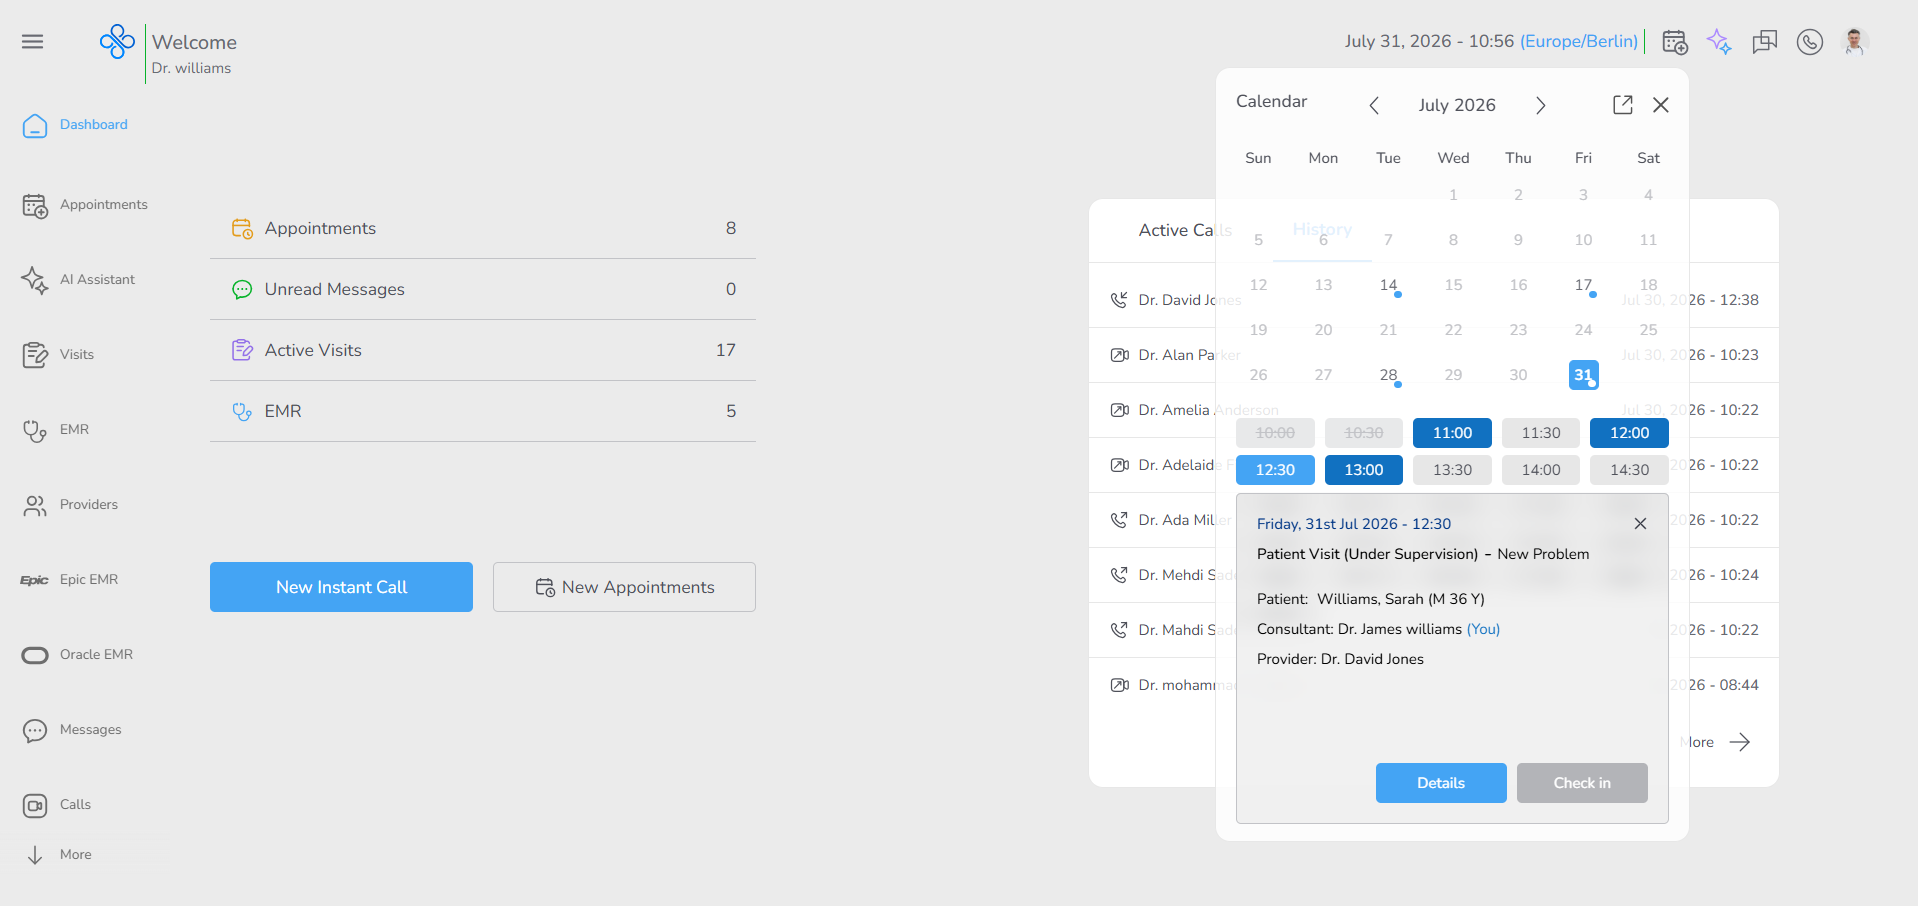
What You Can See
When the calendar panel opens, you will find the following sections:
- A monthly calendar showing the current month.
- Previous and Next Month navigation buttons.
- Daily appointment indicators.
- A list of time slots for the selected date.
- An appointment information panel that changes based on the selected time slot.
- An Open in Full Screen button.
- A Close button.
Calendar Overview
- The current month is displayed by default when the calendar opens.
- Each day may display a small blue dot beneath the date.
- A blue dot indicates that at least one appointment is scheduled for that day.
- Dates without a dot do not have any scheduled appointments.
- You can move between months using the Previous Month and Next Month buttons.
- Click any date to display its available time slots.
Viewing daily time slots
- After selecting a date, all time slots for that day appear below the calendar.
- Each time slot visually shows its status, so you can understand it at a glance.
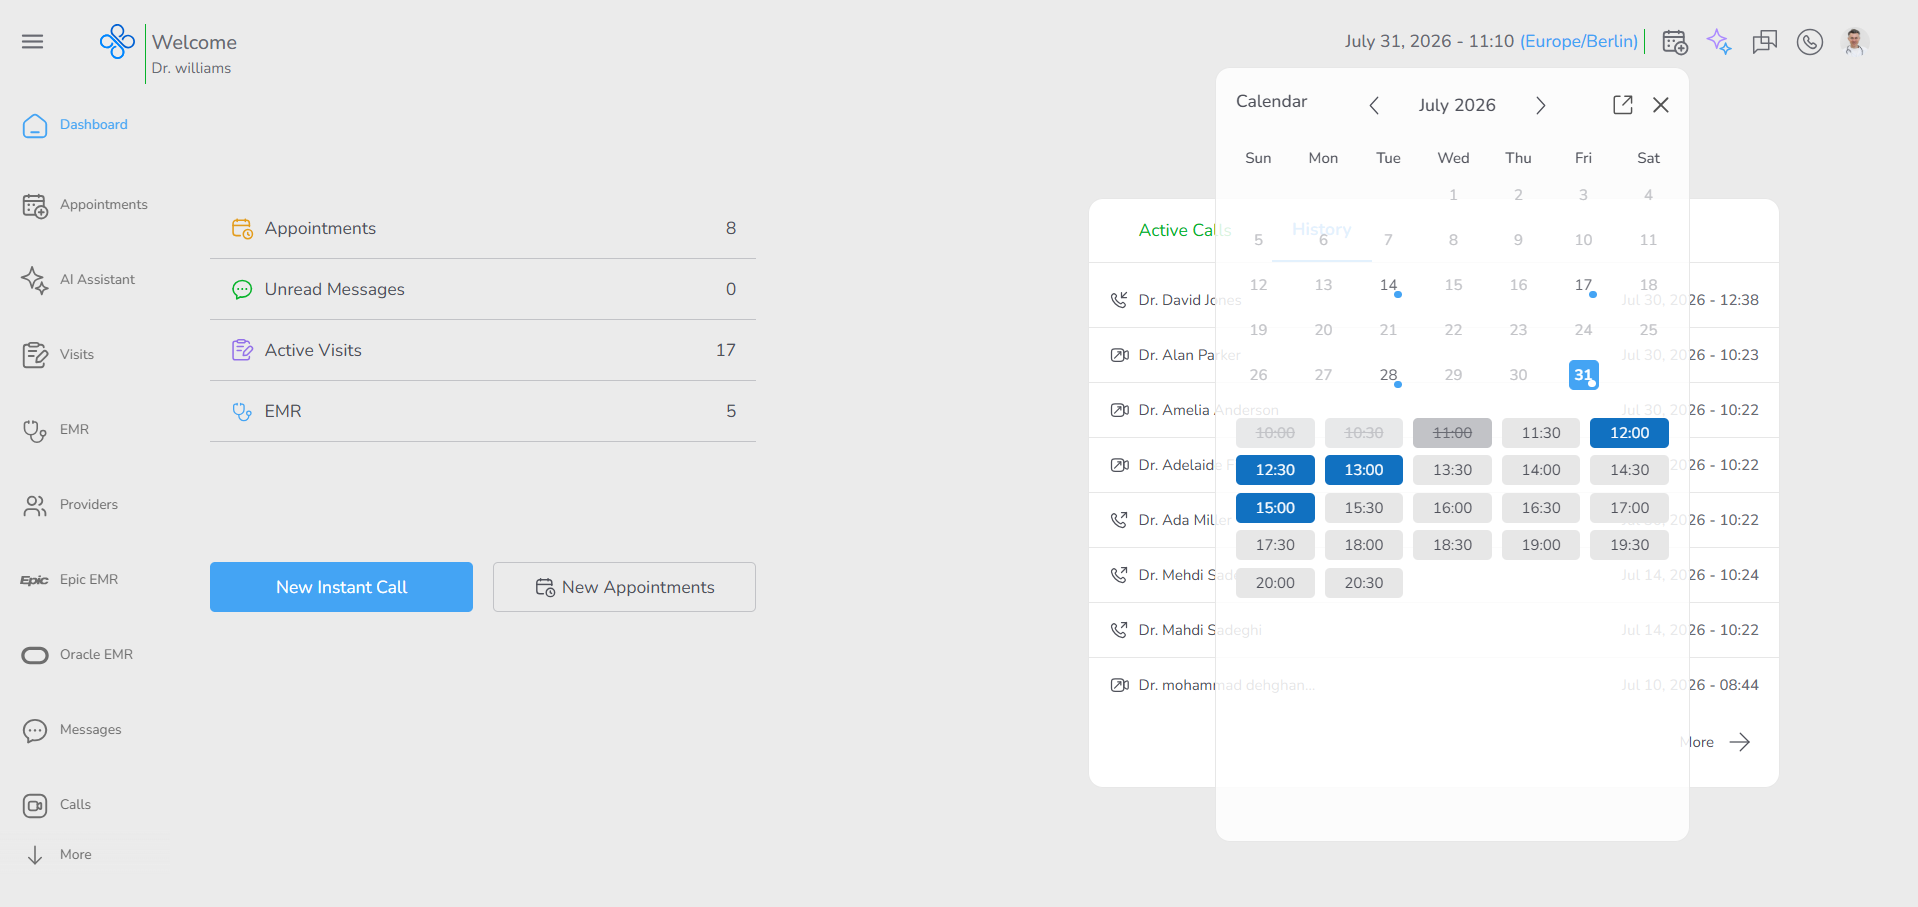
Common time slot states:
- Past time slot
- Shown in lighter gray.
- No action is available.
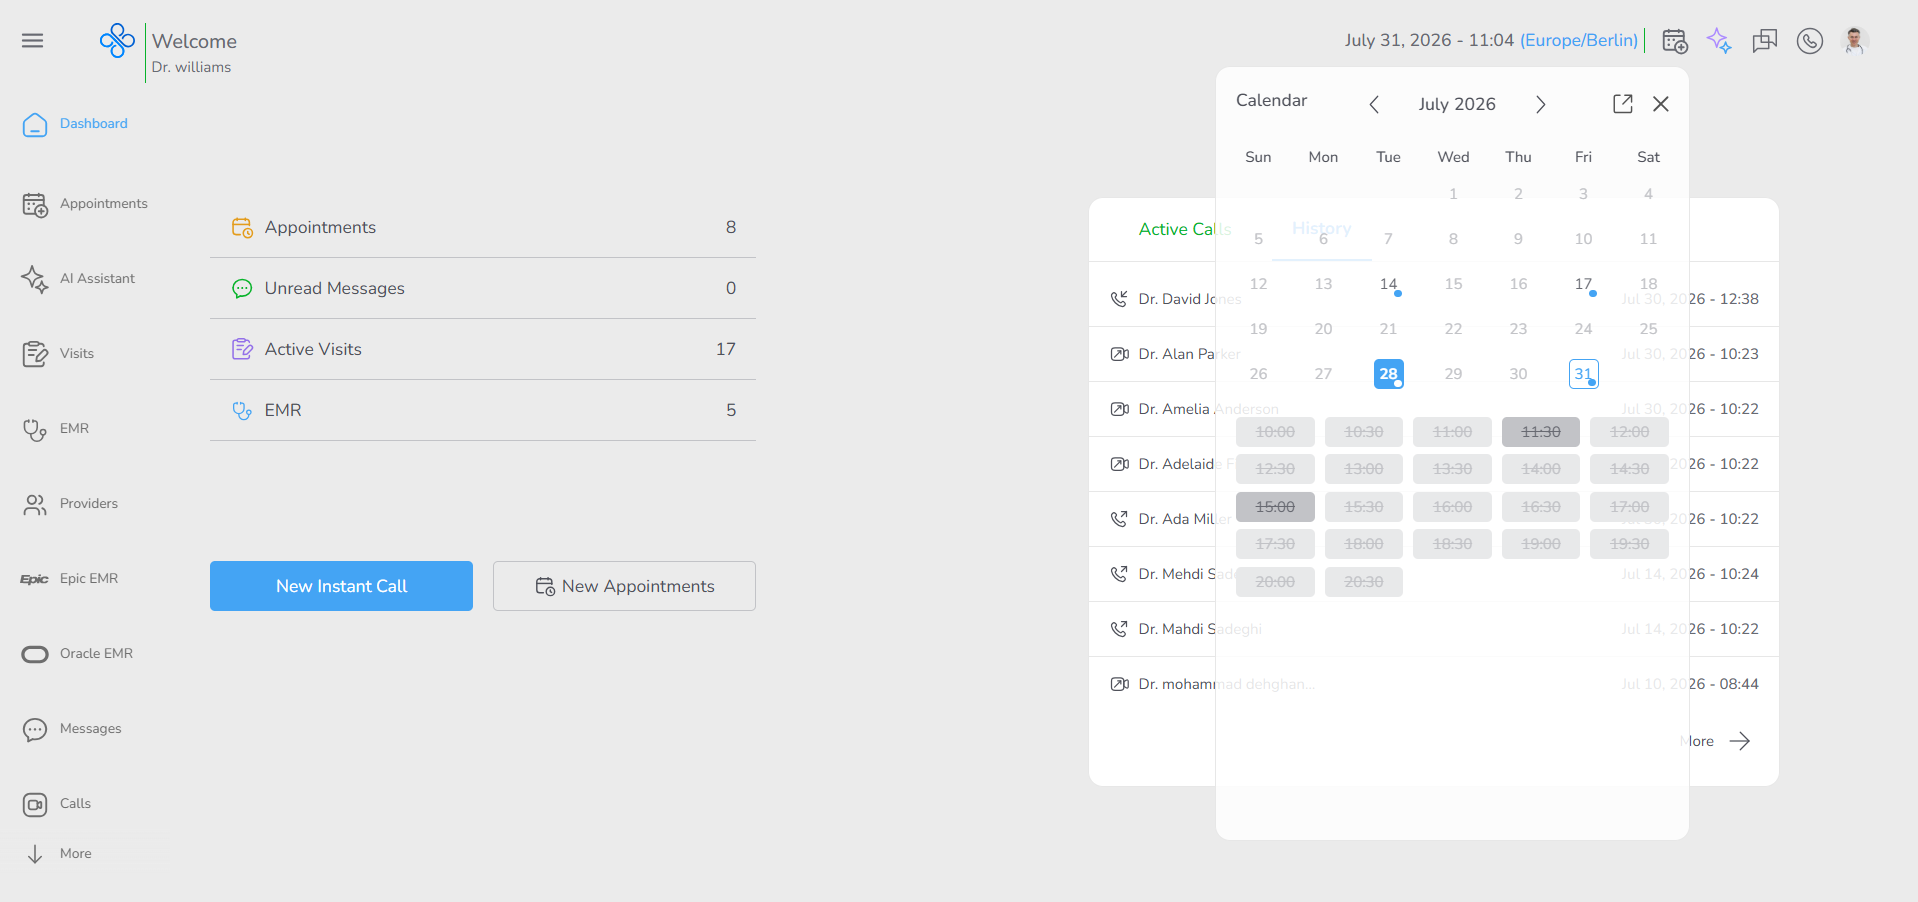
- Available Time Slot
- An available time slot indicates that no appointment has been scheduled for that time.
- You can use this slot to create a new appointment.
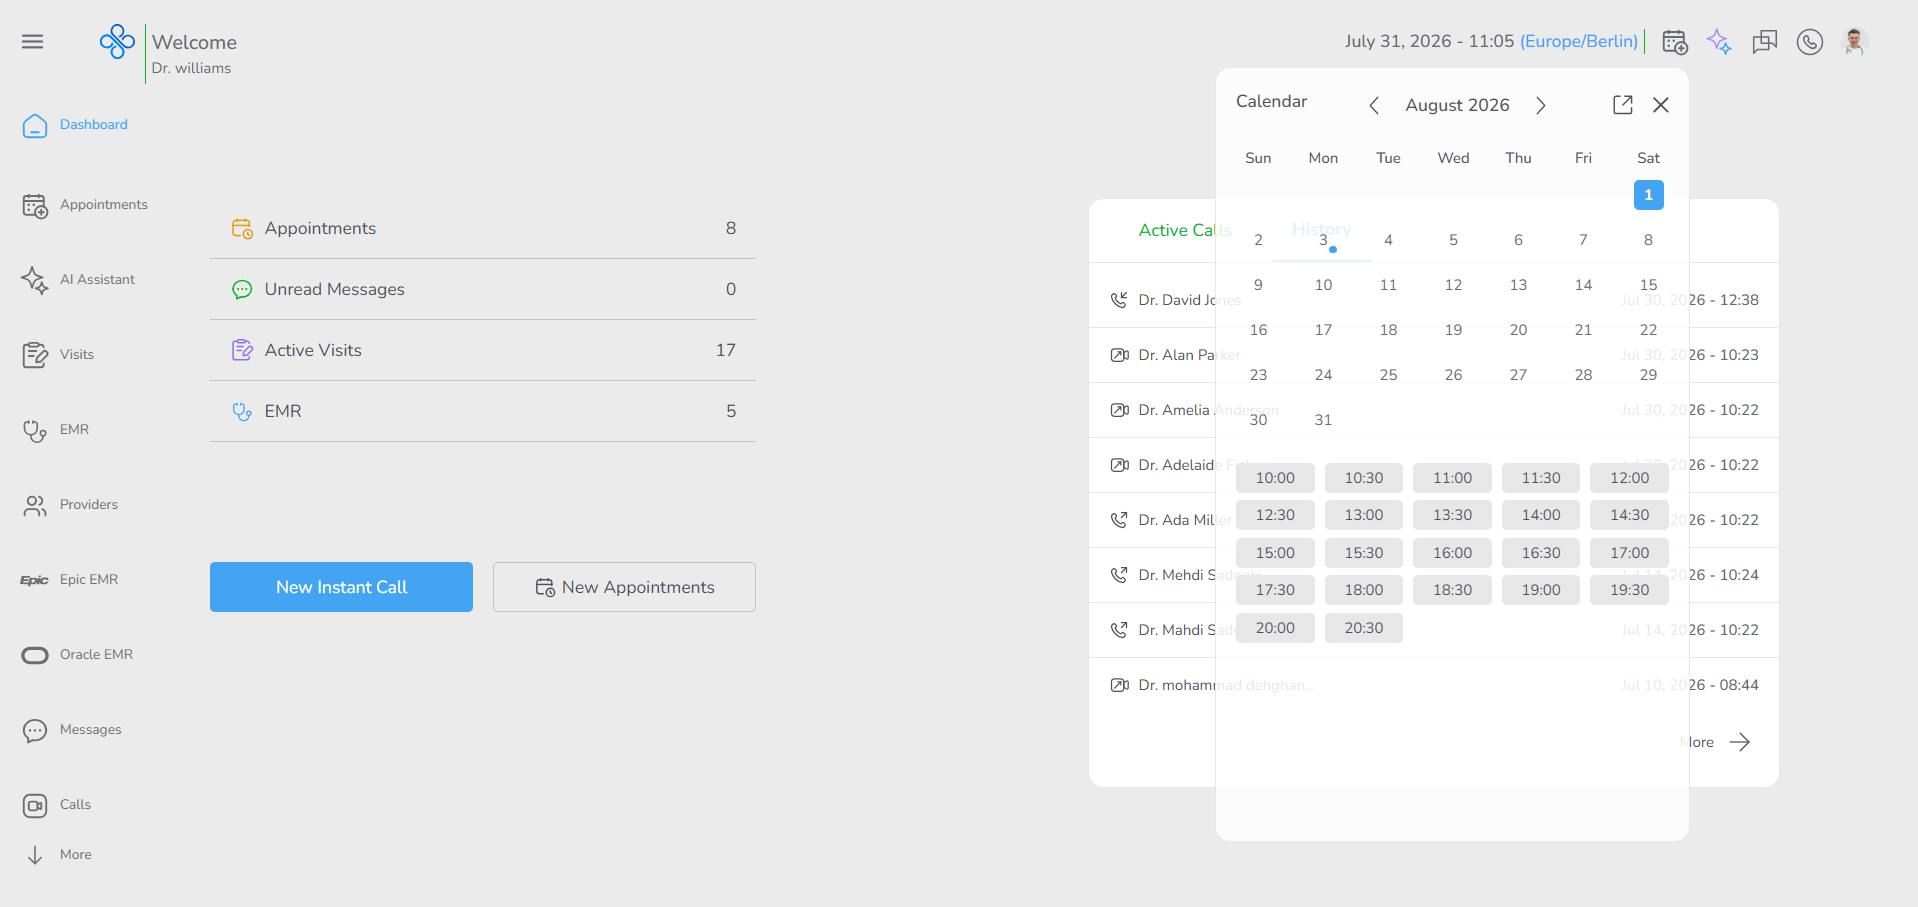
- Booked Time Slot
- Booked appointments are displayed as blue time slots, making them easy to identify in your daily schedule.
Selecting a time slot with an appointment
When you click on a time slot that already has an appointment:
- An appointment details box opens inside the calendar area.
- You can see key information such as:
- Appointment type
- Date and time
- Current status
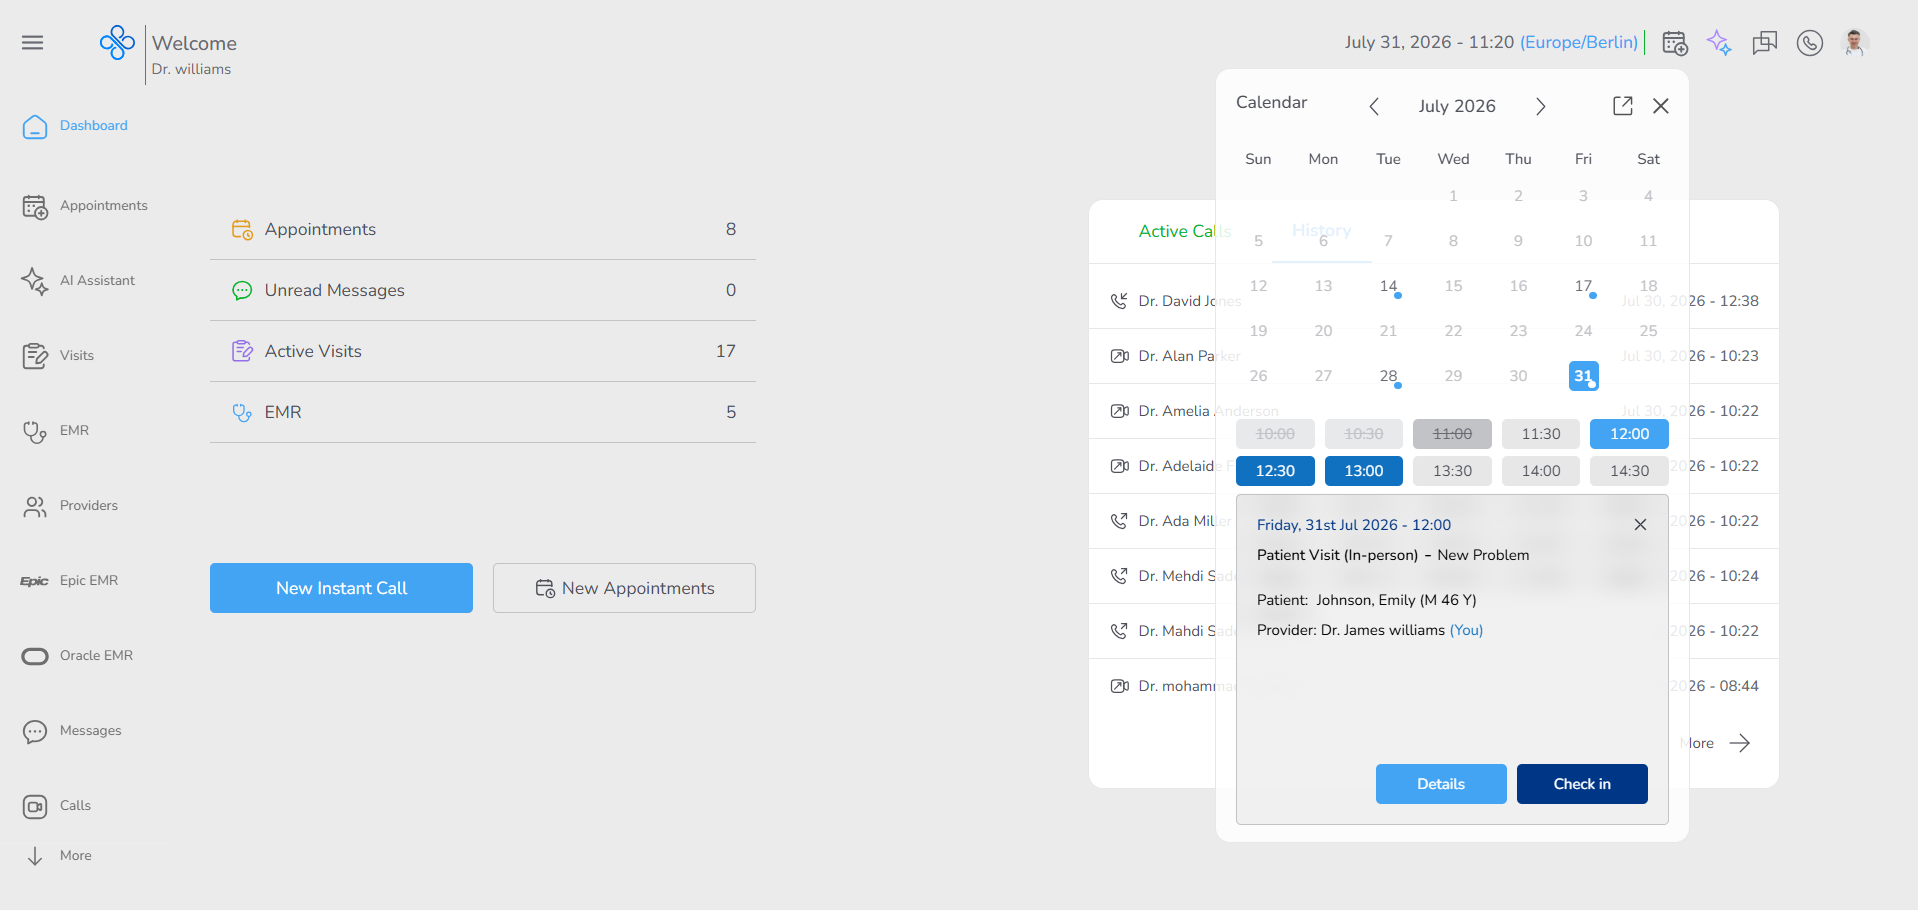
Inside this box, you may see several action buttons, depending on the appointment type and its current status:
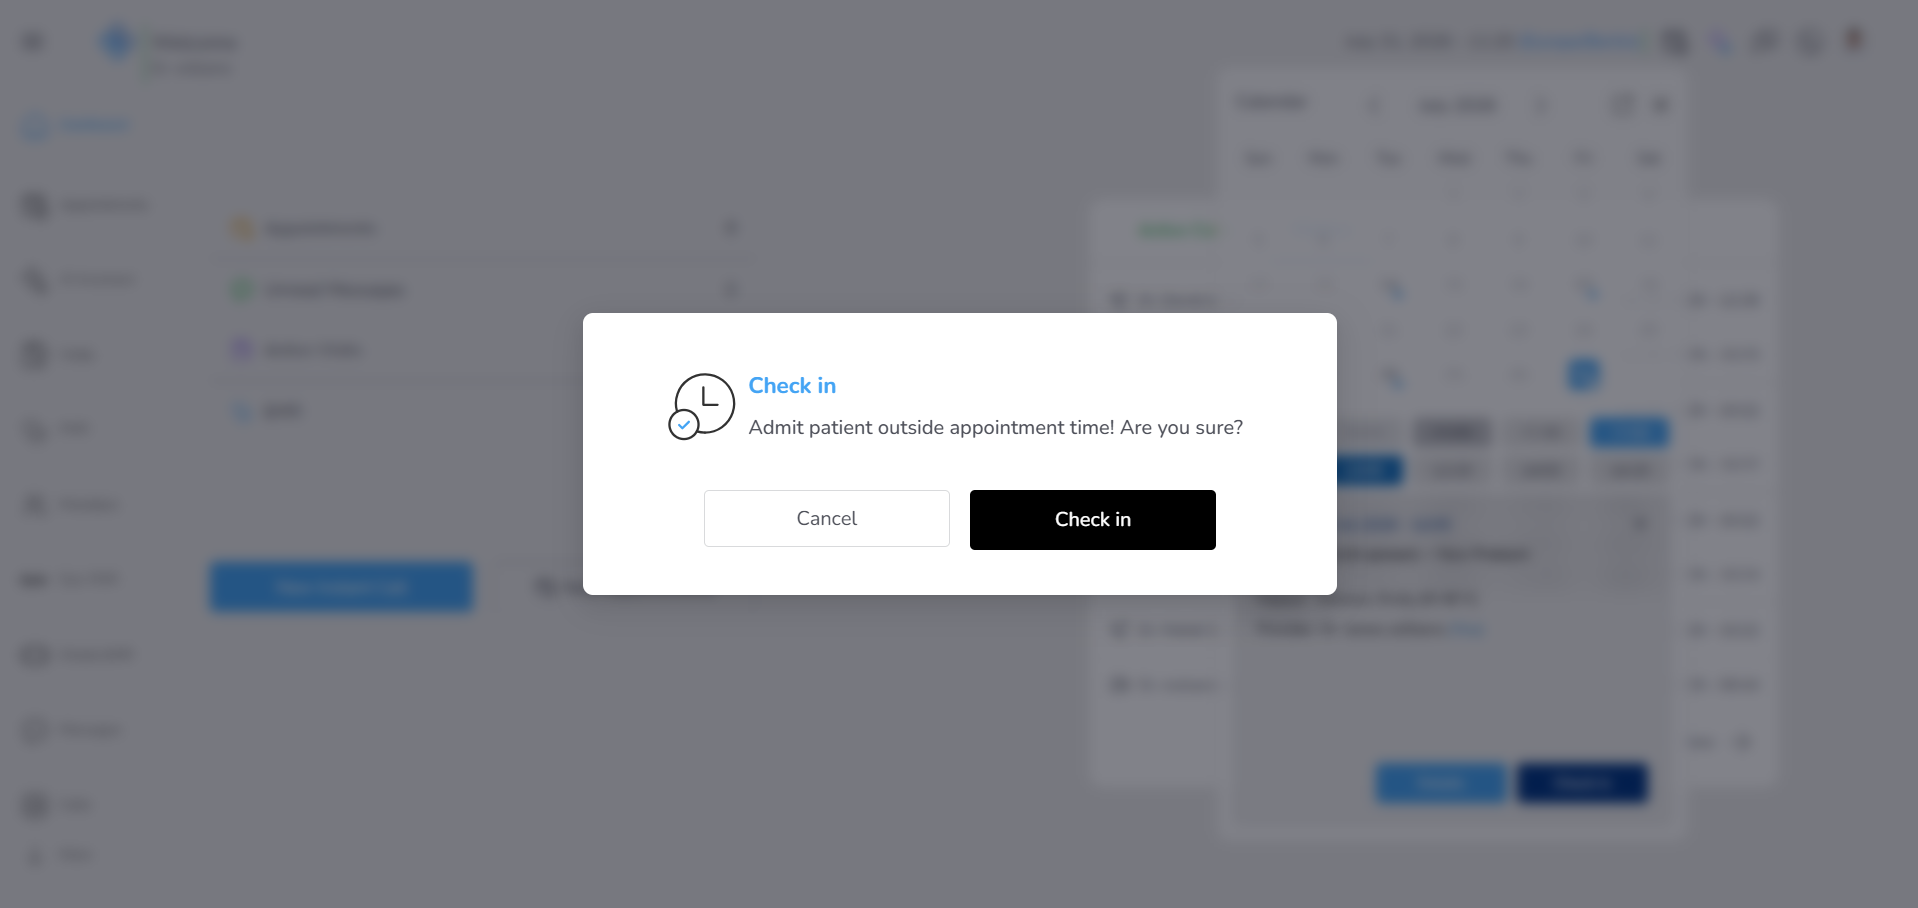
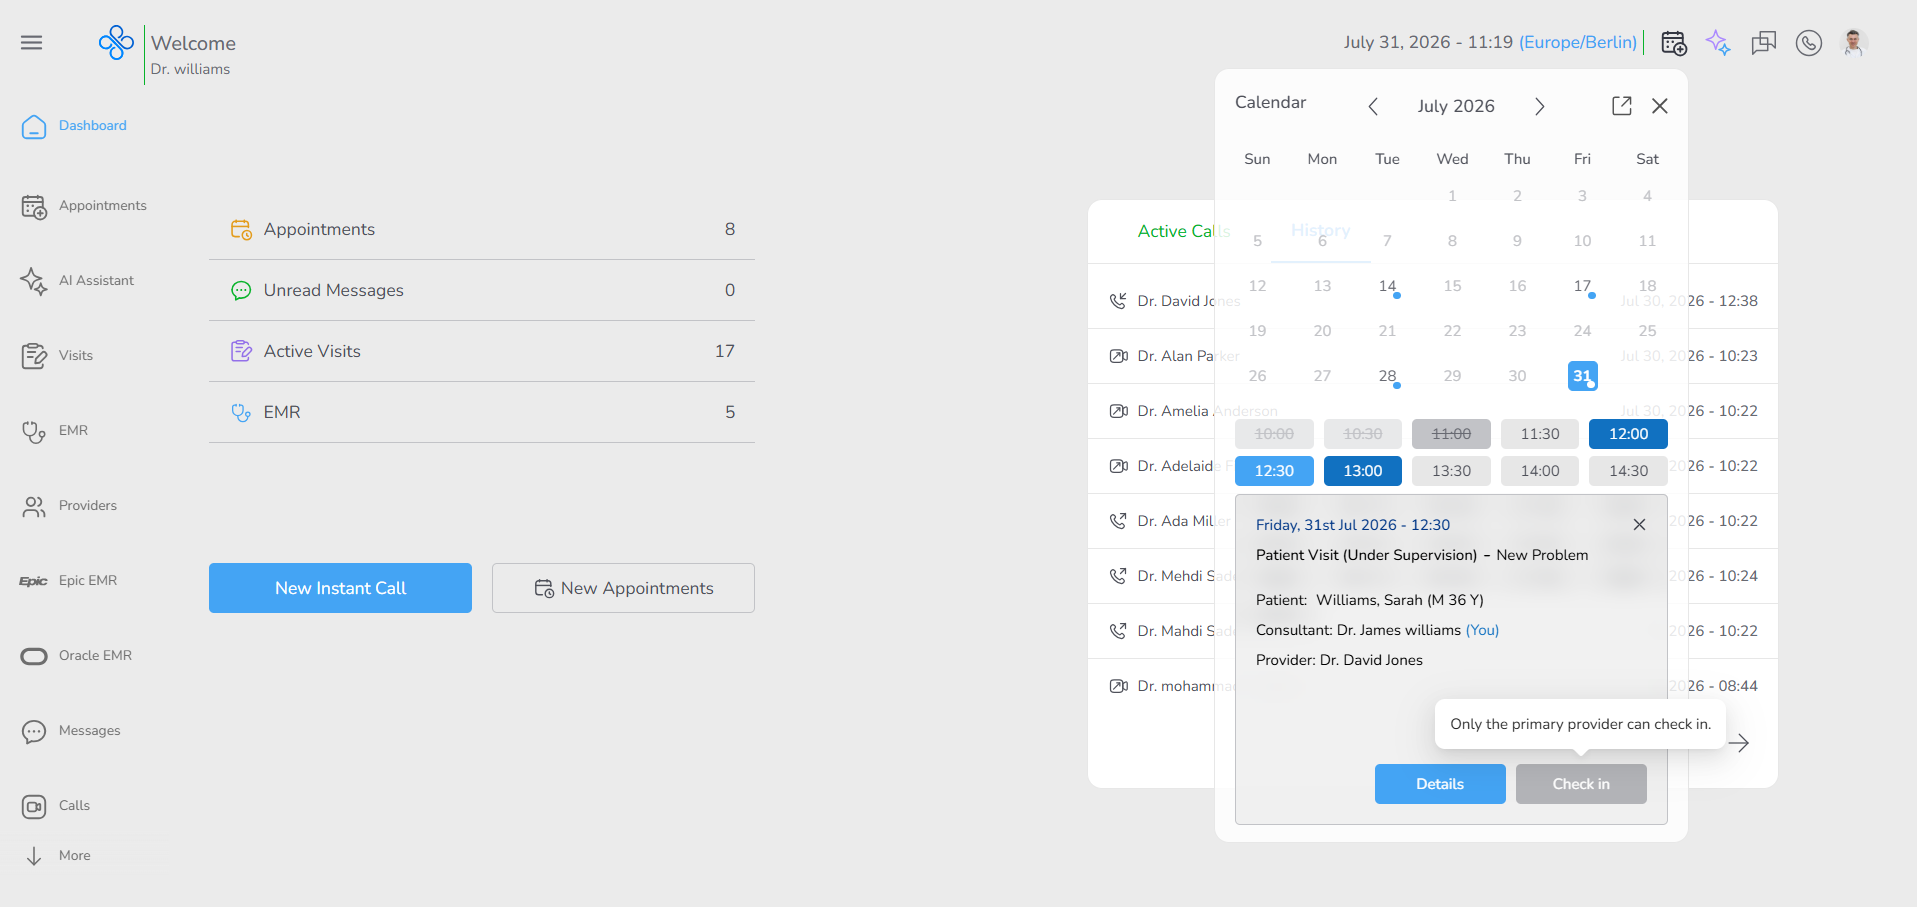
- Check-In
- Used to confirm the patient’s arrival.
- When clicked, a confirmation modal appears.
Note:
For Under Supervision appointment types, the Check-In action is available only to the Provider. Other participants (such as consultants) do not have permission to perform Check-In for this type of appointment.
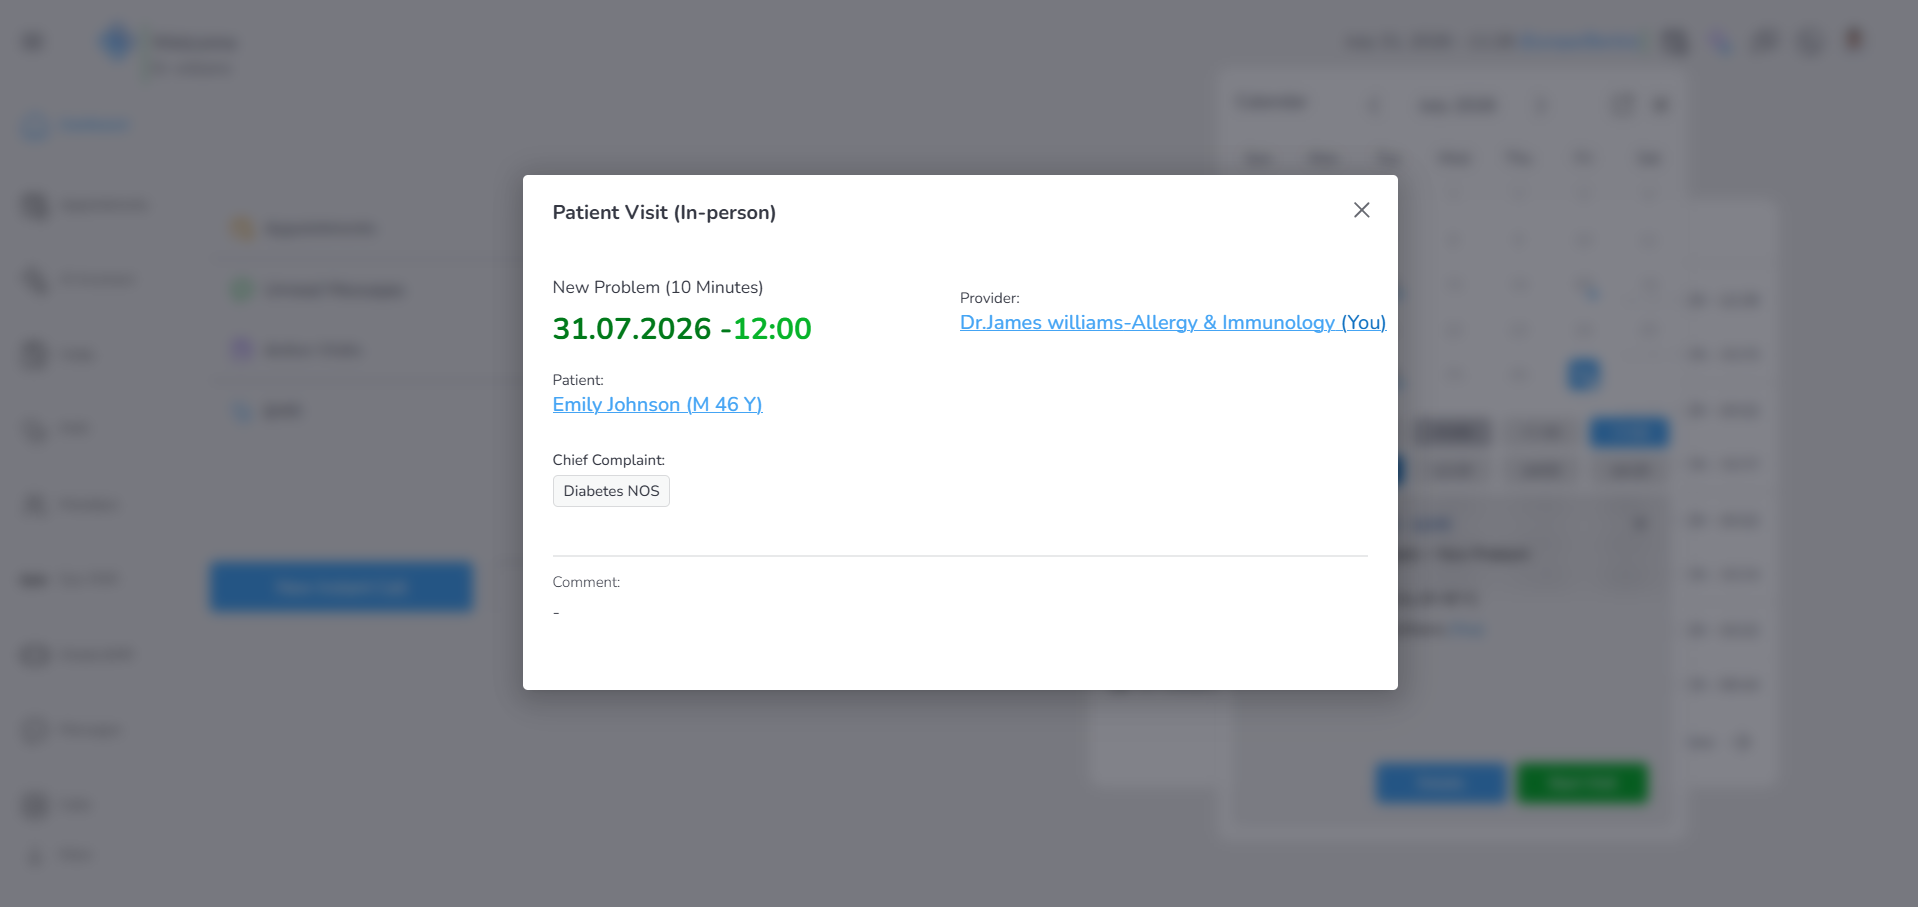
- Details
- Opens a modal with full appointment information.
- In this modal, you can review more details such as participants, notes, and other related data.
- This is useful when you want to review the appointment without taking any action.
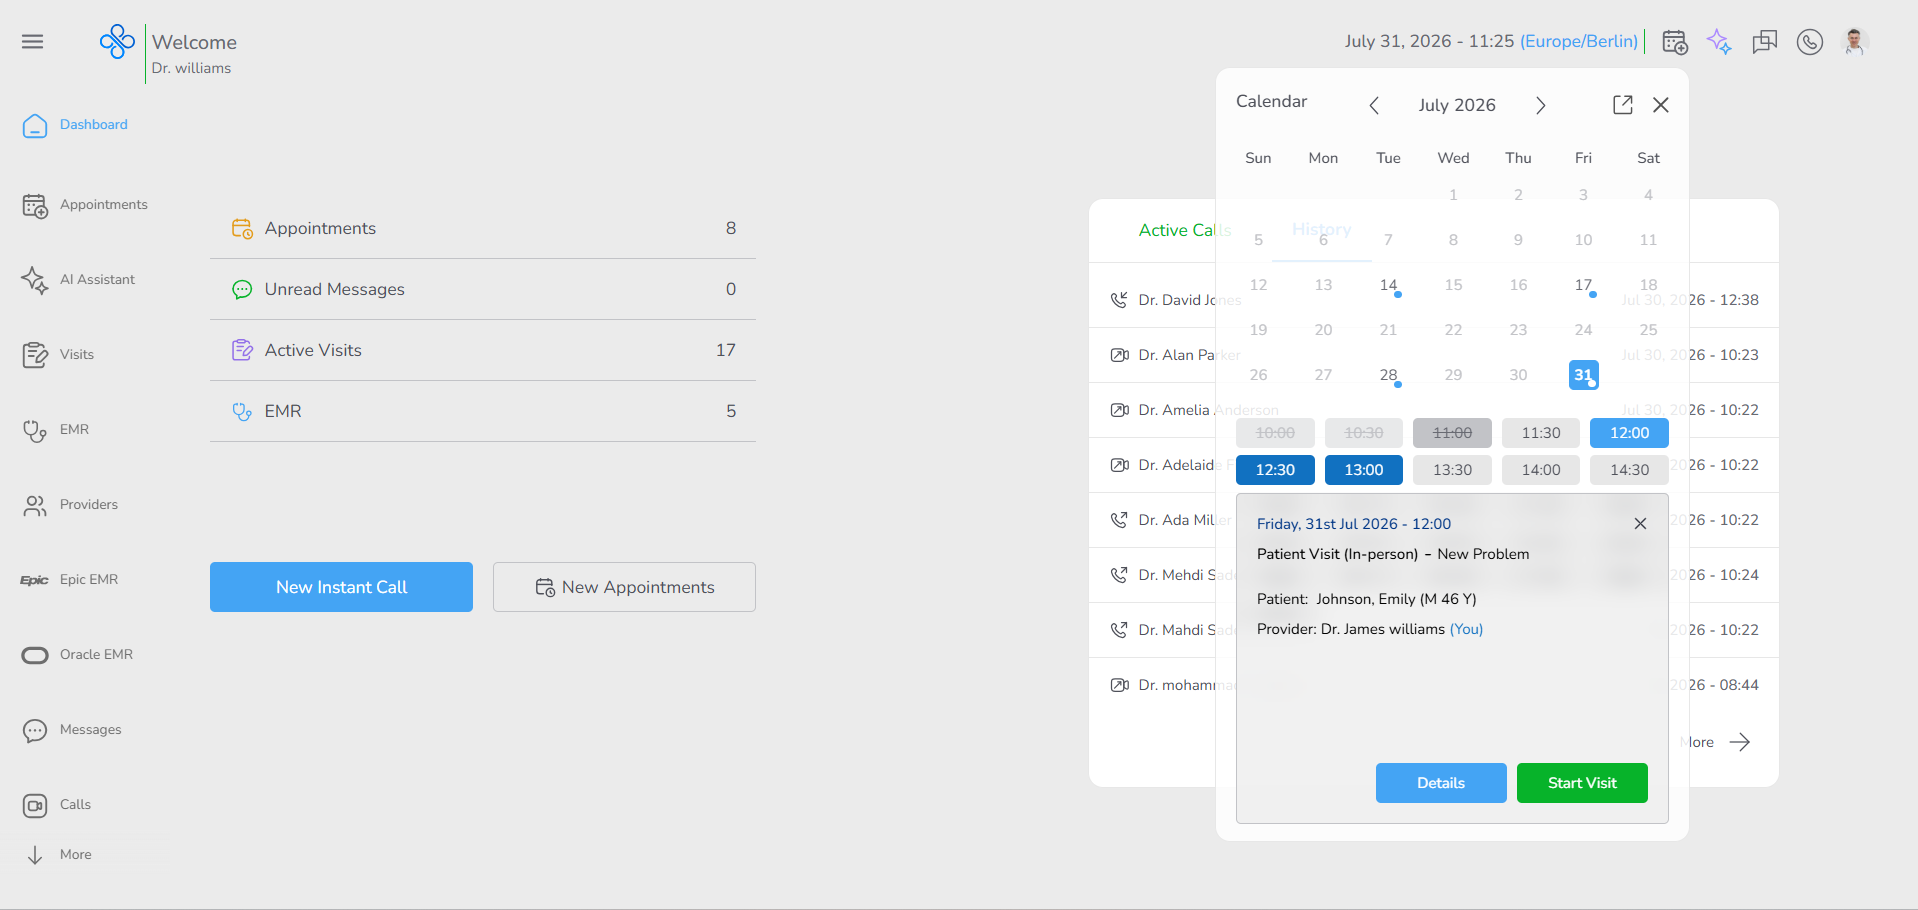
- Start Visit (only for appointment types that include a patient)
- Becomes available after successful Check-In.
- Clicking it takes you to the patient visit page where you can start the consultation.
When you use these actions, the appointment status updates automatically.
Selecting an empty (free) time slot
-
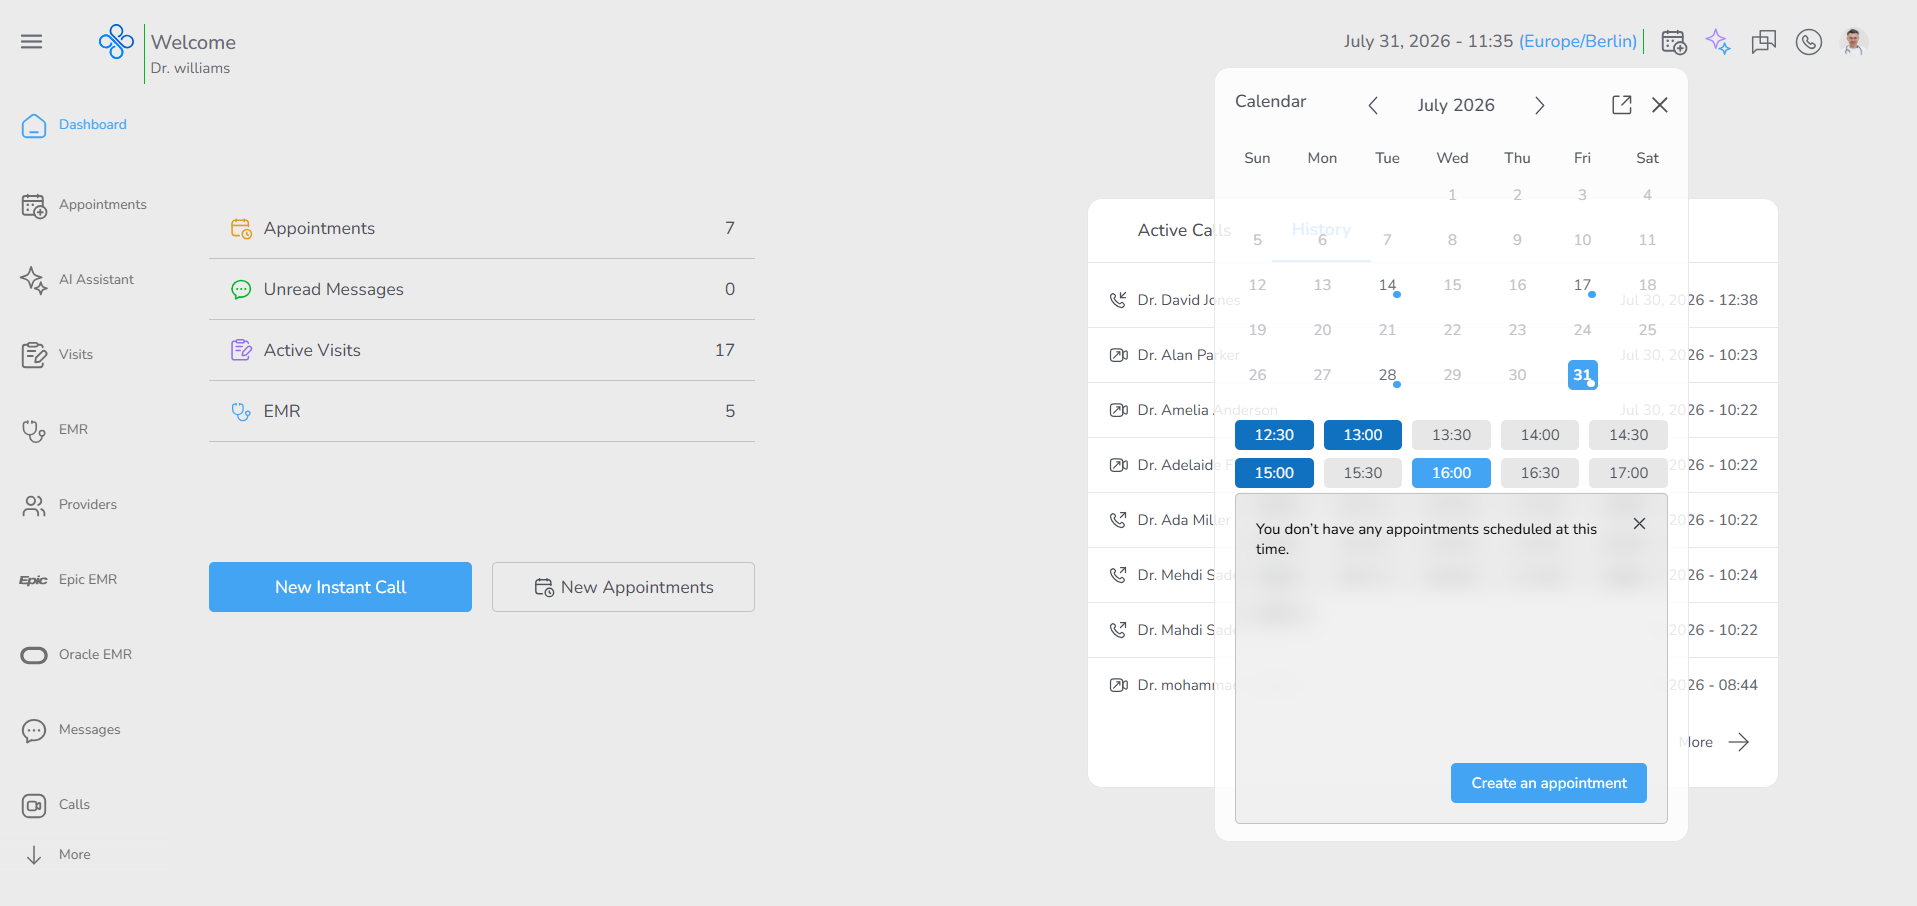
If you click on a time slot with no appointment scheduled:
- A message appears inside the calendar box:
- “You don’t have any appointments scheduled at this time.”
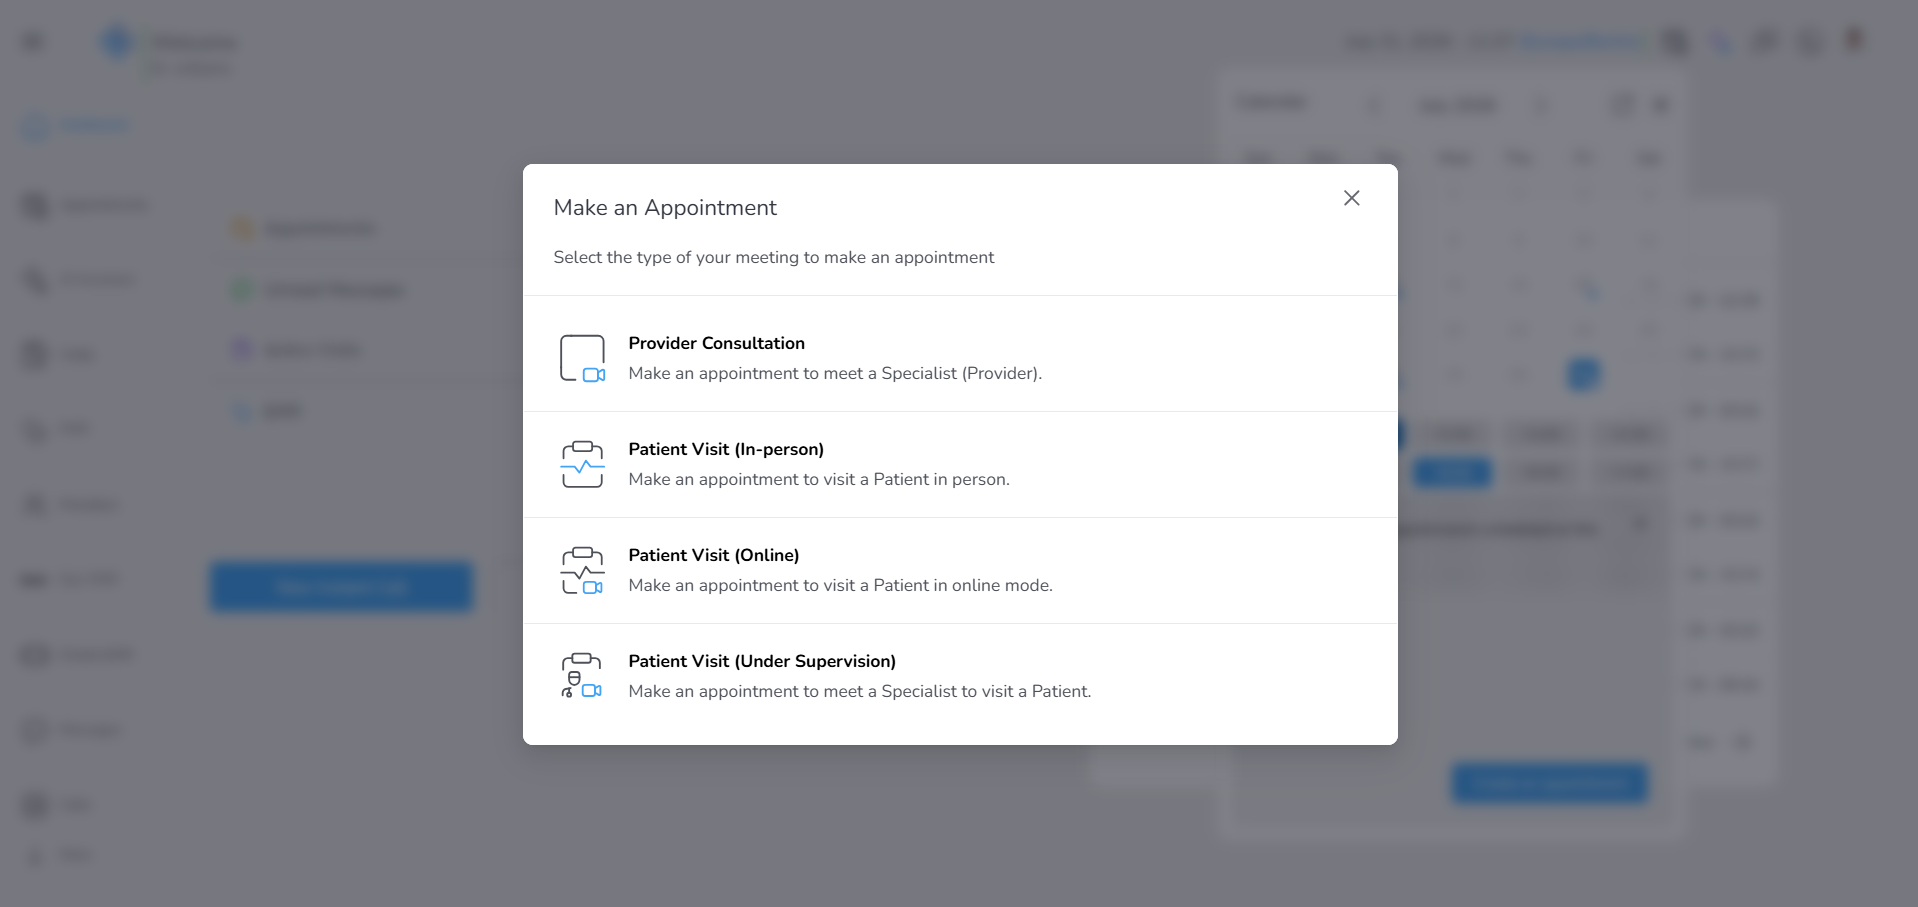
- Below the message, you will see a Create an Appointment button.
- A message appears inside the calendar box:
-
Clicking this button starts the appointment creation process.
-
(For more details, see the Private (https://app.clickup.com/9015704788/docs/8cp1f6m-2395/8cp1f6m-2635).)
Real-time behavior
- The calendar updates automatically when:
- A new appointment is created
- An appointment is checked in
- A visit is started
- This means you always see the latest and most accurate schedule without refreshing the page.
Why this section is important
- You can plan your day visually.
- You can move directly from schedule → check-in → visit with just a few clicks.
- You can quickly spot free time slots and turn them into appointments.
This section is designed to help you manage your time efficiently while keeping all appointment-related actions in one clear, simple view.
7. Welcome Message
On the left side of the Dashboard header, you will see a personalized welcome message displaying your name.
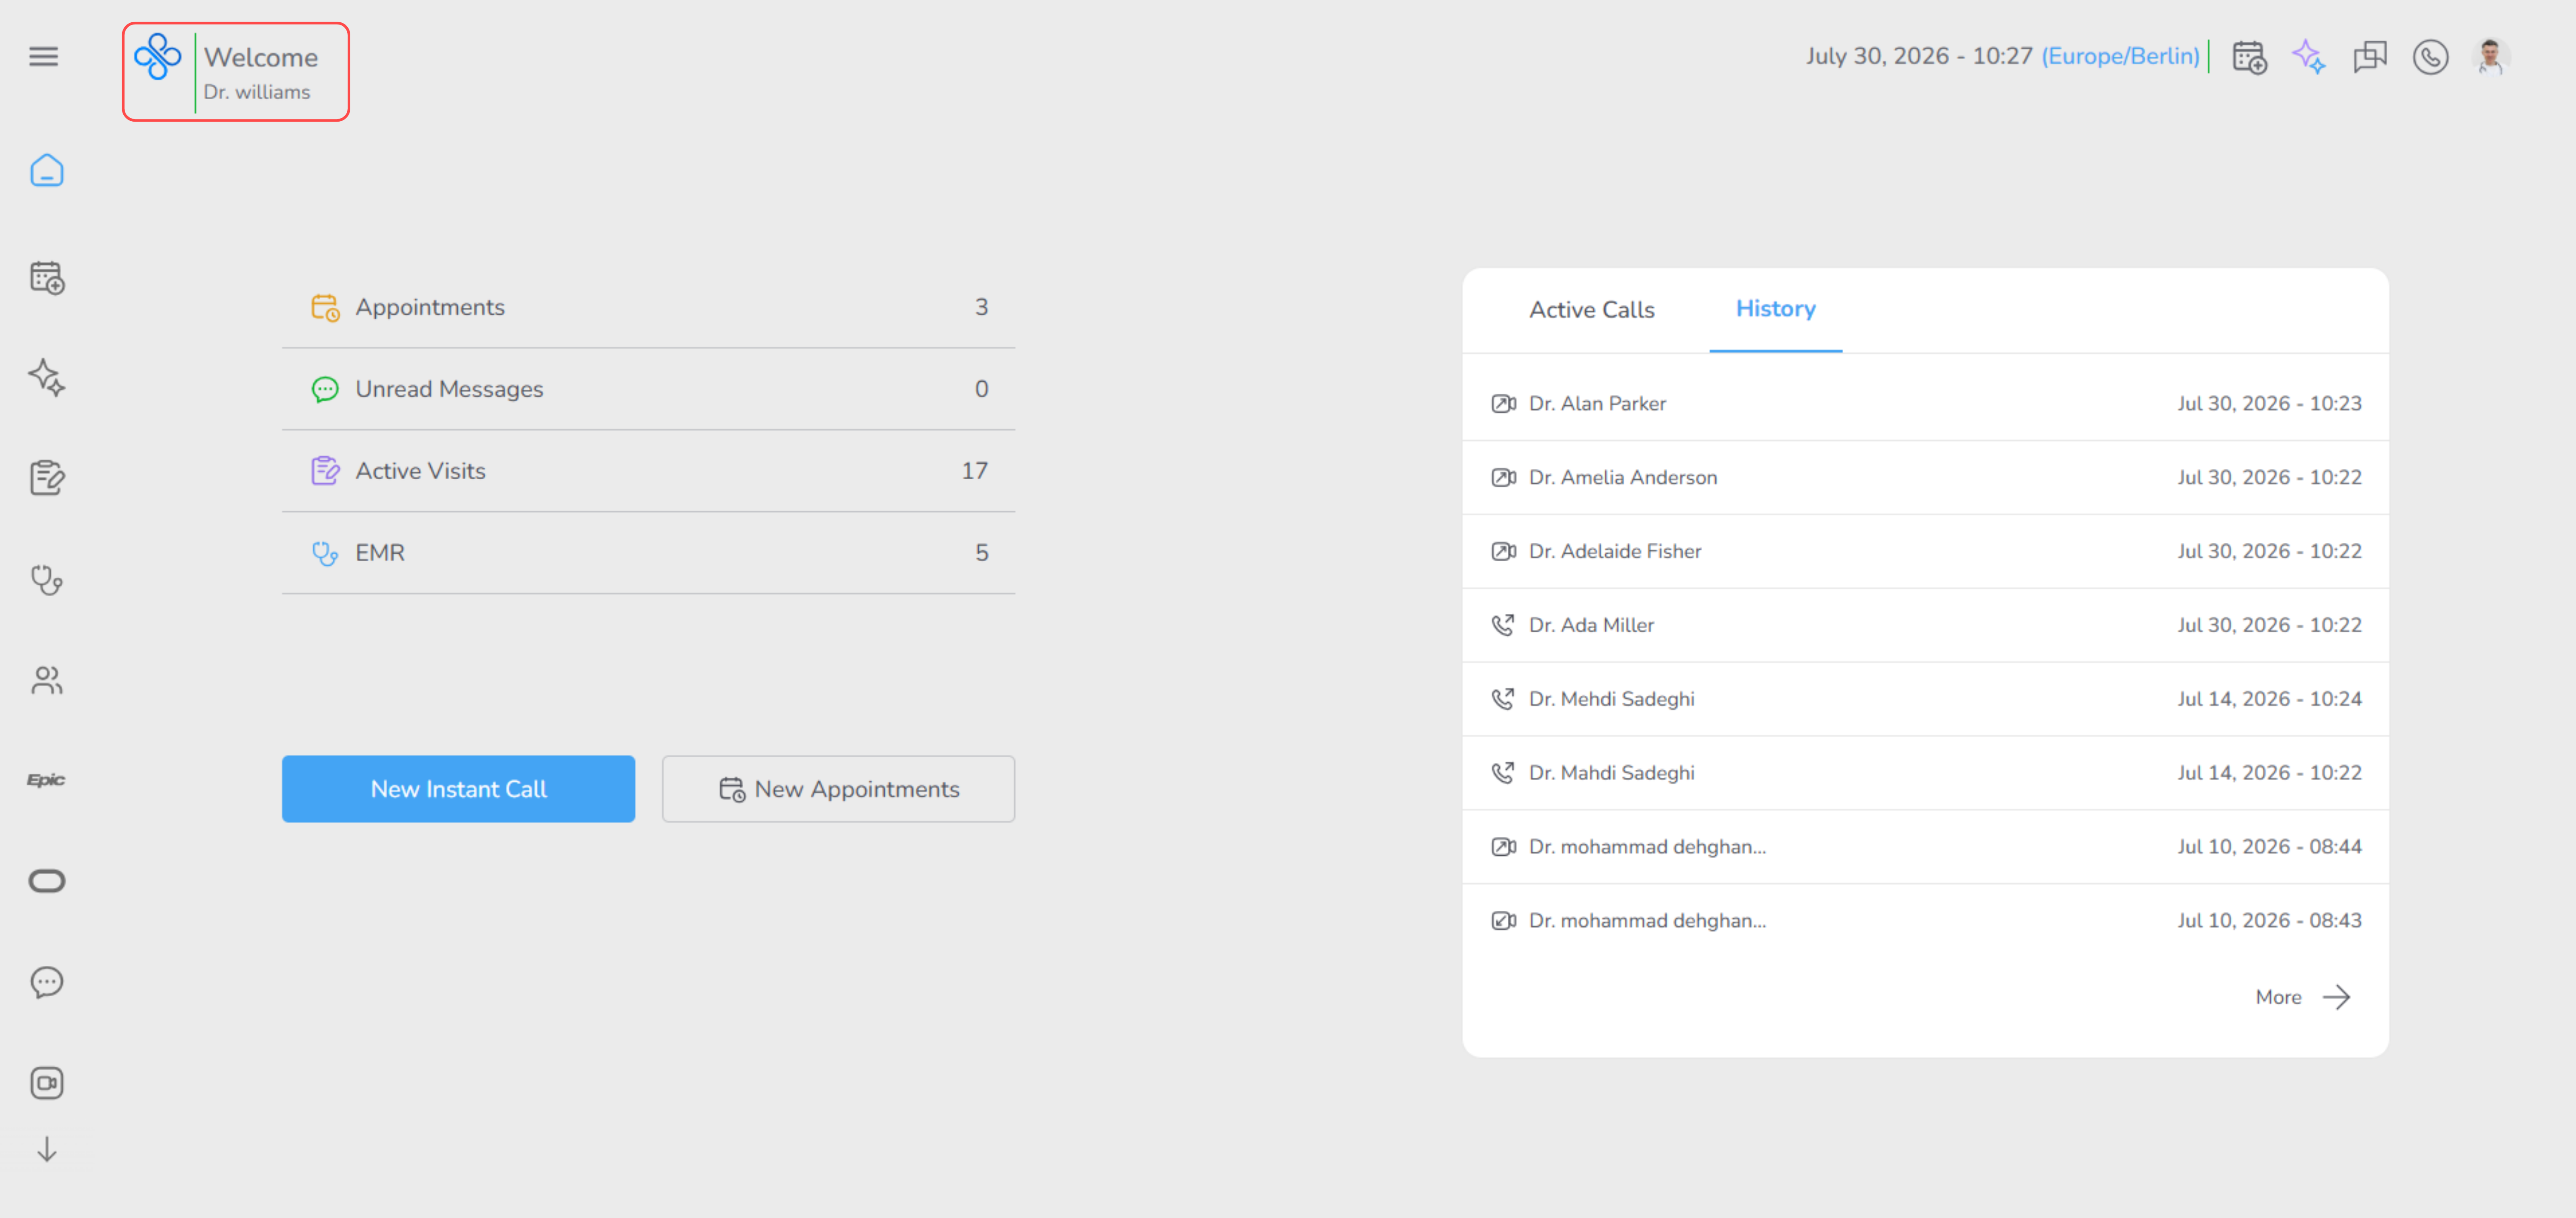
This section helps you quickly confirm that you are signed in to the correct account and provides a friendly starting point each time you access the Dashboard.
The welcome message is displayed in the following format:
Welcome, Dr. John Smith
The name shown is automatically retrieved from your profile and cannot be edited from the Dashboard.
3. Quick Stats
The Quick Stats section is located on the left side of the Dashboard.
This section provides a real-time overview of your current workload while also giving you quick access to the most commonly used actions and modules.
The counters and shortcuts are updated automatically as your schedule and activities change.
Quick Statistic Cards
The top area contains several statistic cards. Each card displays a live count and serves as a shortcut to its corresponding section of the platform.
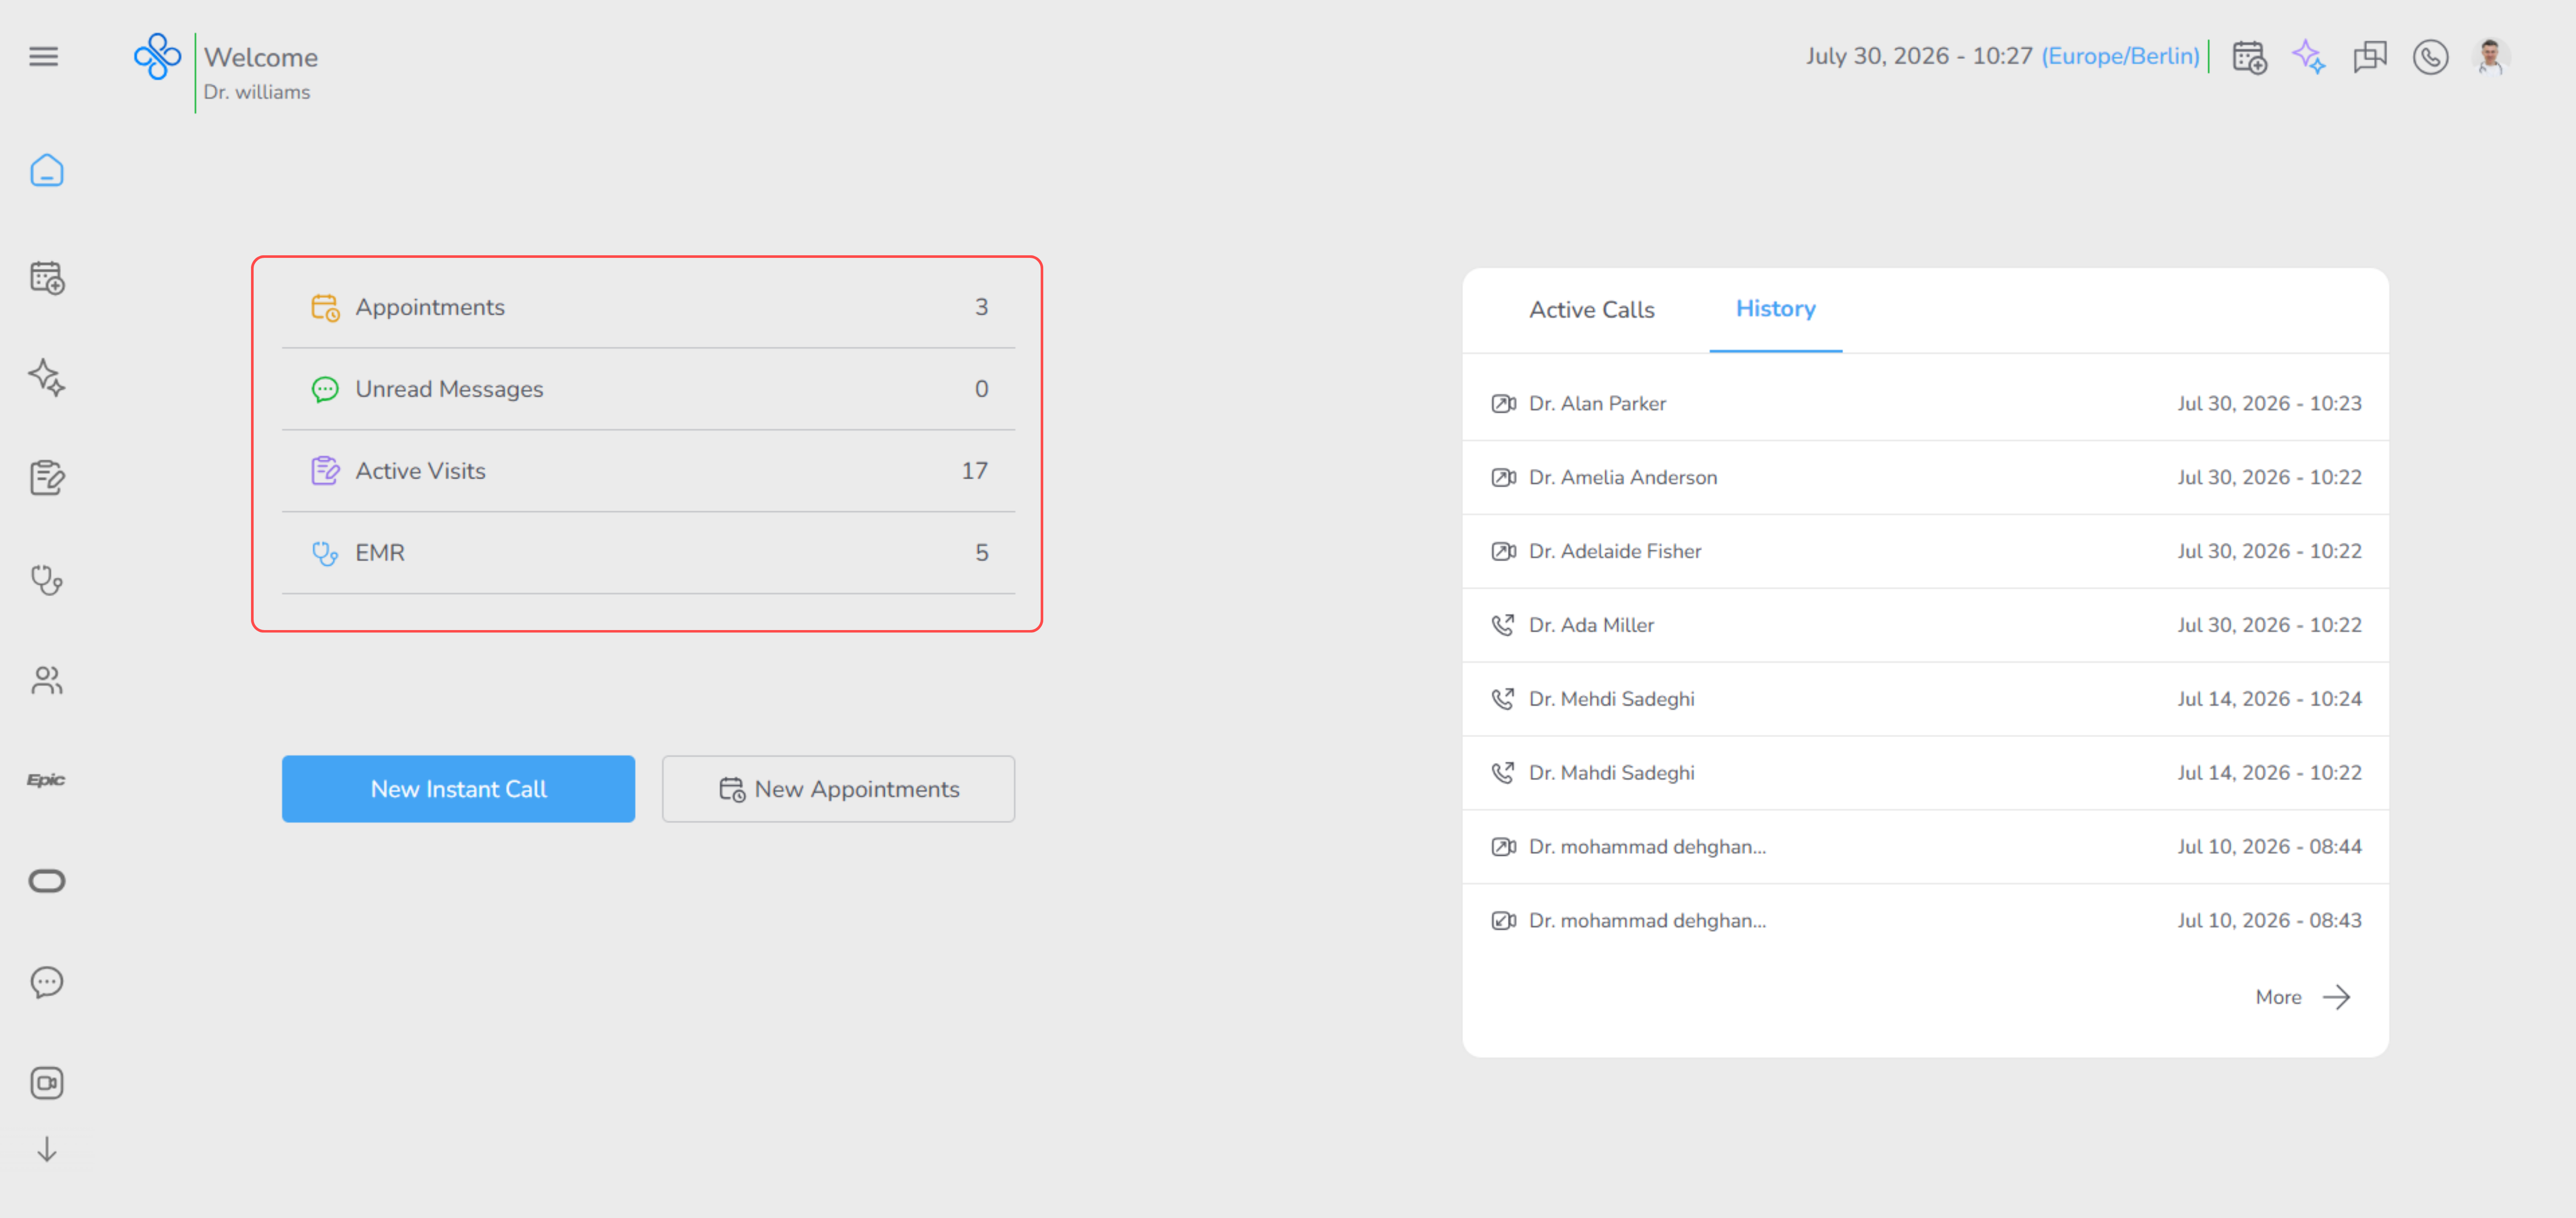
Appointments
Displays the number of your upcoming appointments.
Click this card to open the Appointments page, where you can review, manage or update your scheduled appointments.
Unread Messages
Displays the number of unread messages in your inbox.
Click this card to open the Messages page.
Active Visits
Displays the number of patient visits that have started but have not yet been completed.
Click this card to open the Visit History page, where you can continue managing active visits.
EMR
Displays the total number of patients associated with your account.
Click this card to open the EMR page, where you can access and manage your patient records.
Quick Action Buttons
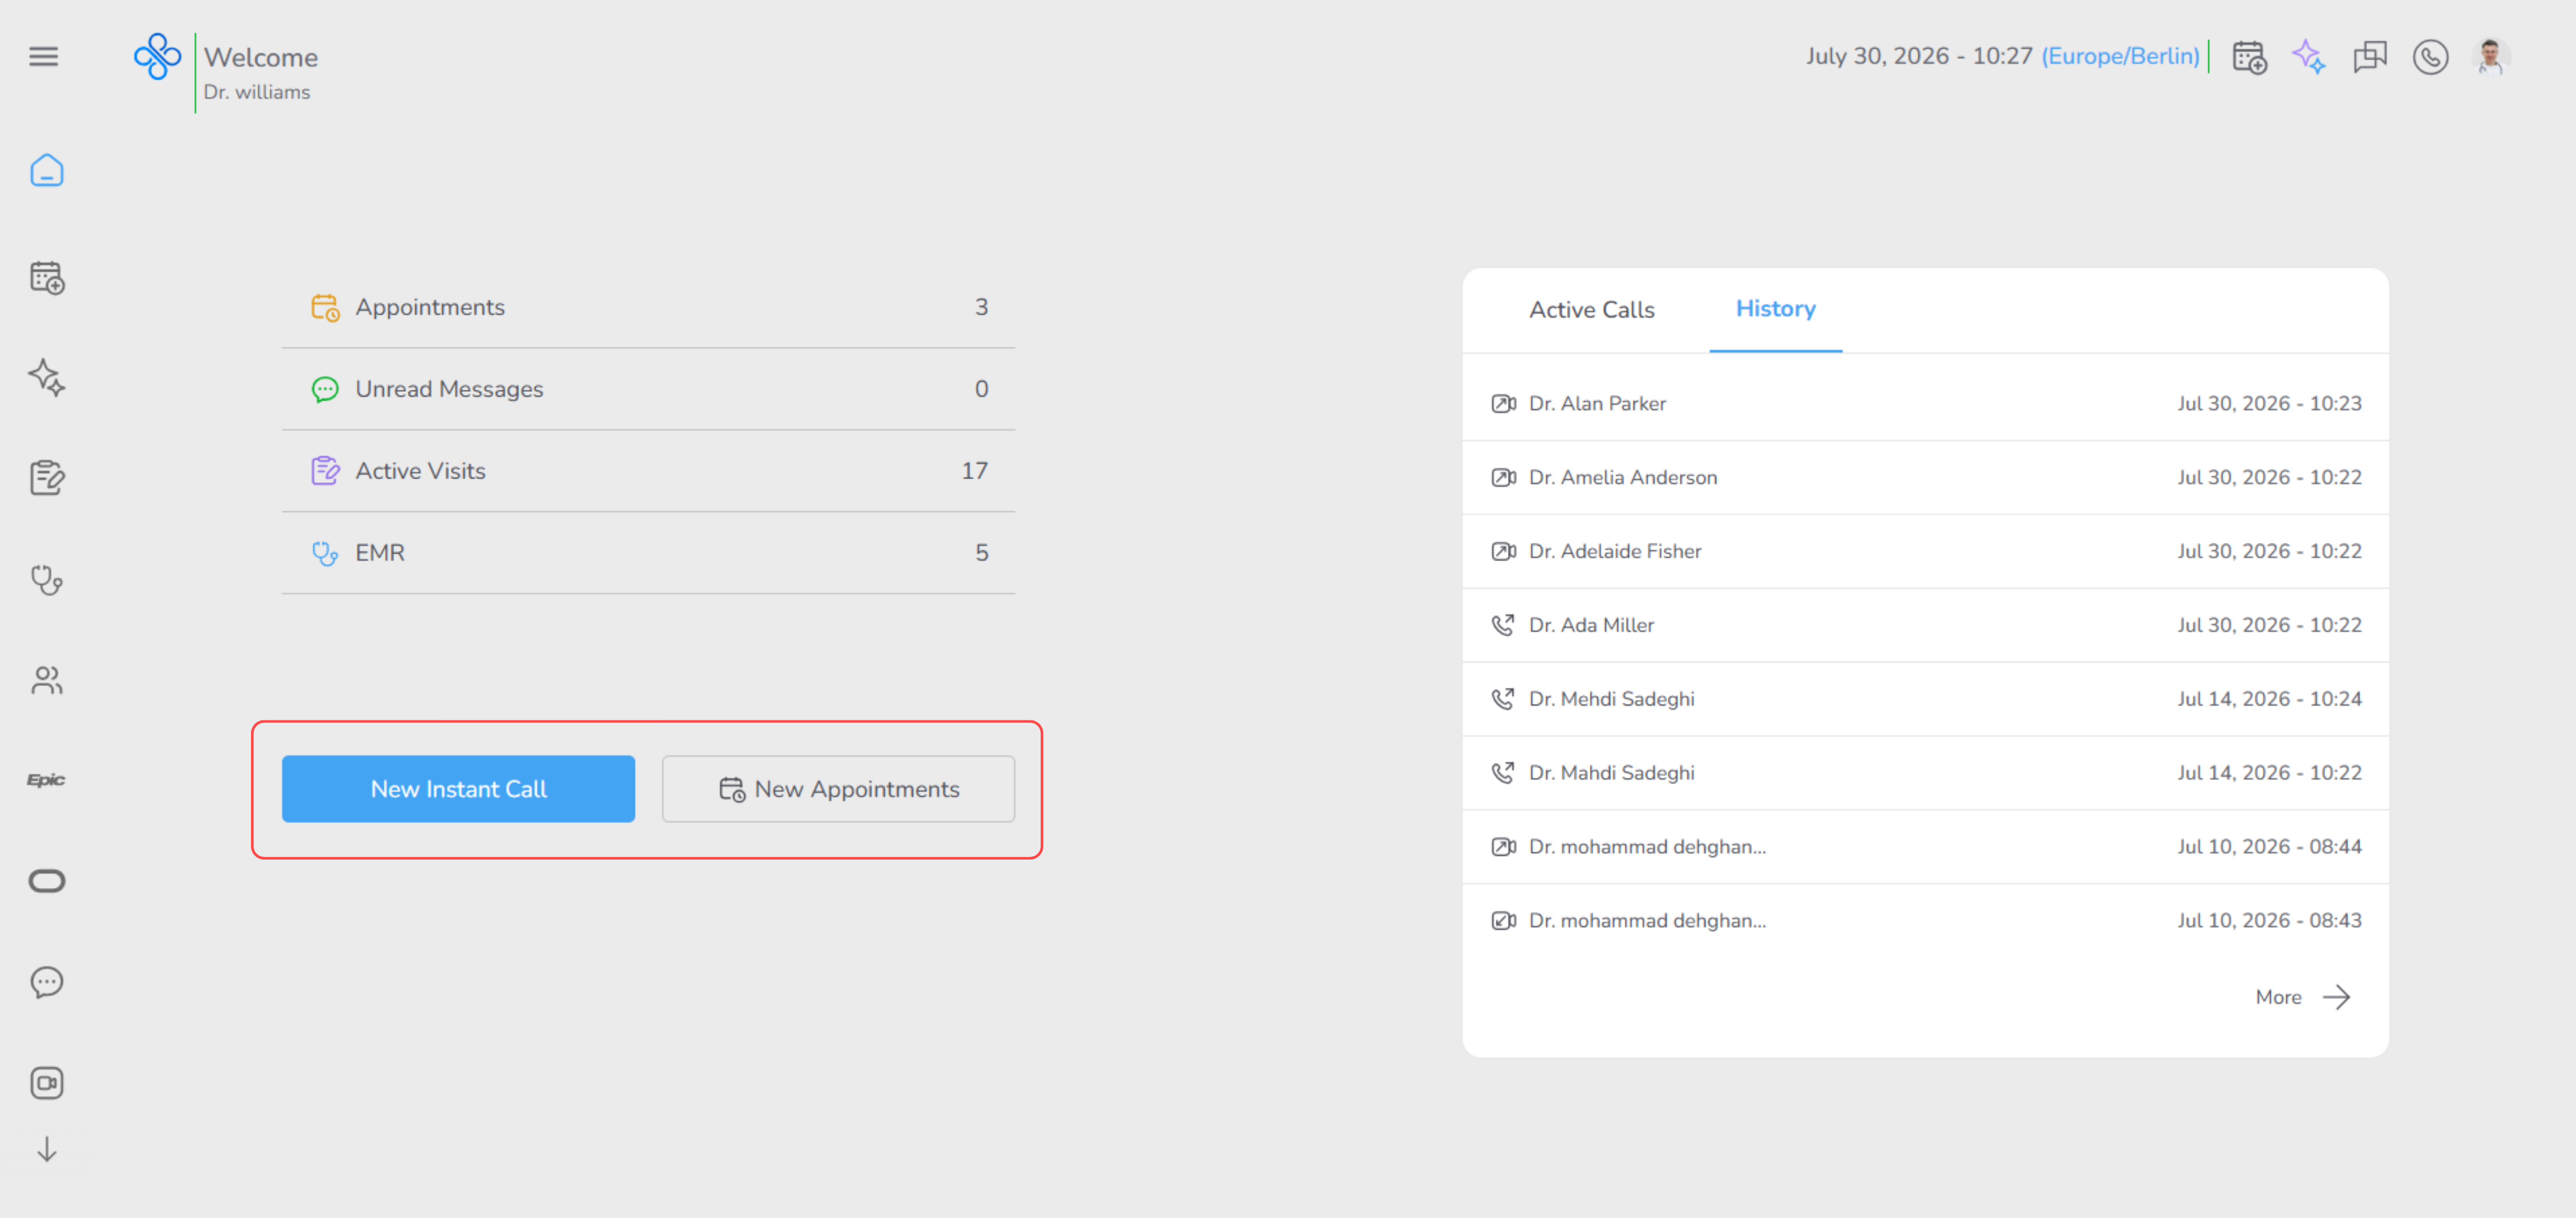
Below the statistic cards, two quick action buttons allow you to immediately perform common tasks.
New Instant Call
Click New Instant Call to start a new provider-to-provider call.
You are redirected to the Providers page, where you can select the provider you want to contact and initiate the call.
New Appointment
Click New Appointment to create a new appointment.
Selecting this button opens the Create Appointment dialog, allowing you to enter the appointment details and schedule a new appointment without navigating away from the Dashboard.
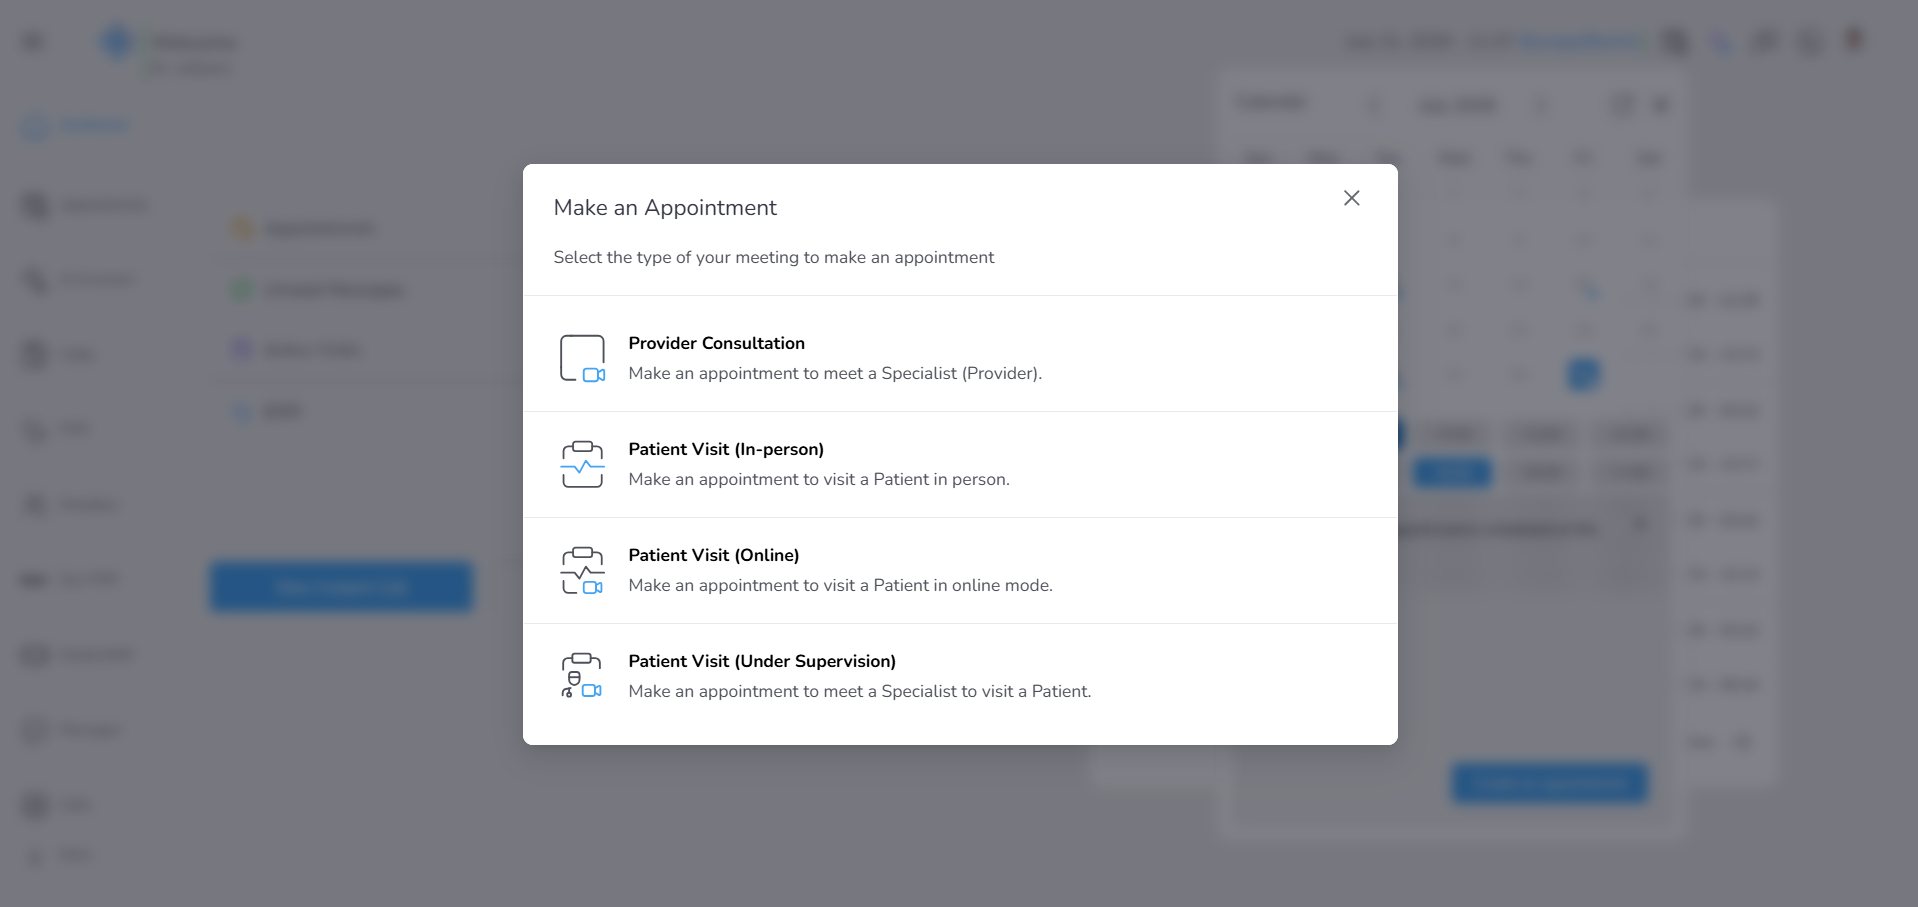
For detailed instructions on creating appointments, refer to the Private (https://app.clickup.com/9015704788/docs/8cp1f6m-2395/8cp1f6m-2635).
The Quick Stats section is designed to help you monitor your current workload and access the most frequently used features with a single click, reducing the time required to navigate through the platform.
4. Calls Panel
The Calls Panel, located on the right side of the Dashboard, provides quick access to your call activities without leaving the current page.
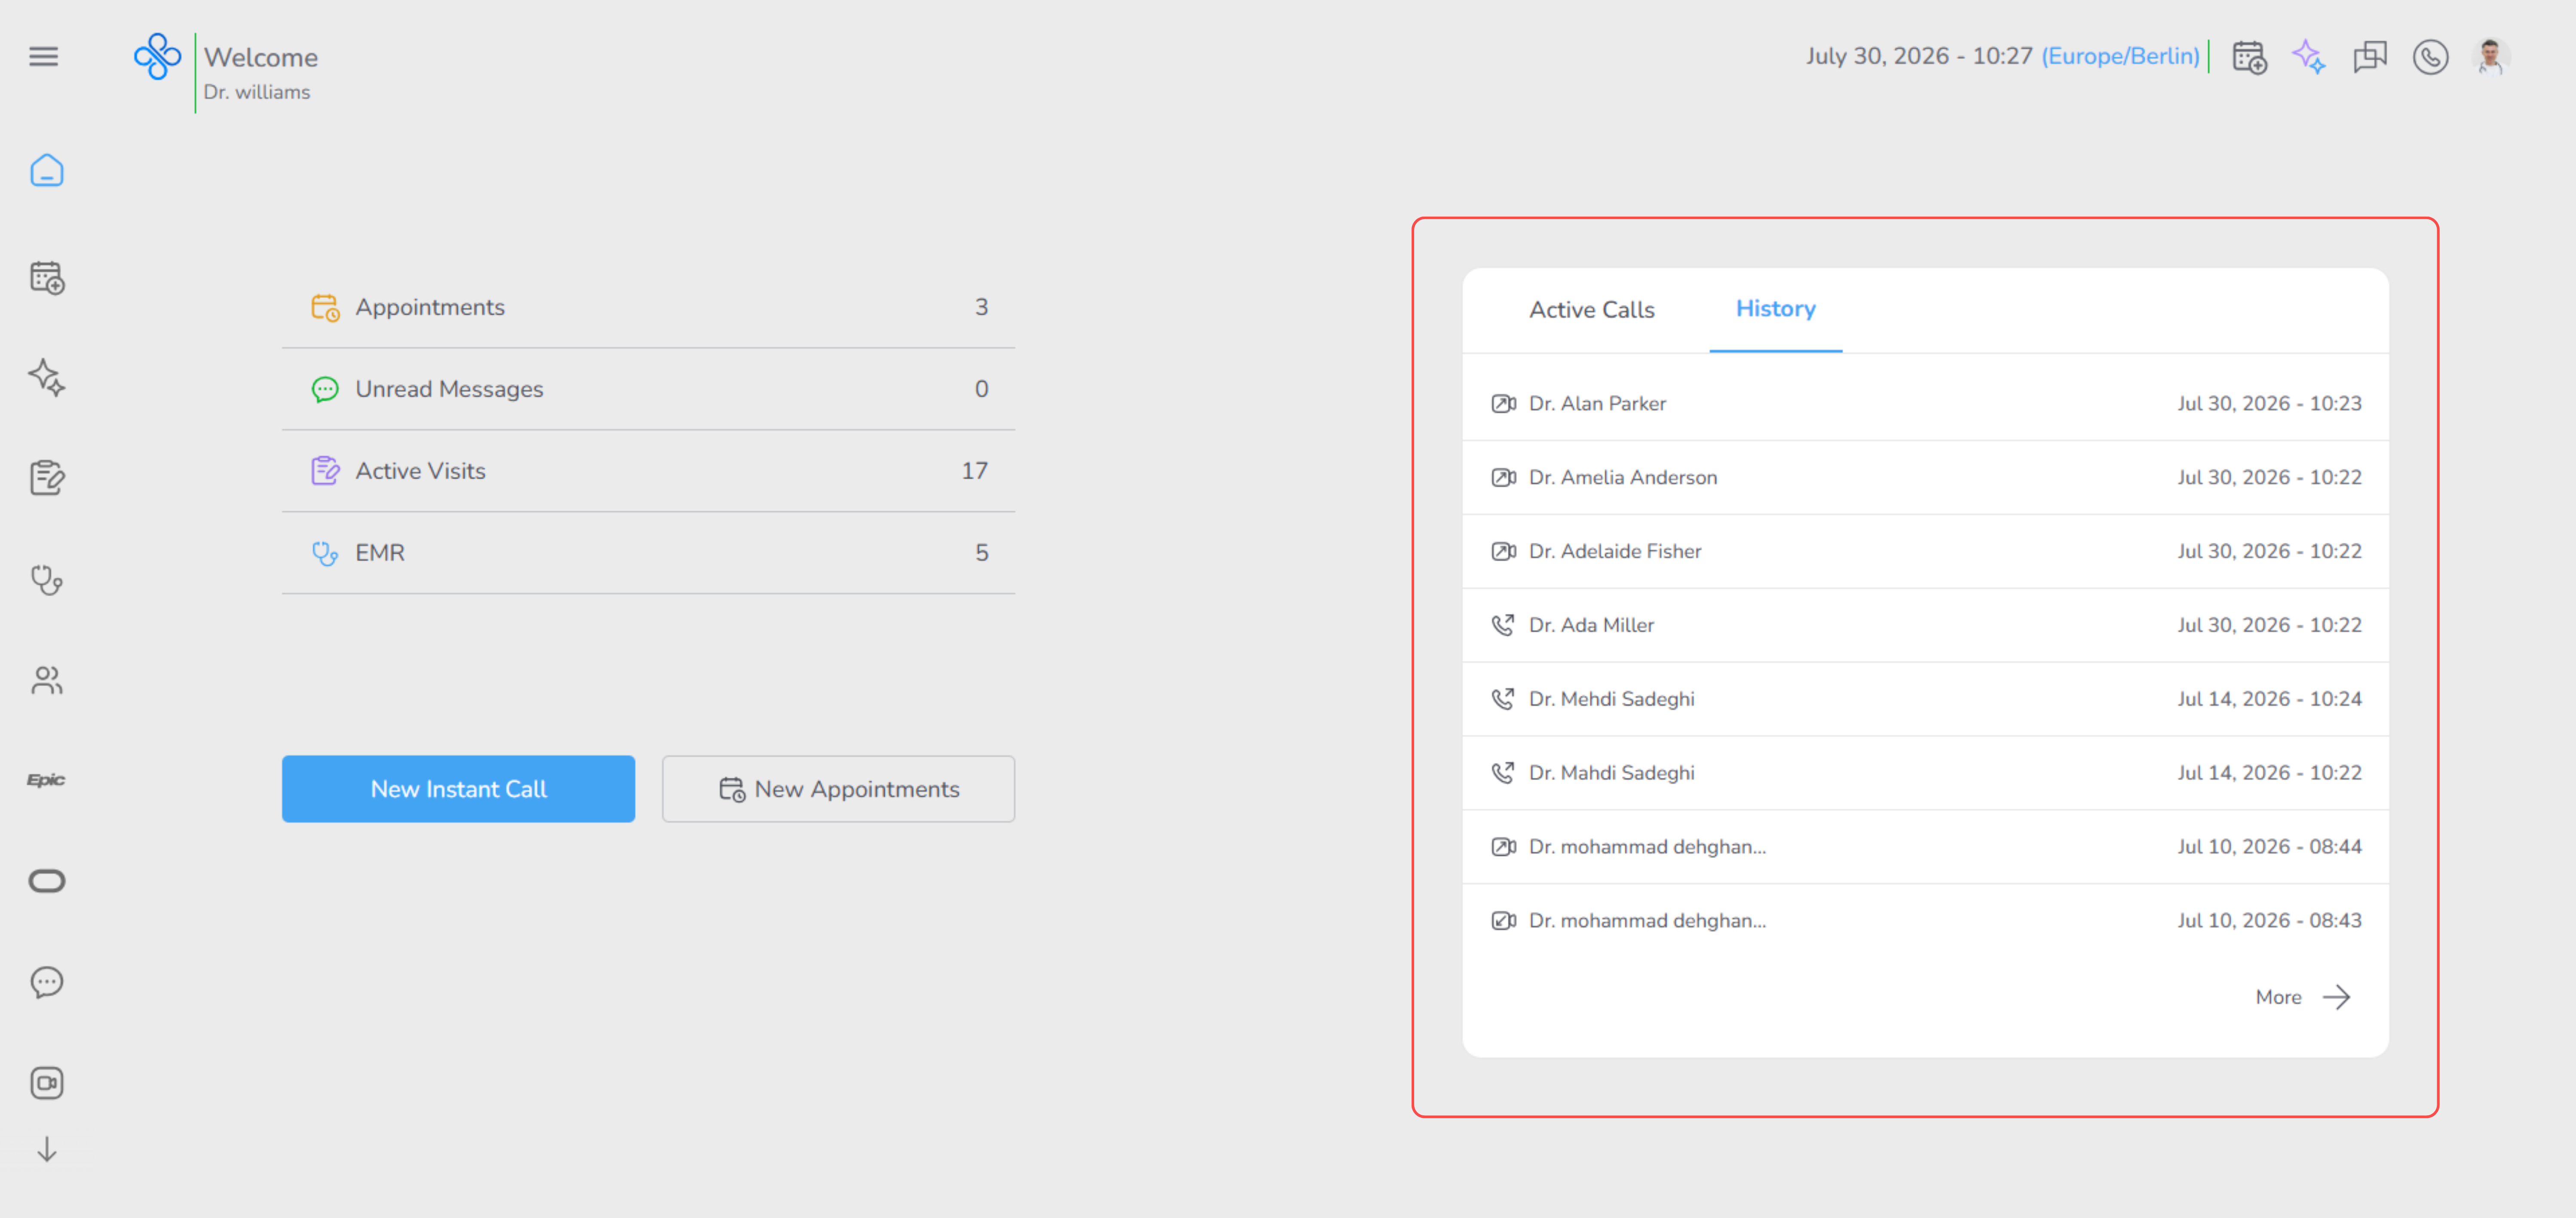
The panel is divided into two tabs:
- Active Calls – Displays your current incoming, outgoing and active calls.
- History – Displays your recent call history.
This allows you to manage live calls separately from previously completed calls, making it easier to focus on your current communication.
Active Calls
Select the Active Calls tab to view all calls that currently require your attention.
This tab displays calls that are waiting for a response, currently connected or otherwise require your interaction. The information and available actions change automatically based on the current call status.
Incoming Calls
When another user calls you, the incoming call appears in the Active Calls tab.
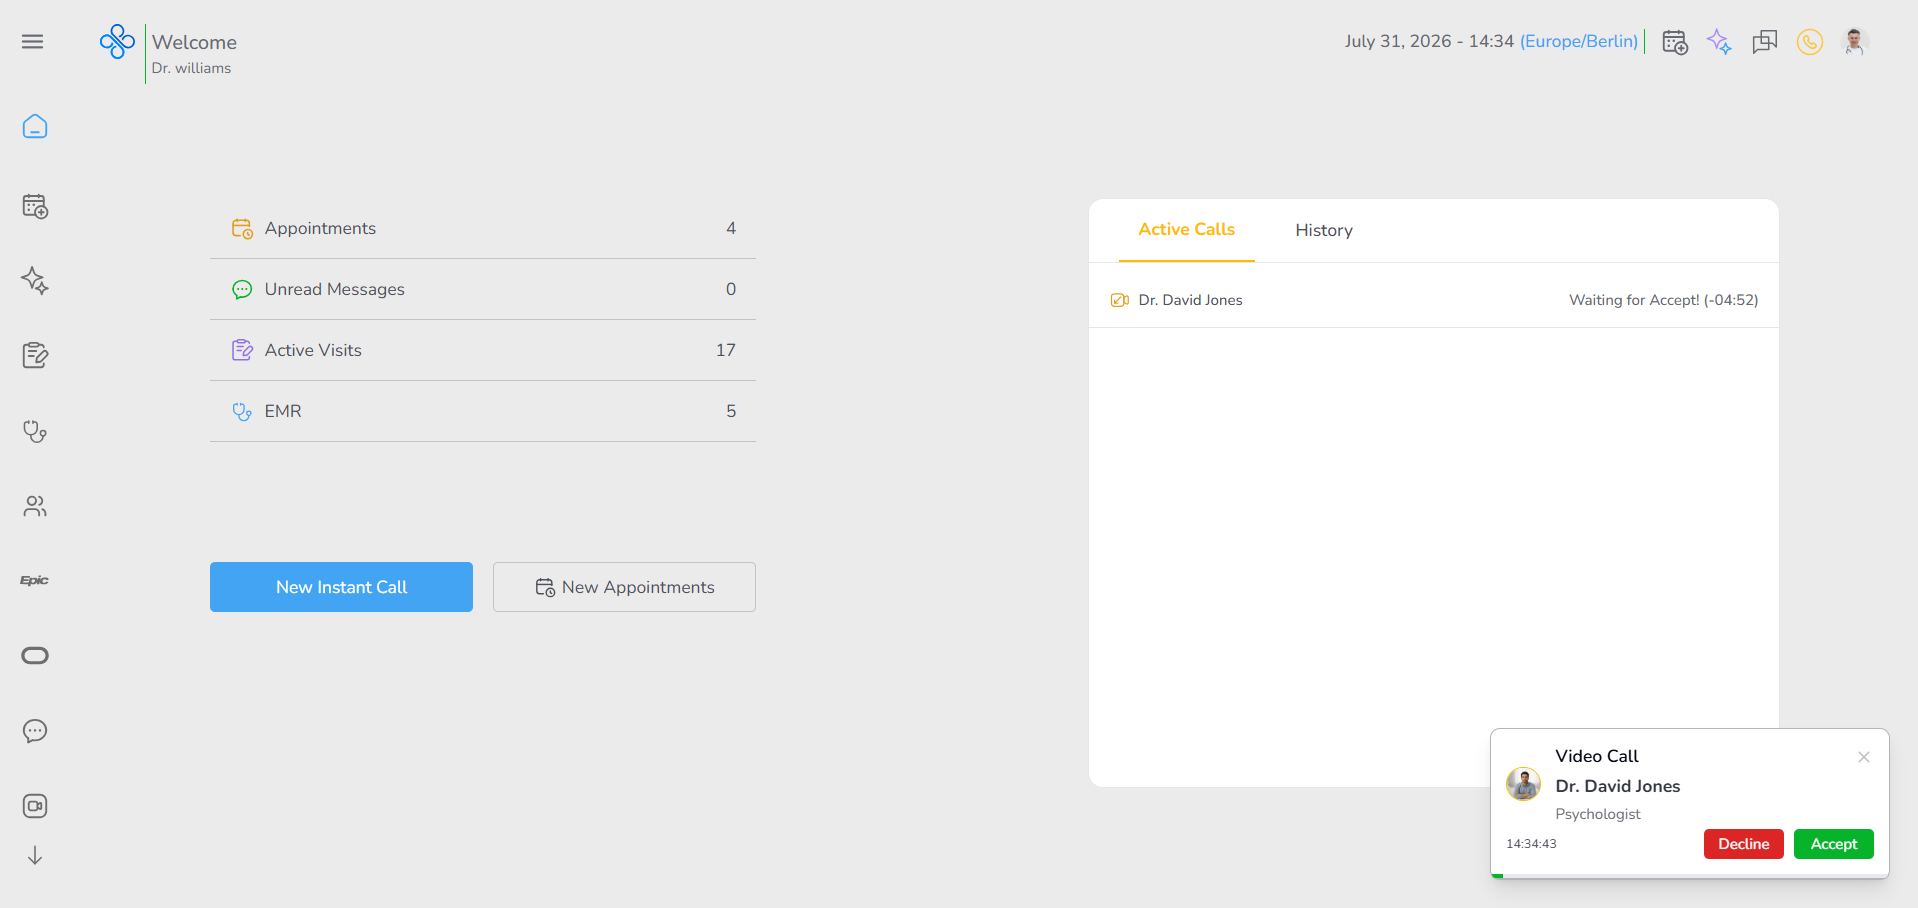
Each incoming call displays:
- The caller's name.
- An icon indicating whether the call is Audio or Video.
- The status Waiting for Accept.
- A 5-minute countdown timer showing the remaining time to answer the call.
Hover over the call to display the available actions:
- Accept
- Decline
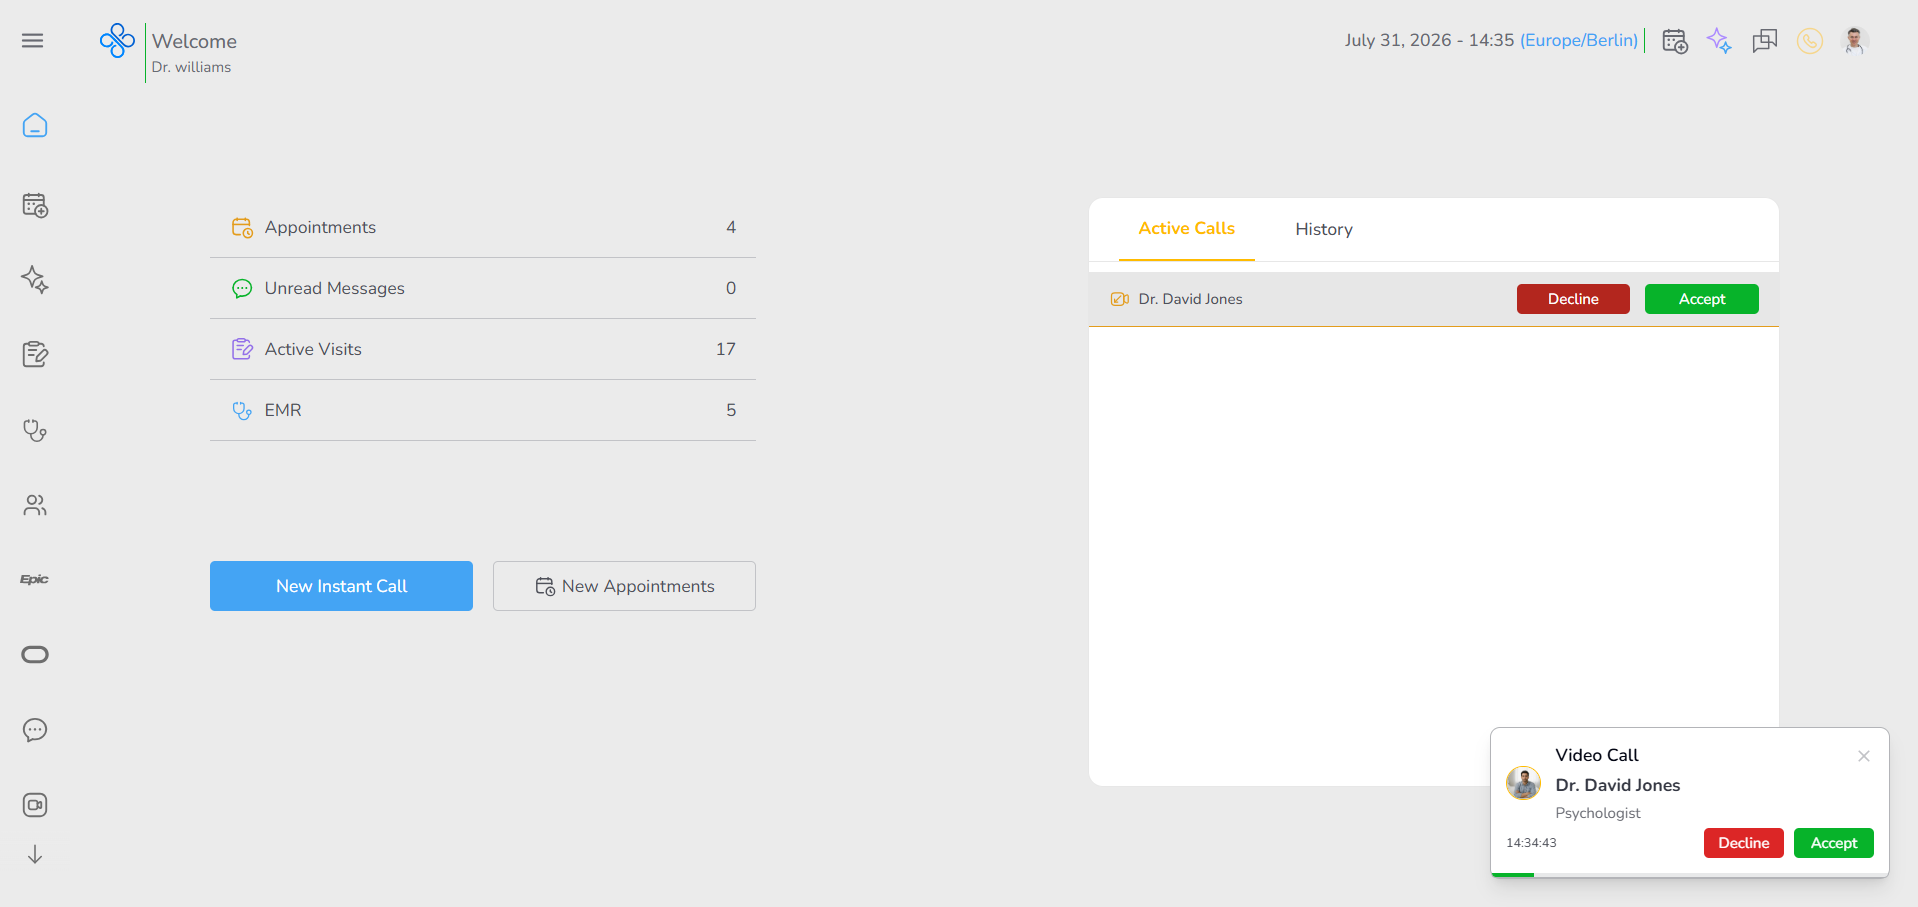
Click Accept to answer the call.
Click Decline to reject the incoming call.
In addition to appearing in the Active Calls tab, an incoming call notification is also displayed in the bottom-right corner of the Dashboard, allowing you to respond immediately without opening the panel.
Outgoing Calls Waiting for Acceptance
If you initiate a call and then return to the Dashboard before the other participant answers, the call remains visible in the Active Calls tab.
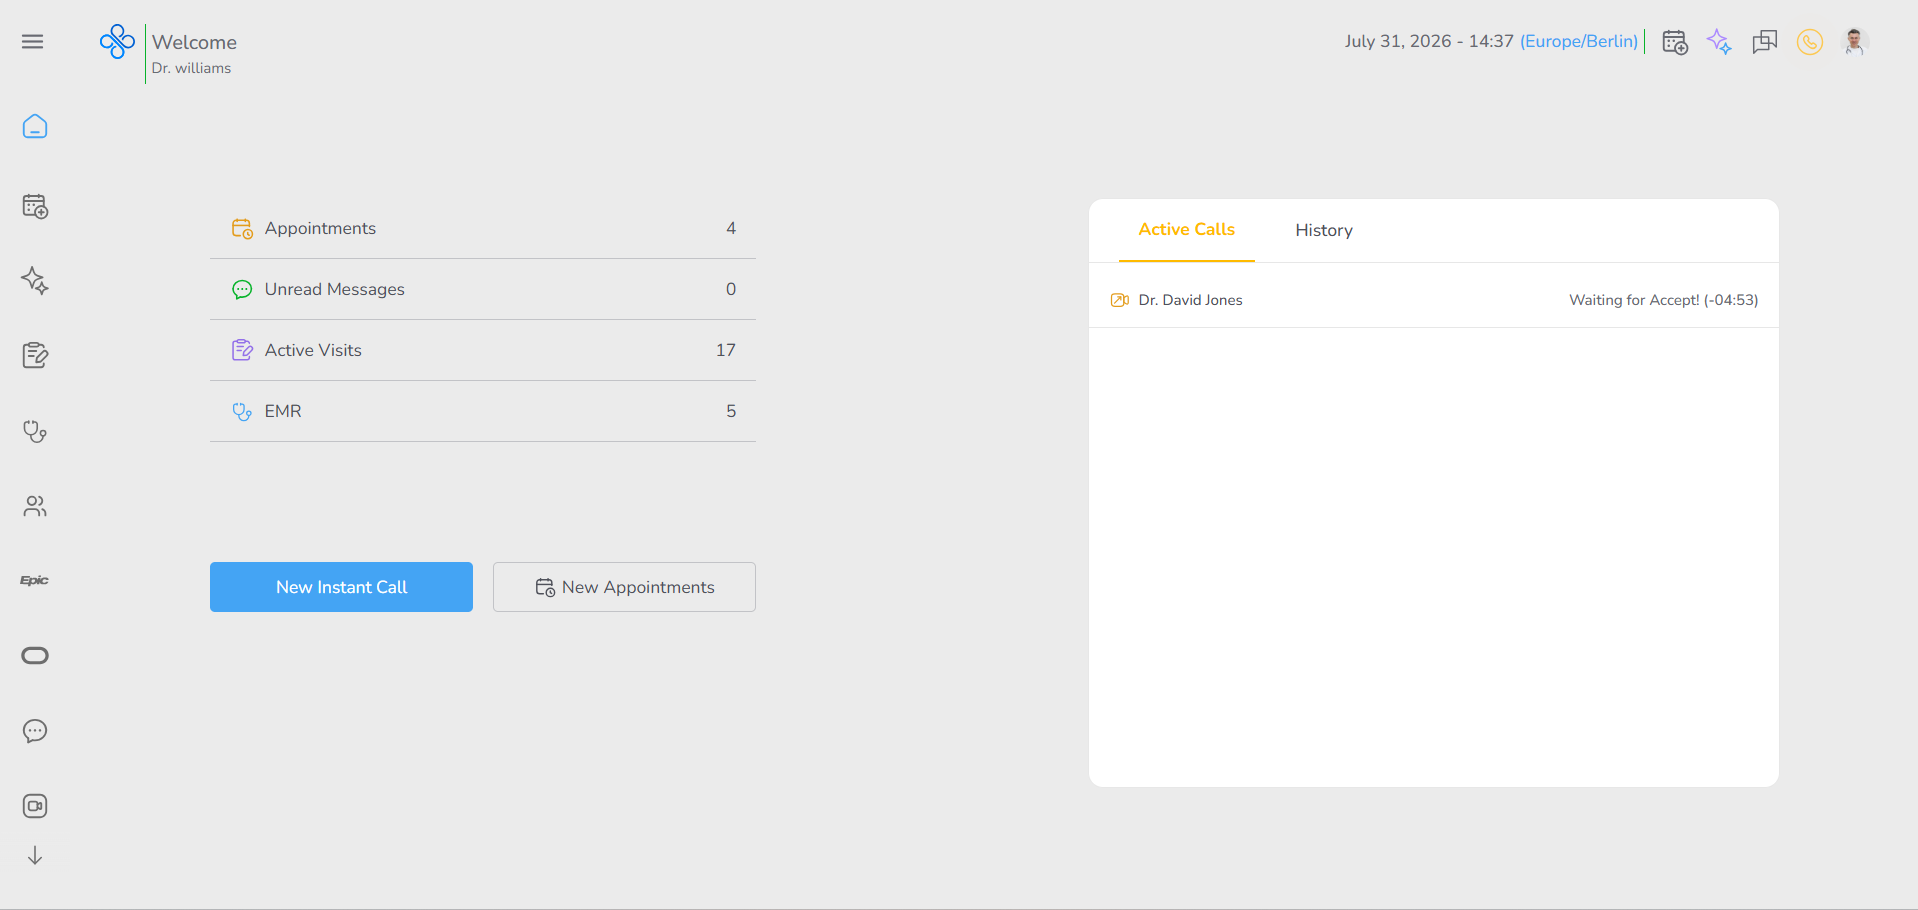
Each outgoing call displays:
- The recipient's name.
- An icon indicating whether the call is Audio or Video.
- The status Waiting for Accept.
- A 5-minute countdown timer while waiting for the recipient to answer.
Hover over the call to display the available actions:
- Preview
- Cancel
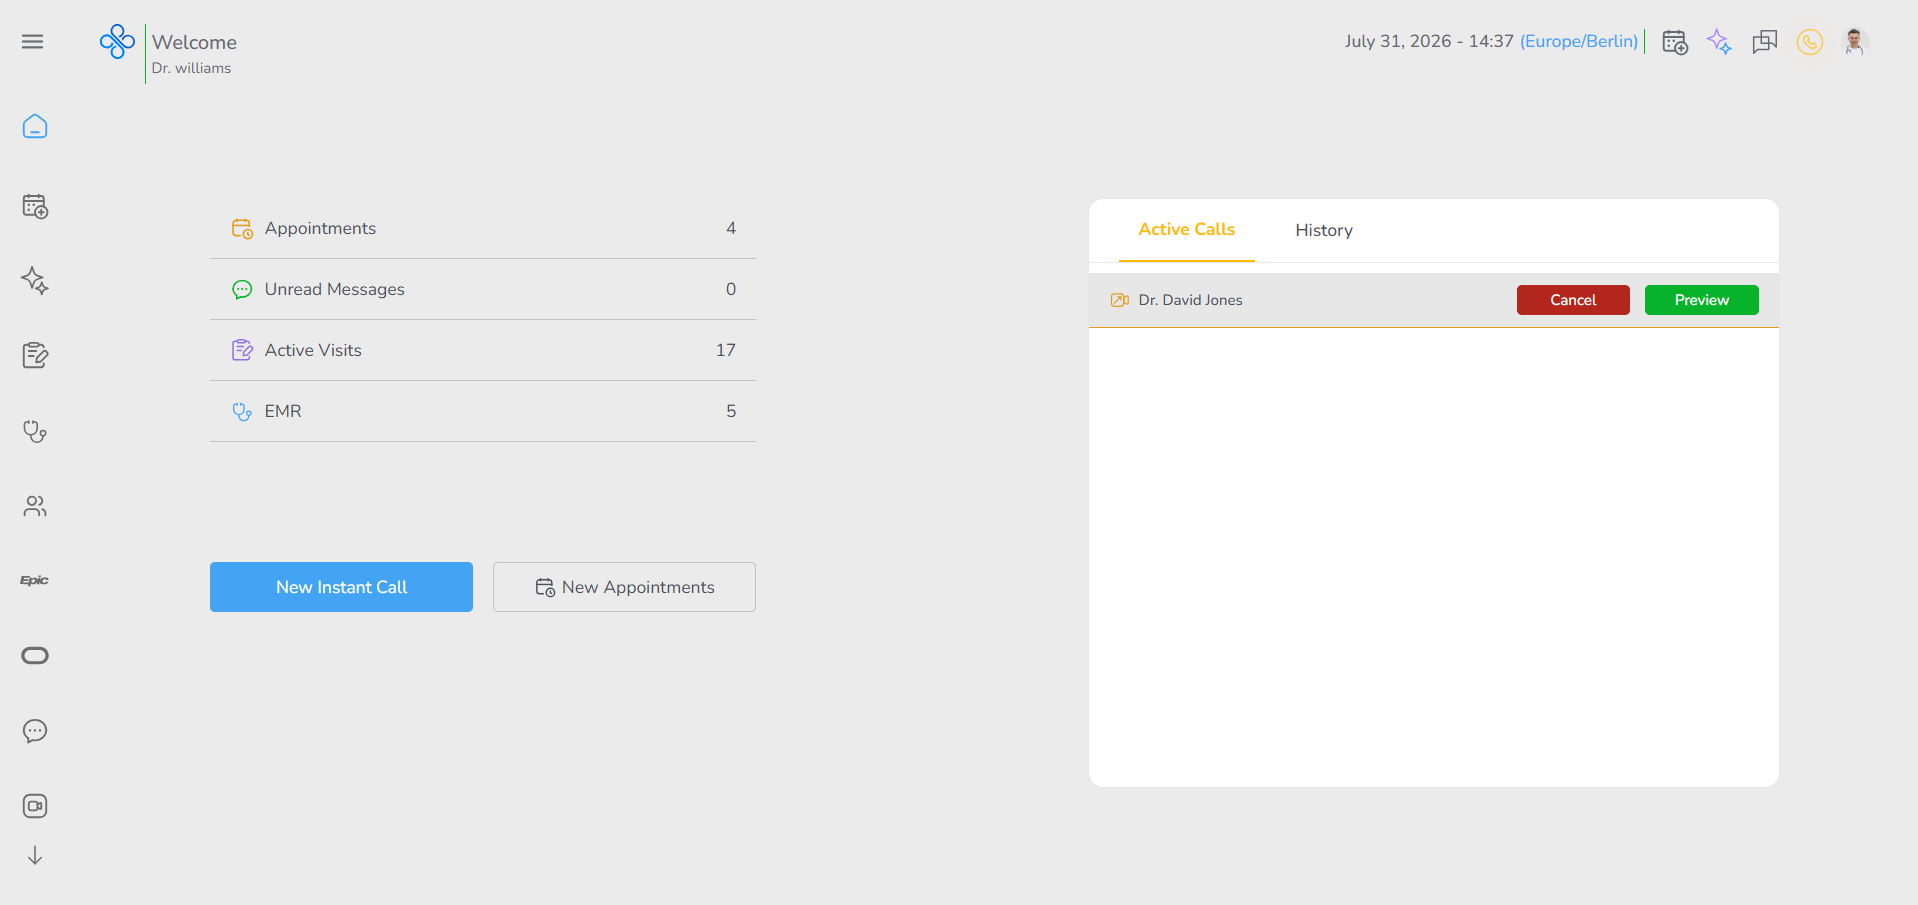
Click Preview to return to the Call Preview screen, where you can continue waiting for the recipient to answer.
Click Cancel to cancel the outgoing call before it is accepted.
Active Calls
When a call has been successfully connected, it remains visible in the Active Calls tab while the conversation is in progress.
This includes:
- Calls that are currently active.
- Scheduled appointment calls that have already started.
- Calls that remain active after returning to the Dashboard.
Active calls are highlighted in green to distinguish them from calls waiting for acceptance.
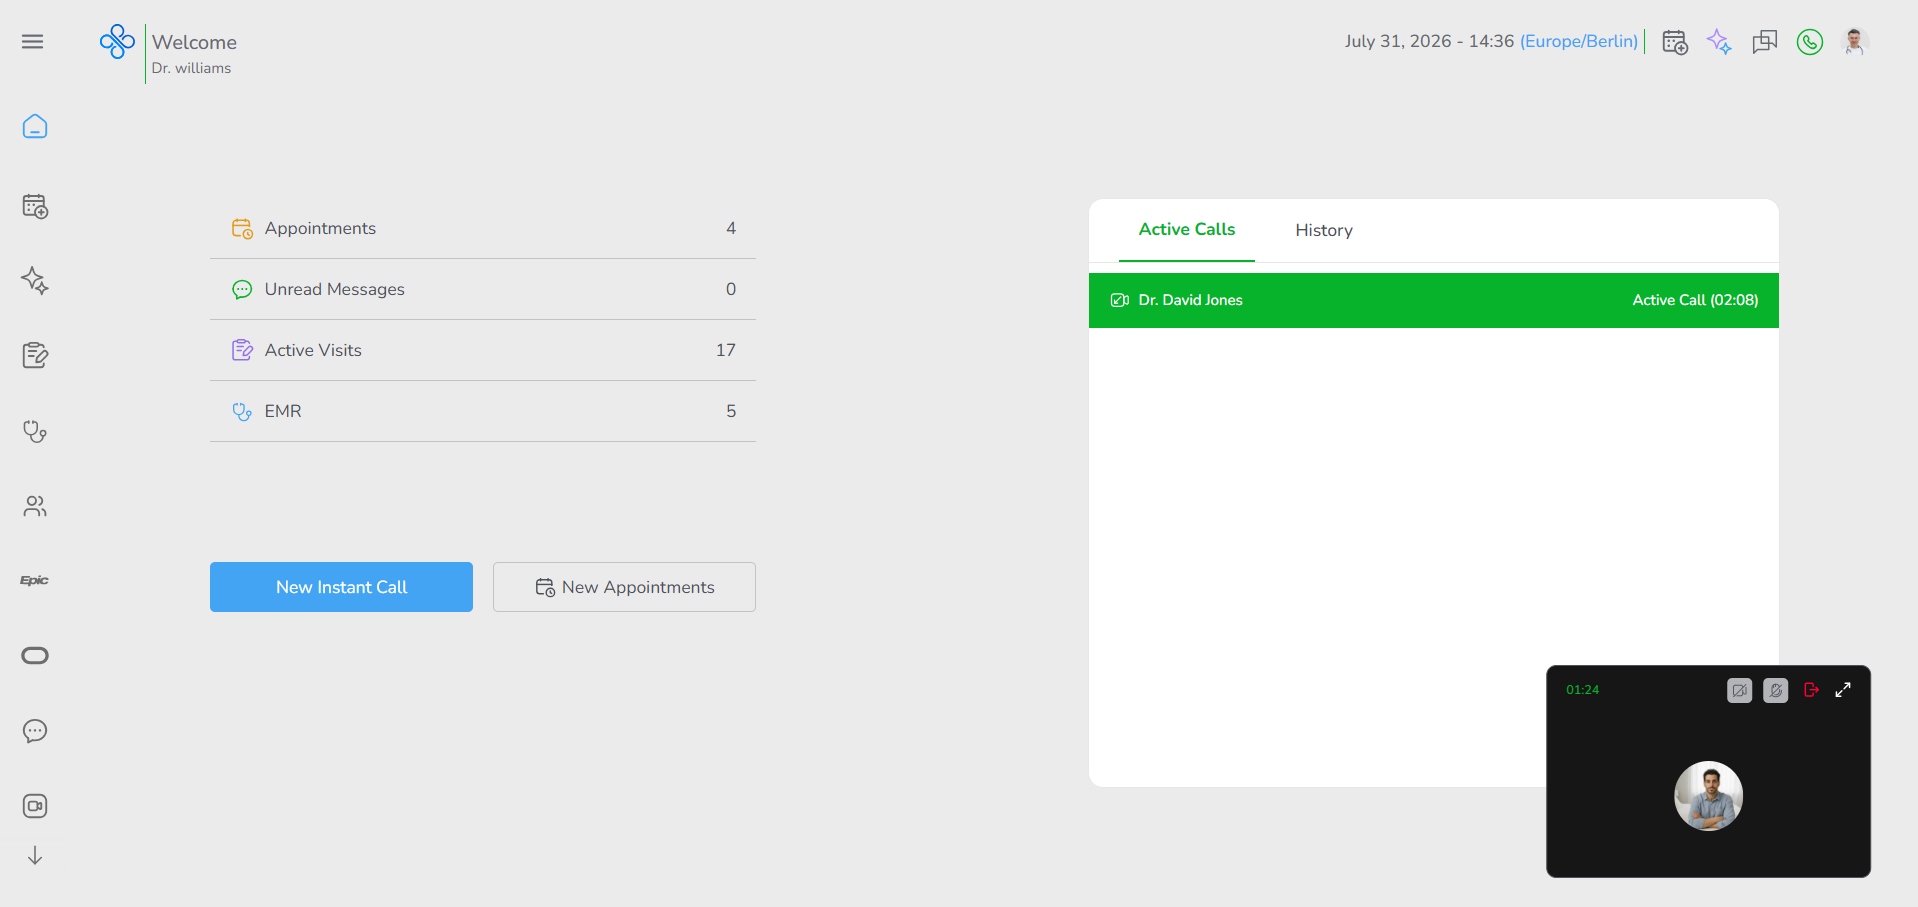
Each active call displays:
- The participant's name.
- An icon indicating whether the call is Audio or Video.
- The status Active Call.
- A live call duration timer showing the elapsed conversation time.
Hover over the call to display the available actions:
- Back to Call
- Hang Up
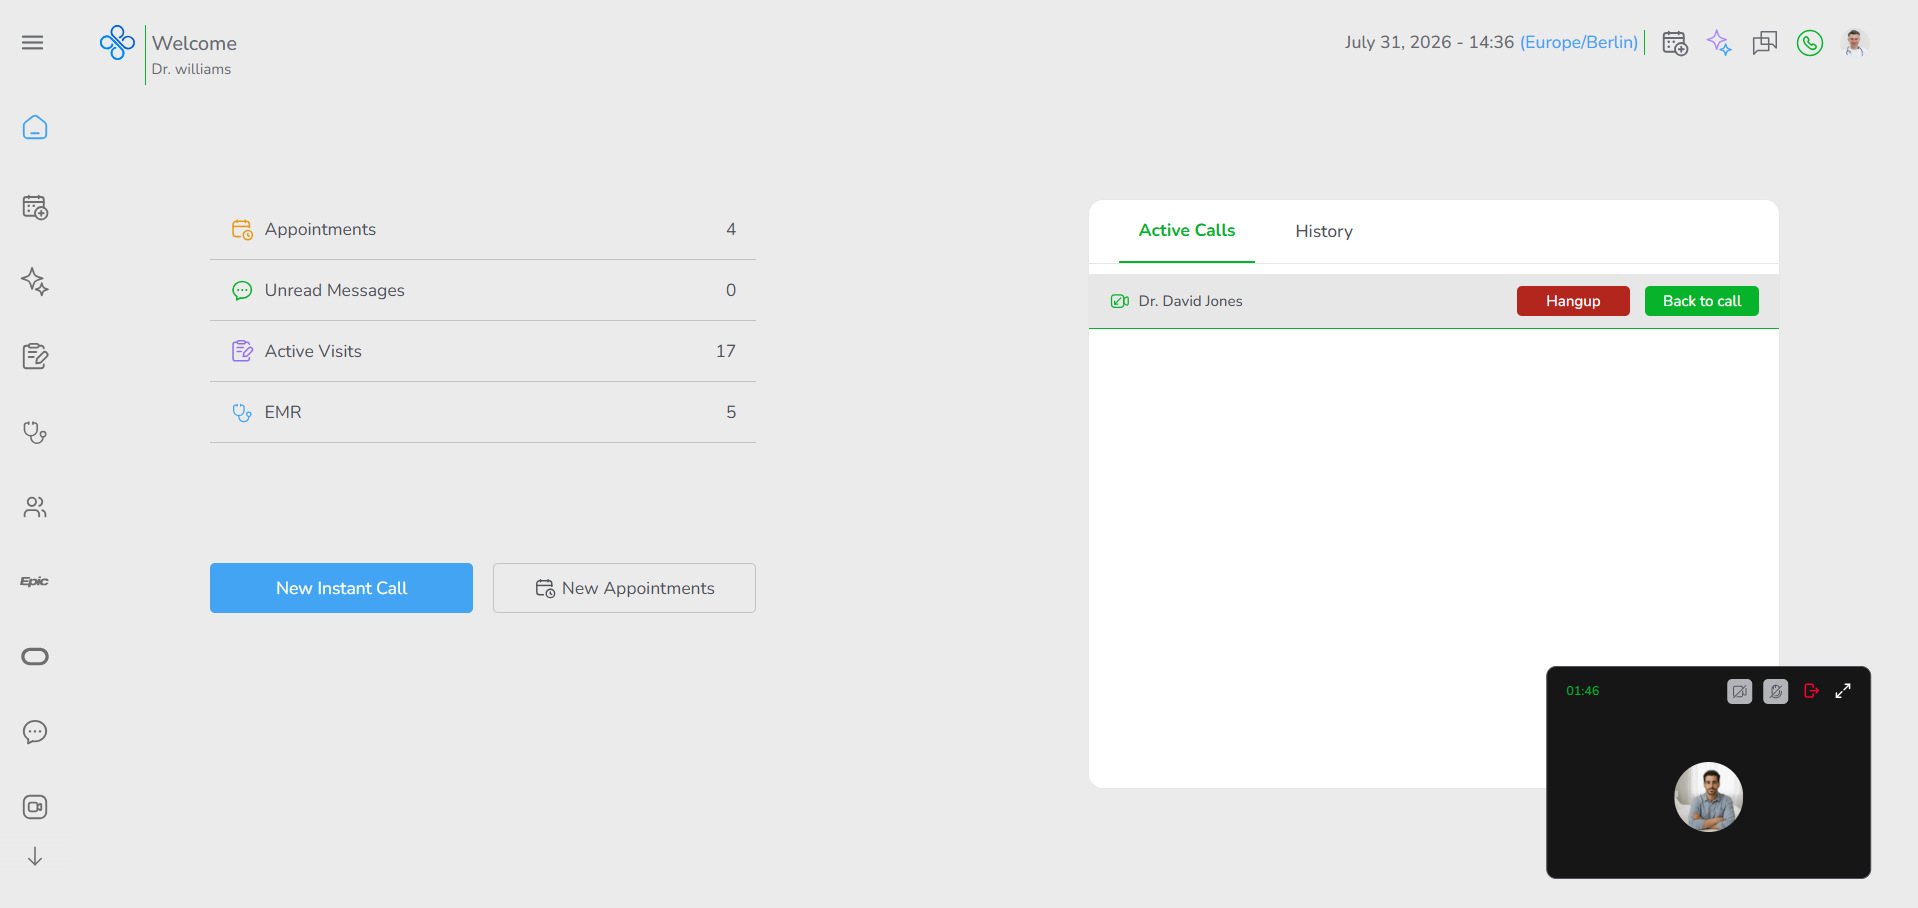
Click Back to Call to immediately return to the ongoing call.
Click Hang Up to end the current call.
You can also return to the active call at any time using the Call icon in the Dashboard header.
No Active Calls
If there are no incoming, outgoing or active calls, the Active Calls tab displays an empty state message.
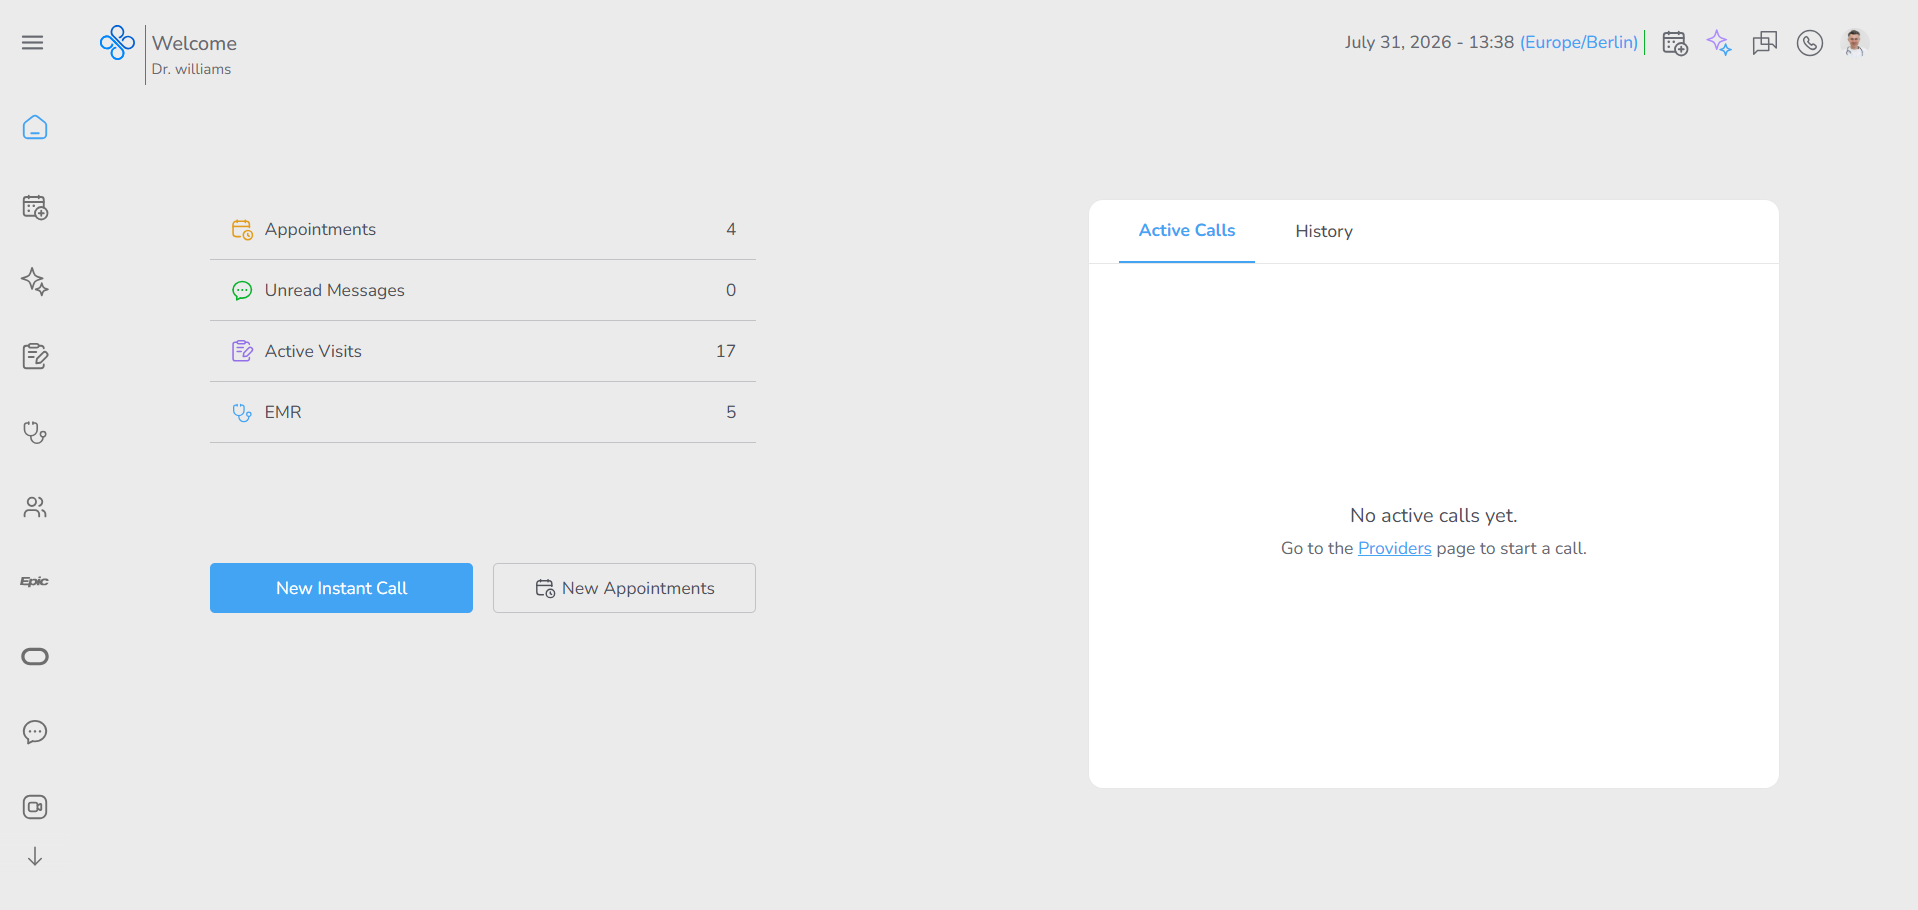
A Providers link is available within this message.
Click Providers to open the Providers page, where you can select a provider and start a new audio or video call.
This provides a quick way to initiate a call directly from the Dashboard, even when there are no active calls to display.
History
Select the History tab to view your recent call history.
The History tab contains your previously completed calls, allowing you to quickly reconnect with recent contacts.
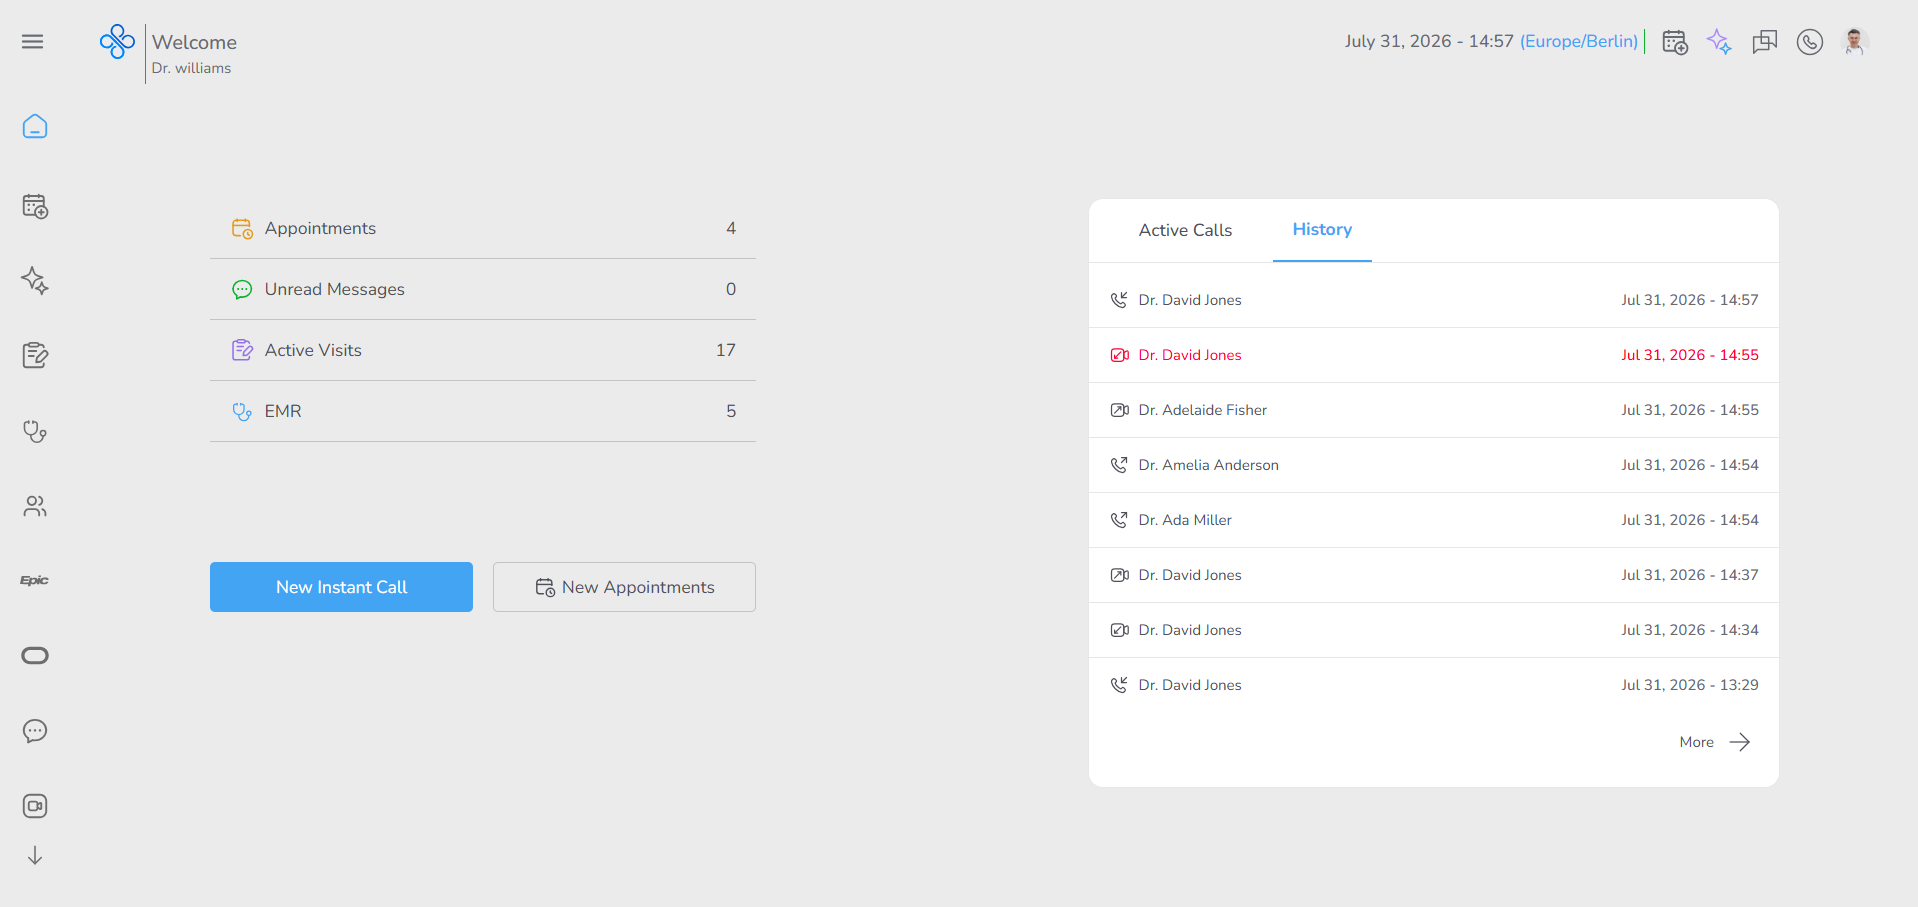
Each history item displays information such as:
- Contact name.
- Call type (Audio or Video).
- Date and time of the call.
Hover over a history item to reveal the available quick actions.
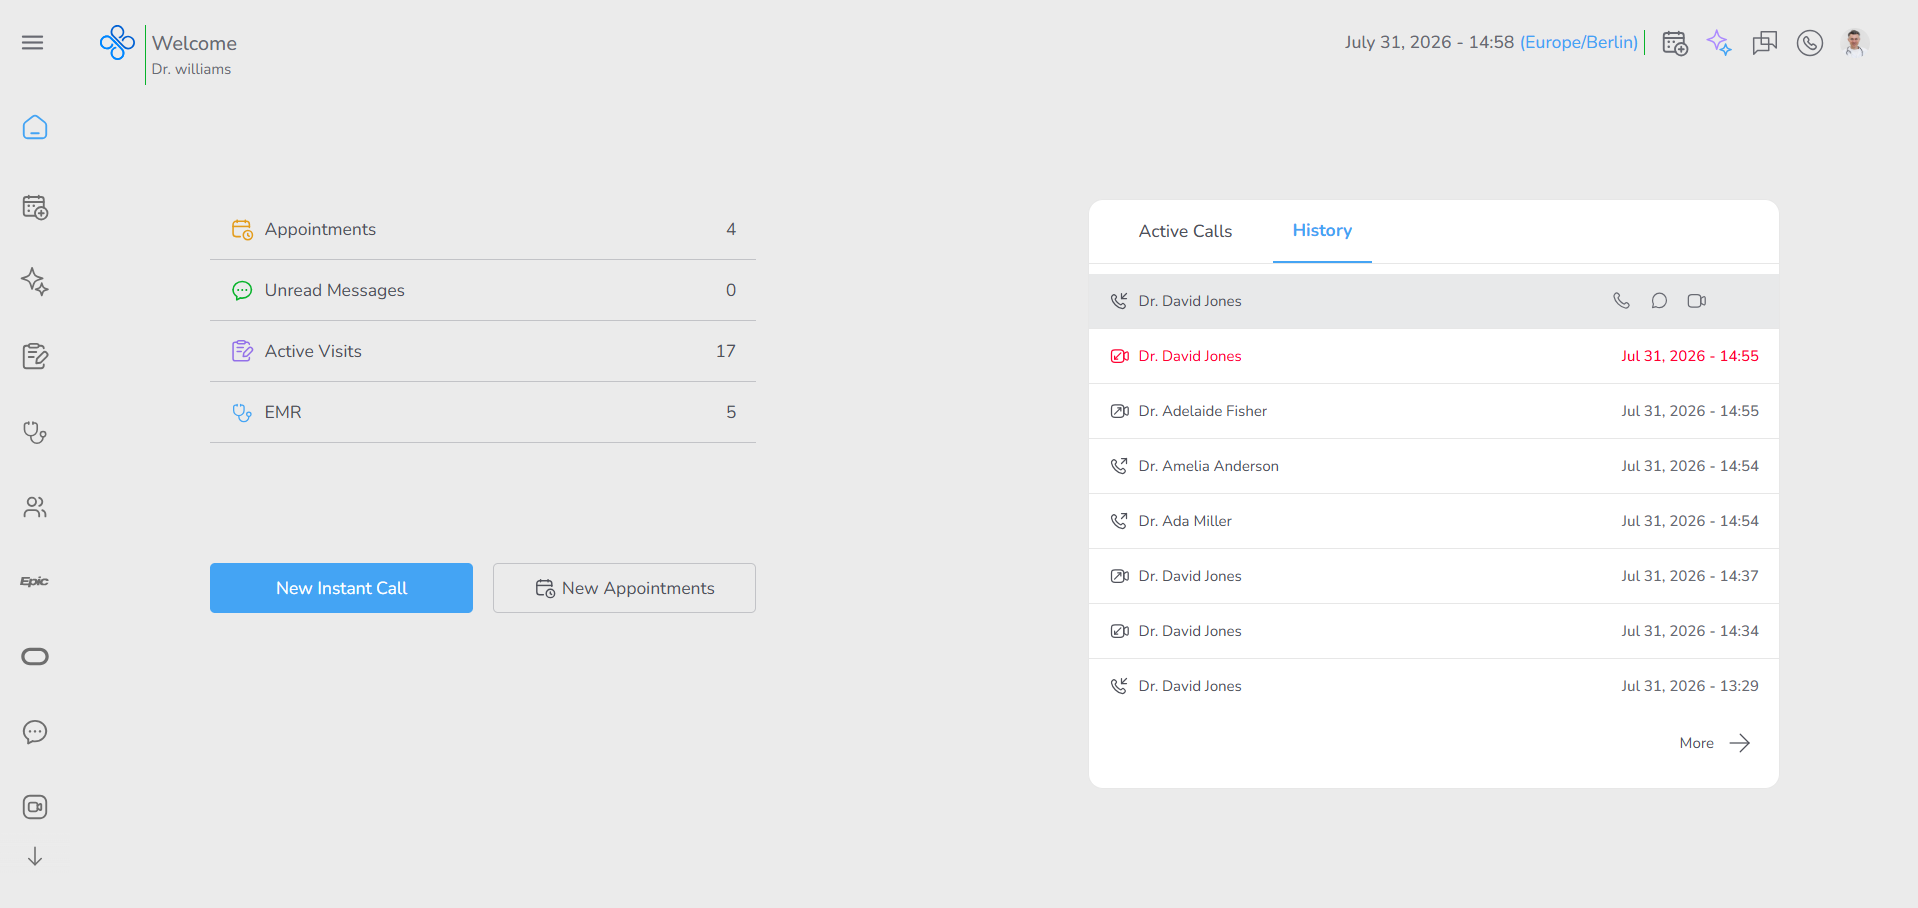
Depending on your permissions and the contact, these actions may include:
- Audio Call
- Video Call
- Message
Clicking any of these actions immediately performs the selected operation.
If more call records are available than can be displayed in the panel, a More button appears at the bottom.
Click More to open the full Calls page, where you can browse and manage your complete call history.
Missed calls are displayed in red, making them easy to distinguish from completed calls and helping you quickly identify calls that require follow-up.
For more information about calls and call management, refer to the Private (https://app.clickup.com/9015704788/docs/8cp1f6m-3315/8cp1f6m-3095) .
5. Sidebar Navigation
The Sidebar is your main navigation menu and is always available on the side of the screen. It helps you move between all major sections of the platform quickly and easily. What the Sidebar contains
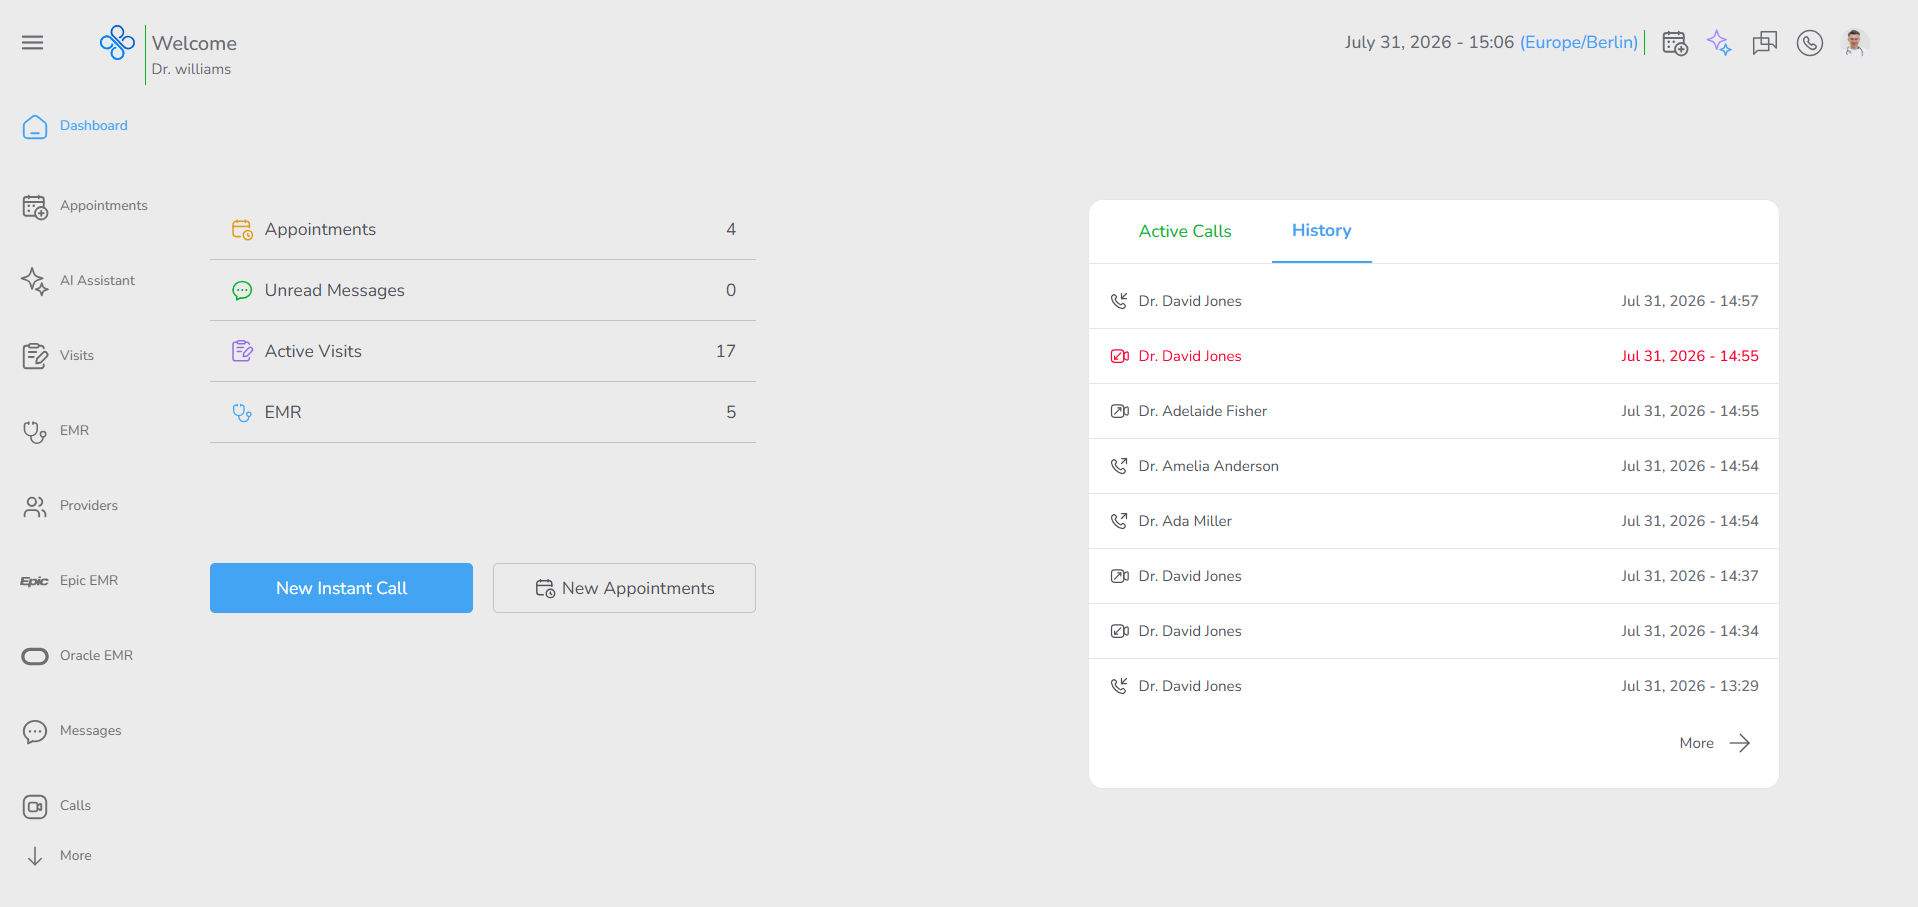
The Sidebar includes icons and labels for key areas such as:
- Dashboard (Home) – Returns you to the main Dashboard at any time.
- Calls – Manage audio and video calls.
- Appointments – View, create, and manage all appointments.
- Visits – Access ongoing or completed patient visits.
- EMR – Access and manage patient electronic medical records within the platform.
- Providers – Browse and interact with other providers.
- Messages – Access your conversations to read, send, and manage messages.
- AI Assistant – Chat with the AI assistant for medical and clinical support.
- Epic EMR – Connect to your organization's Epic Electronic Medical Record (EMR) system to access patient information and clinical data available through your Epic environment.
- Oracle EMR – Connect to Oracle Health EMR to access patient records and clinical information from your organization's Oracle Health system.
- Meditech EMR – Connect to the MEDITECH EMR system to access patient records and clinical information maintained within your organization's MEDITECH environment.
- Apps – Customize your workspace by exploring and enabling different platform features. You can add tools such as Appointments, EMR, and other available applications to match your workflow and preferences.
- OHIF – Open the medical imaging viewer to review available patient imaging studies.
- Support – Contact the support team or report issues if you need assistance using the platform.
How to use the Sidebar
- The Sidebar provides quick access to the main areas of the platform and remains available throughout your session for fast navigation.
- Click any sidebar icon to open its corresponding page.
- The currently active page is visually highlighted, making it easy to identify your current location within the platform.
- By default, the Sidebar is displayed in its collapsed view, showing only the icons for each section.
- Hover your mouse over the Sidebar to temporarily expand it and display the name of each menu item alongside its icon.
- If you prefer to keep the Sidebar expanded at all times, click the Menu (hamburger) button located in the upper-left corner of the Dashboard. This pins the Sidebar in its expanded state, allowing the menu titles to remain visible while you work.
- Click the Menu button again to collapse the Sidebar and return it to the icon-only view.
- The Sidebar also supports drag-and-drop customization.
- Click and hold any menu item, then drag it to a new position within the Sidebar to rearrange the order of the available sections according to your preference.
- Your customized menu order is preserved, allowing you to organize frequently used features for quicker access. Why this matters
- You can access all core features from one place.
- No need to remember complex paths or menus.
- It supports a smooth workflow, especially when switching between appointments, visits, and communication tools.
Fields (Field Descriptions)
| Area | Field | Description |
|---|---|---|
| Header | Welcome Message | Displays a personalized welcome message and the signed-in provider’s name on the left side of the header. |
| Header | Date & Time | Displays the current date, time, and provider’s selected time zone. |
| Header | Calendar Icon | Opens the Calendar panel for reviewing scheduled appointments, available time slots, and appointment actions. |
| Header | Medi (AI Assist) Icon | Opens the Medi panel for starting, reviewing, or continuing AI conversations. |
| Header | Chat Icon | Opens the Messages page. An indicator appears when unread messages are available. |
| Header | Call Icon | Provides access to waiting or active calls and visually reflects the current call status. |
| Header | Profile Dropdown | Displays the provider’s photo, name, and email, together with options for profile settings, appearance preferences, and signing out. |
| Sidebar | Navigation Items | Provides access to Dashboard, Calls, Appointments, AI Assistant, Visits, EMR, Providers, Messages, Apps, Epic EMR, Oracle EMR, MEDITECH EMR, OHIF, Support, and other enabled features. |
| Sidebar | Active Item | Highlights the icon and label of the page that is currently open. |
| Sidebar | Hover Expansion | Temporarily expands the Sidebar to display menu labels alongside their icons. |
| Sidebar | Pin / Unpin Menu | Uses the hamburger menu to keep the Sidebar expanded or return it to the icon-only view. |
| Sidebar | Drag-and-Drop Ordering | Allows menu items to be moved and arranged in the user’s preferred order. |
| Quick Stats | Appointments Counter | Displays the number of upcoming appointments and links to the Appointments page. |
| Quick Stats | Unread Messages Counter | Displays the number of unread messages and links to the Messages page. |
| Quick Stats | Active Visits Counter | Displays the number of visits that have started but are not yet completed. |
| Quick Stats | EMR Counter | Displays the number of patients associated with the provider and links to the EMR page. |
| Quick Actions | New Instant Call | Opens the Providers page, where the user can select a provider and start an audio or video call. |
| Quick Actions | New Appointments | Opens the appointment creation modal for scheduling a new appointment. |
| Calls Panel | Active Calls Tab | Displays incoming calls, outgoing calls waiting for acceptance, and currently connected calls. |
| Calls Panel | Incoming Call | Displays the caller’s name, incoming audio or video icon, Waiting for Accept status, and a five-minute countdown timer. Hovering reveals Accept and Decline actions. |
| Calls Panel | Outgoing Pending Call | Displays the recipient’s name, outgoing audio or video icon, Waiting for Accept status, and a five-minute countdown timer. Hovering reveals Preview and Cancel actions. |
| Calls Panel | Active Call | Displays an active call highlighted in green, together with the participant’s name, call type, Active Call status, and call duration. Hovering reveals Back to Call and Hang Up actions. |
| Calls Panel | No Active Calls | Displays an empty-state message and a Providers link for starting a new call. |
| Calls Panel | History Tab | Displays recent completed and missed calls, including contact name, call type, date, and time. |
| Calls Panel | Missed Call | Displays unanswered calls in red so they can be easily identified in the call history. |
| Calls Panel | History Quick Actions | Reveals audio call, video call, and message actions when the user hovers over a call-history item. |
| Calls Panel | More | Opens the full Calls page when additional call-history records are available. |
| Calendar | Month Selector | Displays the current month and allows navigation between previous and next months. |
| Calendar | Appointment Indicator | Displays a small dot beneath dates that contain one or more appointments. |
| Calendar | Date Selector | Allows the user to select a date and display its daily time slots. |
| Calendar | Past Time Slot | Displays a past time in a lighter gray style with no available action. |
| Calendar | Available Time Slot | Displays a free time that can be selected to create a new appointment. |
| Calendar | Booked Time Slot | Displays scheduled appointments as blue time slots. |
| Calendar | Appointment Summary | Displays the selected appointment’s type, date, time, and current status. |
| Calendar | Details | Opens a modal containing complete appointment information, including participants, notes, and related data. |
| Calendar | Check-In | Confirms the patient’s arrival when the action is available for the selected appointment. |
| Calendar | Start Visit | Opens the patient visit page after a successful Check-In for appointments that include a patient. |
| Calendar | Create an Appointment | Starts the appointment creation process when an available time slot is selected. |
| Calendar | Open in Full Screen | Opens the complete Calendar page and its full scheduling features. |
| Medi (AI Assist) | Chat Panel | Displays the conversation between the user and Medi without leaving the current page. |
| Medi (AI Assist) | Message Input | Allows the user to type and submit a new question or follow-up message. |
| Medi (AI Assist) | History | Displays previous AI conversations that can be reopened and continued. |
| Medi (AI Assist) | Load Last Conversation | Restores the user’s most recent conversation when no chat has been opened during the current session. |
| Medi (AI Assist) | Open in Full Screen | Opens the complete Medi workspace for longer conversations and full conversation management. |
| Medi (AI Assist) | Close | Closes the Medi panel and returns the user to the current page. |
Behavior & Expected Outcome
- Dashboard information is updated automatically as appointments, visits, messages, and patient information change.
- Quick Stats counters always display the latest available data.
- The Calendar panel refreshes automatically after appointments are created, checked in, started, or updated.
- The Active Calls tab automatically reflects the current call state, including incoming calls, outgoing calls waiting for acceptance, and active calls.
- The History tab is updated automatically as calls are completed or missed.
- Active calls remain accessible from both the Active Calls tab and the Call icon in the Dashboard header.
- Missed calls are clearly identified in the History tab using red text.
- The Sidebar always highlights the currently active page and supports expanded, collapsed, and pinned navigation modes.
- Changes to the Sidebar layout, including the order of menu items, are preserved after customization.
- Theme changes (Light or Dark mode) are applied immediately across the Dashboard and all its components.
Common Errors + Fixes
| Issue | Cause | Fix |
|---|---|---|
| Calendar appointments or time slots are not updating | Temporary network issue or session timeout | Refresh the Dashboard, verify your internet connection, or sign in again if the issue persists. |
| Unable to check in to an appointment | The appointment is not yet available for Check-In or you do not have permission | Wait until the scheduled time or verify that you have permission to perform the Check-In. |
| Start Visit button is unavailable | The patient has not been checked in or the appointment type does not support visits | Complete the Check-In process first or verify the appointment type. |
| Incoming call is not displayed in the Active Calls tab | The call has ended, timed out, or a temporary connection issue occurred | Refresh the Dashboard or check the History tab or Calls page for the latest call information. |
| Unable to return to an active call | The call has already ended or the connection was interrupted | Verify that the call is still active or start a new call if necessary. |
| Unable to start a new call from the Dashboard | No provider has been selected | Click Providers or New Instant Call, select a provider, and initiate the call again. |
| AI Assistant (Medi) is not responding | Temporary connectivity issue or AI service is unavailable | Refresh the page or reopen the Medi panel and try again. |
| Sidebar menu titles are not visible | The Sidebar is in its collapsed view | Hover over the Sidebar to temporarily expand it or click the Menu button to pin it in the expanded state. |
| Sidebar item order is not as expected | Menu items have been rearranged | Drag and drop the menu items again to restore your preferred order. |