Apps
Overview
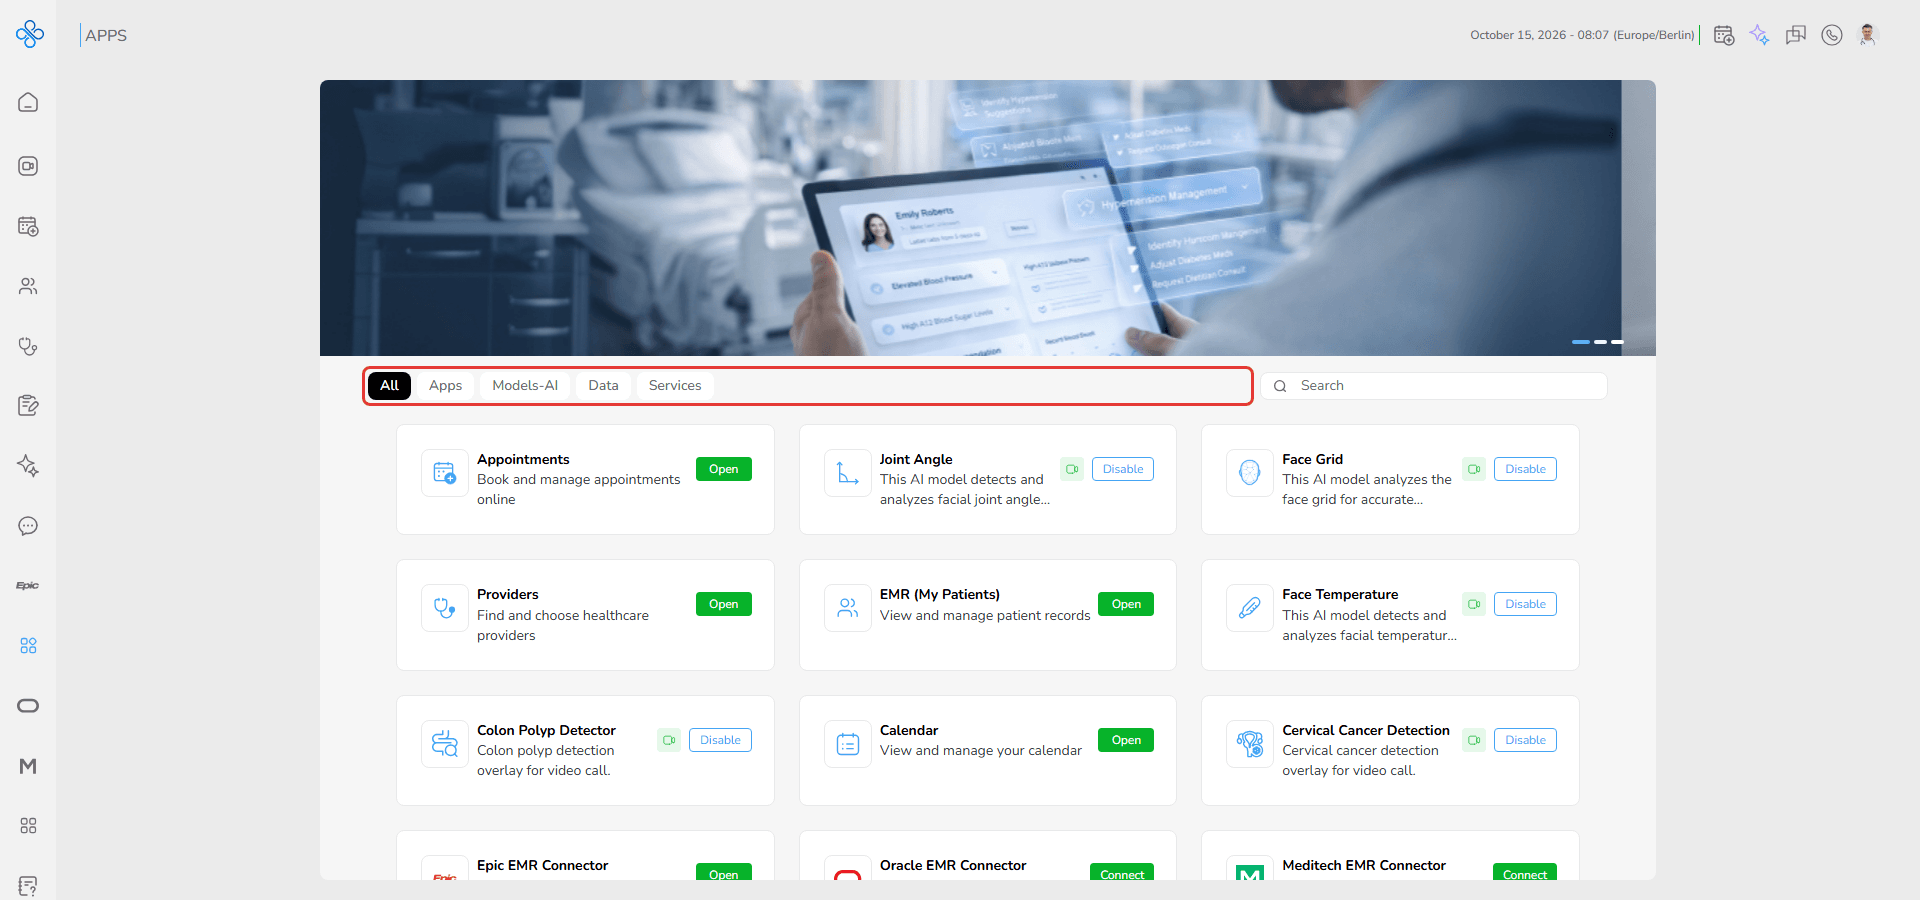
The Apps page allows you to access all available applications, AI models, data sources and services in Telemedical.
You can use this page to activate the tools and features you need for your workflow. By default, some apps and models are inactive. You must get or enable them before they become available in the platform.
This page includes the following tabs:
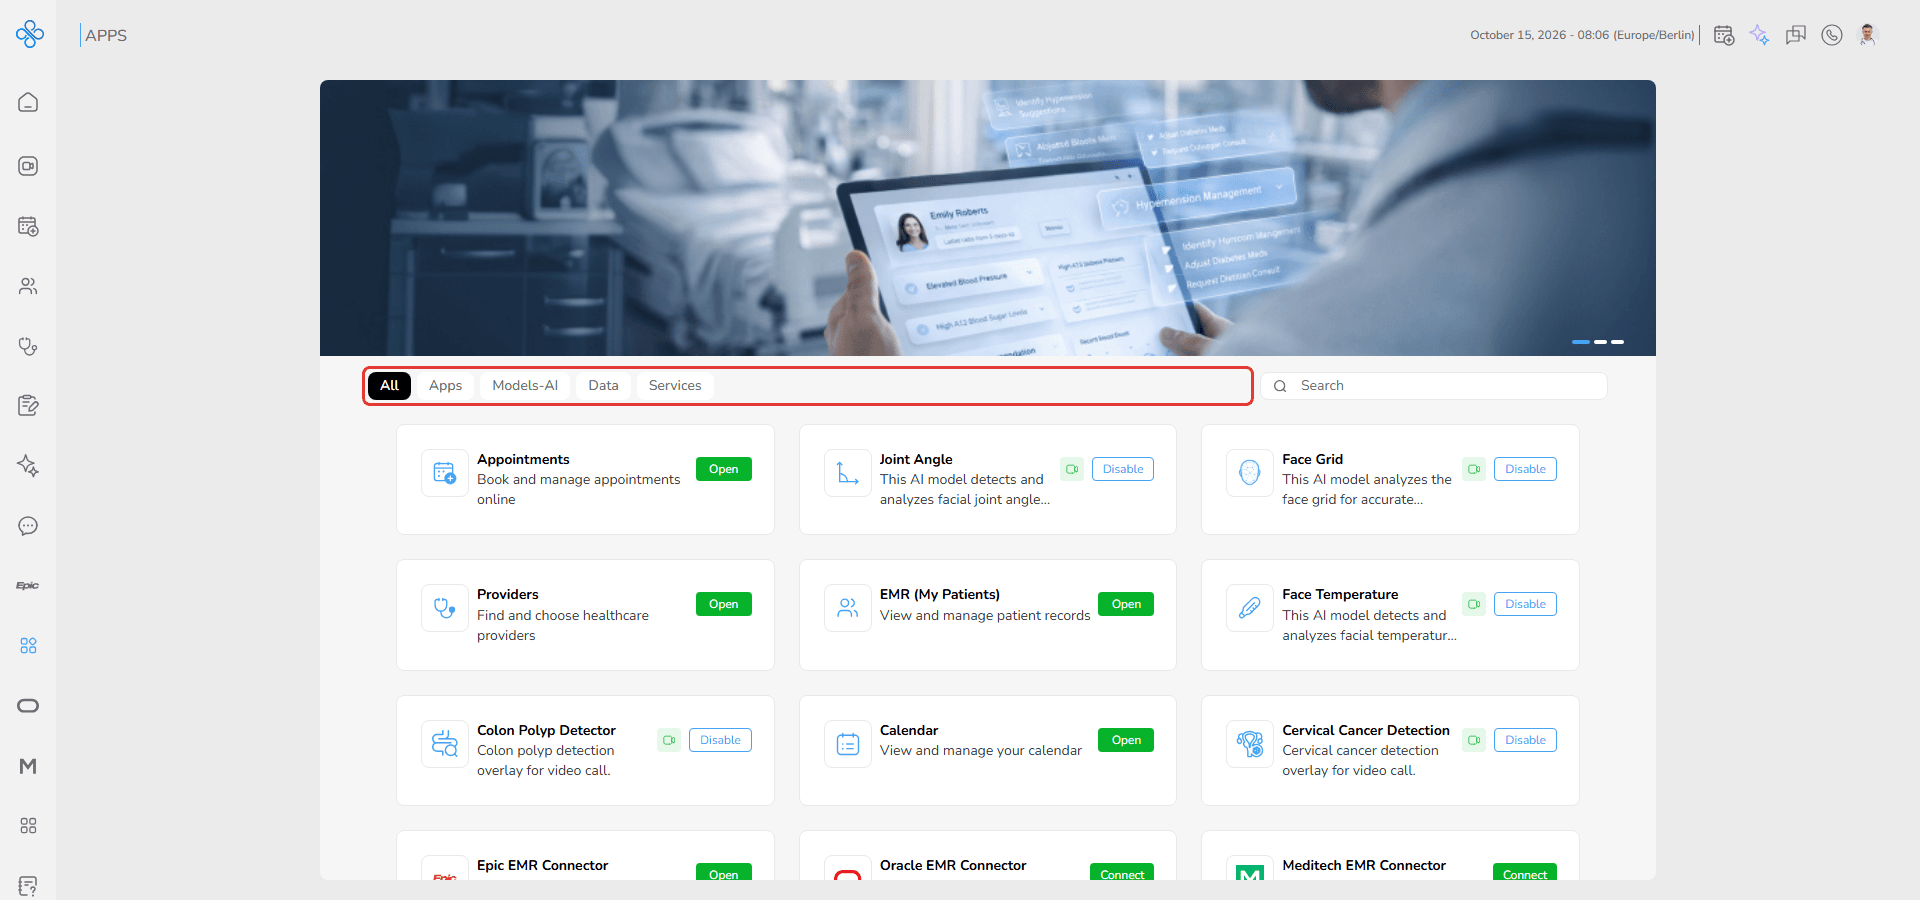
- All
Displays all available items
- Apps
Displays available applications
- Models-AI
Displays AI models, grouped as Streaming AI, Image AI and Generative AI
- Data
Reserved for future features and currently unavailable
- Service
Reserved for future features and currently unavailable
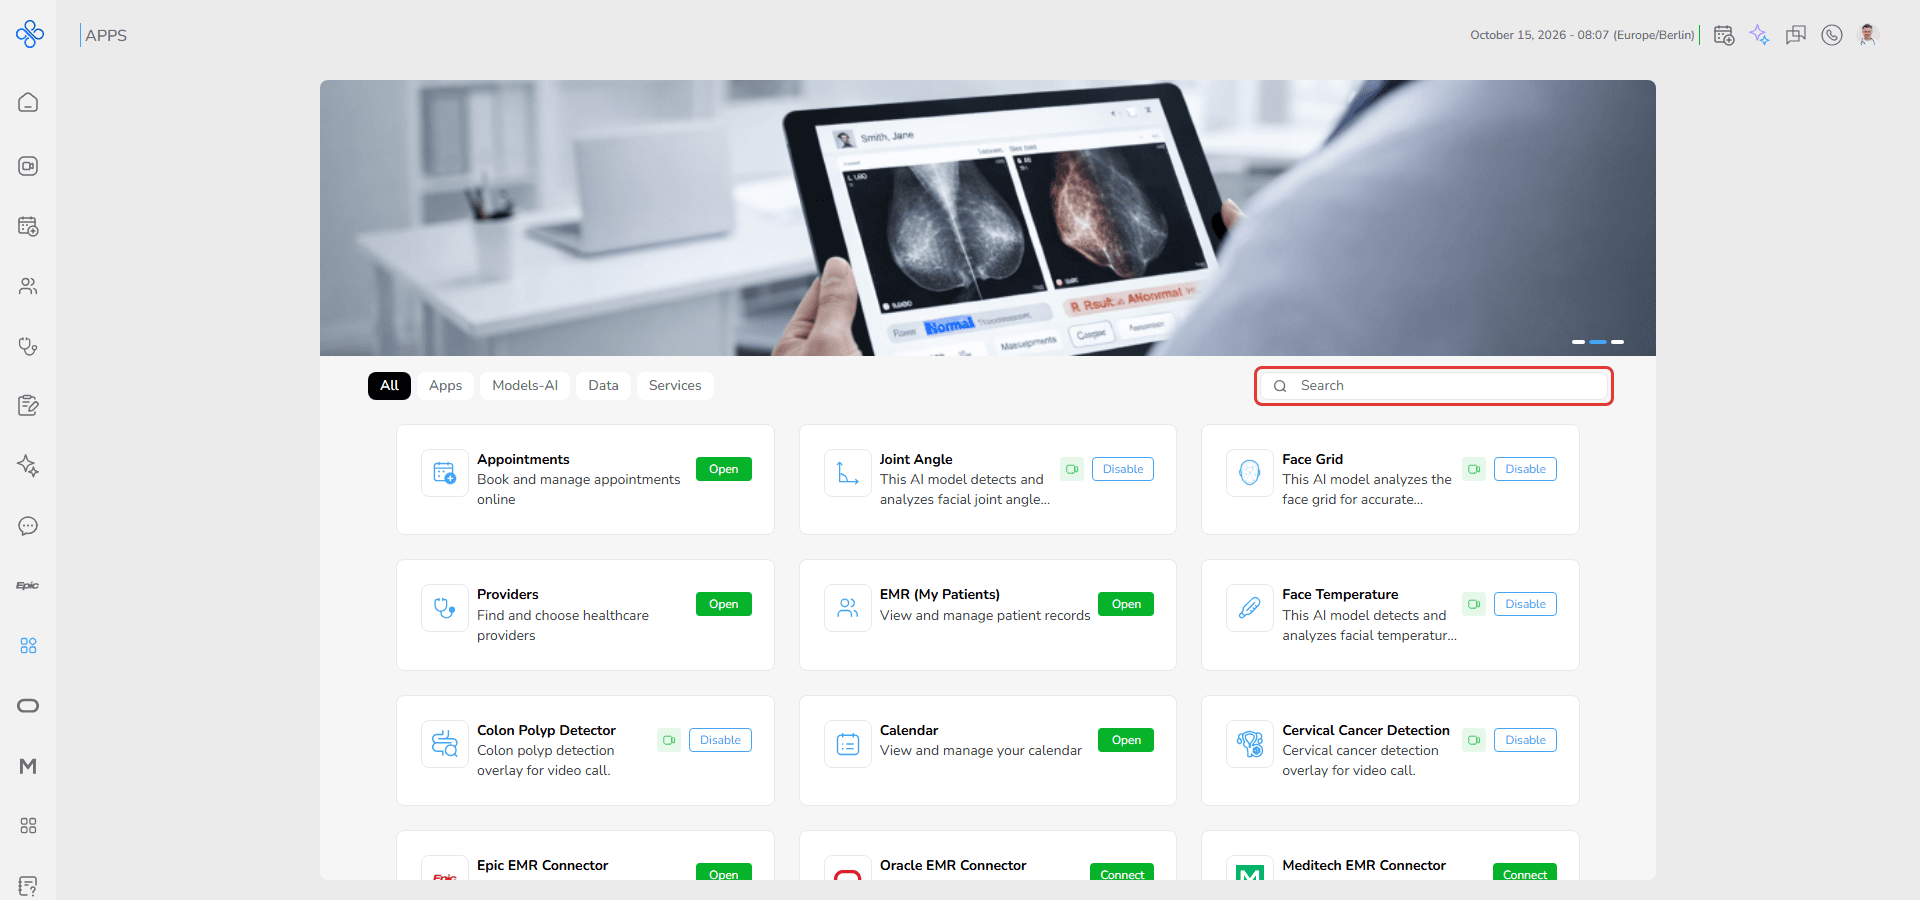
Each tab also includes a search bar that allows you to quickly find apps, models or services.
How to Access Apps
Follow these steps to open the Apps page:
1. Open the Telemedical platform.
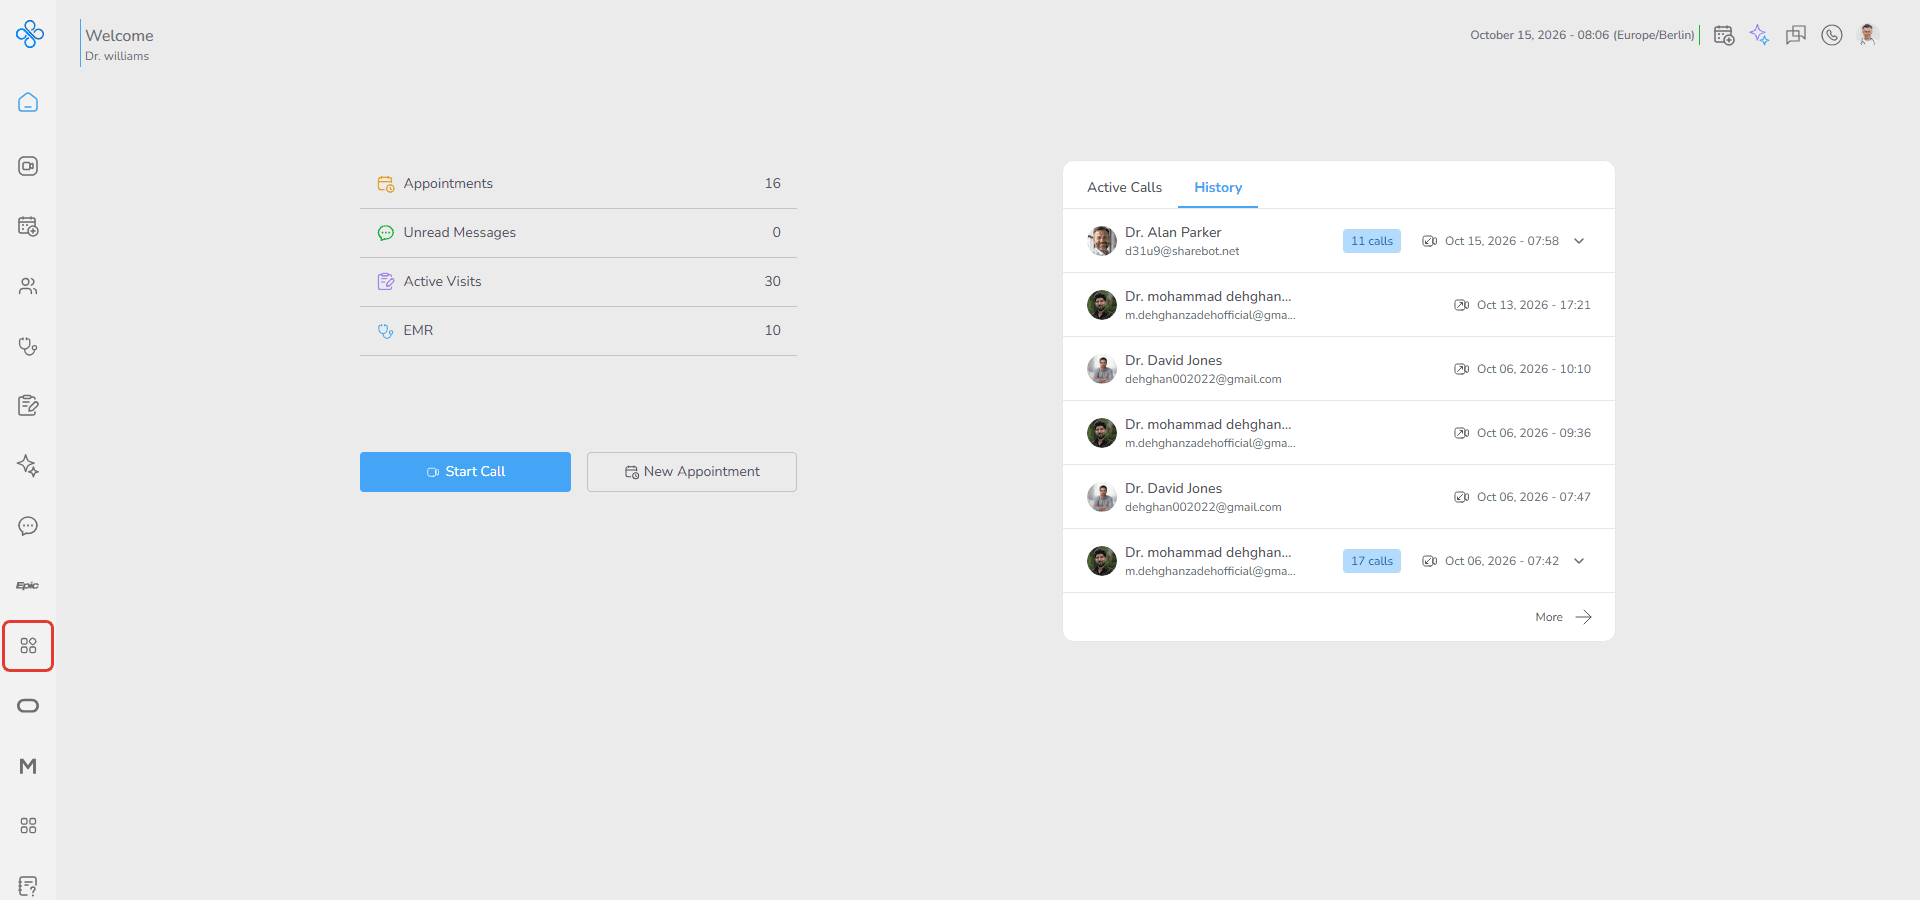
2. From the left sidebar, click Apps.
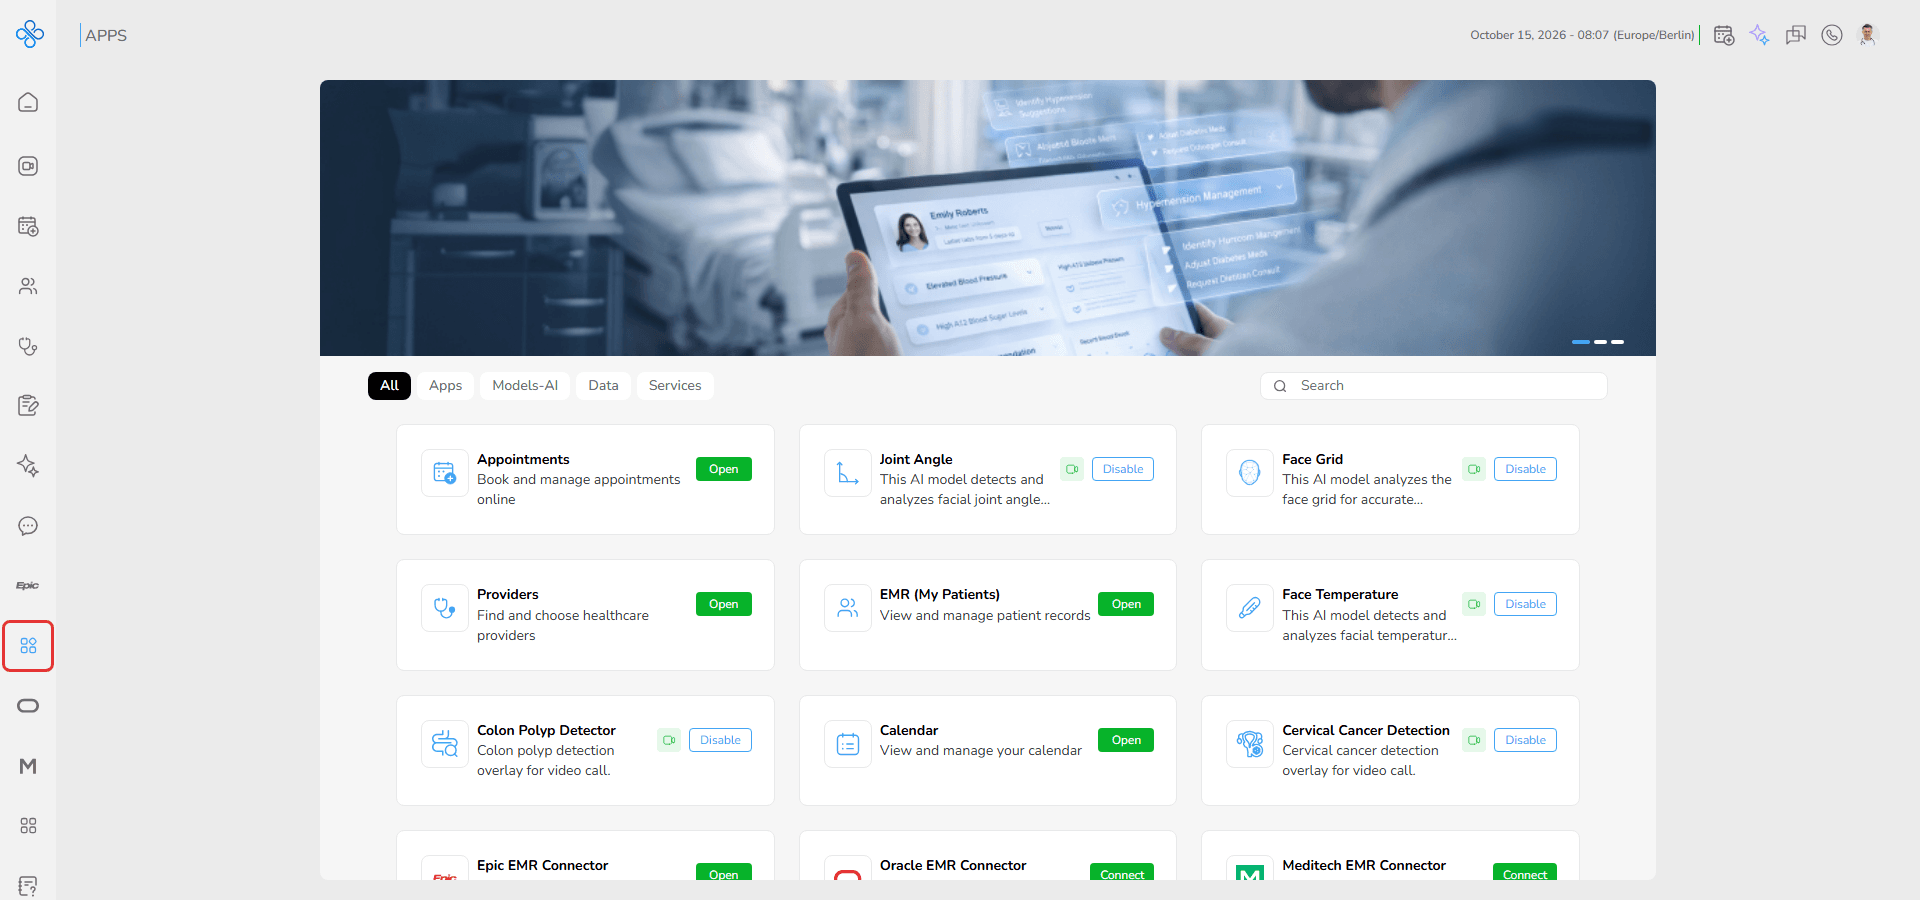
3. The Apps page opens.
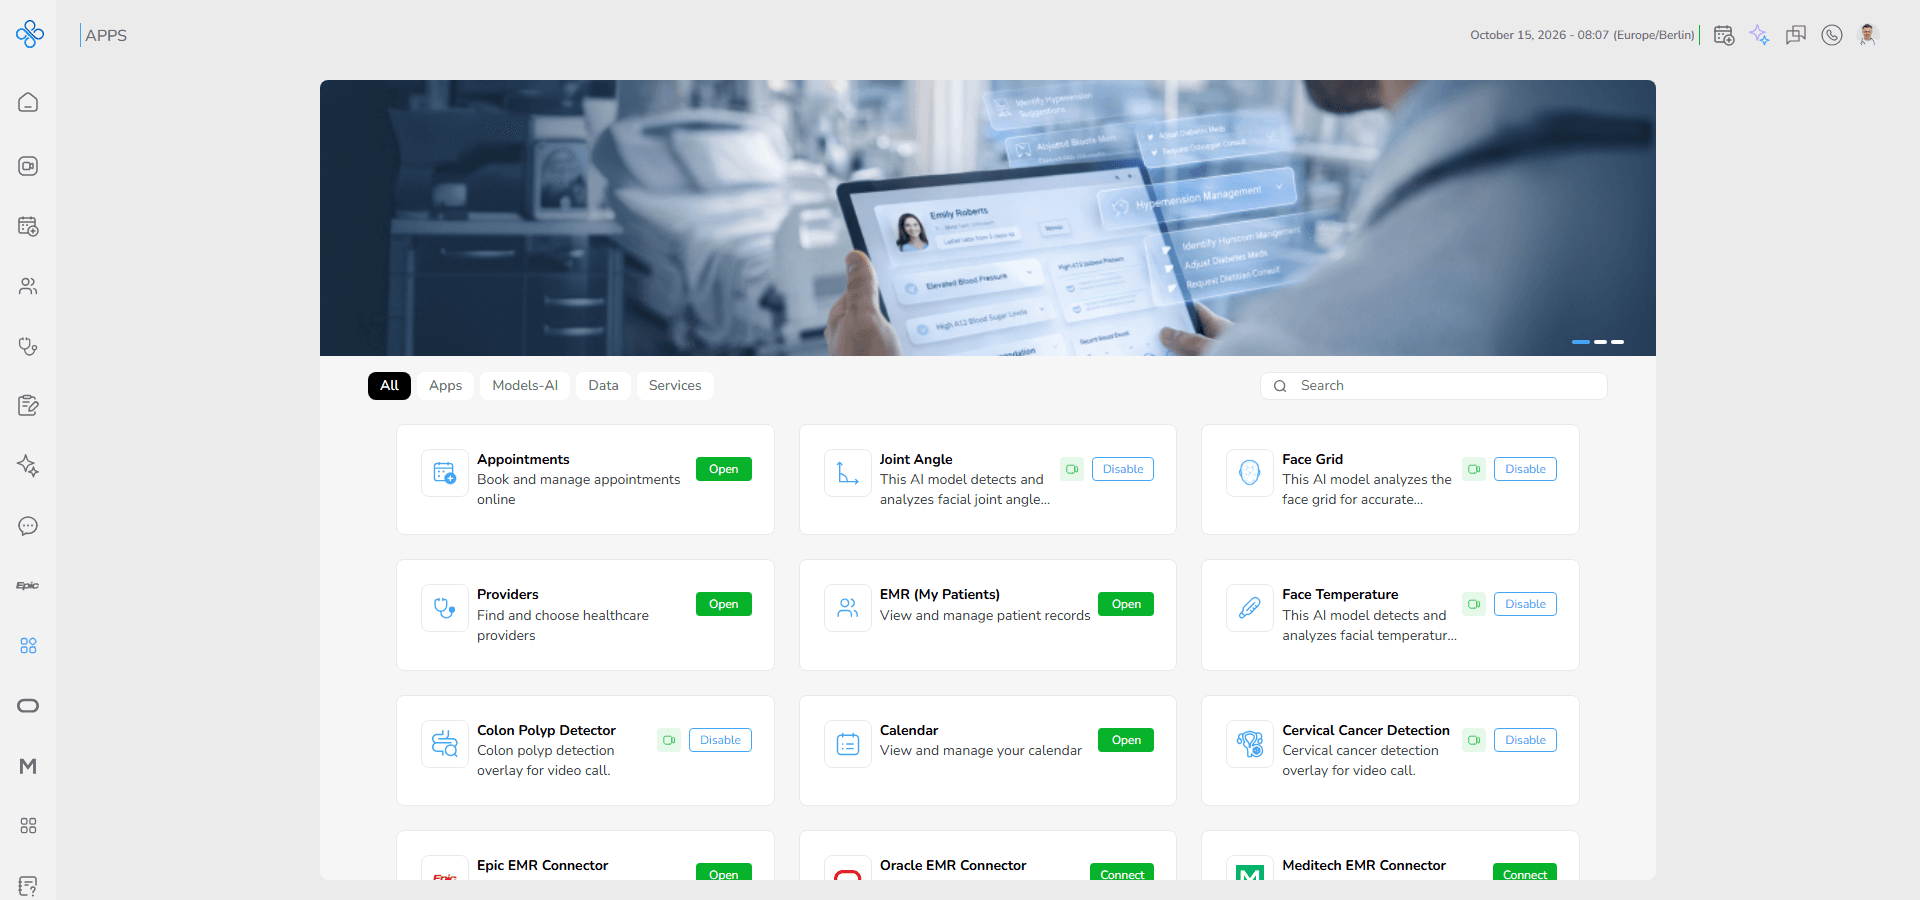
4. Use the tabs at the top of the page to switch between categories.
5. Use the search bar to find a specific app or model.
Steps
How to access an app
1. Open the Apps tab.
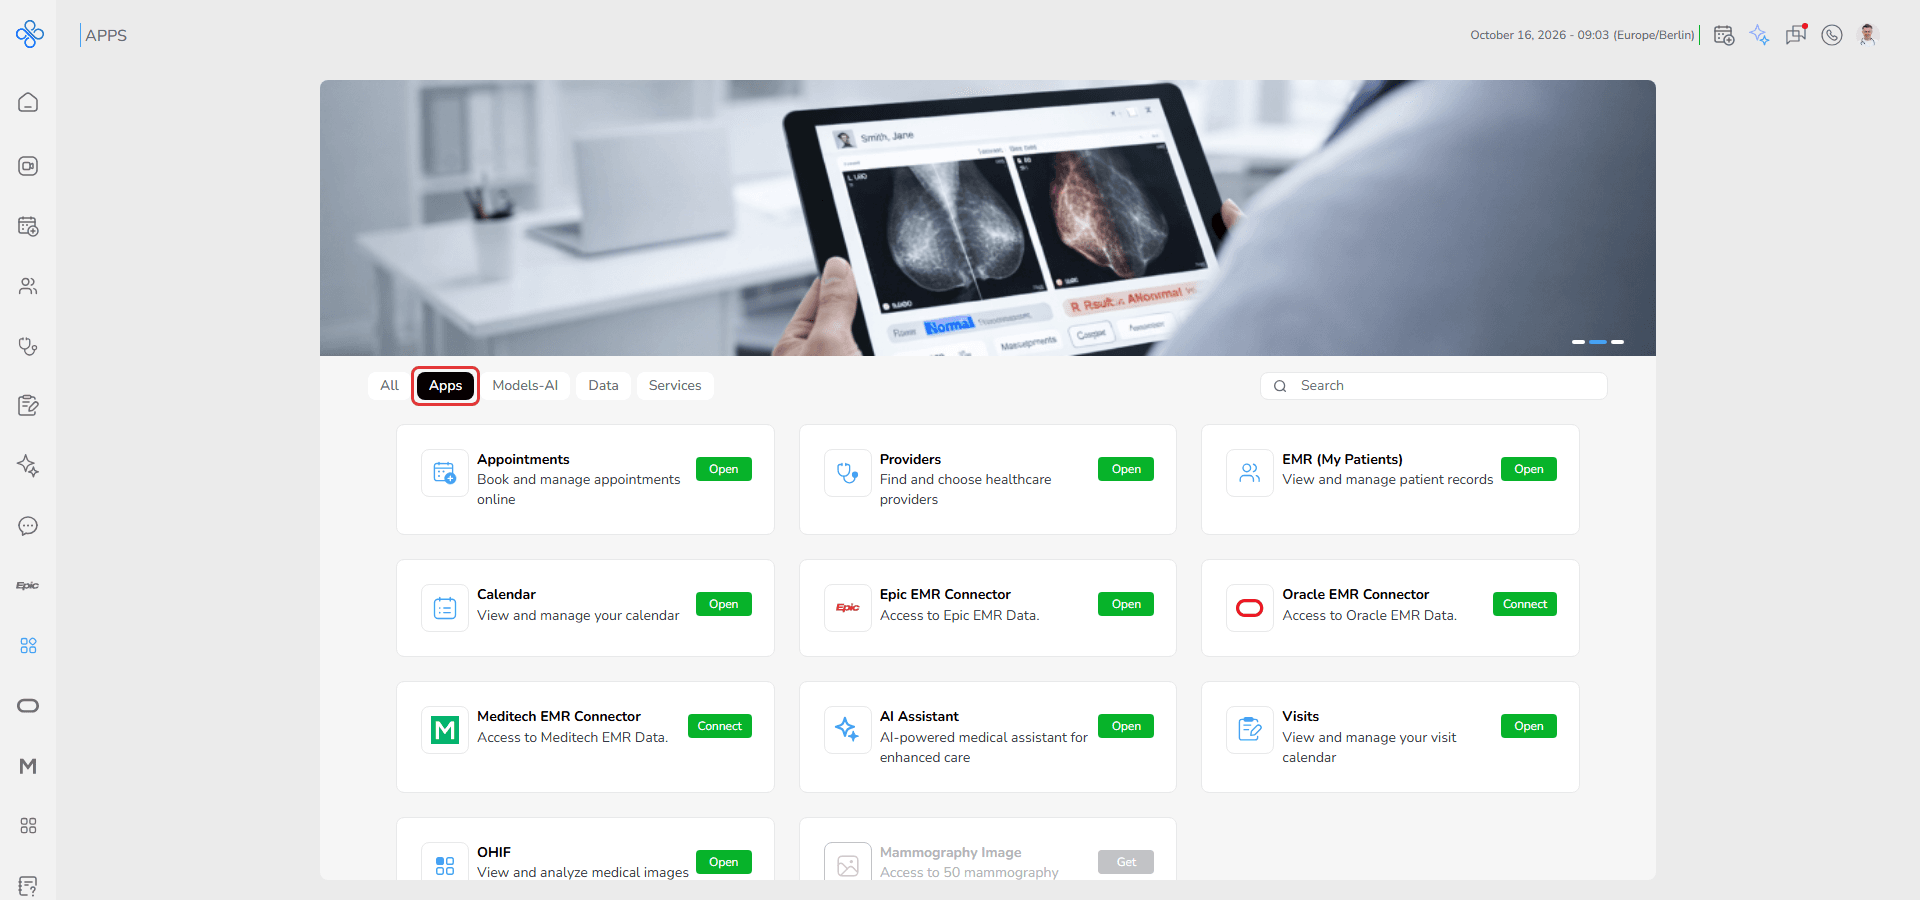
2. Browse the available applications.
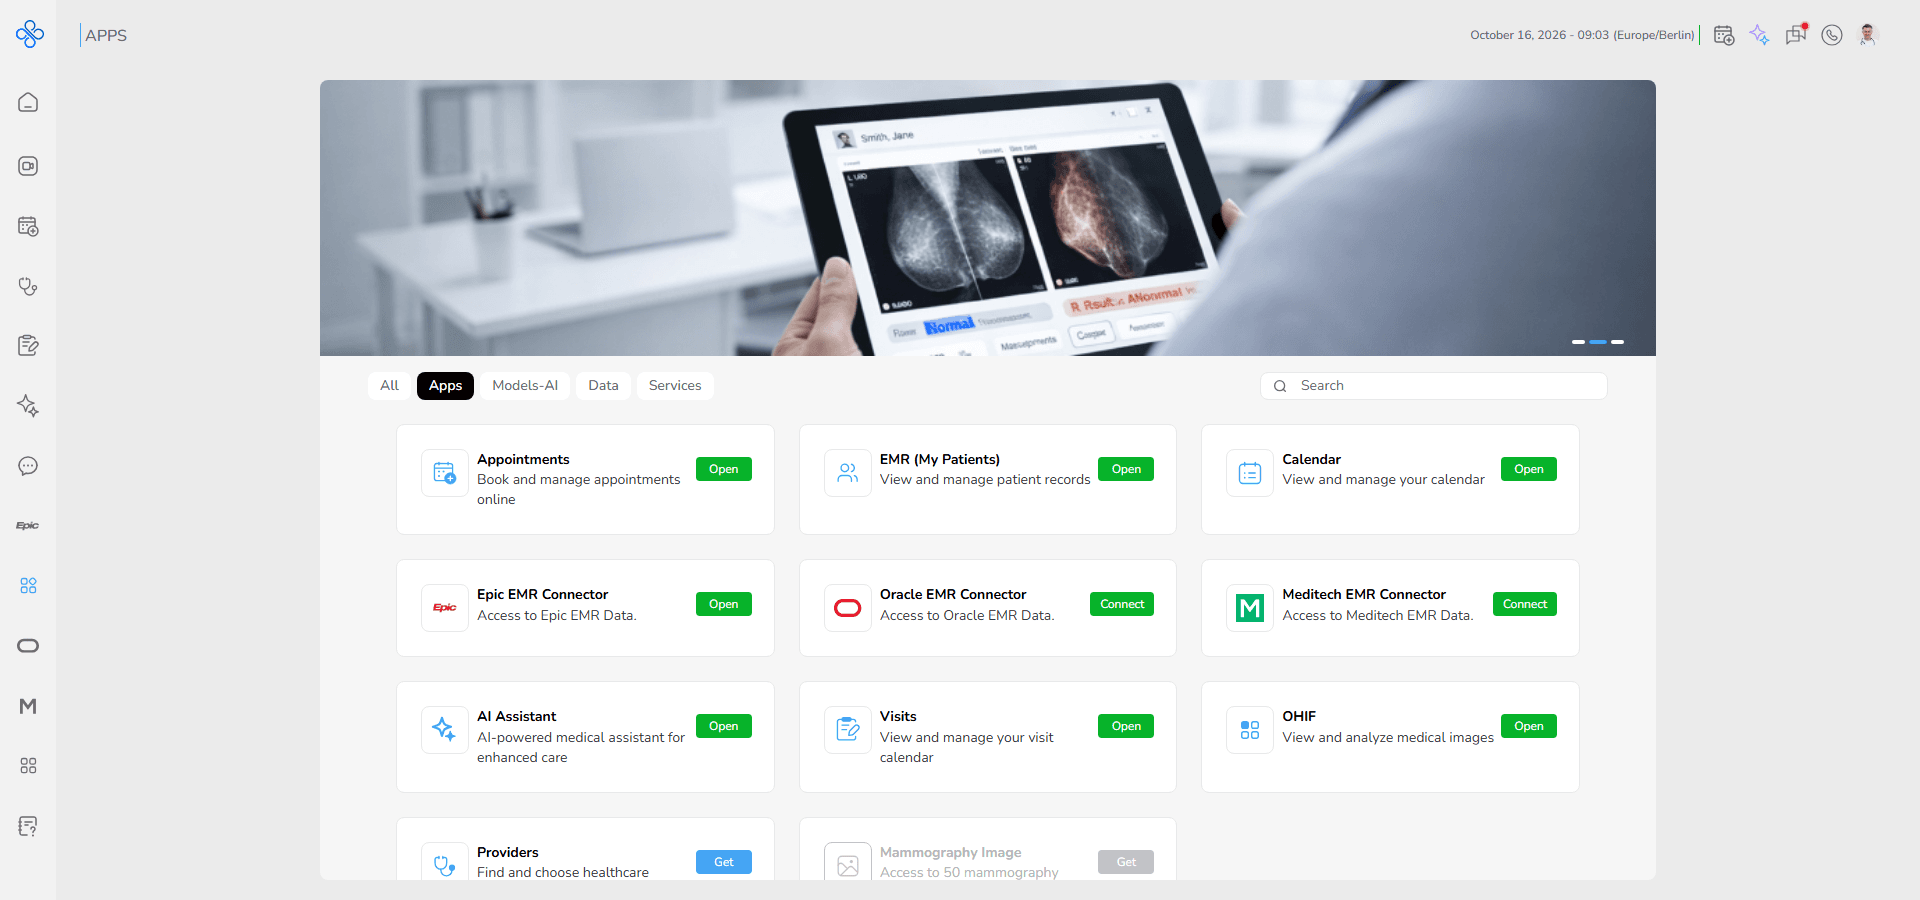
3. Click on an app card.
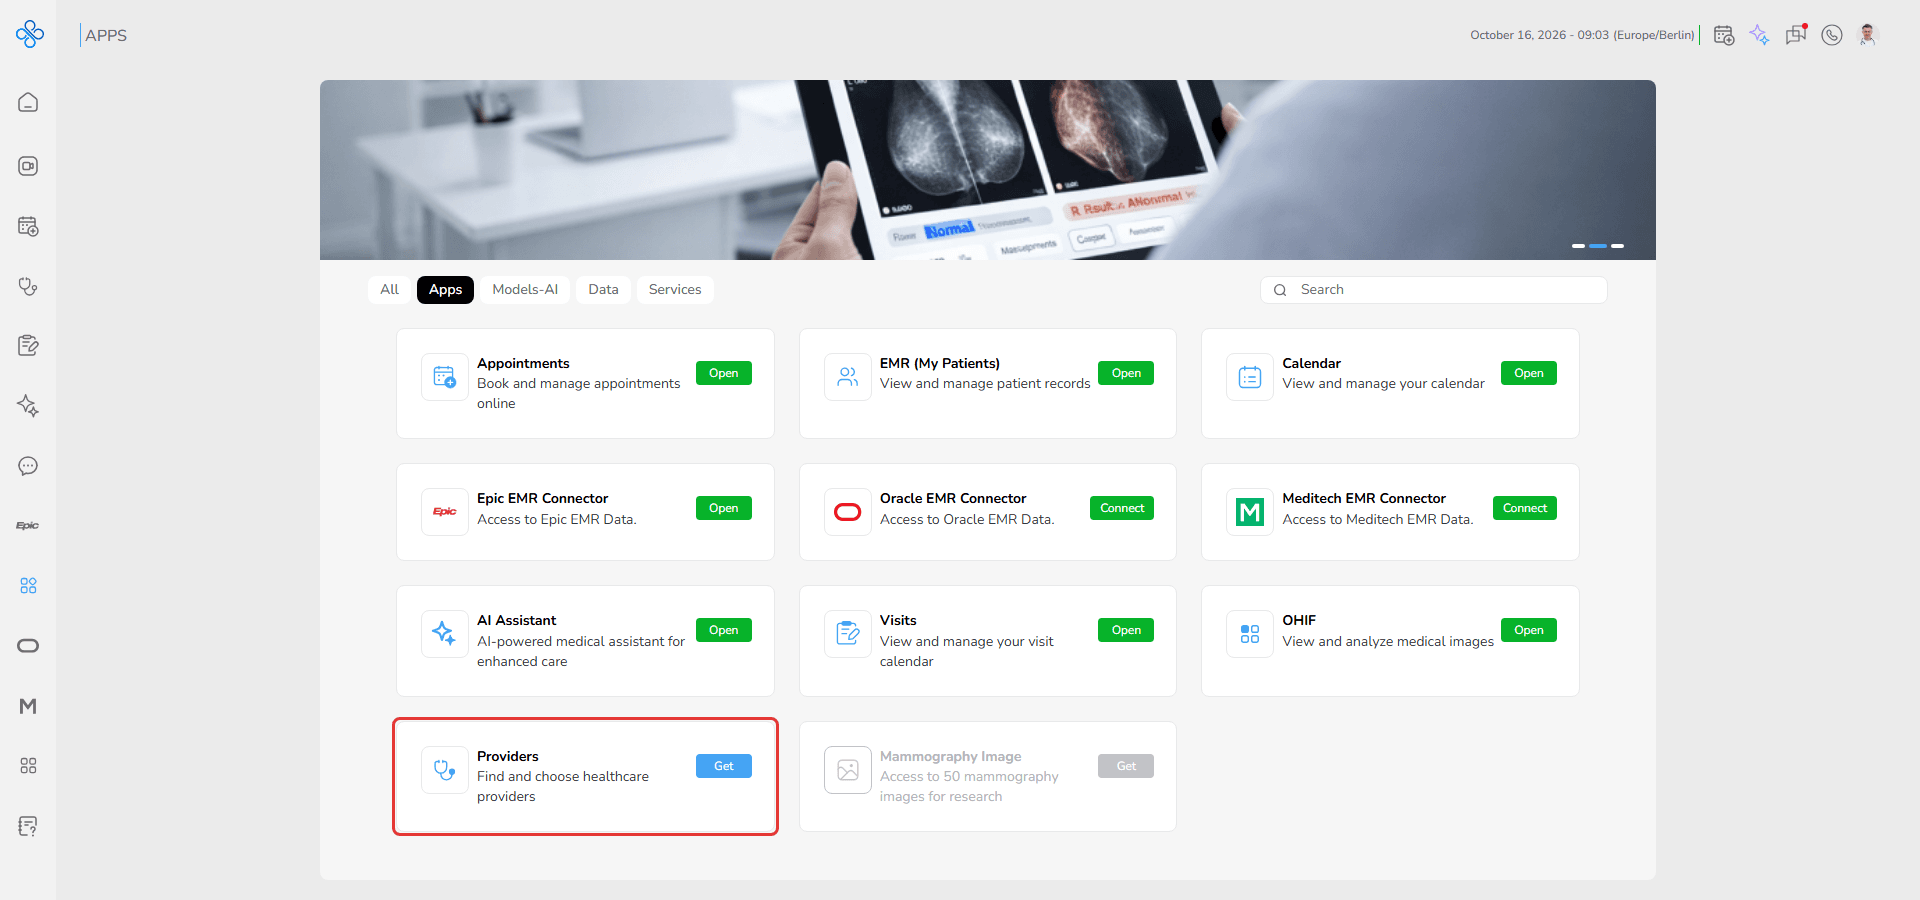
4. A details modal opens.
5. Review the app description and available actions.
6. Click Get.
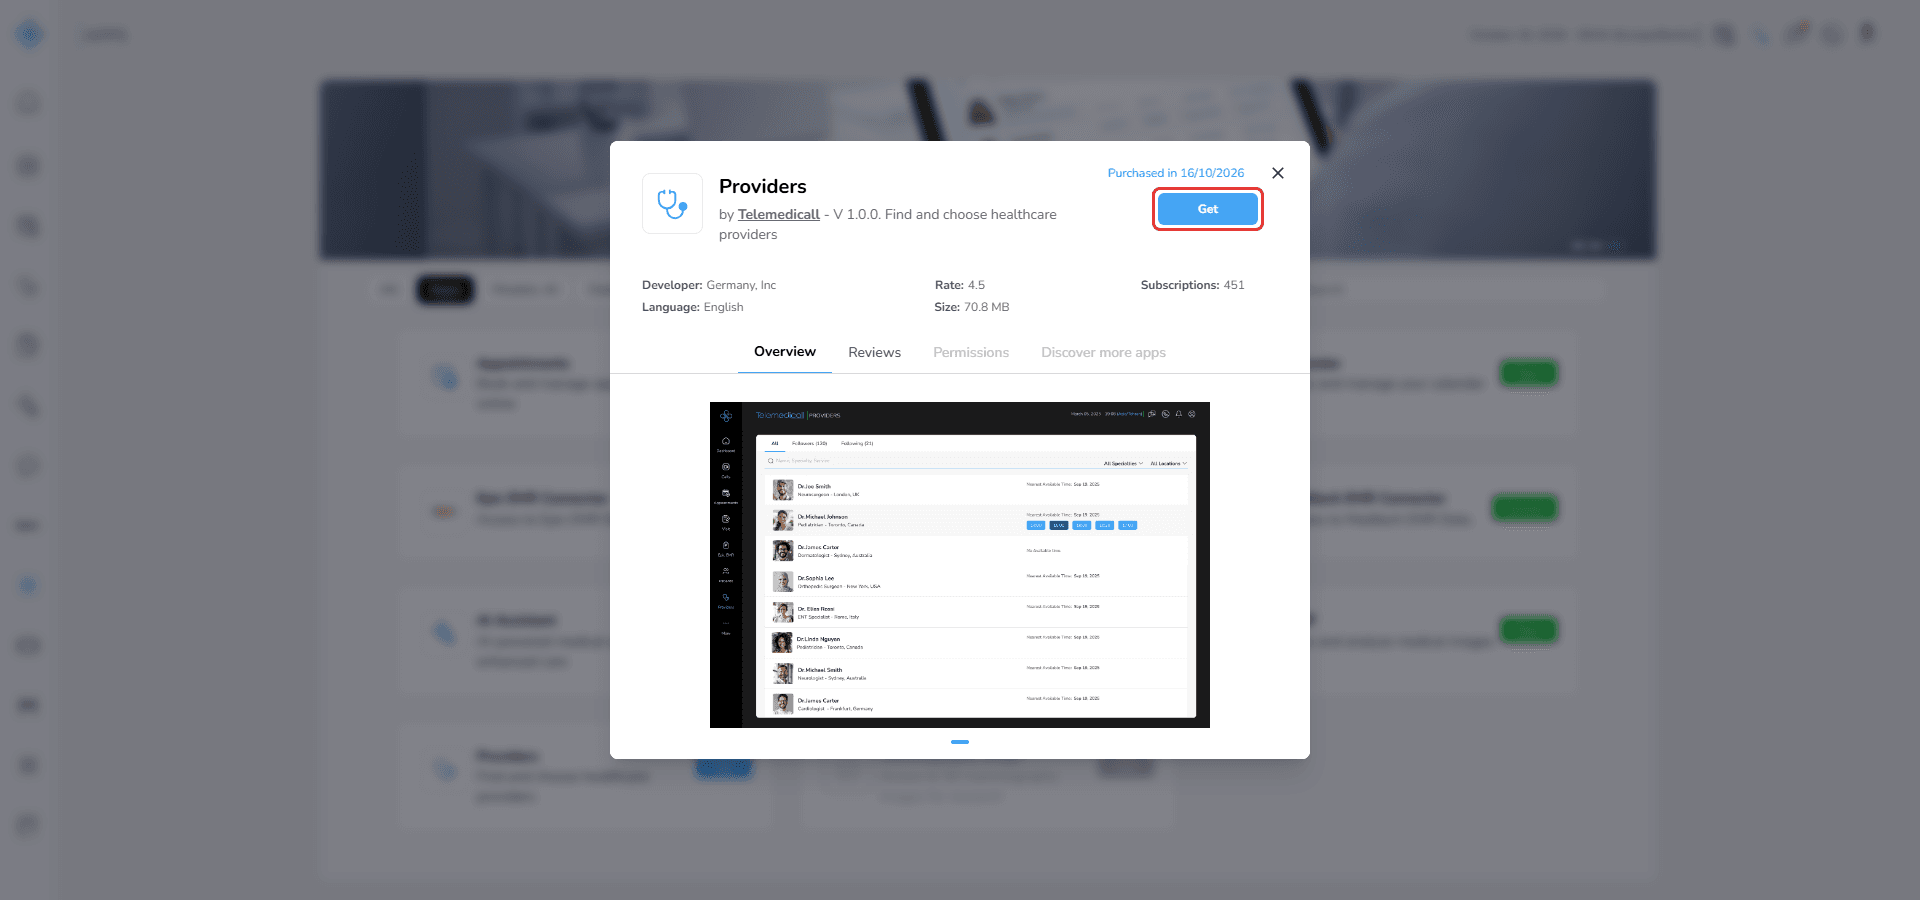
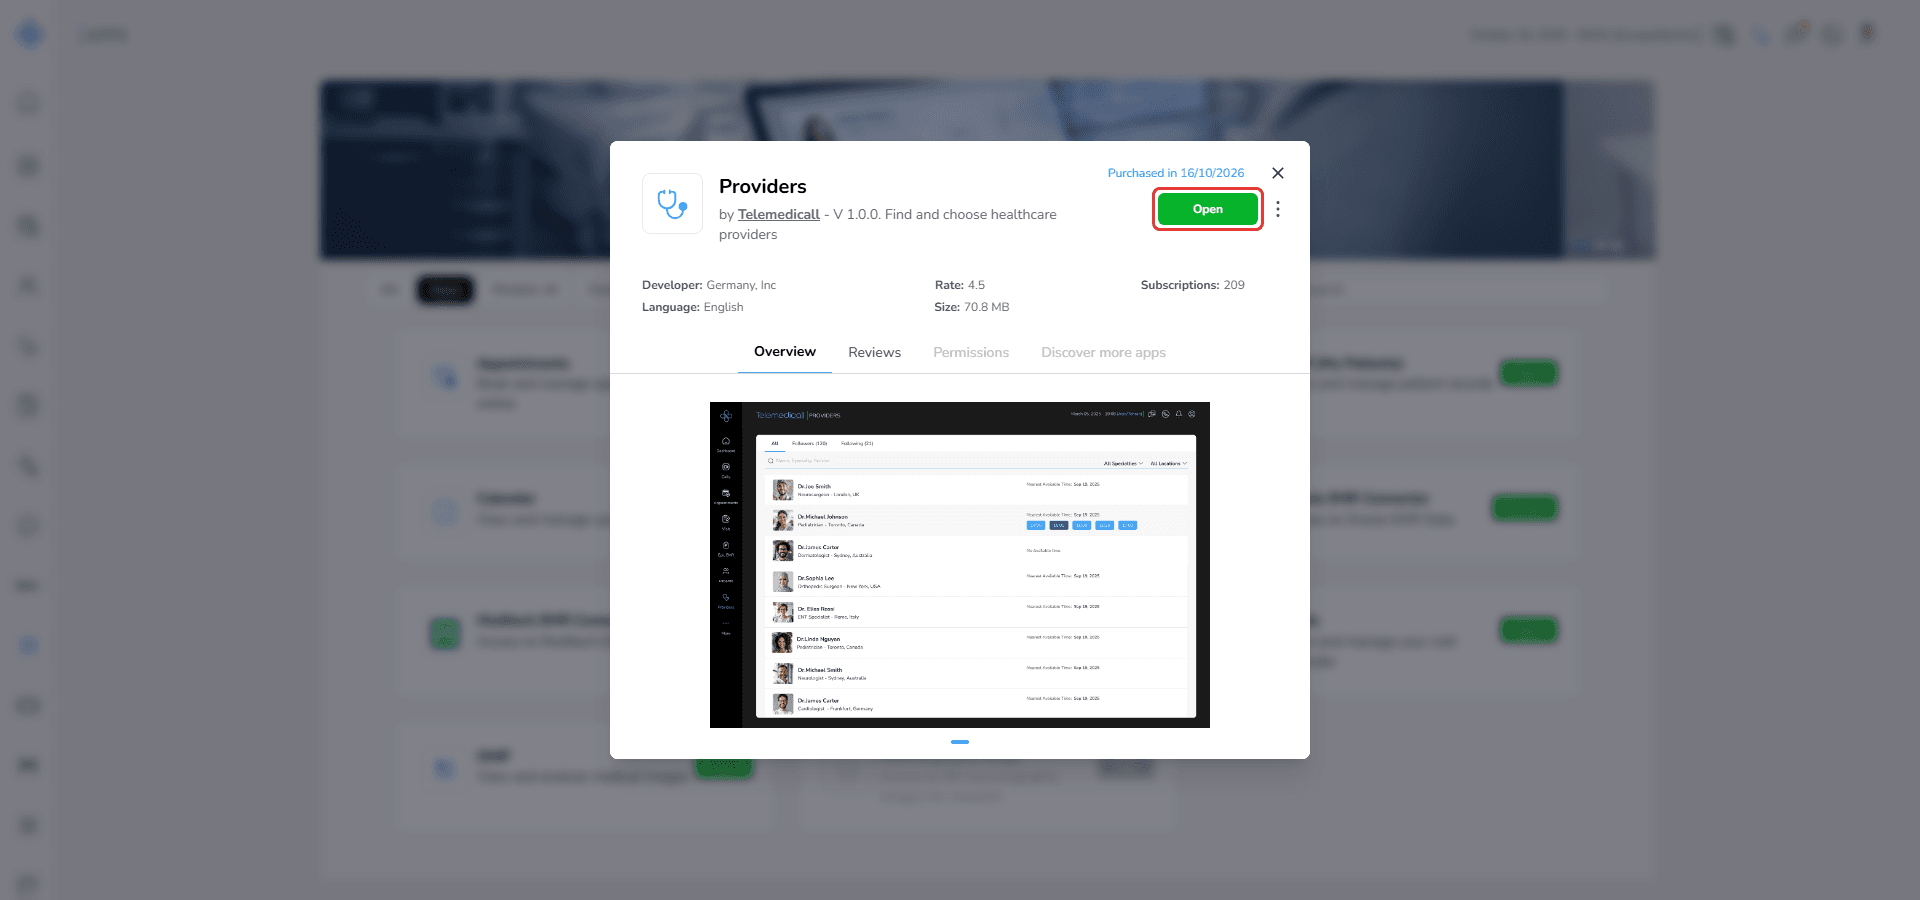
7. After the app is activated:
- The Get button changes to Open
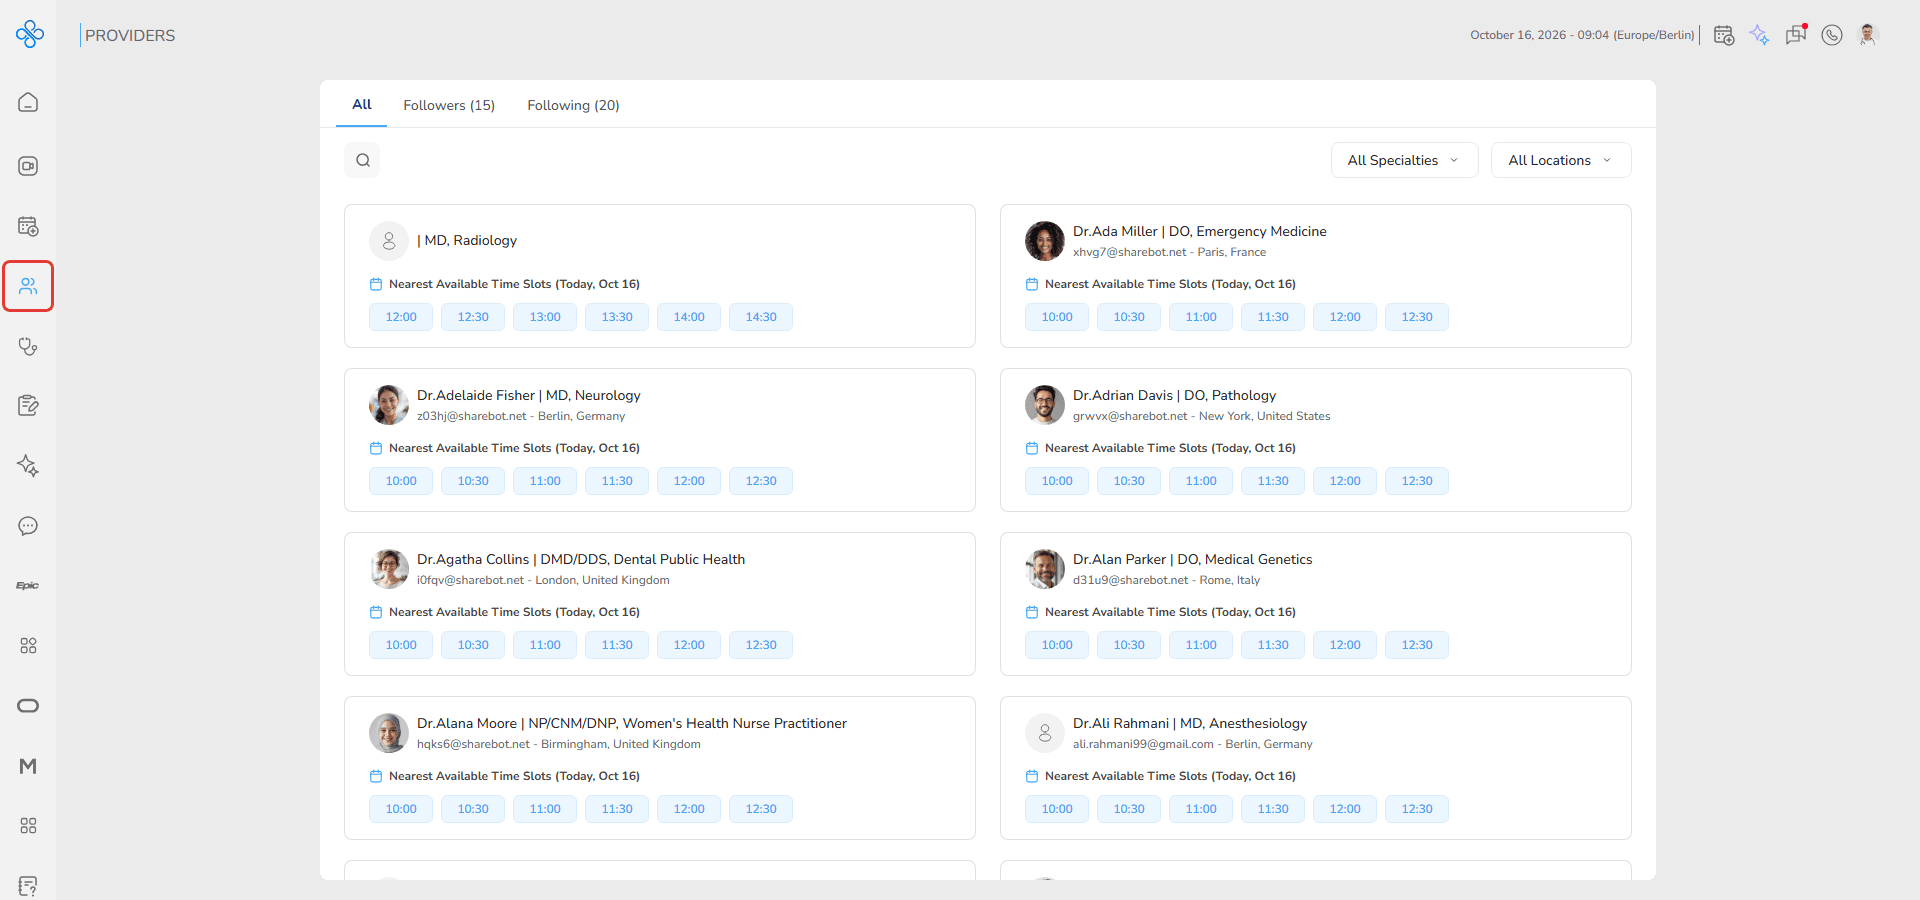
- The app becomes available in the sidebar
- The More Actions menu becomes active
8. Click Open to go directly to the app page.
How to manage an app
You can access app management options in two different ways.
Option 1: From the app modal
1. Click on an app card.
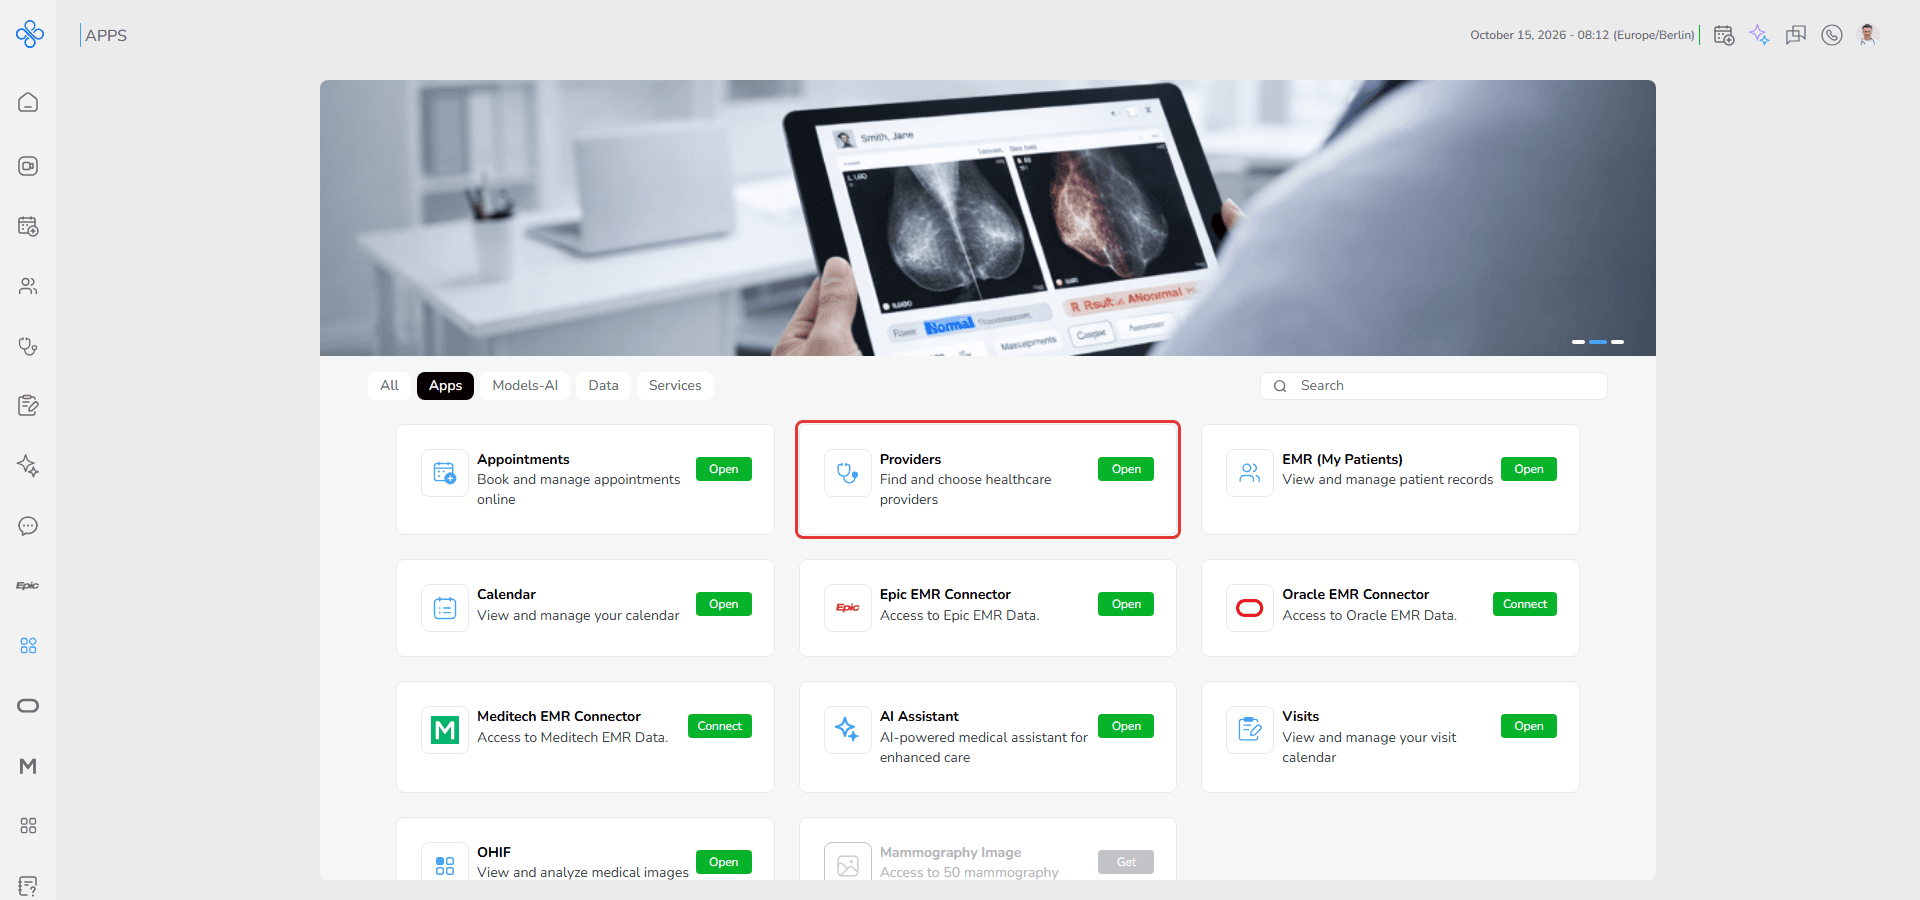
2. The app details modal opens.
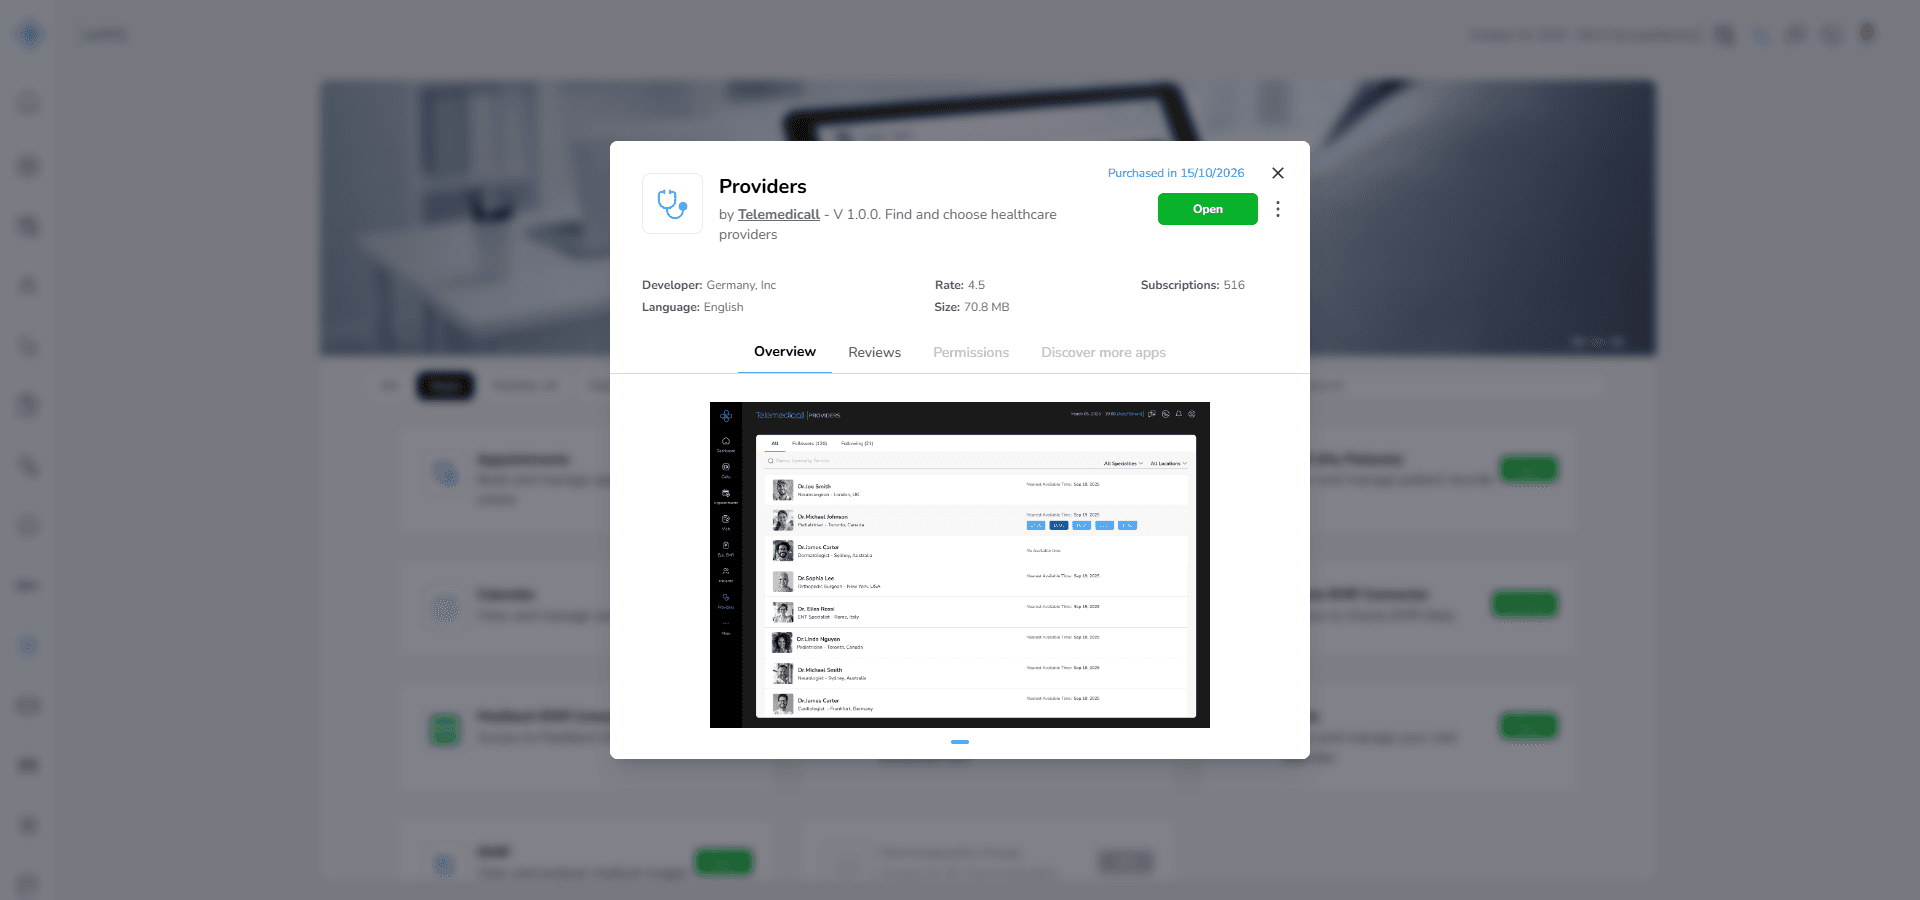
3. Click More Actions.
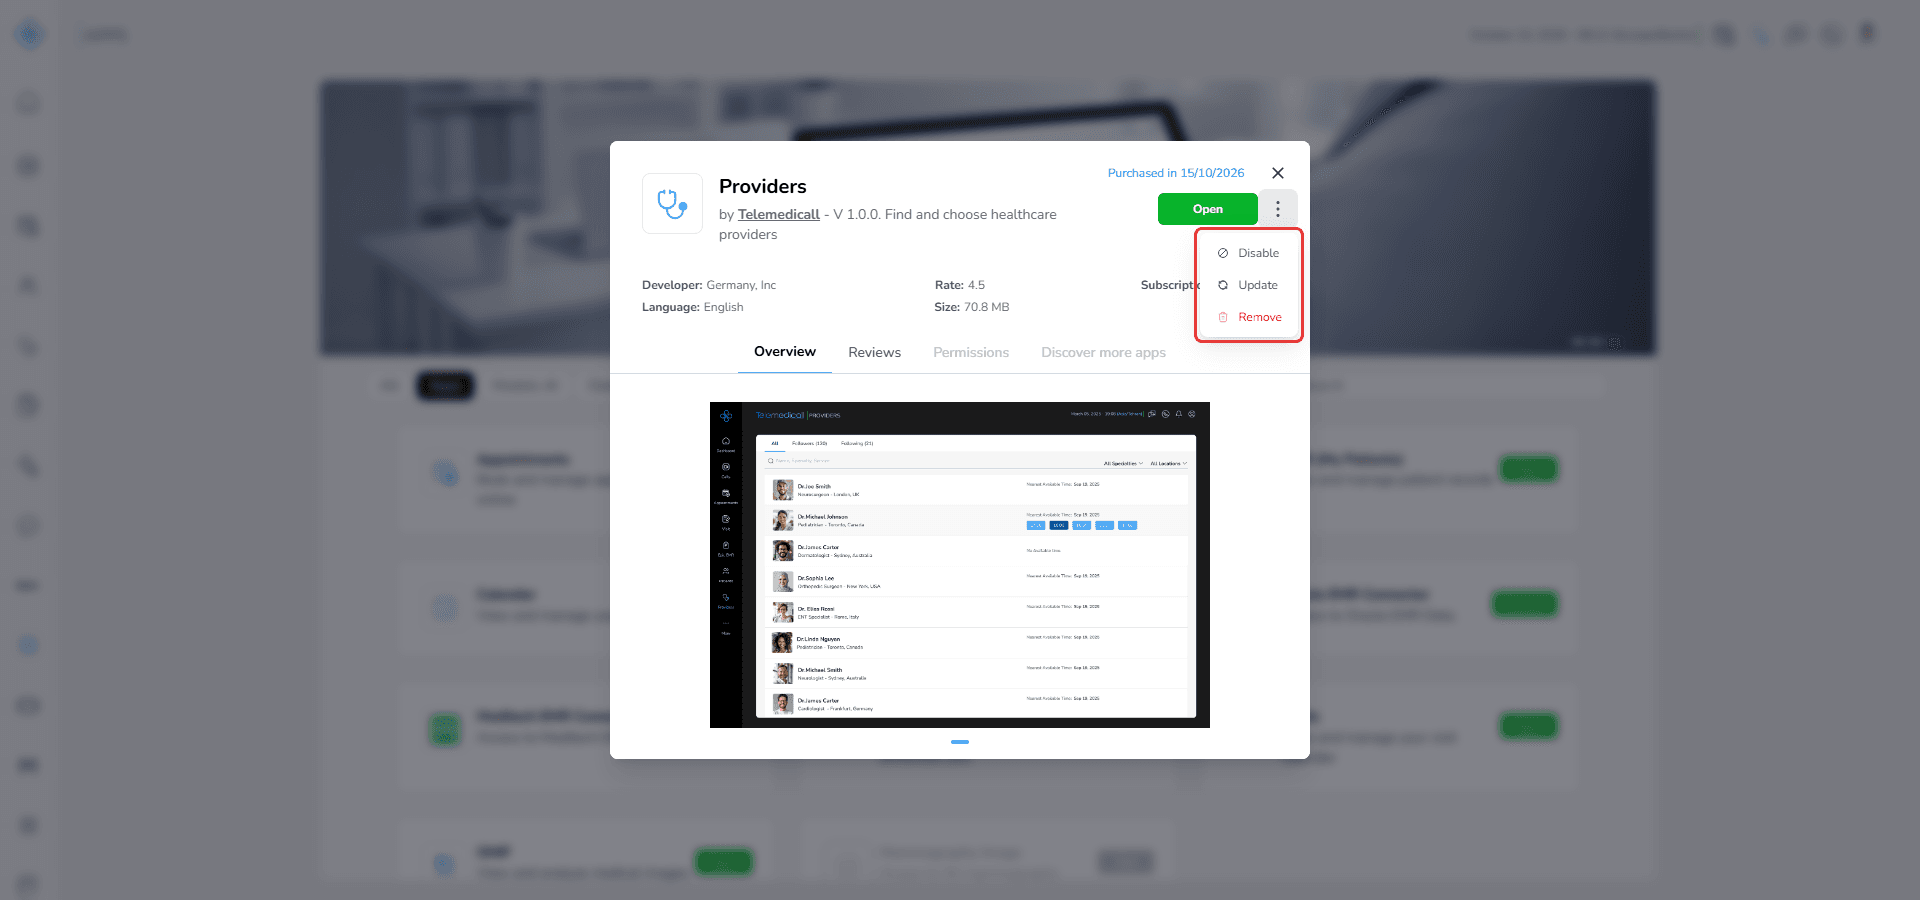
4. Select one of the available options.
Option 2: From the app card
1. Move your cursor over the app card.
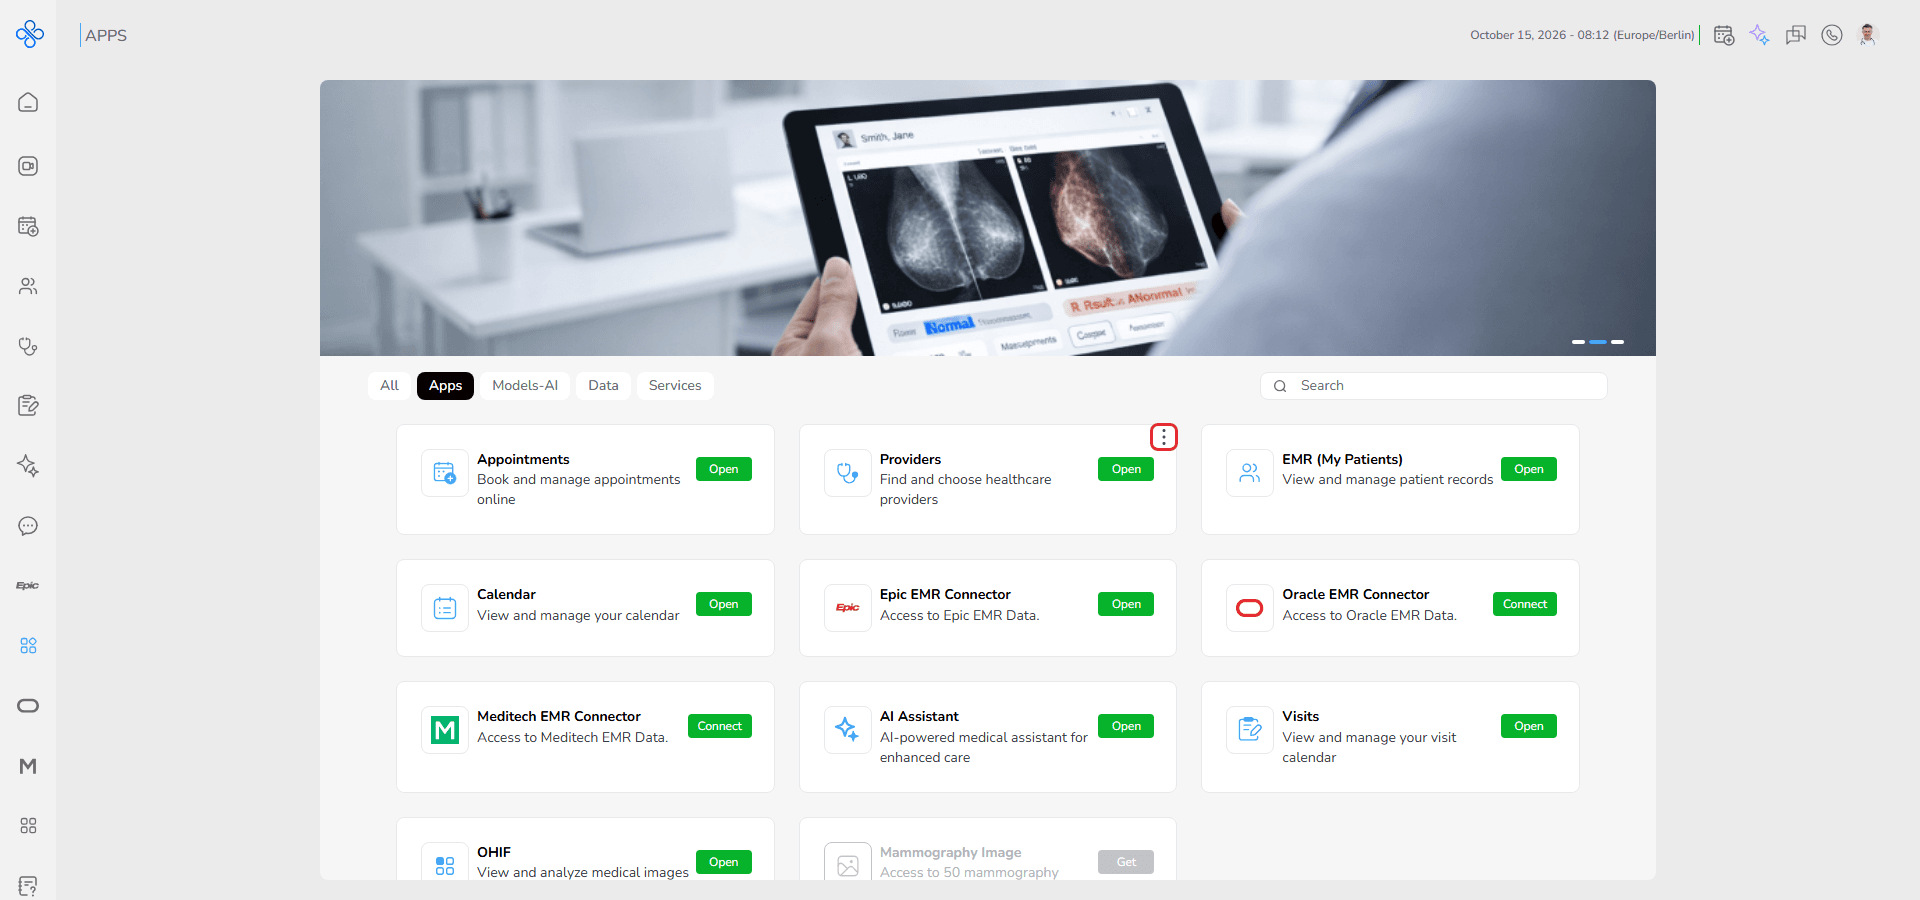
2. The three dots icon appears on the card.
3. Click the three dots icon.
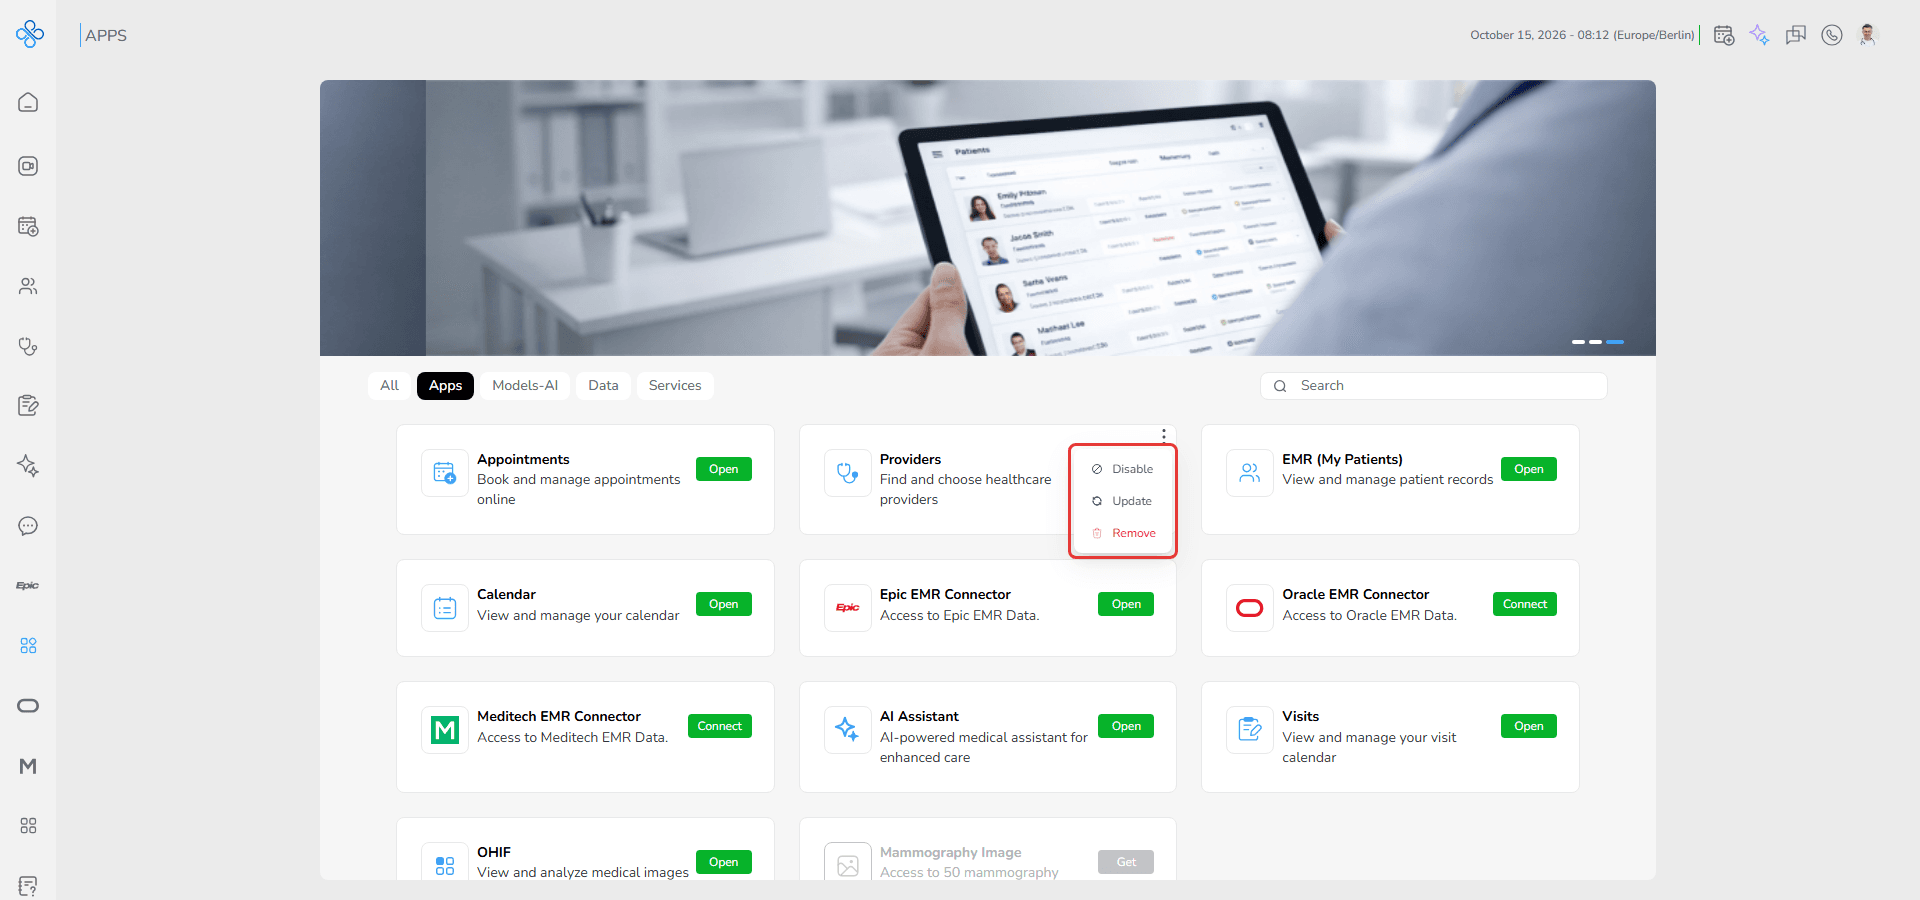
4. The More Actions menu opens.
5. Select one of the available options.
Disable
Temporarily disables the app.
After disabling:
- The app is removed from the sidebar
- The app becomes unavailable in the platform
- The app can be enabled again later
Update
Updates the app when a newer version is available.
After updating:
- The latest version becomes active
- New features and fixes become available
Remove
Completely removes the app from your account.
After removing:
- The app is removed from the sidebar
- Access to the app is removed
- You must get the app again to use it later
How to connect an external EMR
External EMR applications include:
- Oracle EMR Connector
- Epic EMR Connector
- Meditech EMR Connector
1. Open the Apps tab.
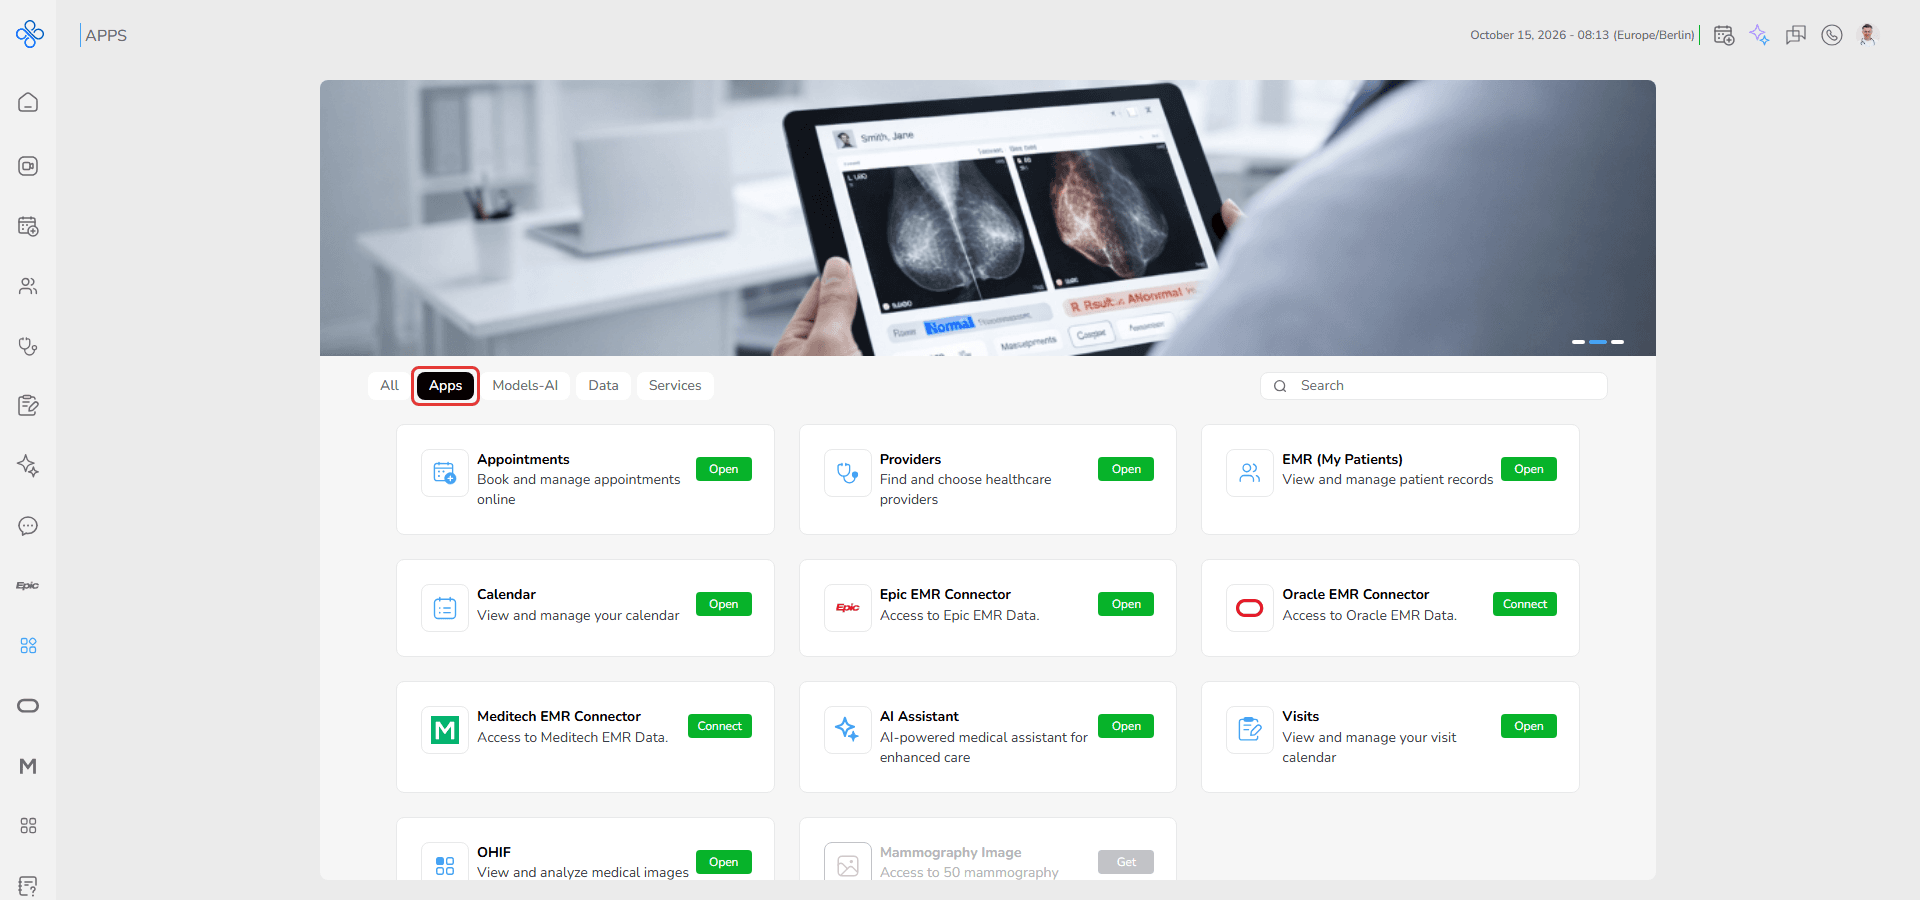
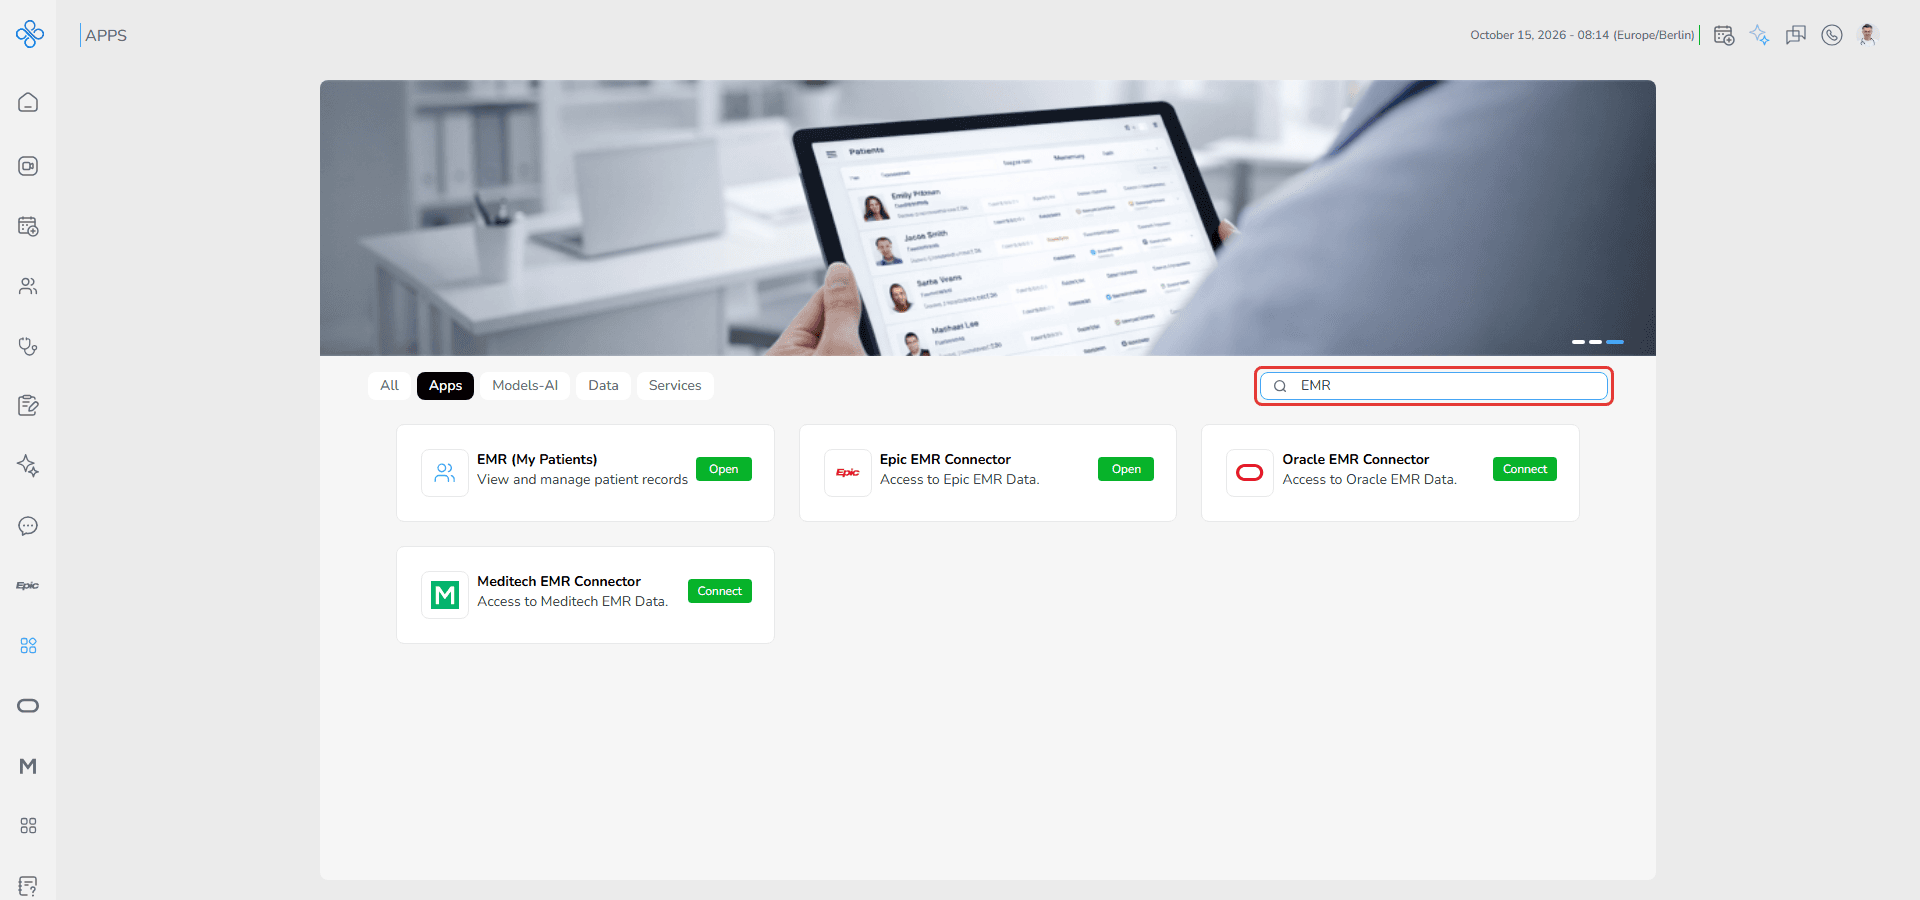
2. Search EMR and select an external EMR application (for example Oracle EMR Connector).
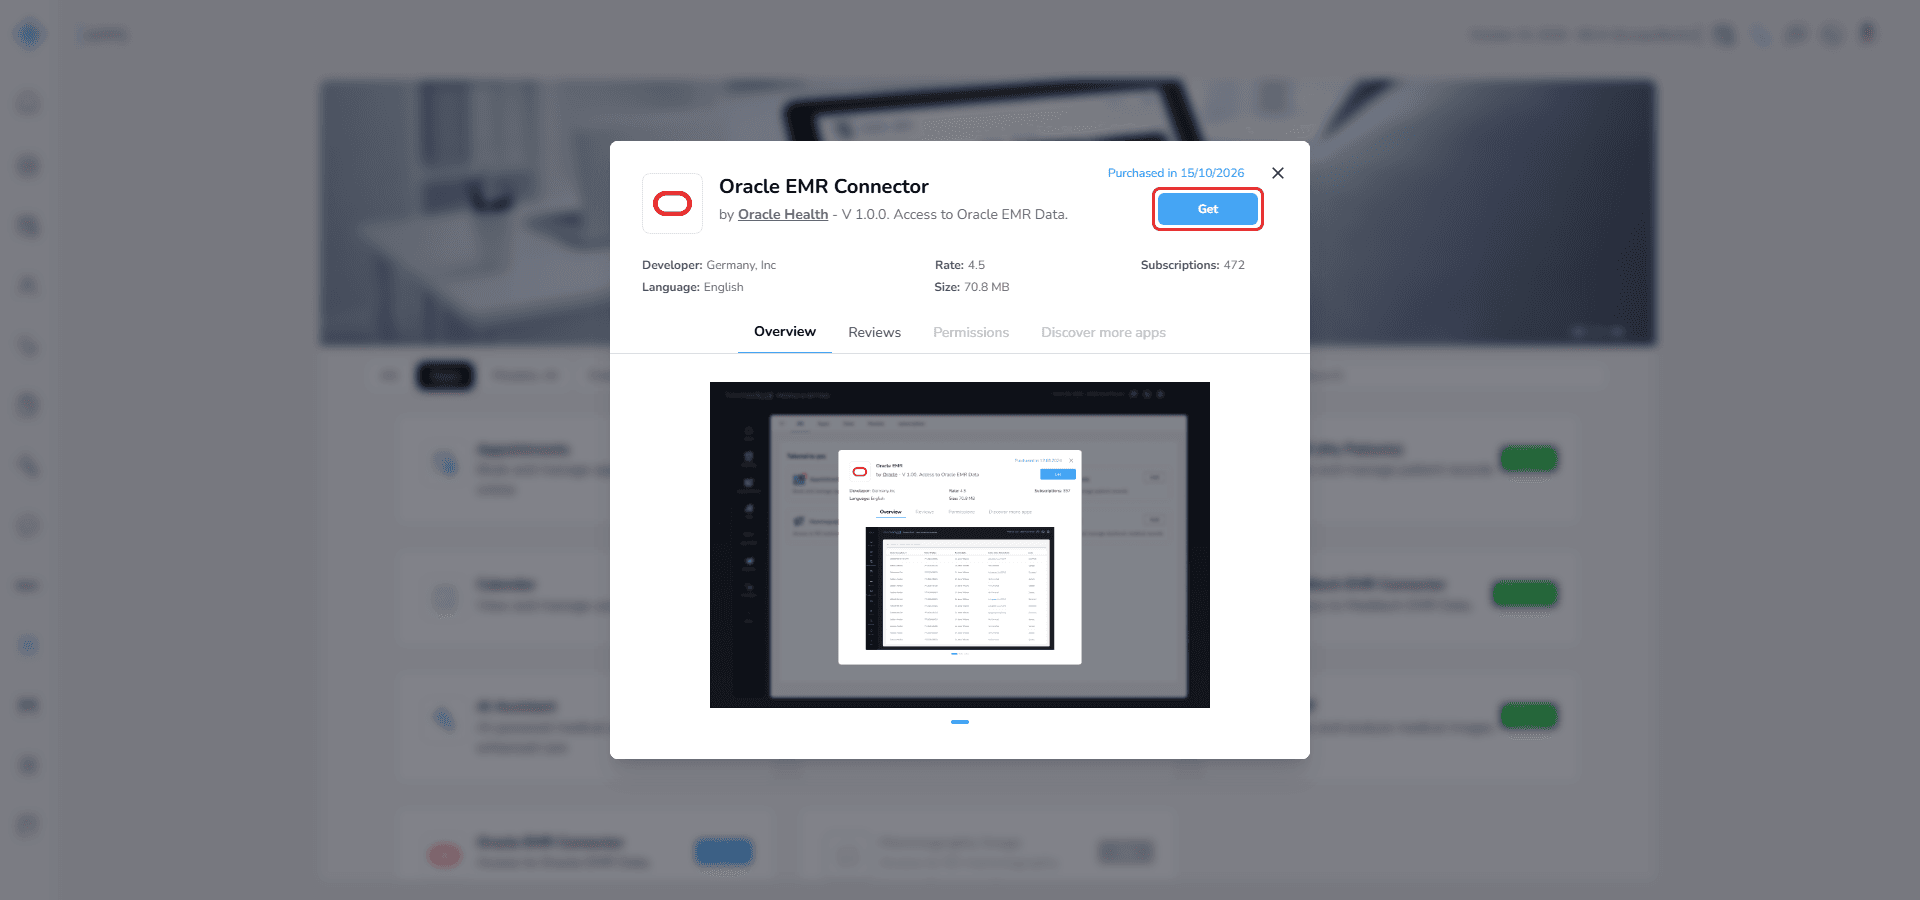
3. Click Get.
4. The button changes to Connect and a connection settings modal opens. It shows a Public Key (copy it to your EMR server) and the connection fields.
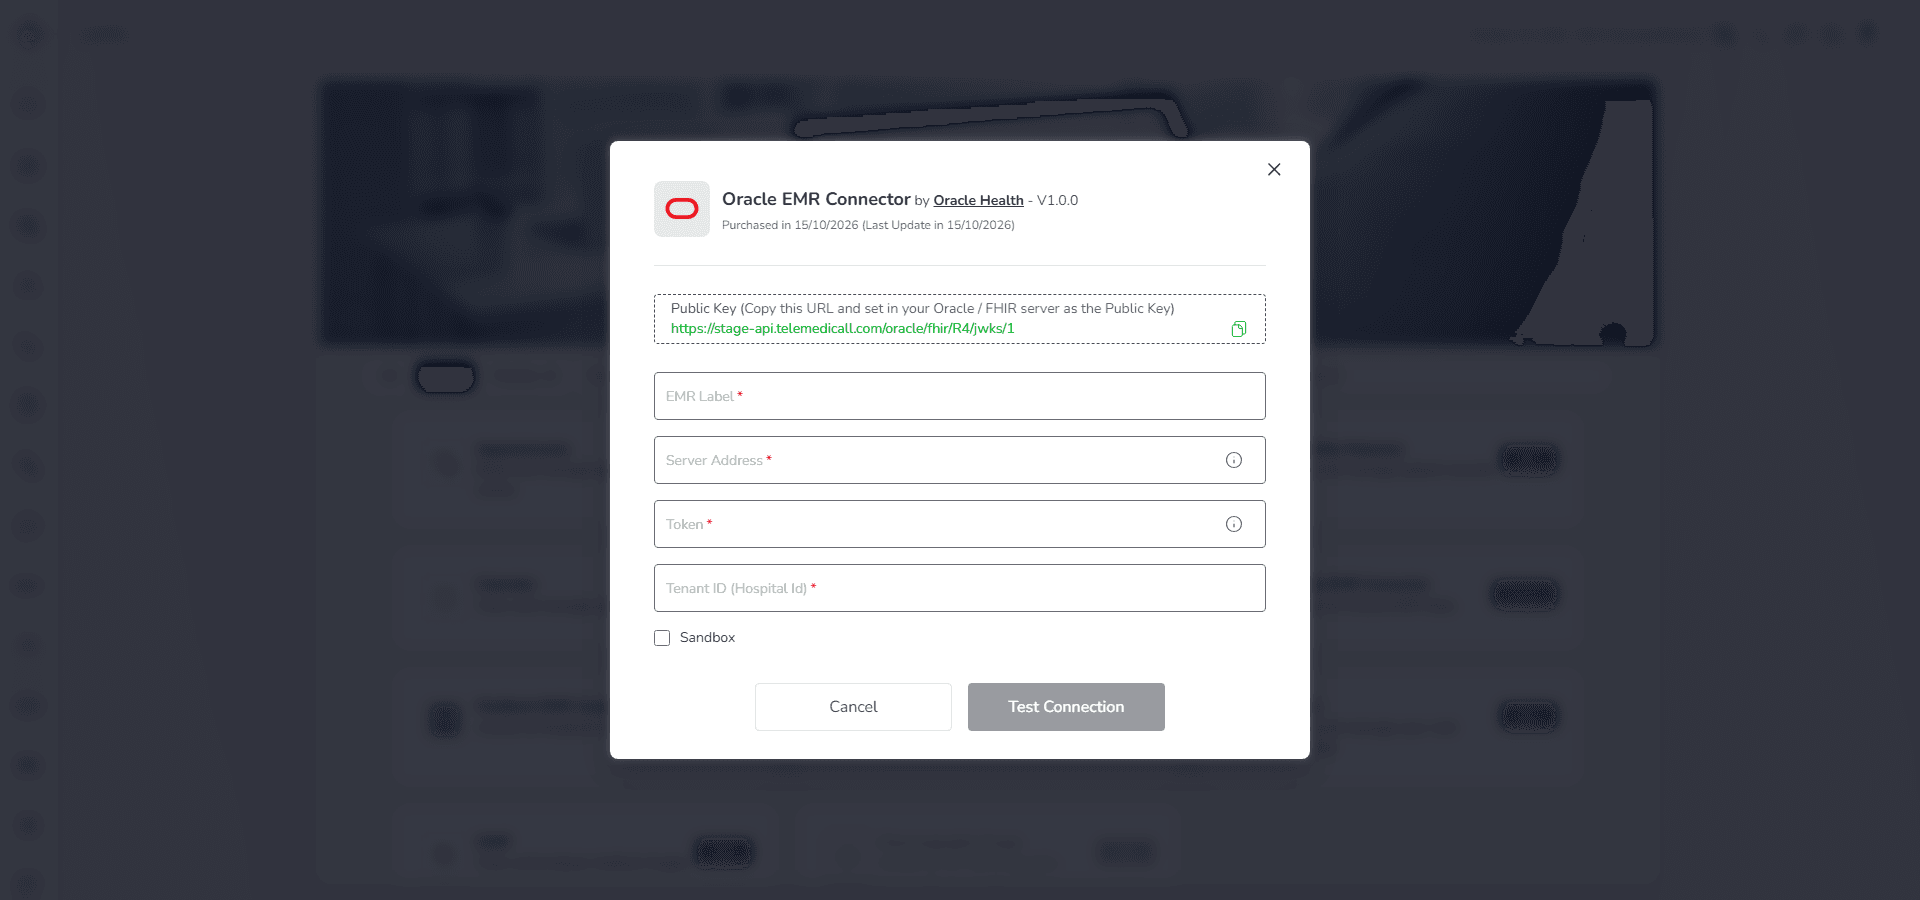
5. Enter the required connection information.
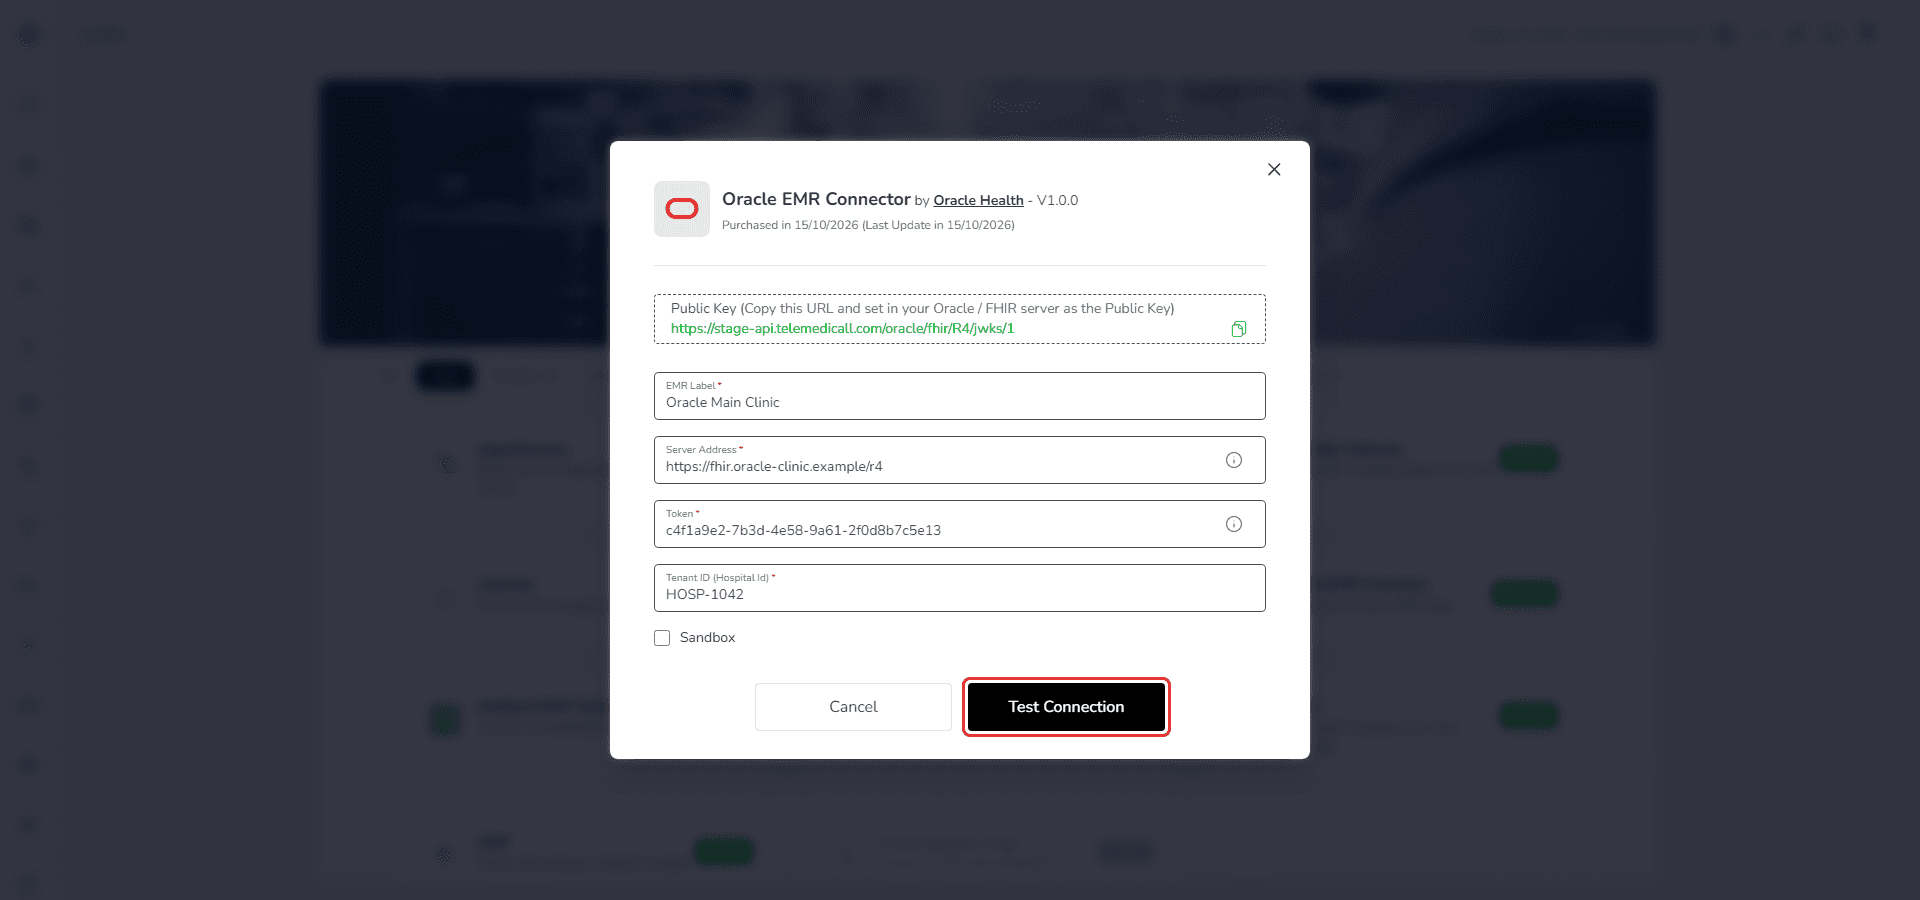
6. Click Test Connection. When the test succeeds, click Connect to complete the setup.
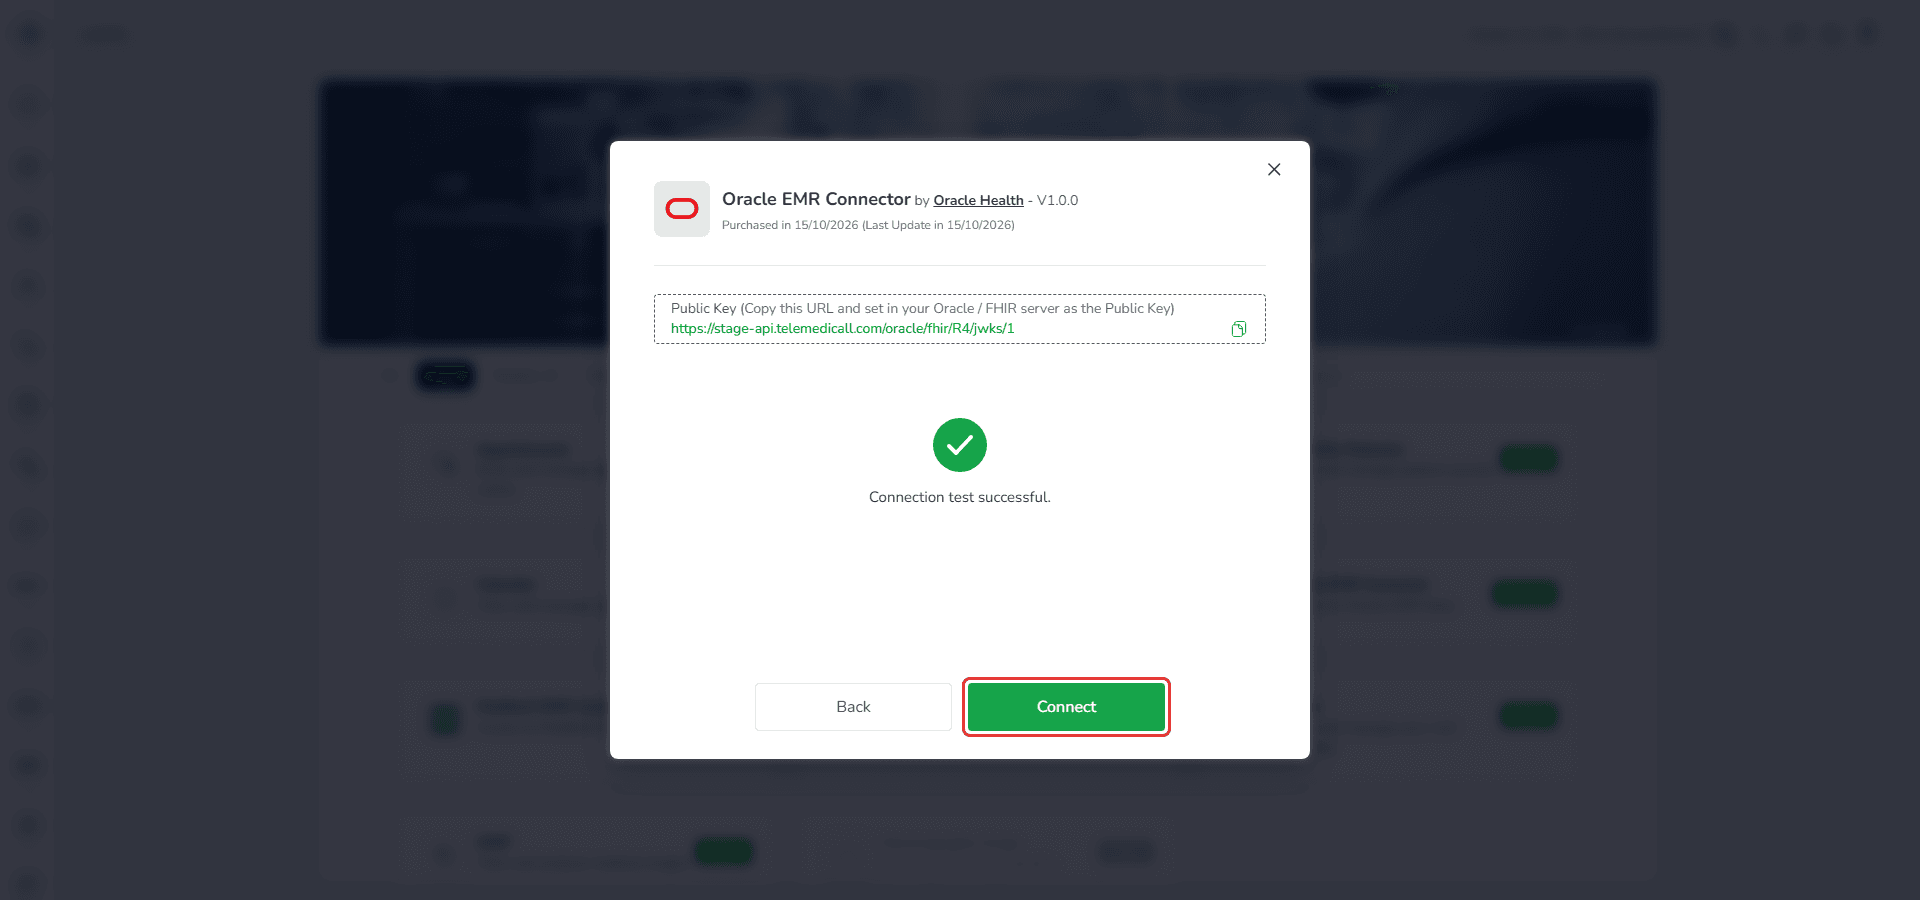
7. After a successful connection:
- The Connect button changes to Open
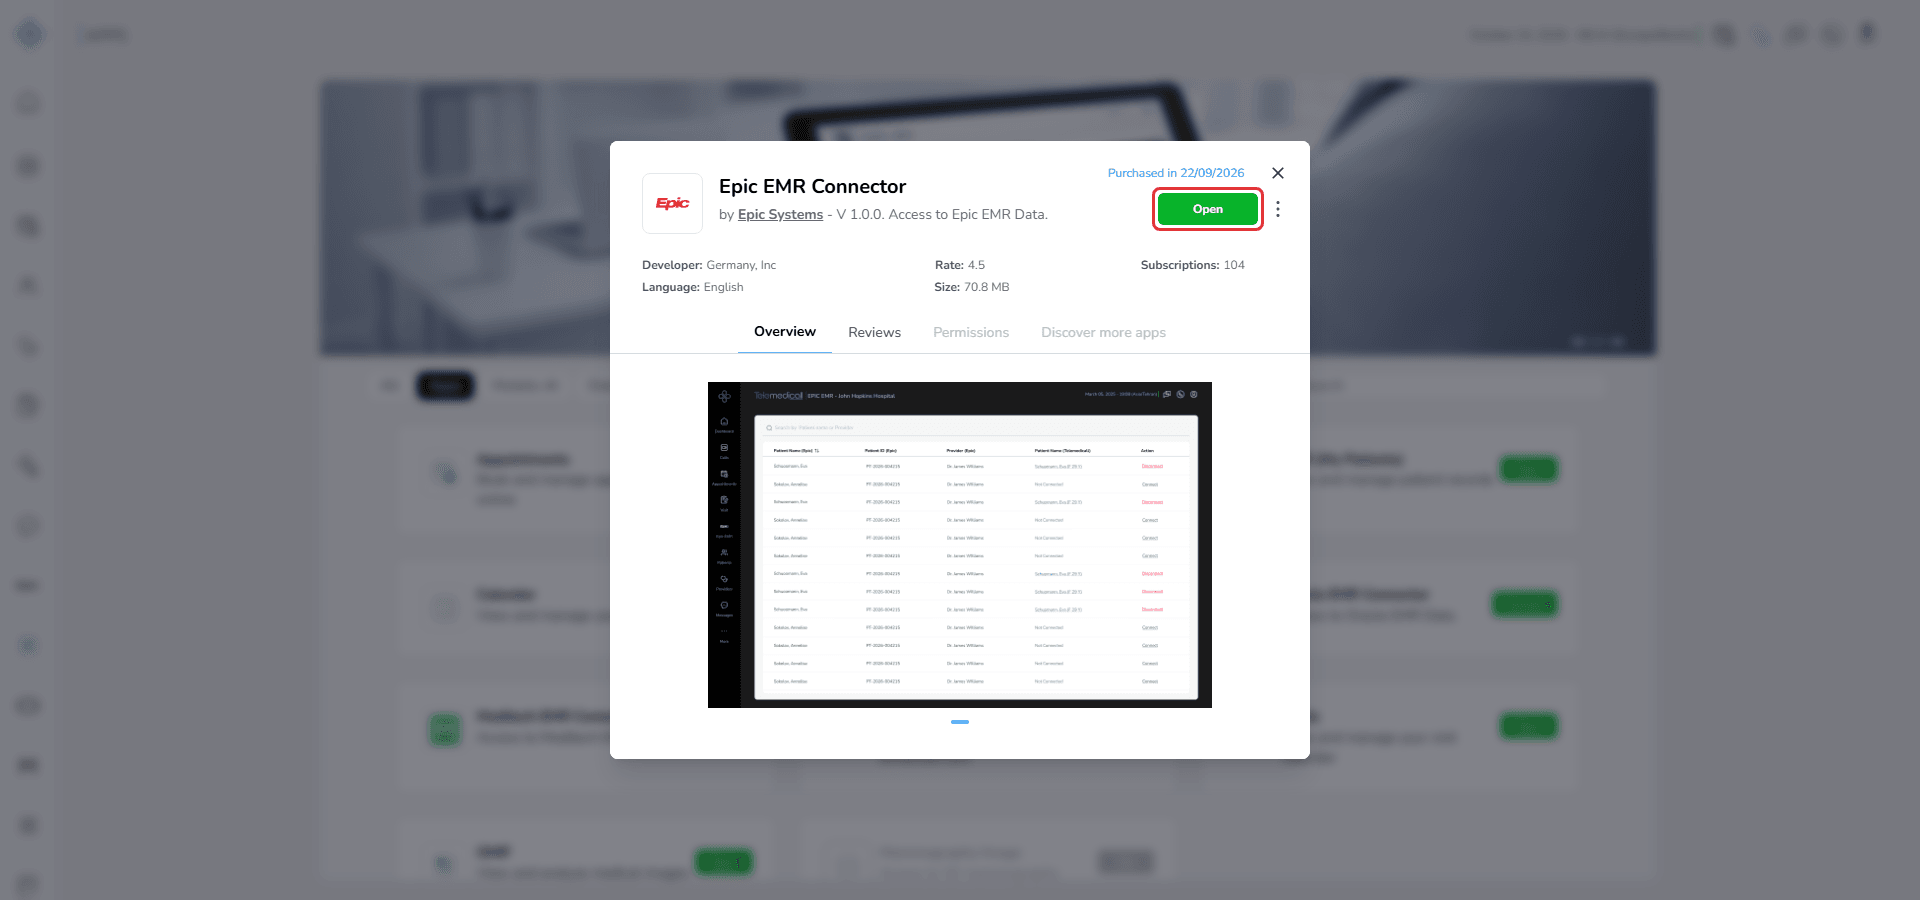
- The EMR becomes accessible in Telemedical
- The application appears in the sidebar
8. Click Open to access the connected EMR page.
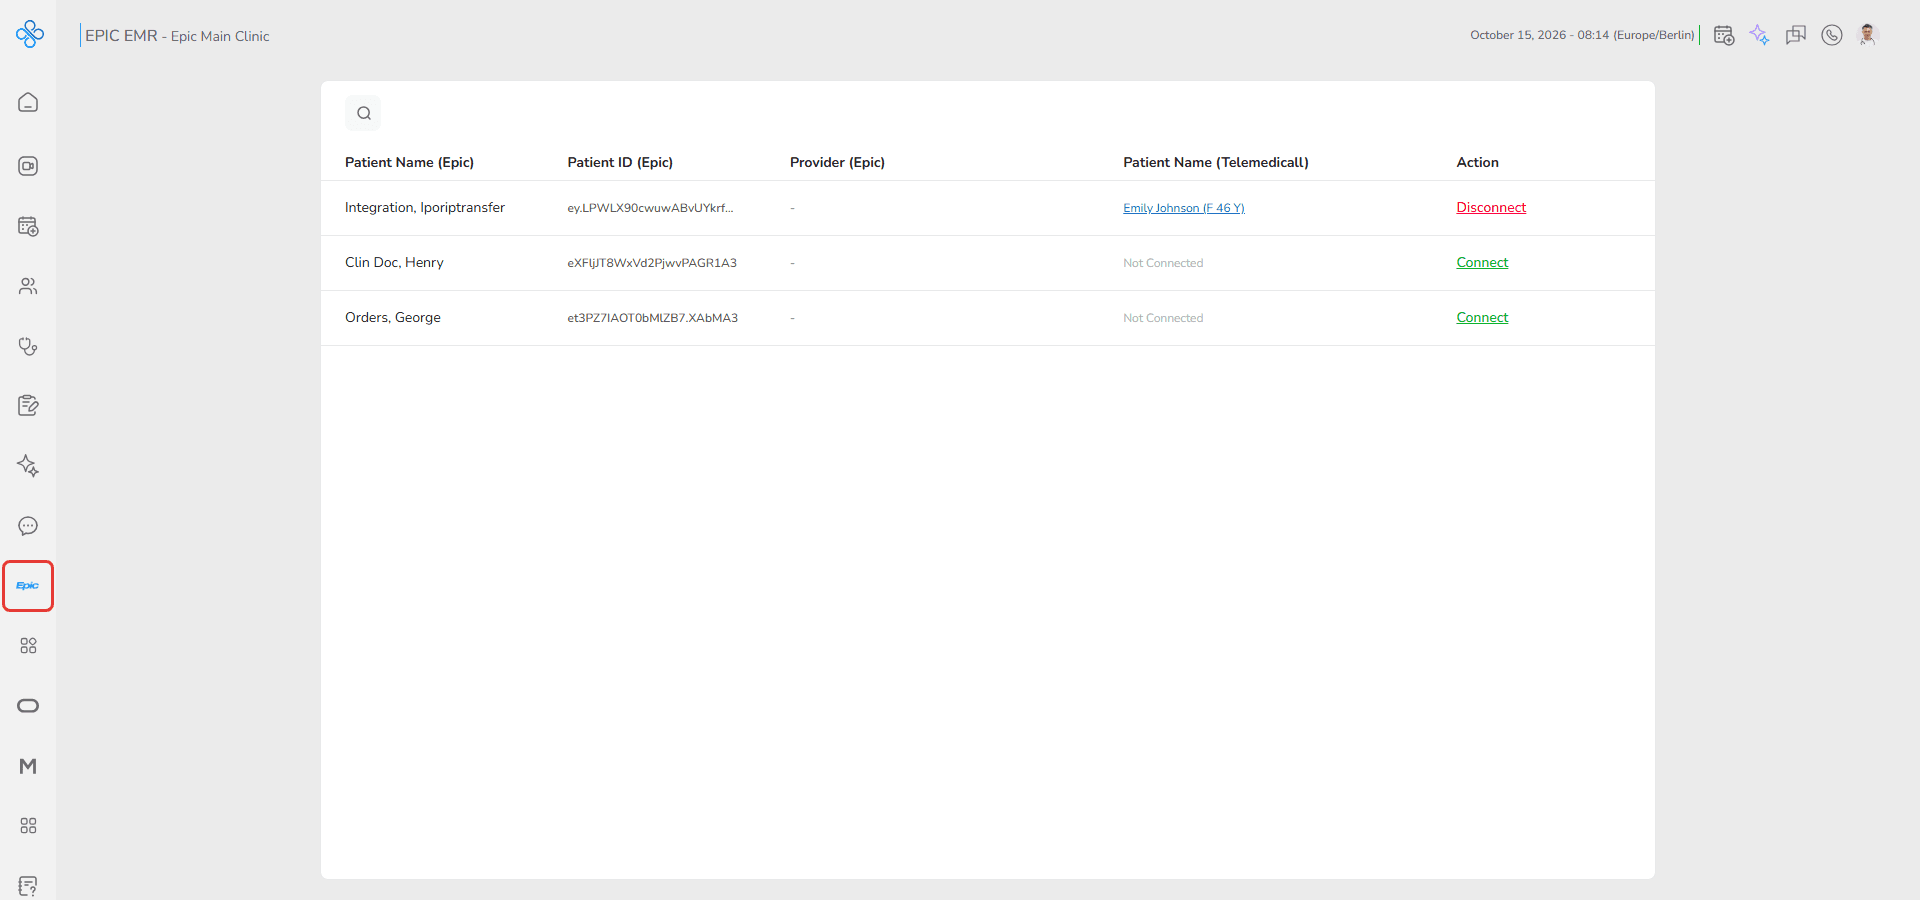
How to manage an external EMR
You can access external EMR management options in two different ways.
Option 1: From the external EMR modal
- Click on an external EMR card.
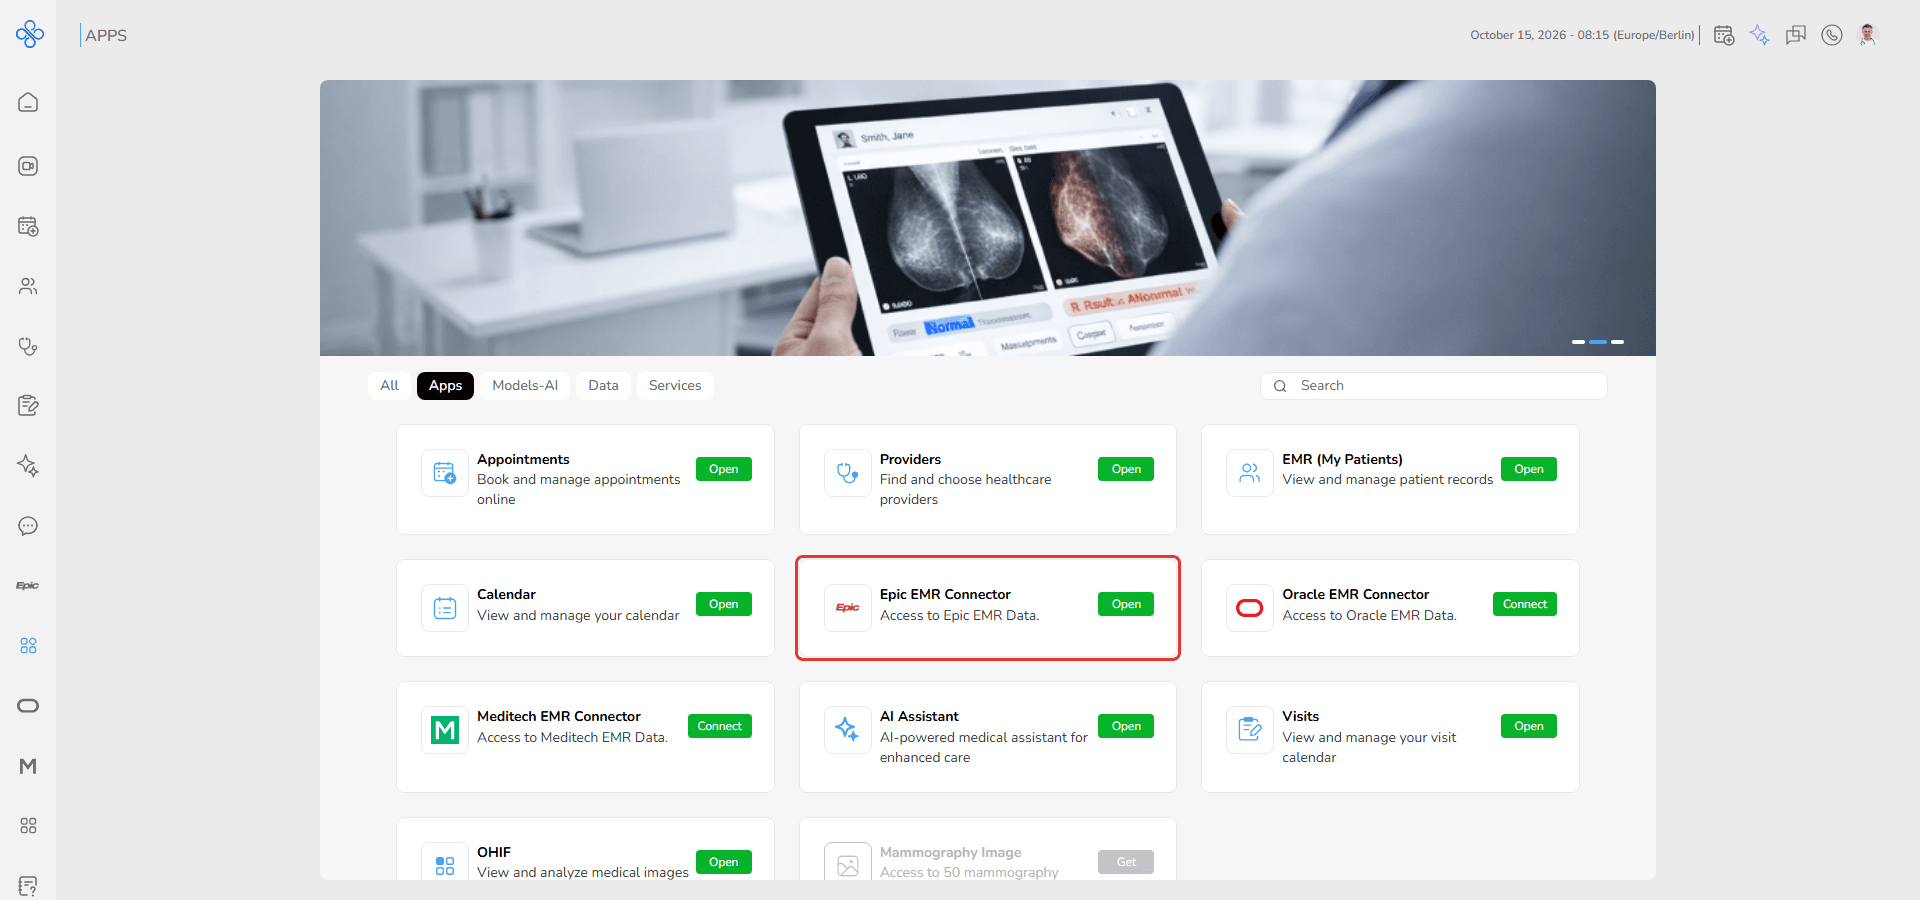
1. The external EMR details modal opens.
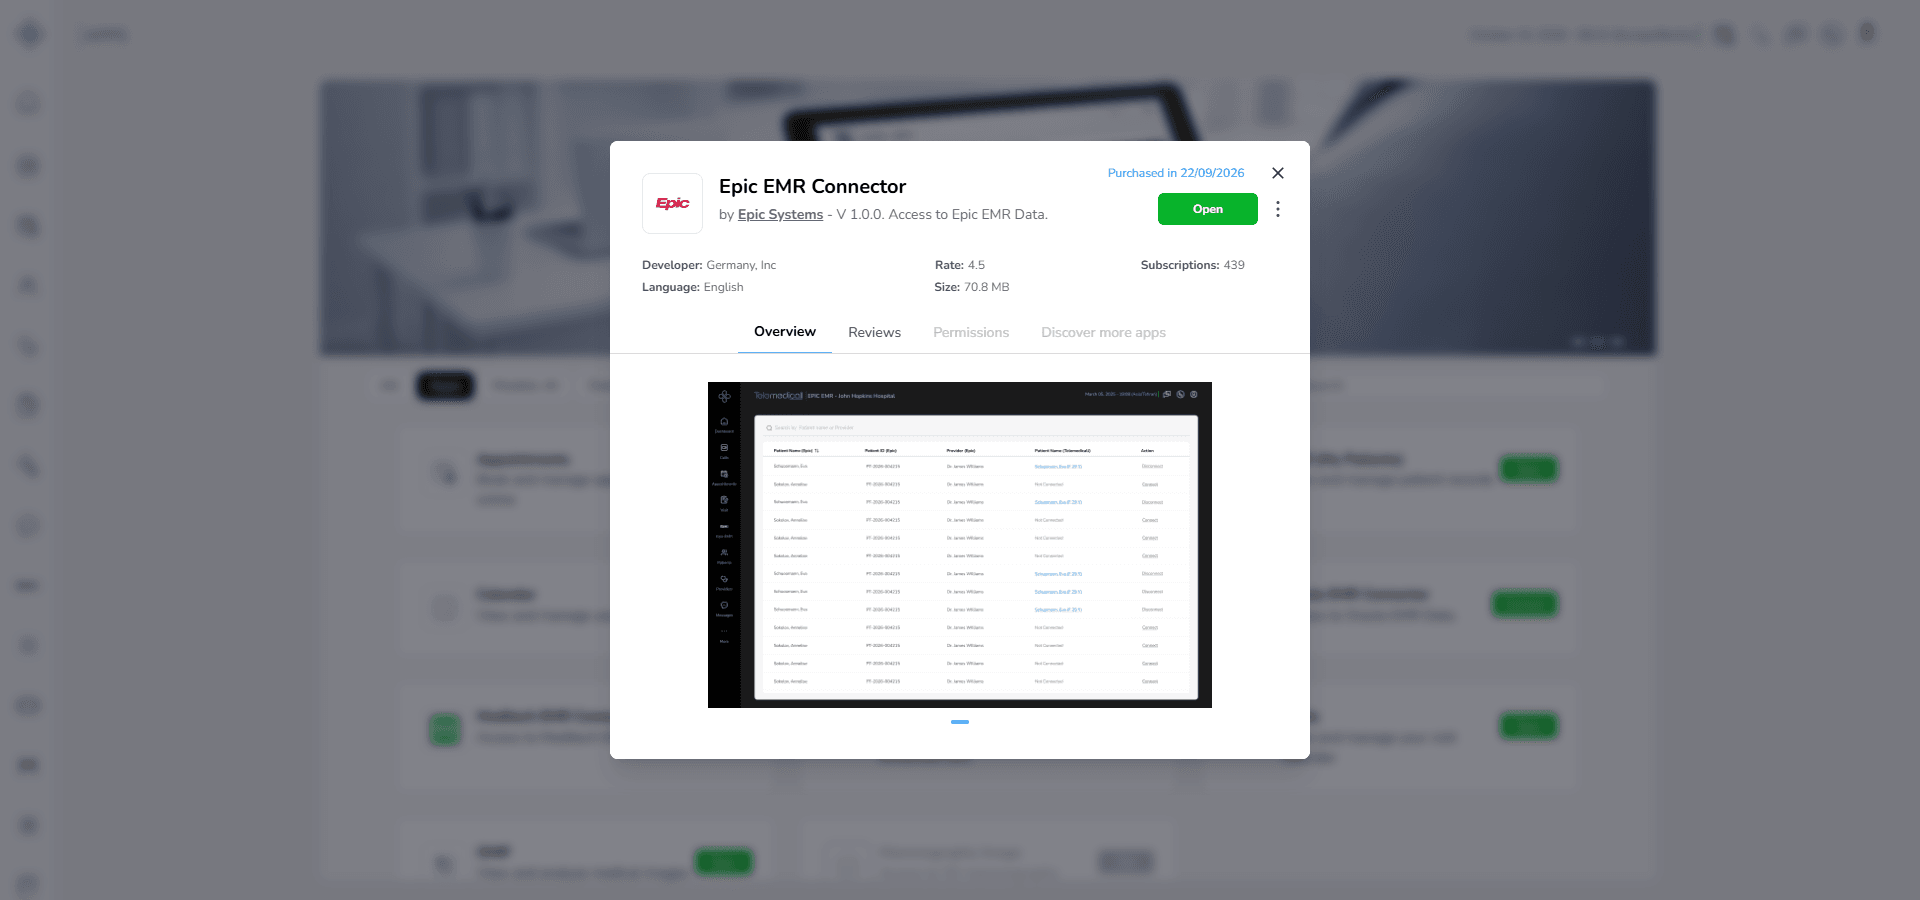
2. Click More Actions.
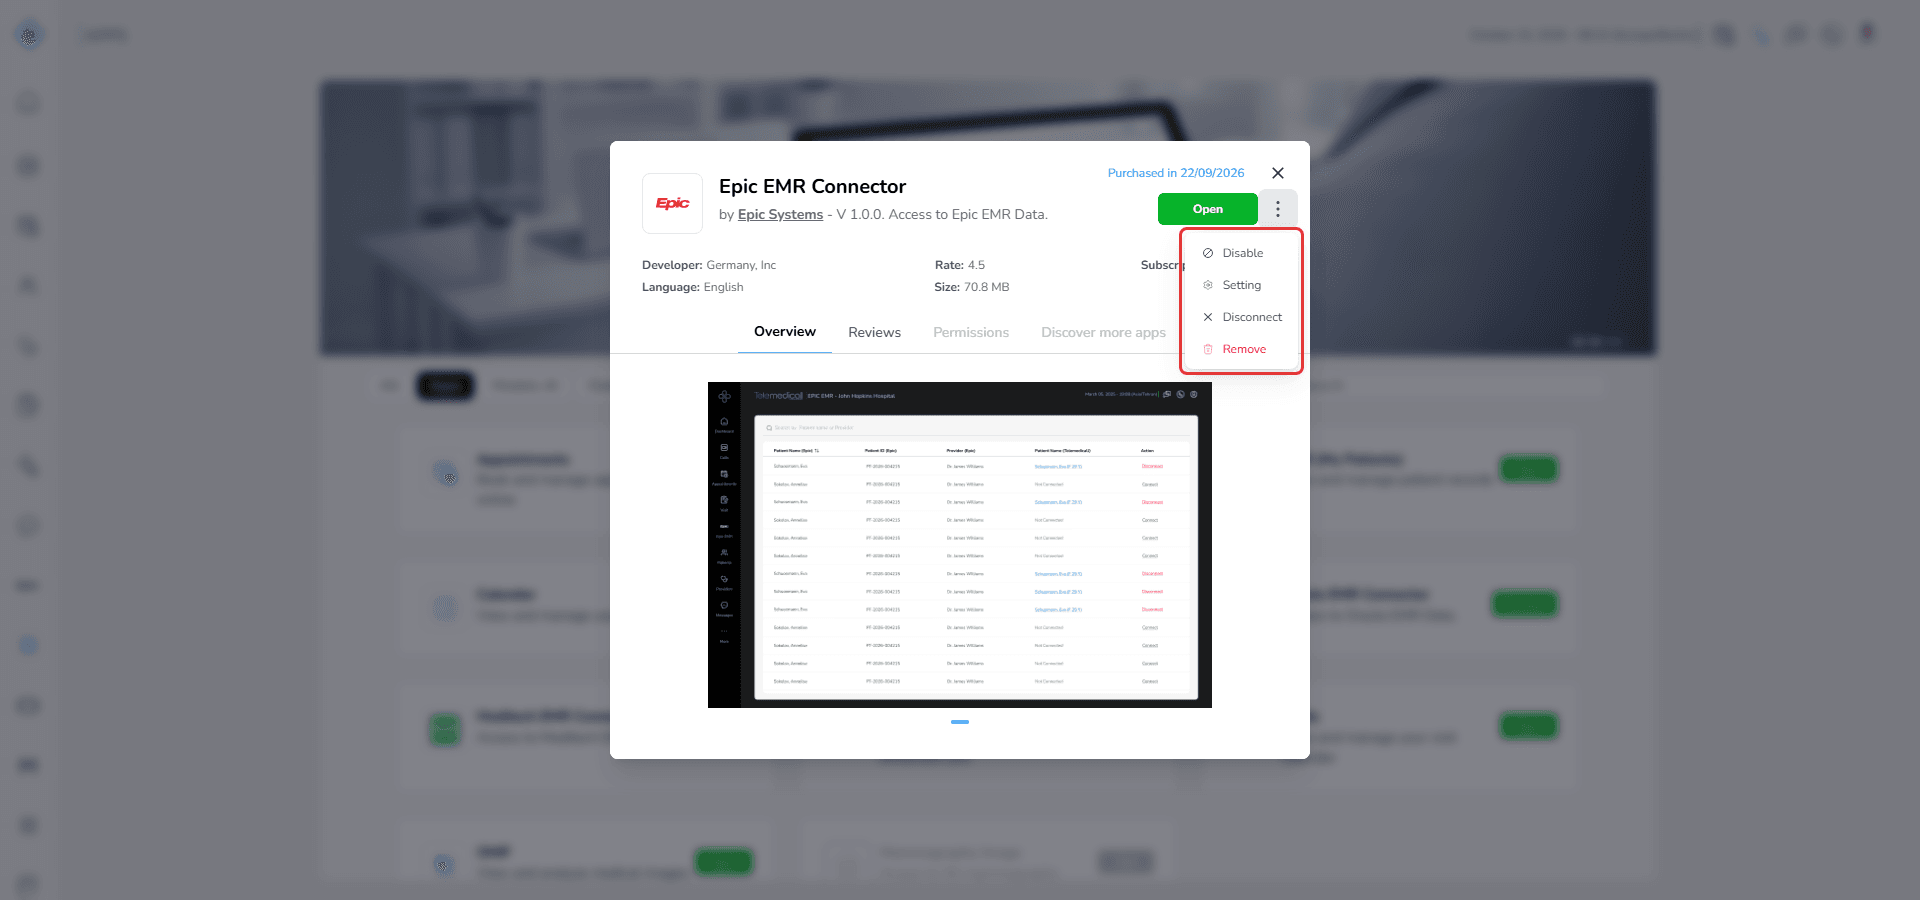
3. Select one of the available options.
Option 2: From the external EMR card
1. Move your cursor over the external EMR card.
2. The three dots icon appears on the card.
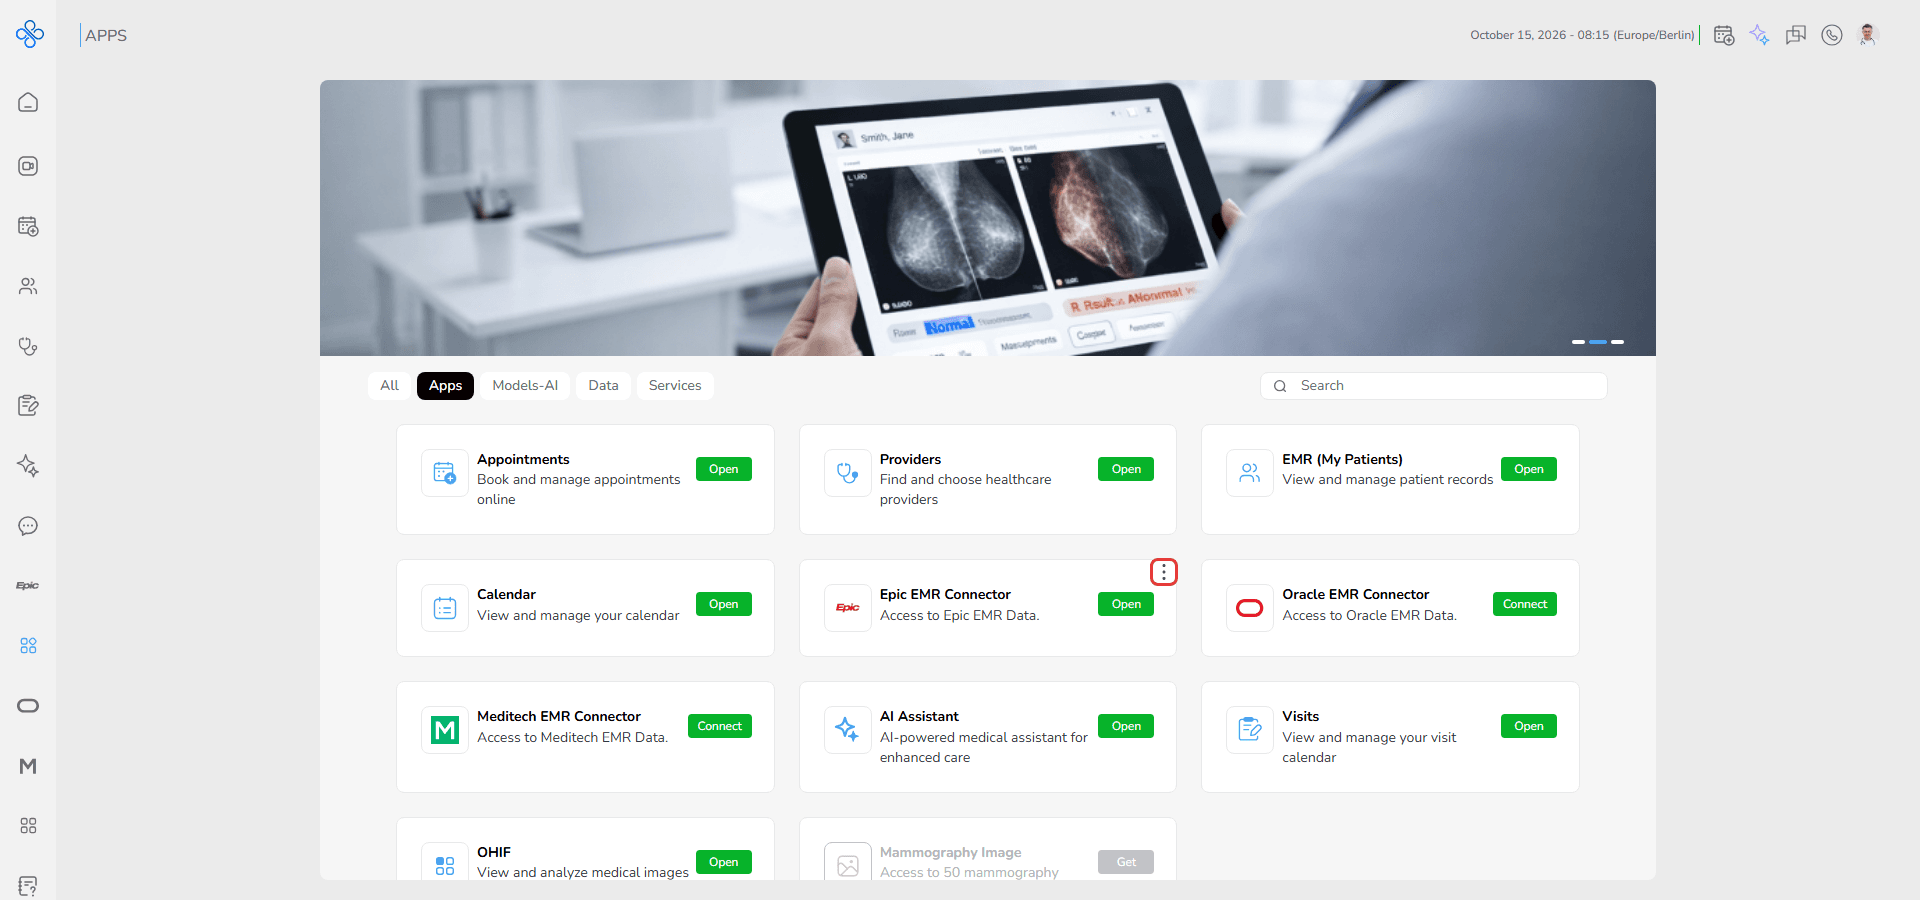
3. Click the three dots icon.
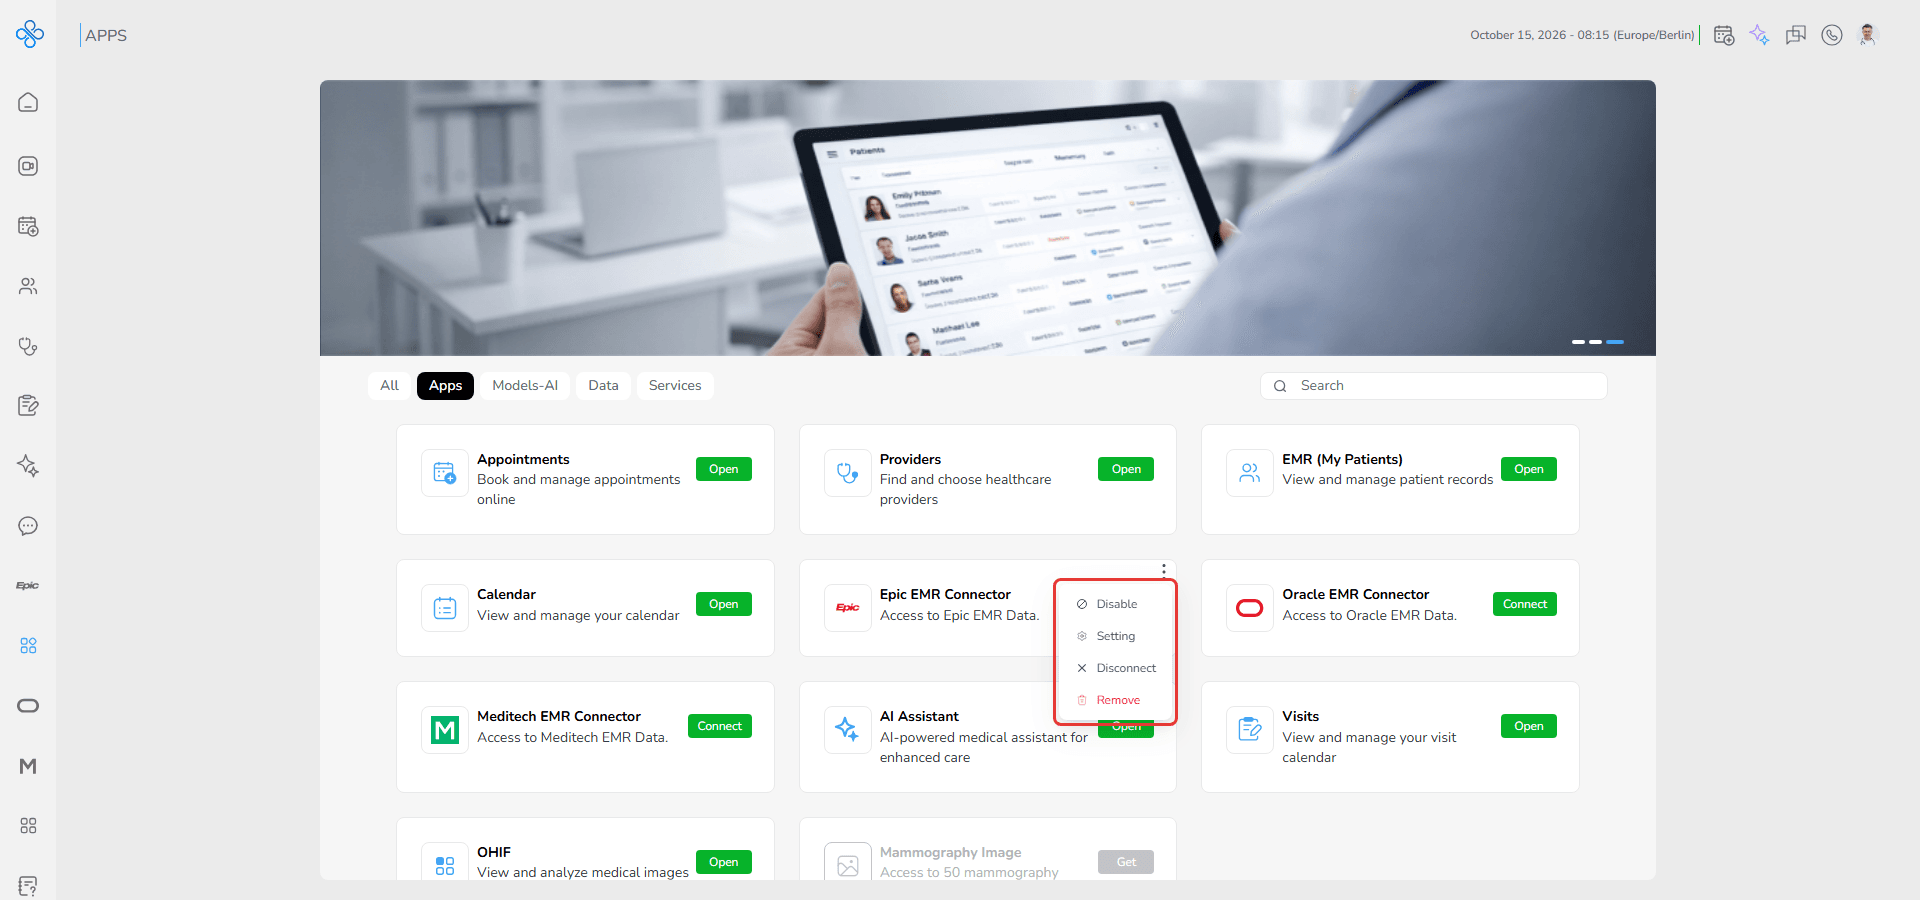
4. The More Actions menu opens.
5. Select one of the available options.
Disable
Temporarily disables the EMR integration.
After disabling:
- The integration becomes unavailable
- The item is removed from the sidebar
Setting
Opens the connection settings modal.
You can update:
- Connection information
- Access settings
- Integration details
Connect / Disconnect
- Connect establishes a new connection
- Disconnect removes the active connection
After disconnecting:
- The EMR data becomes unavailable
- You can reconnect later
Remove
Completely removes the integration.
After removing:
- Access is deleted
- The item is removed from the sidebar
- You must get the integration again to reconnect later
How to enable or disable AI models
Step 1: Open the Models-AI tab.
The models used during video calls are listed under Streaming AI.
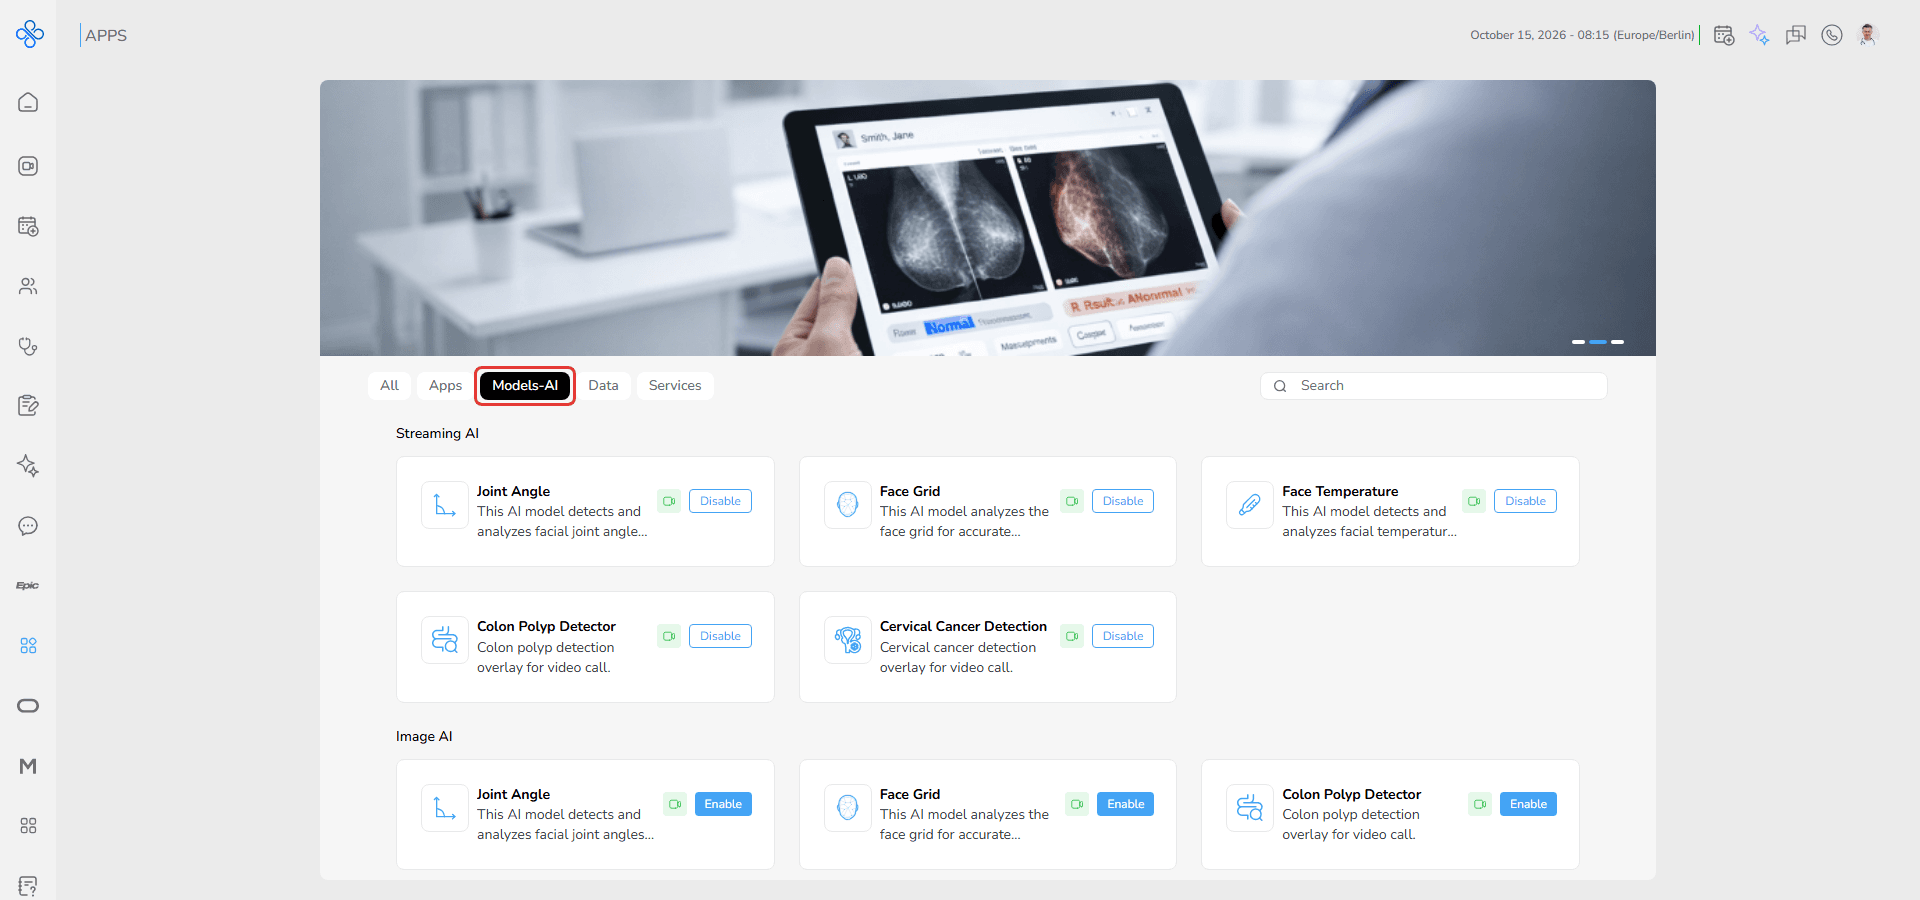
Step 2: Select an AI model.
Step 3: Click Enable to activate the model for calls.
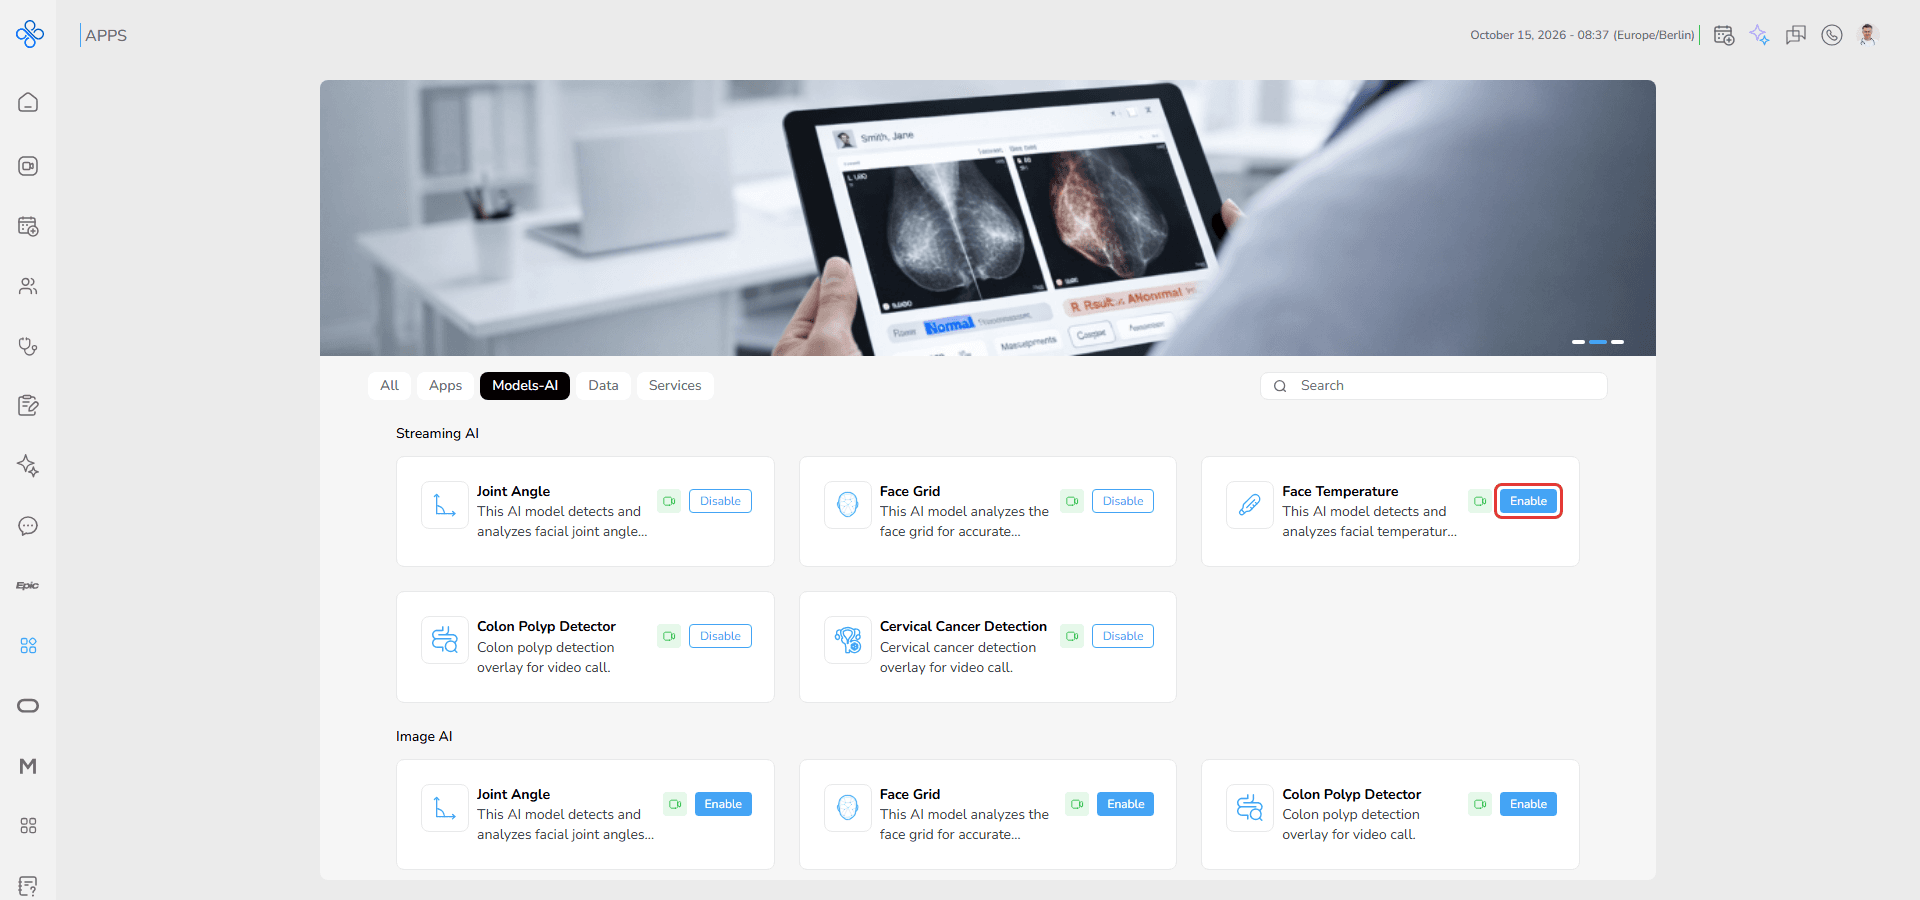
Step 4: When enabled:
* The model becomes available from the **AI Assist** menu during calls
- AI features related to the model can be used
Step 5: Click Disable when you no longer need the model active.
Step 6: After disabling:
* The model is no longer listed in the AI Assist menu during calls
- The model remains installed and can be enabled again later
Generative AI
The Generative AI group on the Models-AI tab lists the AI engines the platform can use to analyze and generate information: OpenAI, Claude AI, Gemini, DeepSeek and Telemedicall AI.
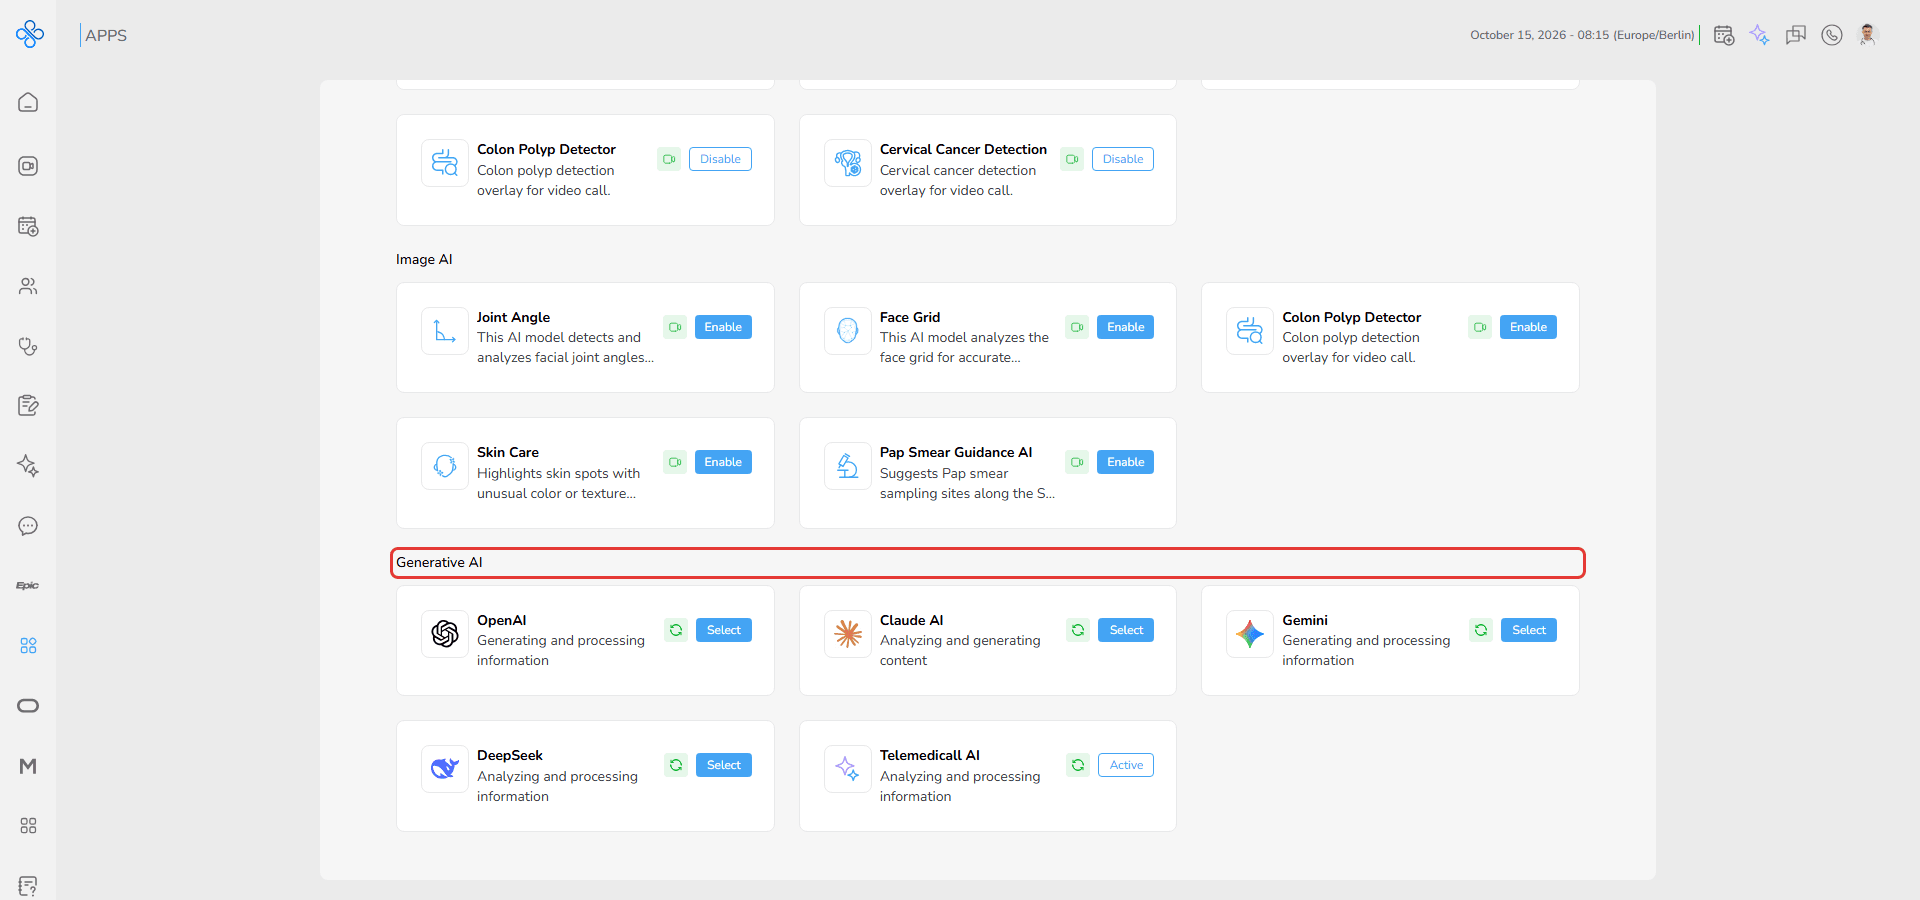
The engine in use is marked Active. Click Select on another engine to use it instead.
Applications
Appointments
The Appointments section helps you create and manage medical appointments in one place.
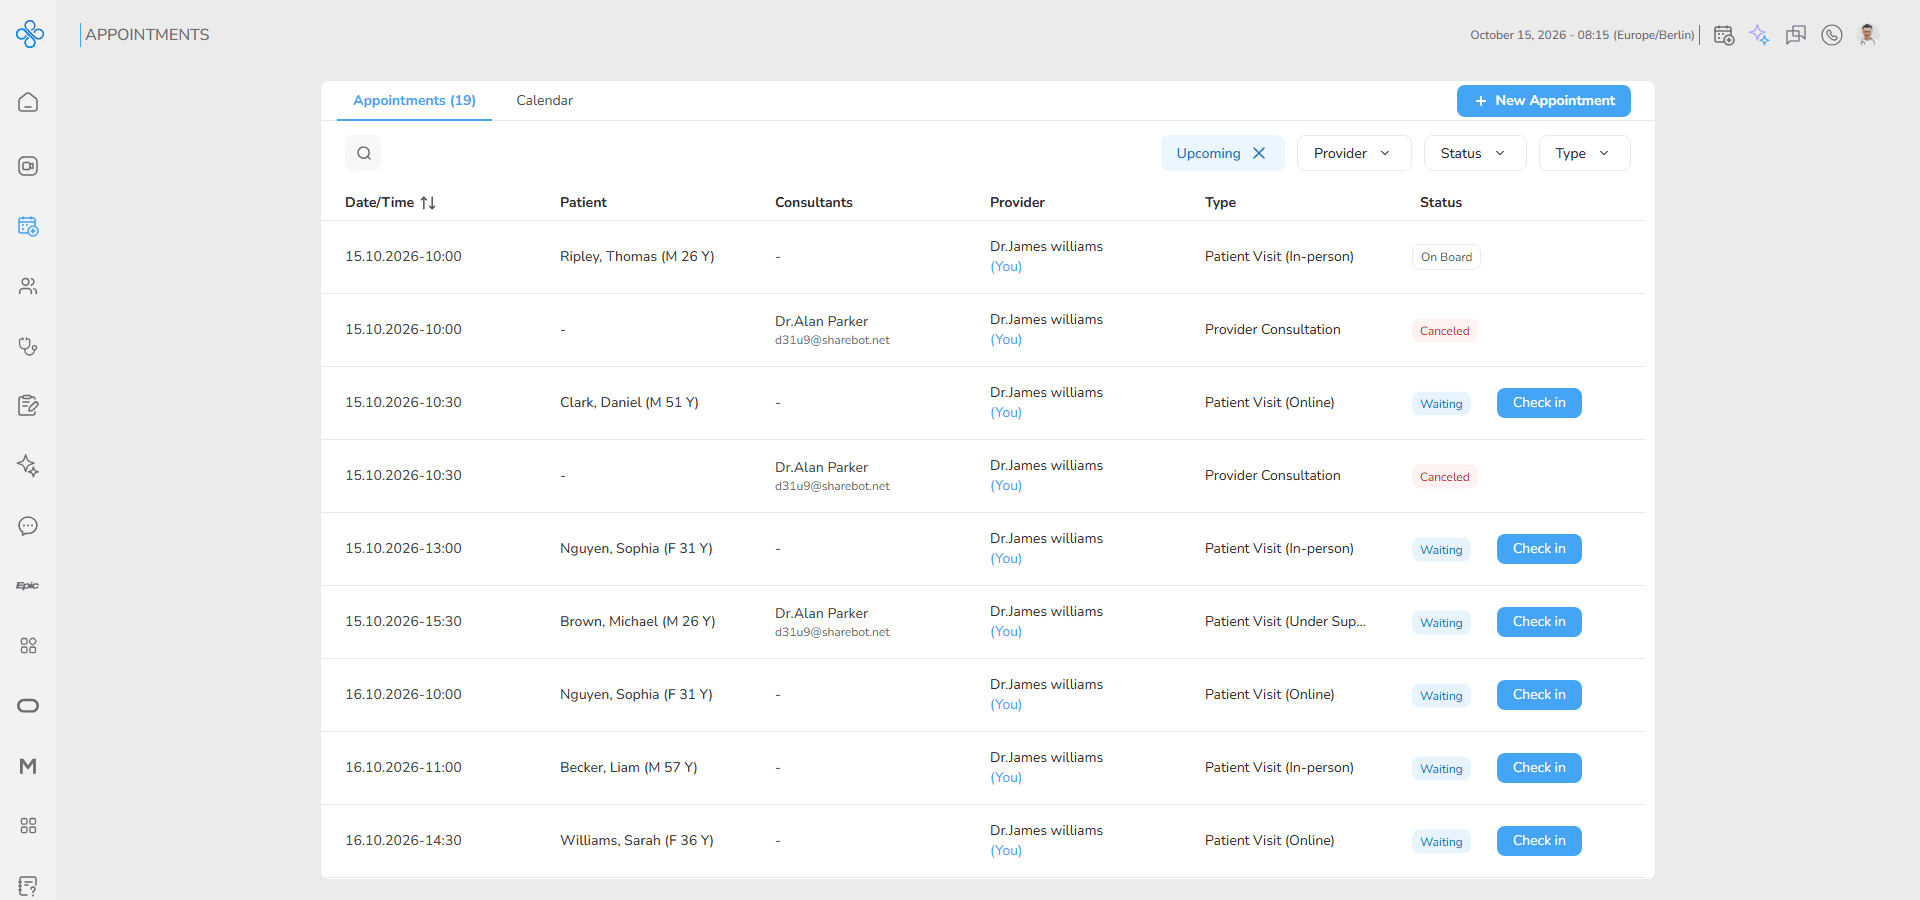
Here, you can:
- Schedule new appointments
- View existing appointments
- Check appointment status
- Check in patients
- Cancel appointments
- Start visits when appointment time arrives
For more detailed instructions about creating, managing and handling appointments, refer to the Appointment System guide.
My Patients (Internal EMR)
The Patient Management section helps you organize and manage patient records in one place.
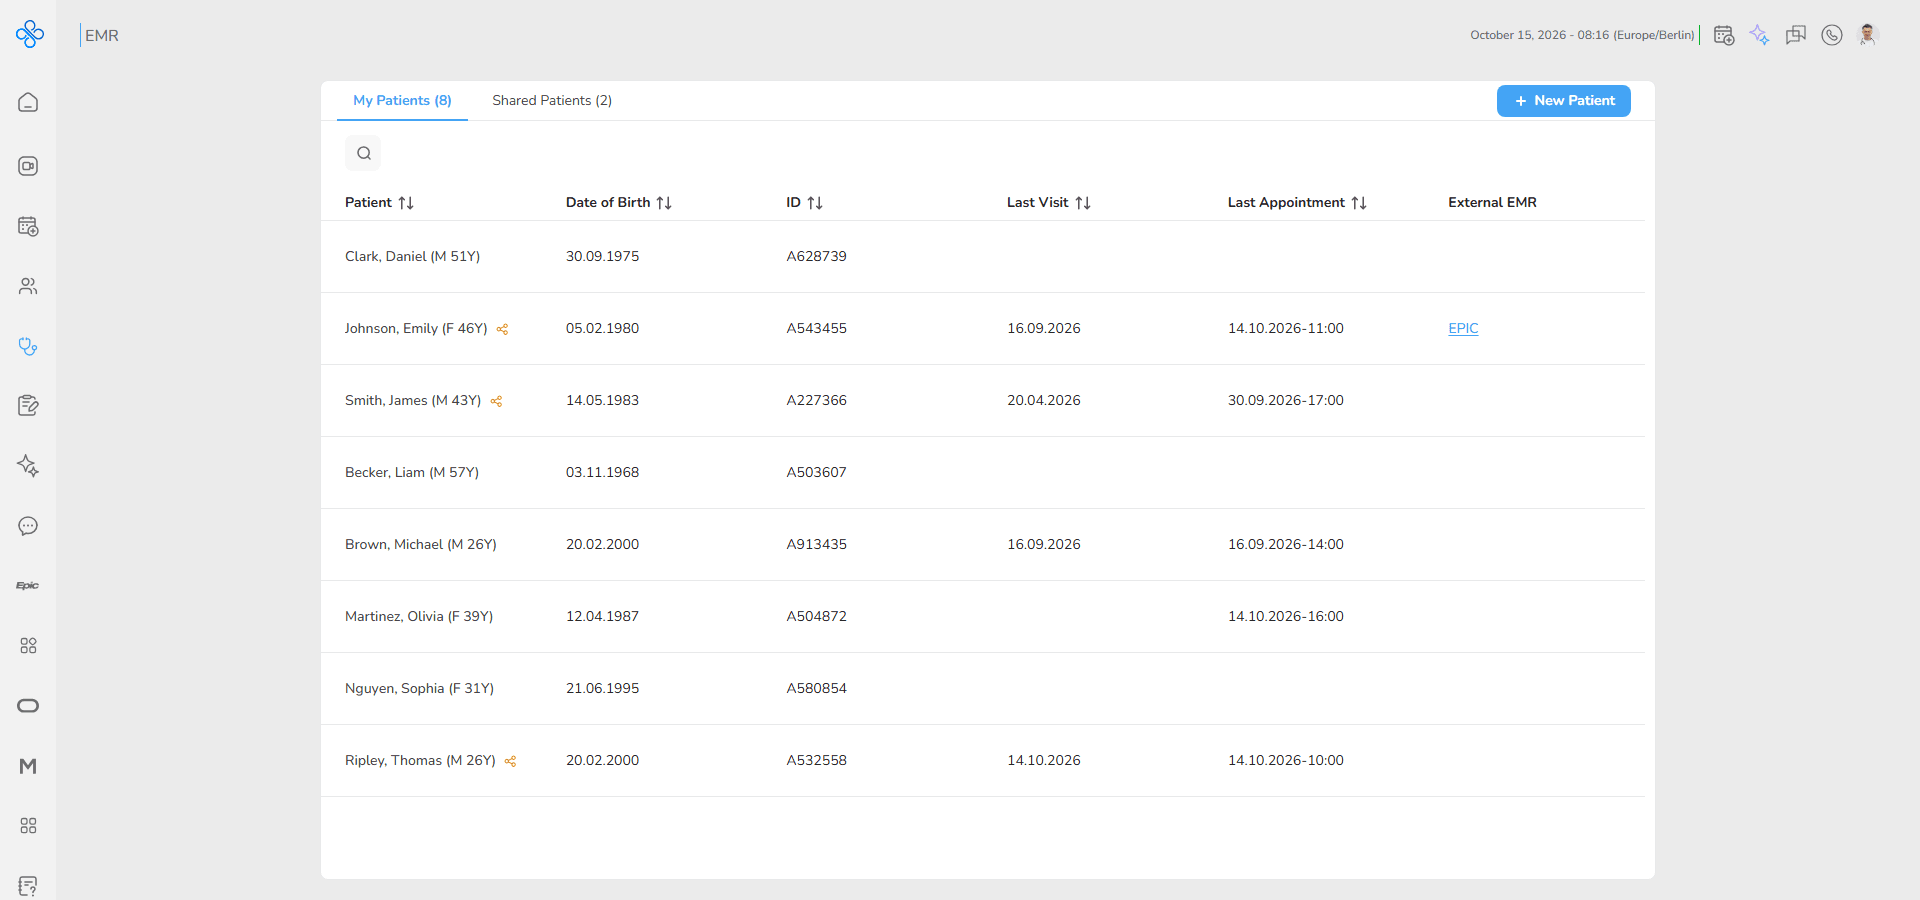
This workspace supports your daily clinical workflow by giving you quick access to patient information and important patient related actions.
You can use this section to:
- Add new patients
- Review patient records
- Update patient information
- Manage patient details
Patients are organized into different tabs, allowing you to clearly separate patients under your direct care from patients shared with you by other providers.
For more detailed instructions, refer to the EMR guide.
Calendar
Used to manage schedules, appointments and availability.
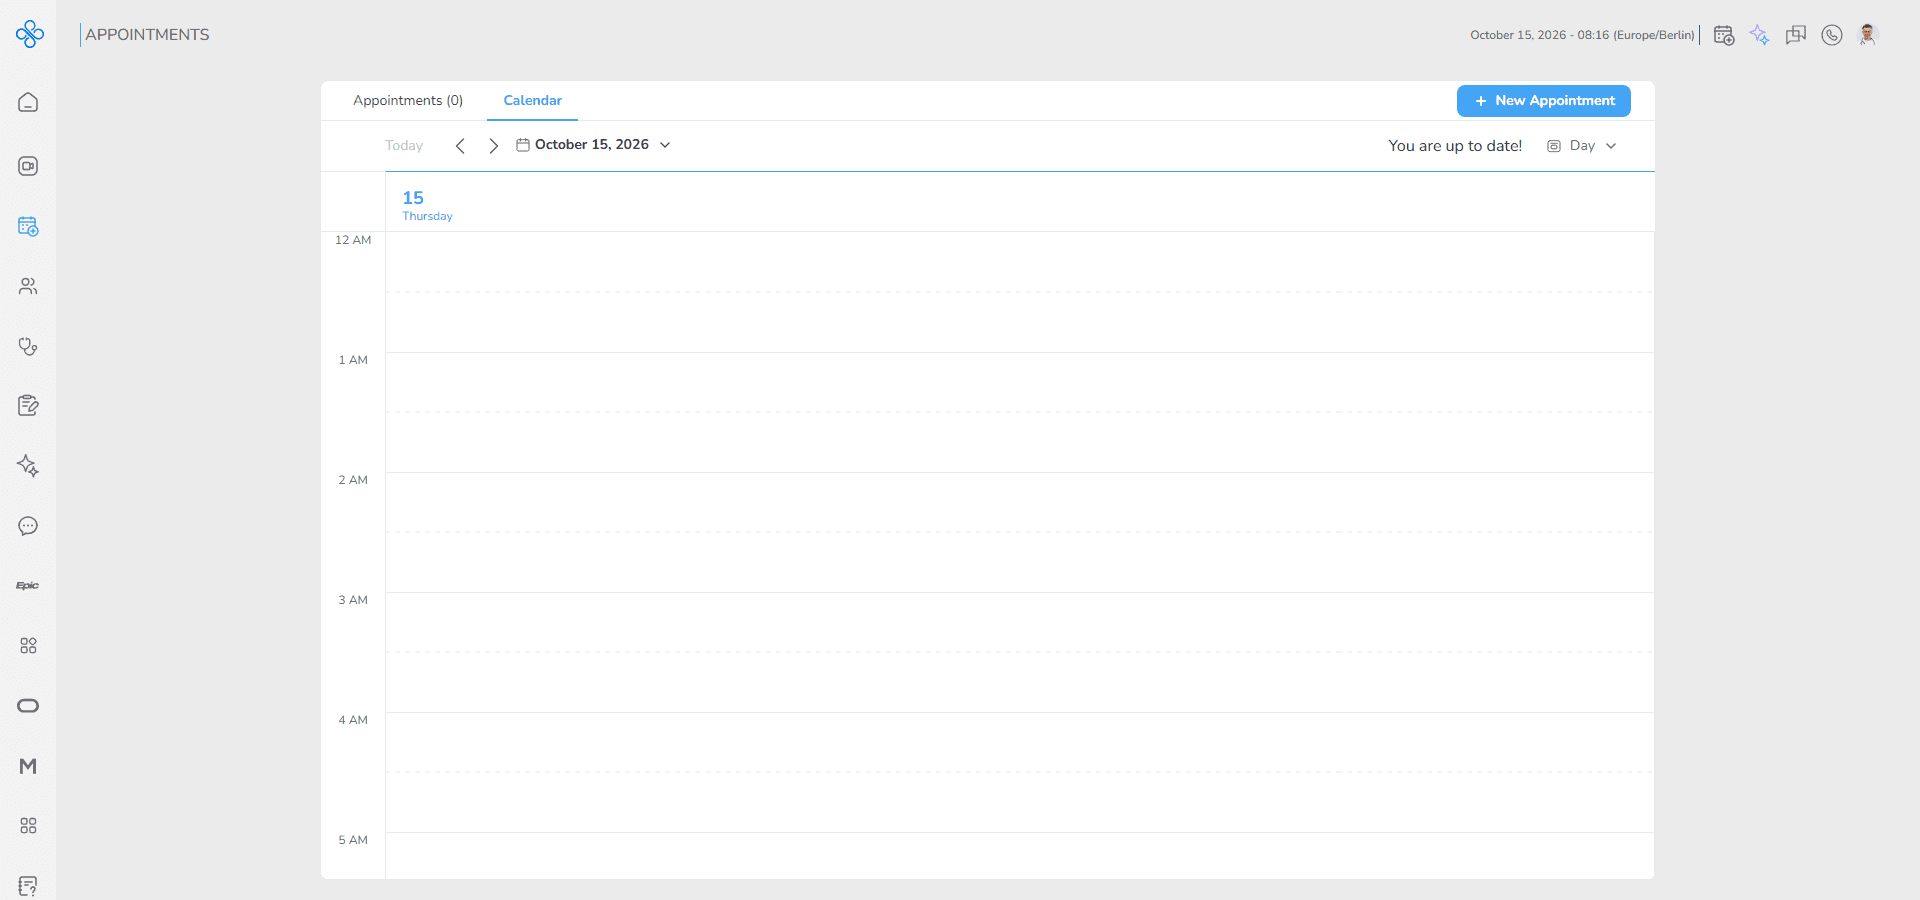
You can organize daily activities and upcoming events.
OHIF
Medical imaging viewer for reviewing and analyzing imaging files.
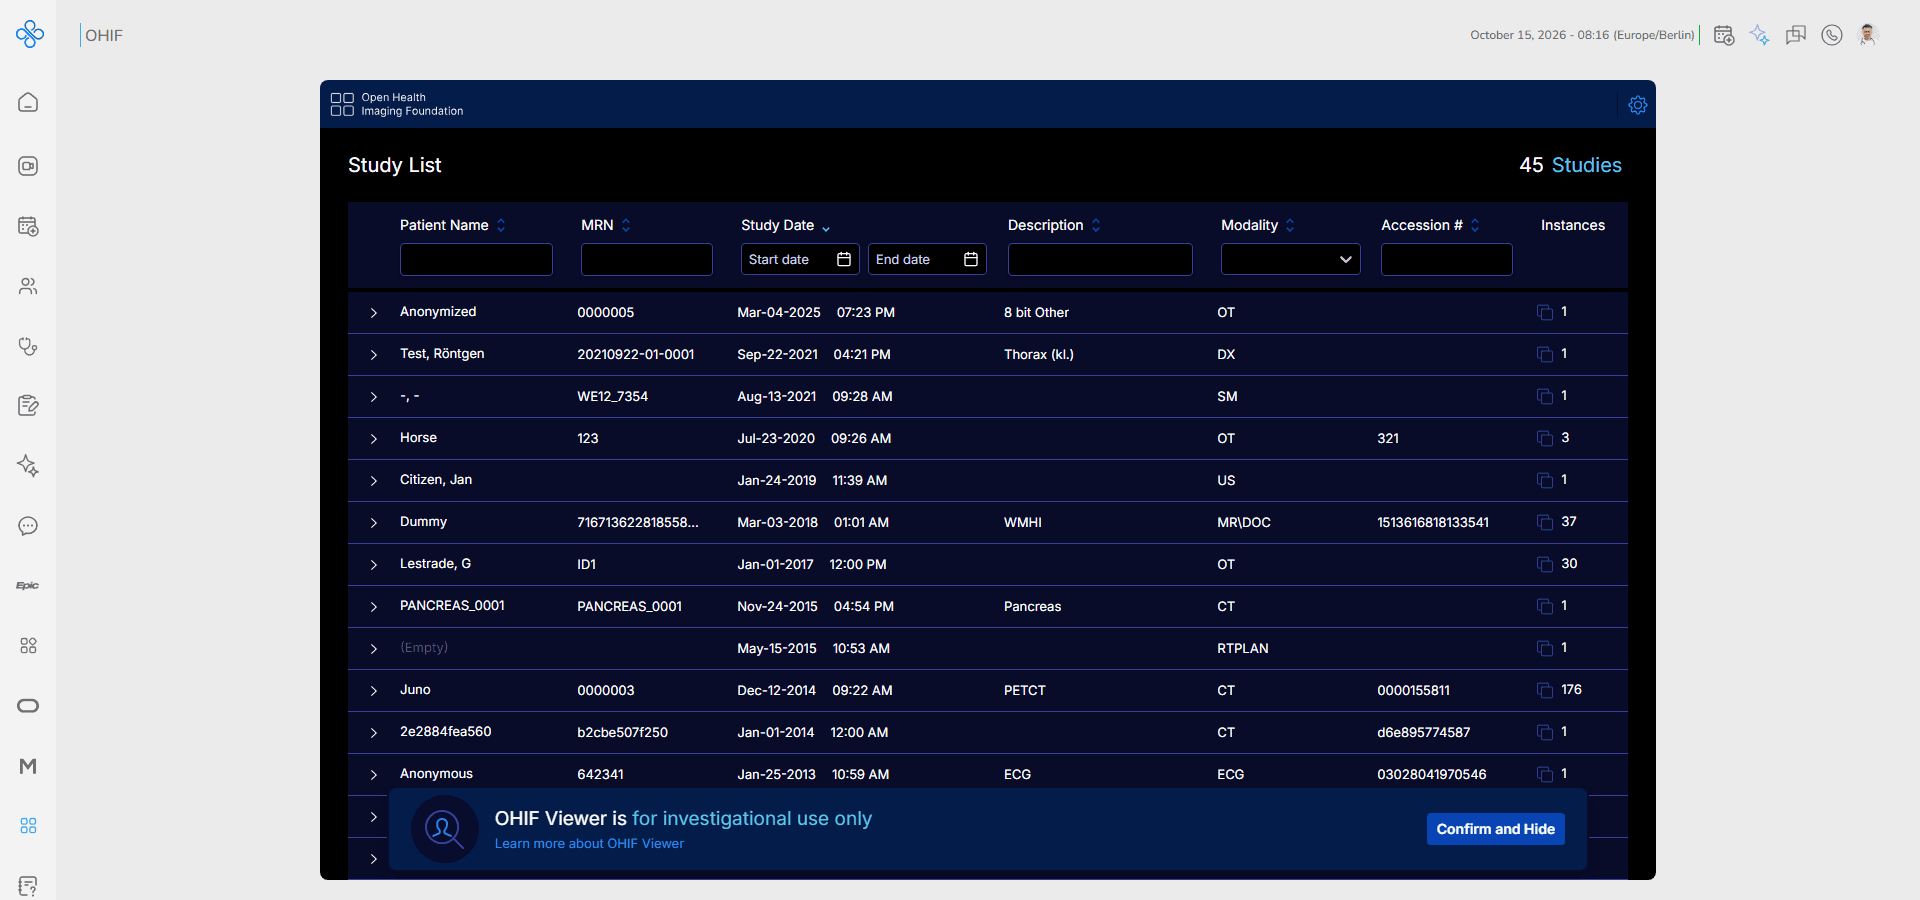
Useful for radiology and diagnostic image workflows.
For more detailed instructions, refer to the OHIF guide.
Providers
The Providers page helps you find, review and connect with healthcare providers in one place.
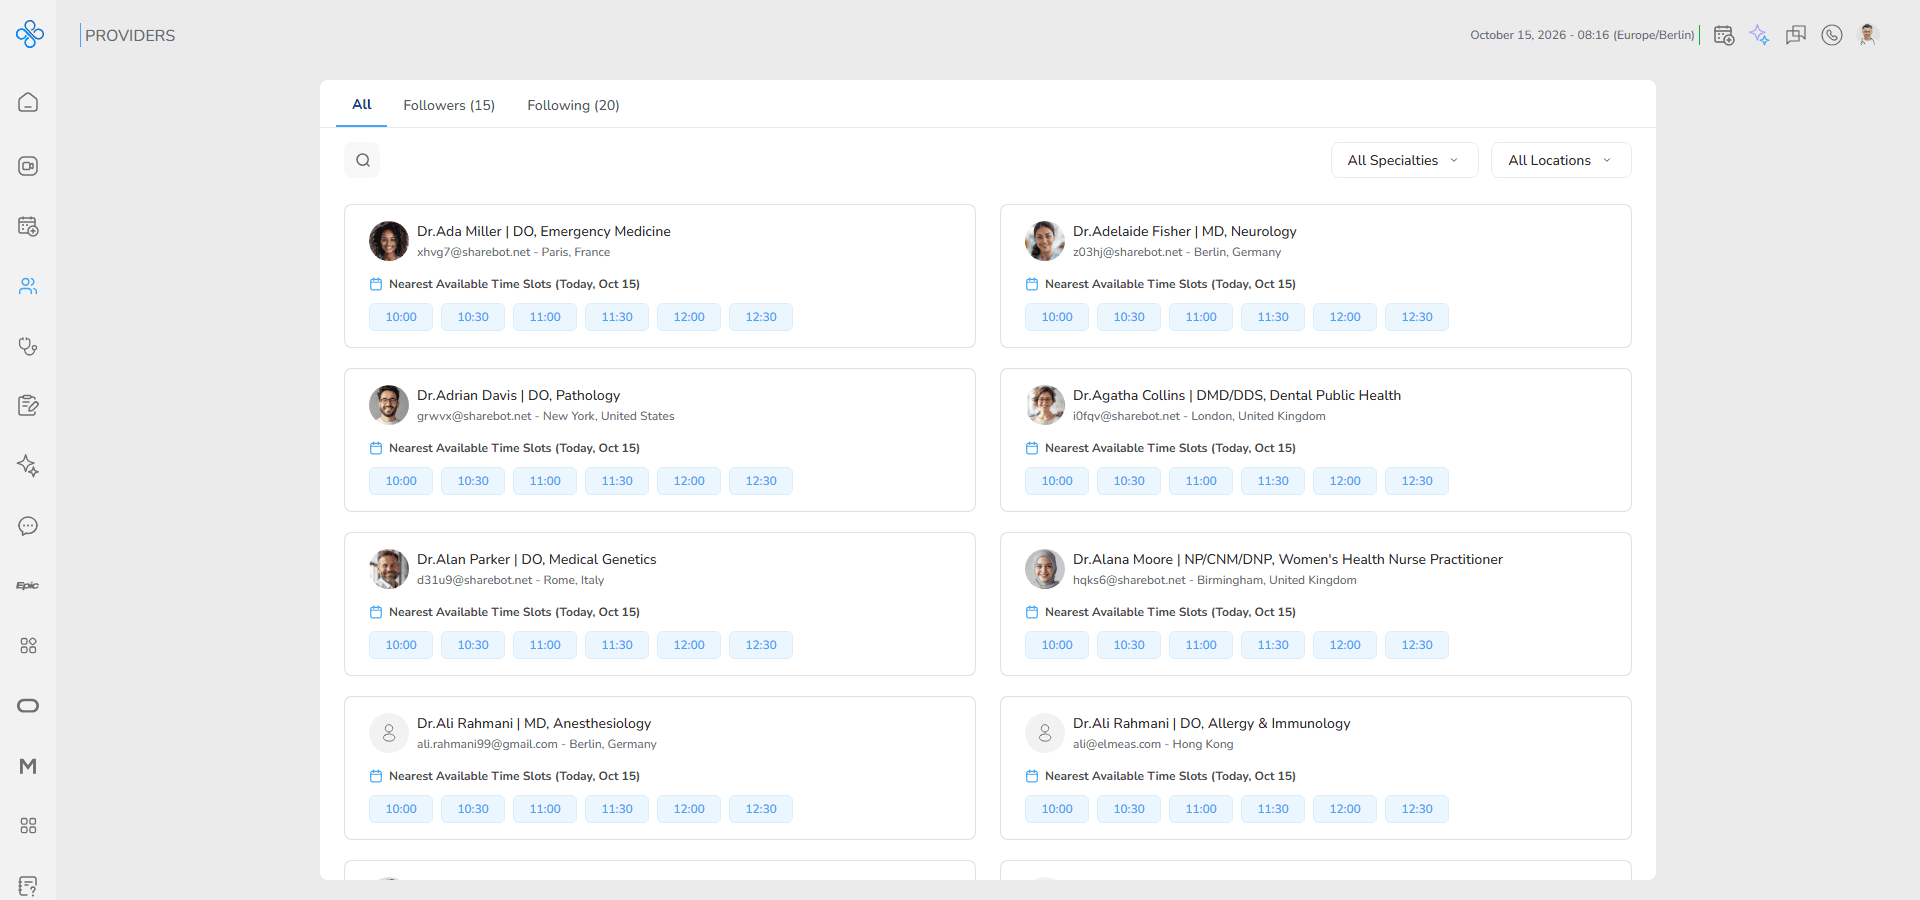
When you open this page, you can see a list of providers along with basic information such as:
- Provider name
- Specialty
- Location
- Nearest available time
This allows you to quickly review providers without opening their profiles.
You can use this page to:
- Search for providers
- Review provider information
- Check provider availability
- Book appointments
- Follow providers
- Start chats, voice calls or video calls
- Share files with connected providers
This page is designed to help you move from finding a provider to communicating with them quickly and easily.
For more detailed instructions, refer to the Providers guide.
Visits
The Visits page allows you to view and manage all patient visits you are involved in.
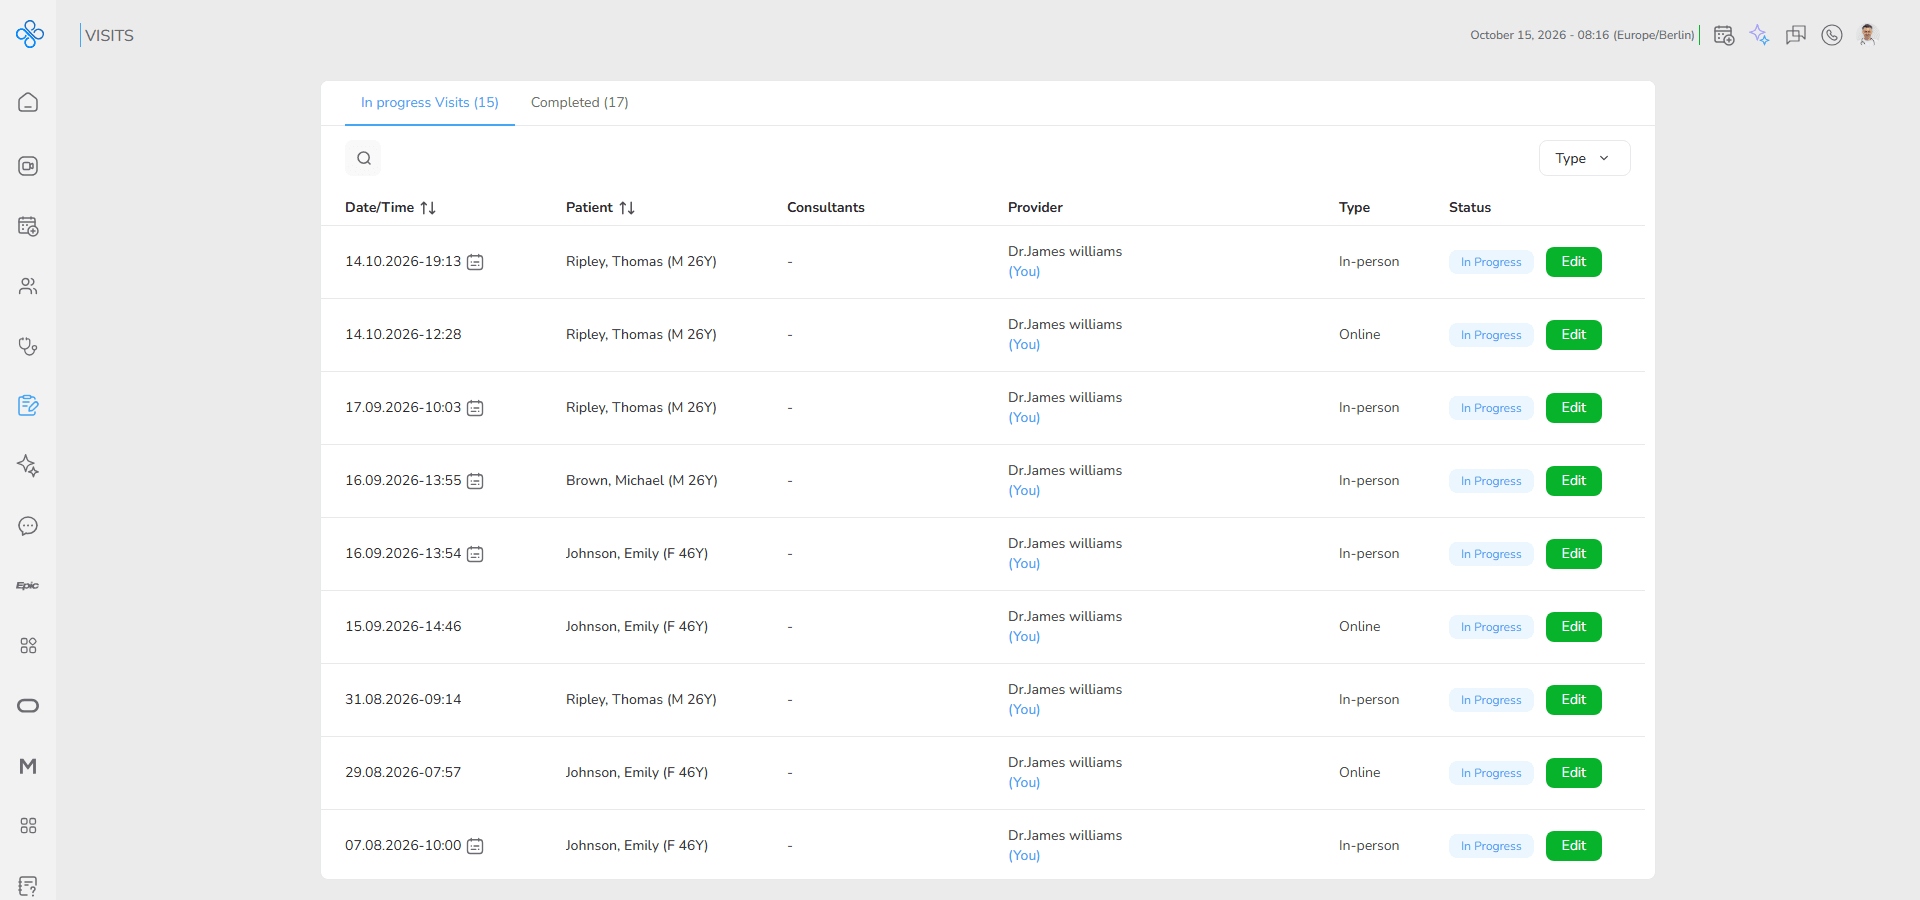
This section helps you track clinical activities, monitor ongoing consultations and review completed visits when needed.
Visits can be created in two different ways:
- From an appointment workflow by selecting Start Visit
- As a walk in visit created manually from a patient’s visit history
The page is divided into two tabs to help you organize visits based on their current status:
- In Progress Visits
- Displays active or unfinished visits that still require actions or follow up
- Completed Visits
- Displays visits that have already been finalized and closed
You can use this page to:
- Track active visits
- Continue unfinished consultations
- Review completed visits
- Access patient visit information
- Manage visit related workflows
For more detailed instructions, refer to the Visit Management guide.
AI Assistant
The AI Assistant section provides a dedicated space where you can interact with the platform’s intelligent assistant through organized chat topics.
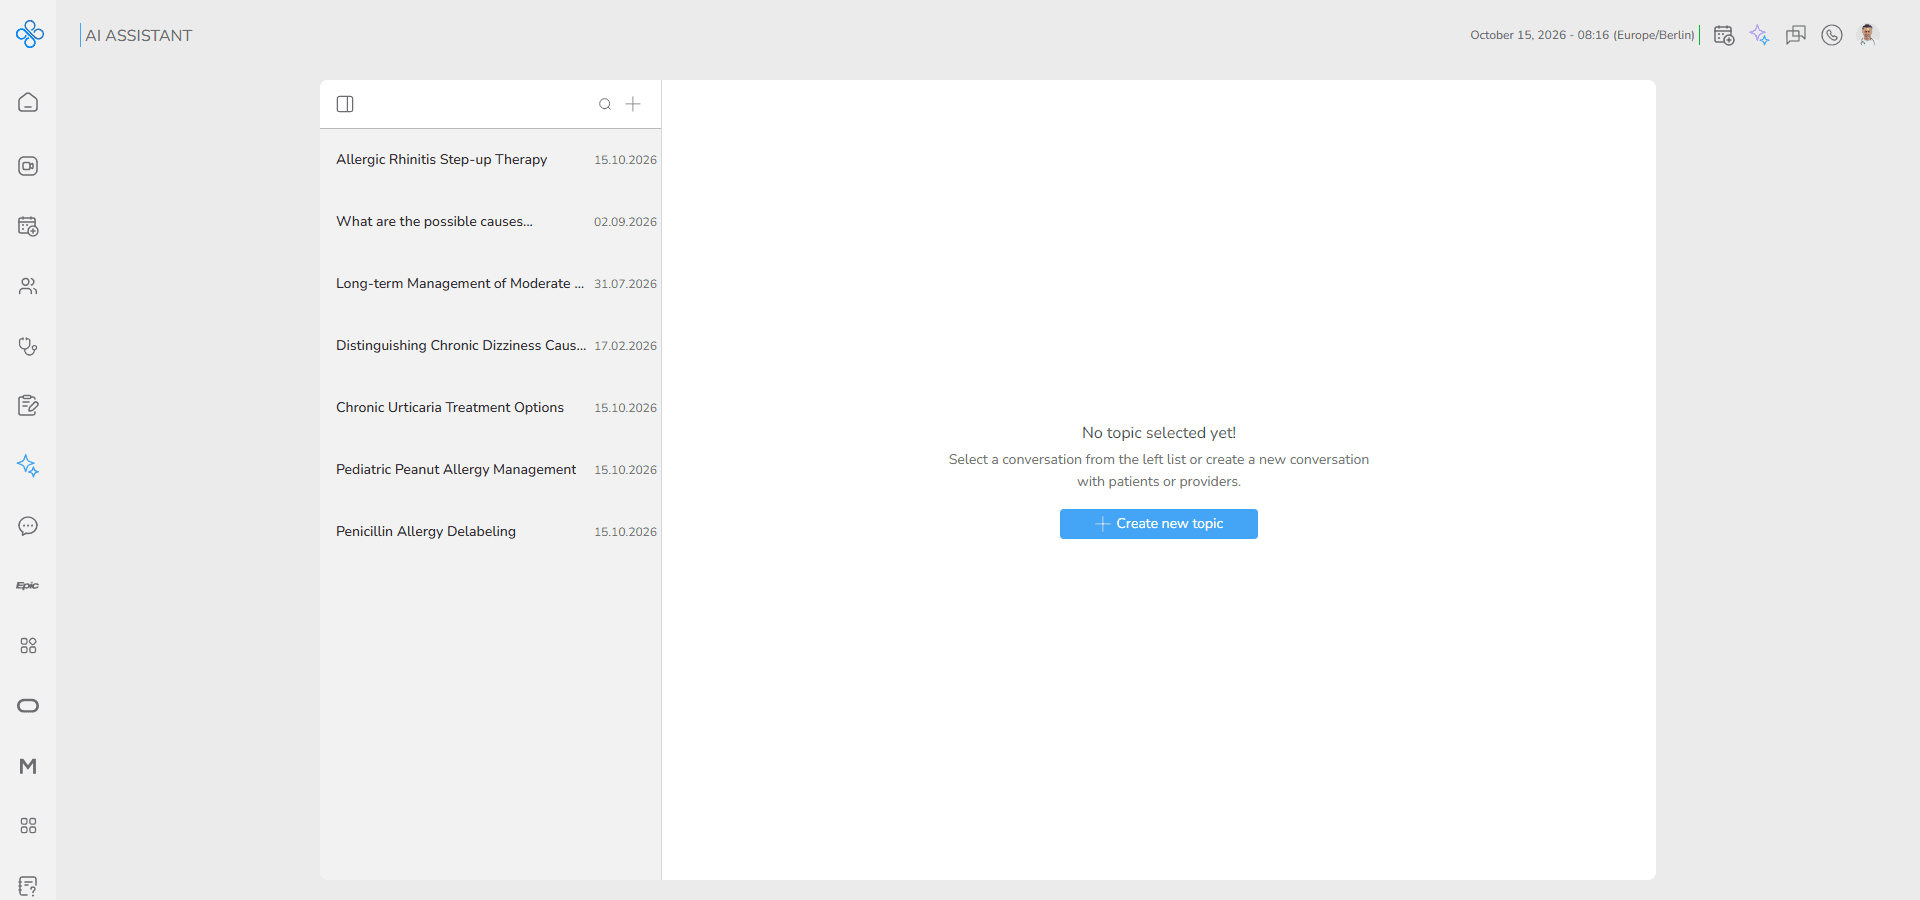
Each topic works as a separate conversation thread, allowing you to keep different questions, consultations and discussions organized and easy to review later.
This structure helps keep conversations clear and focused, especially when managing multiple subjects or workflows at the same time.
You can use the AI Assistant to:
- Ask clinical or workflow related questions
- Organize conversations by topic
- Continue previous discussions
- Review earlier responses and notes
- Keep communication structured and easy to manage
For more detailed instructions, refer to the AI Agent guide.
Mammography Image
Provides access to mammography image datasets for research purposes.
External EMR Applications
Oracle EMR
Integration with Oracle EMR systems.
Allows you to access Oracle EMR data directly inside Telemedical.
Epic EMR
Epic EMR integration allows you to connect your Telemedical account to your Epic system.
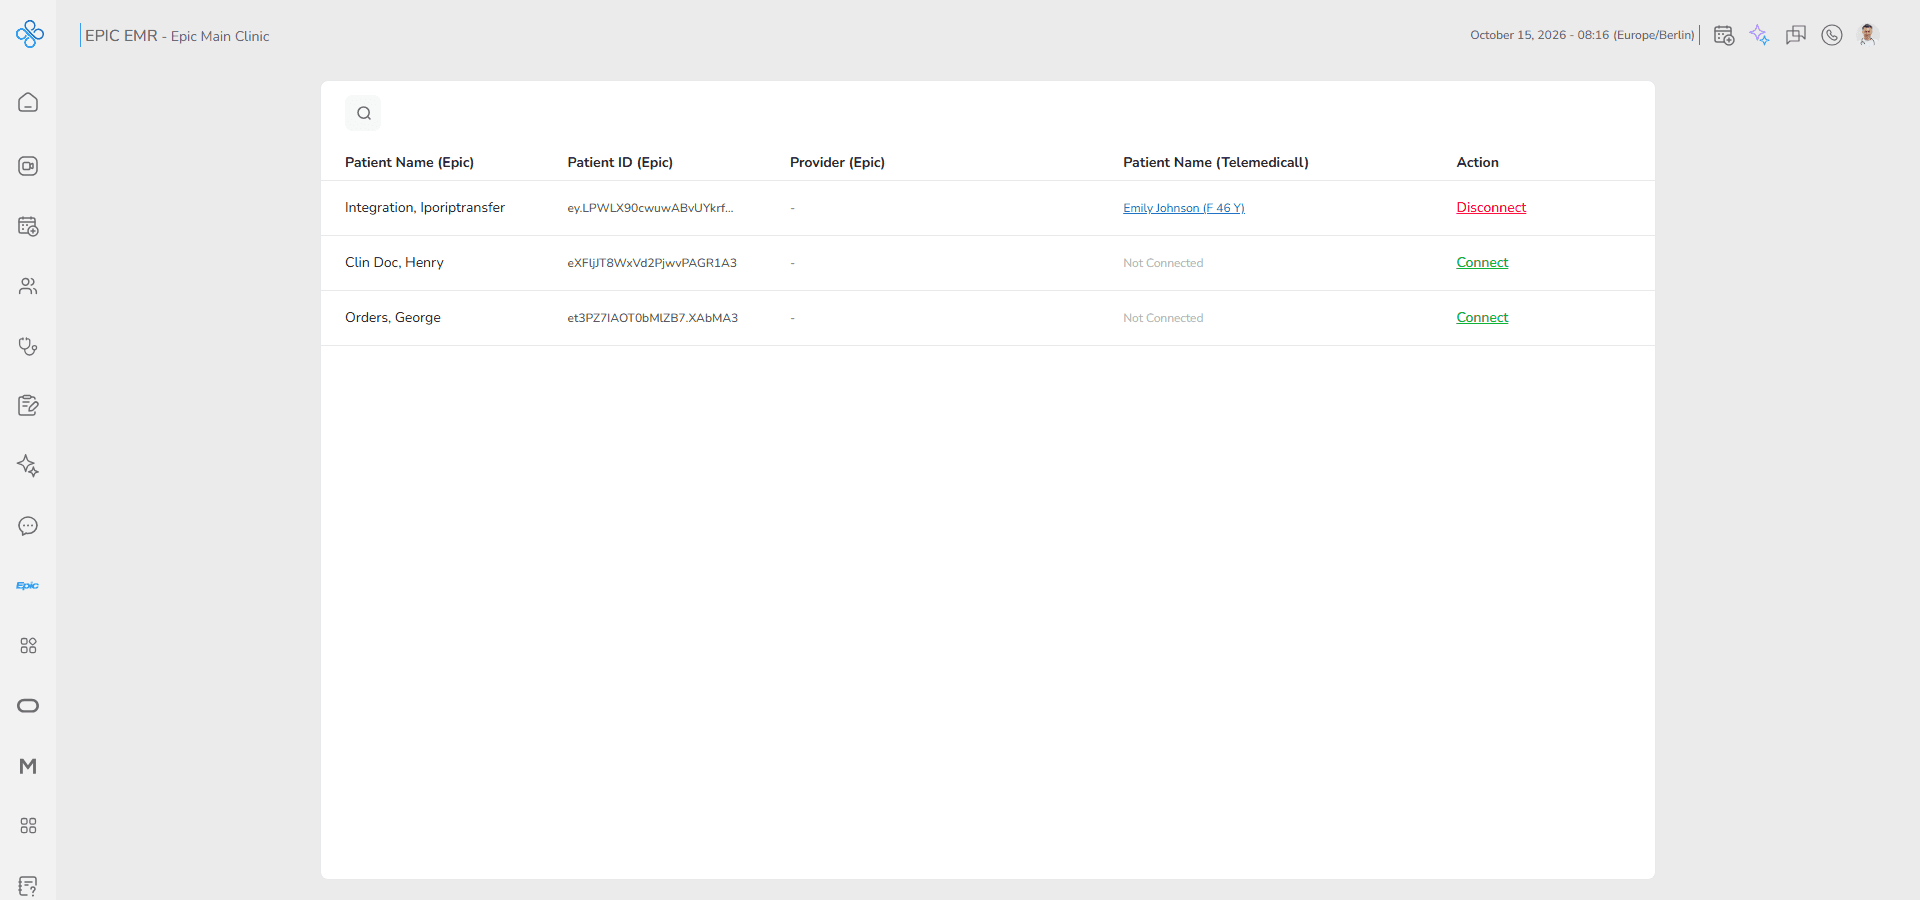
After connecting, you can access Epic patient records directly inside Telemedical without switching between platforms.
You can use this integration to:
- View Epic patient information inside Telemedical
- Link Epic patients with Telemedical patient records
- Access diagnoses, allergies and clinical history in one place
- Review patient information more efficiently during workflows
This integration helps provide a more complete patient overview while keeping your workflow simple and centralized.
For more detailed instructions, refer to the Epic EMR guide.
Meditech EMR
Integration with Meditech EMR systems.
Allows access to Meditech patient and clinical data.
AI Models
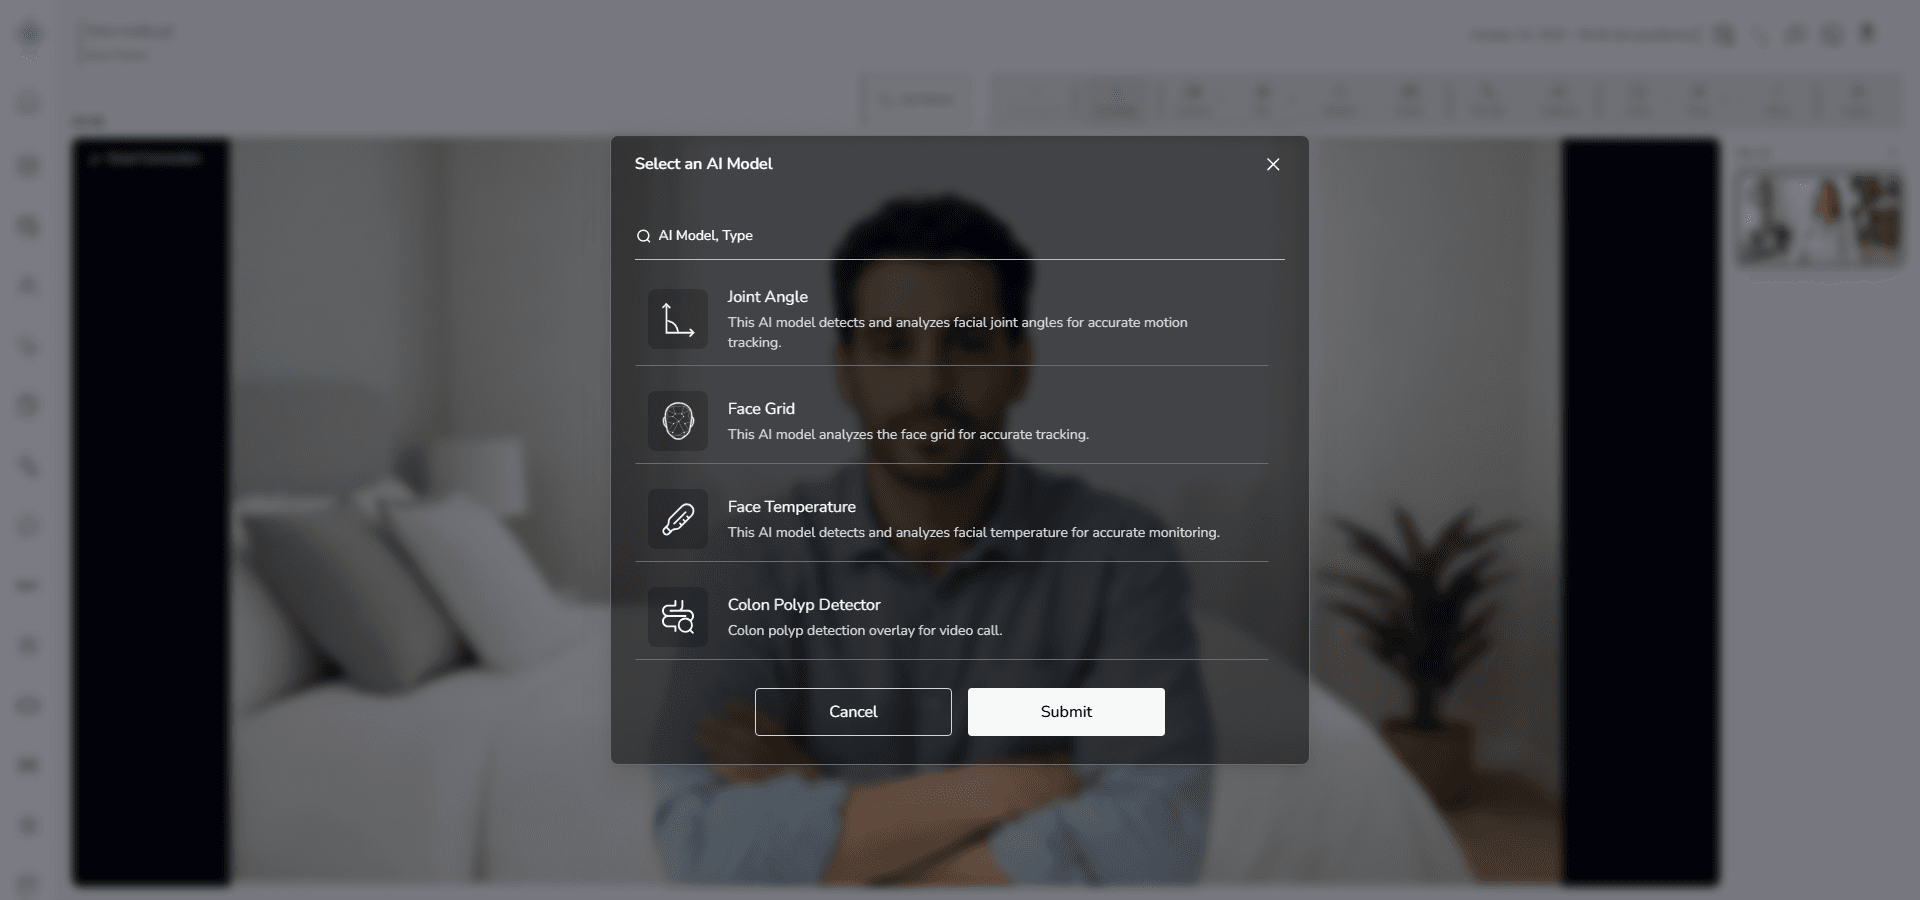
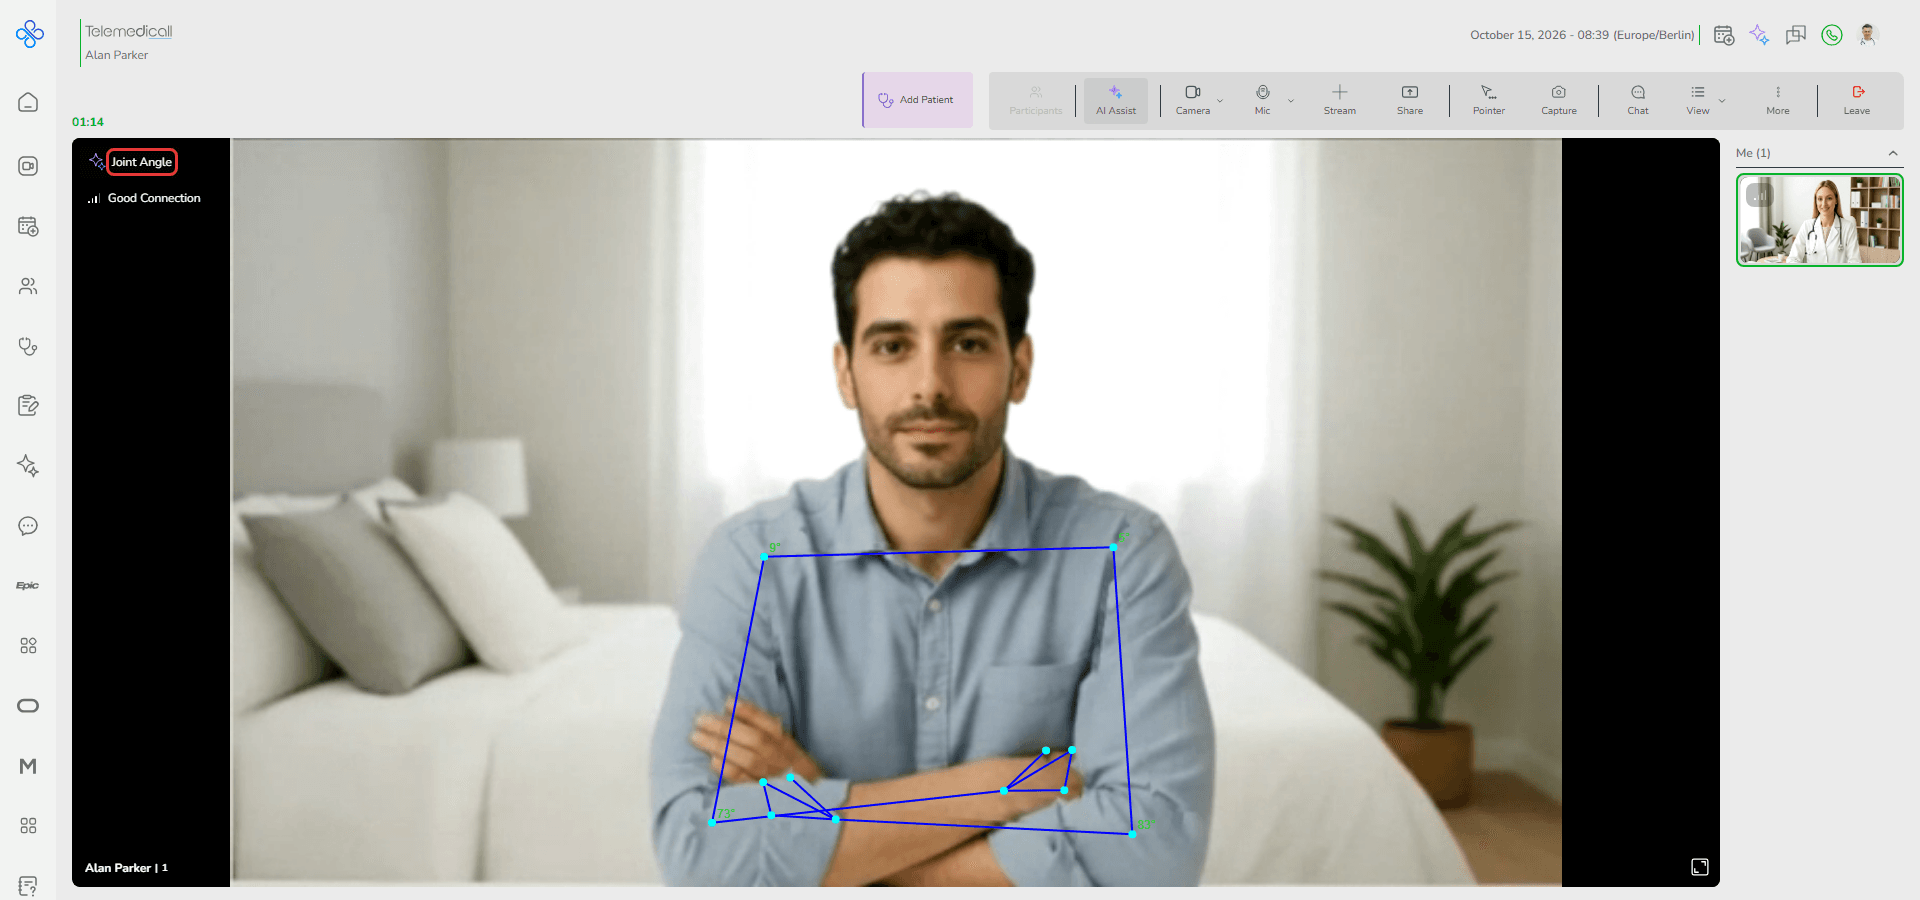
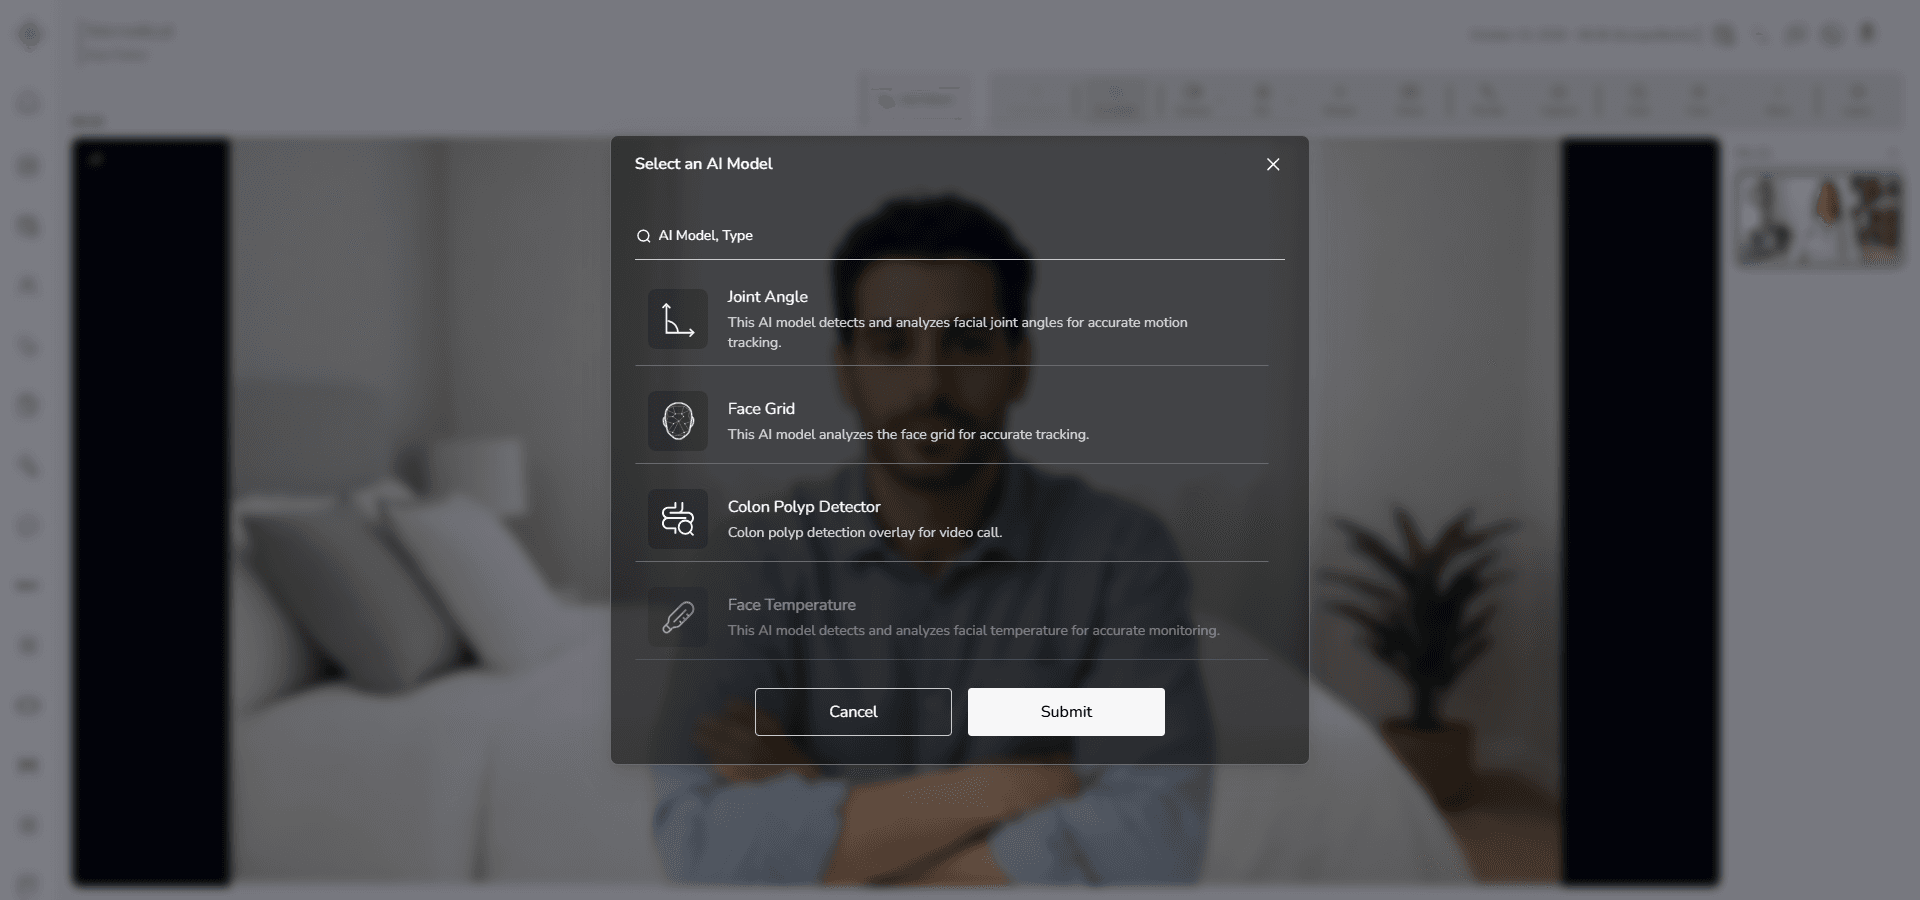
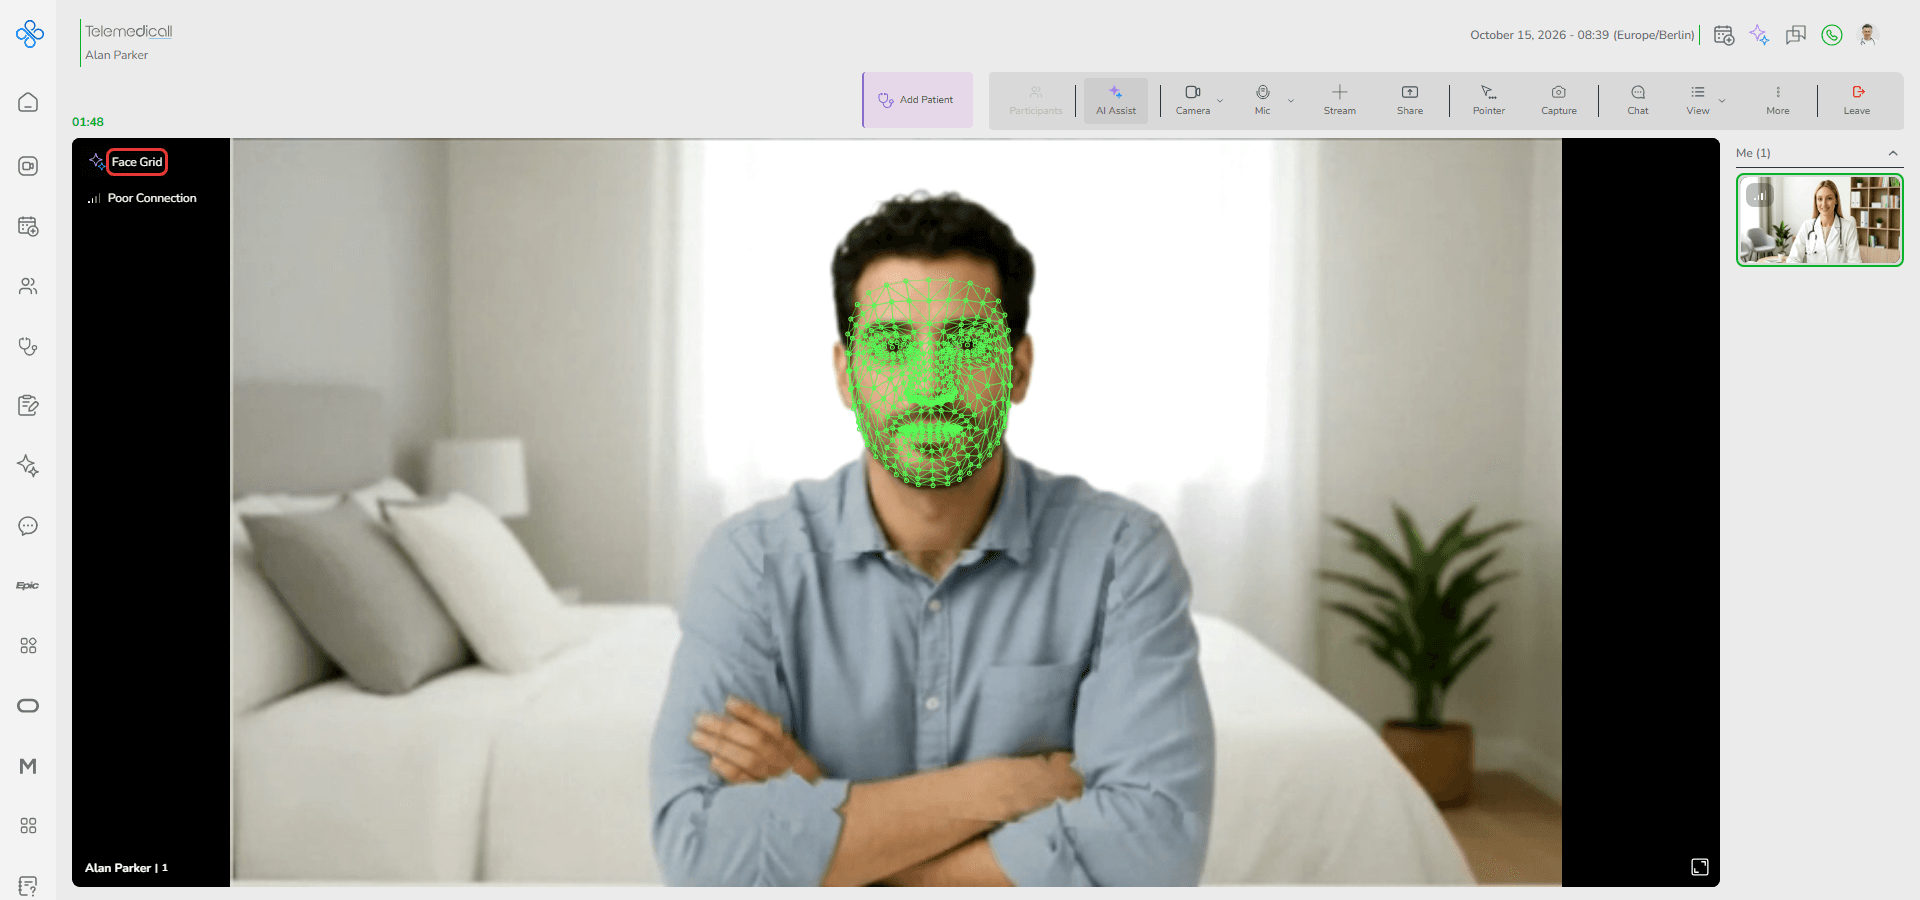
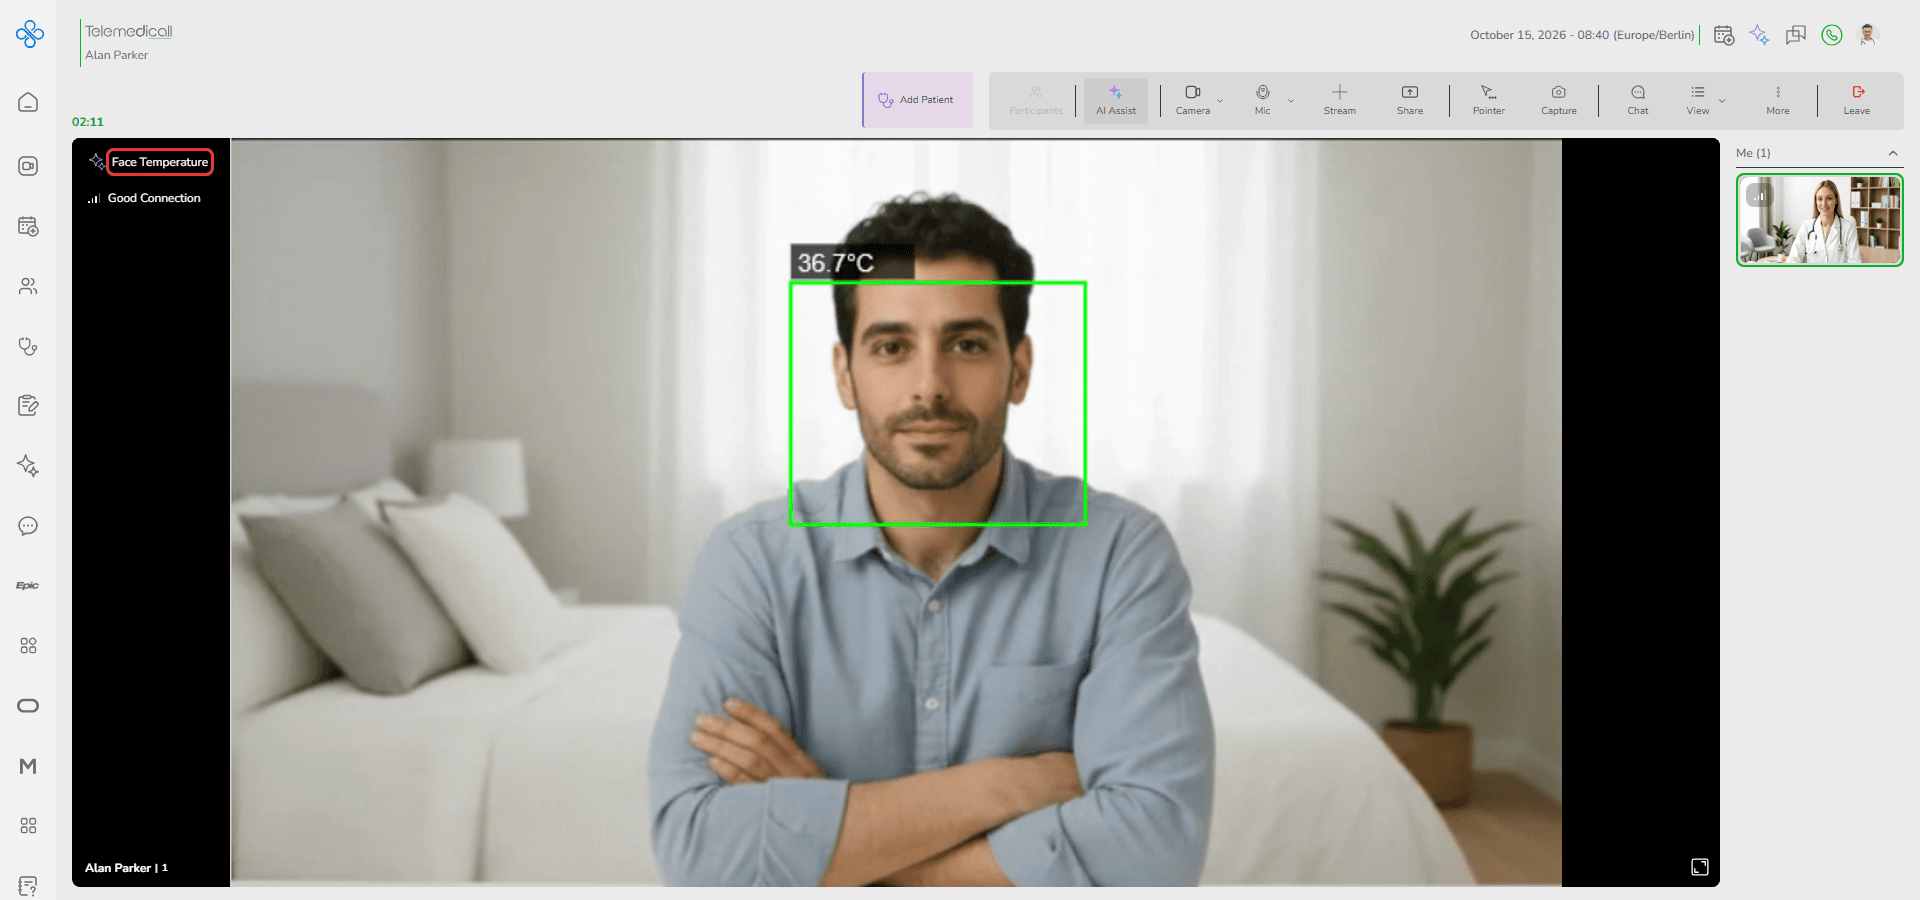
During a video call, click AI Assist in the call toolbar, select a model and click Submit. The model name appears on the video while it runs.

The Streaming AI group also includes Cervical Cancer Detection; the Image AI group adds Skin Care and Pap Smear Guidance AI.
Face Grid
This model overlays a grid on the face.
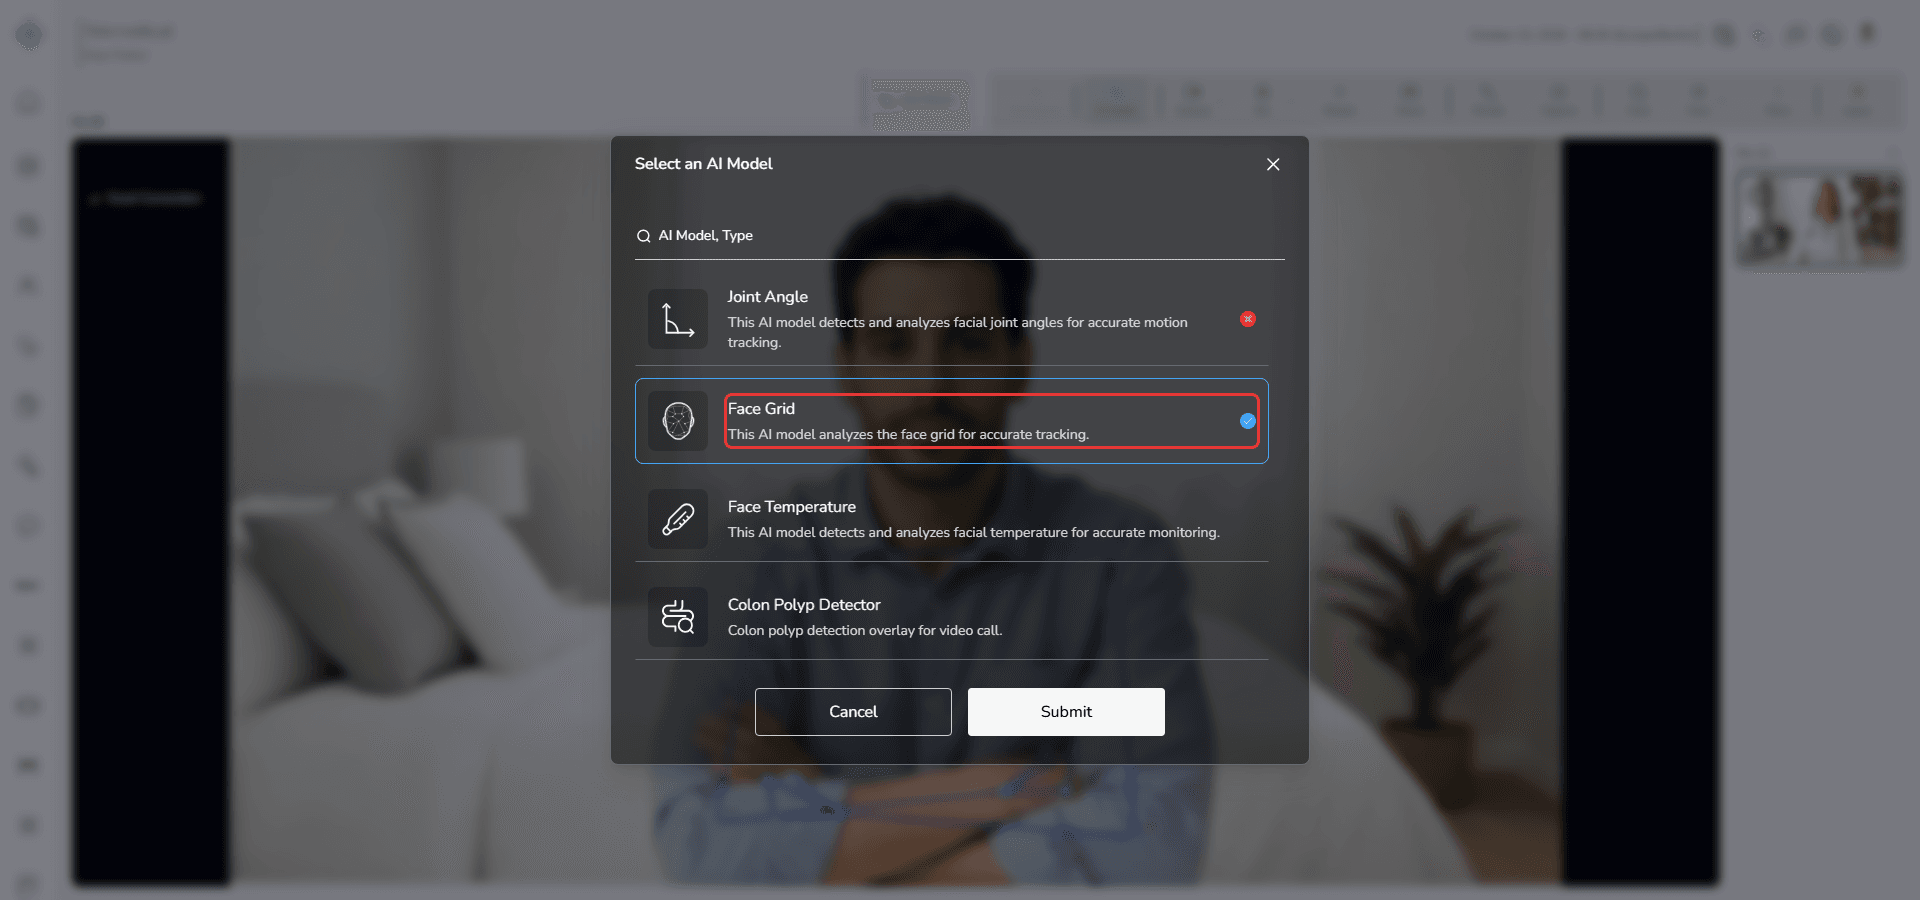
It helps track facial structure and positioning.
After activation, the grid appears aligned with the face.
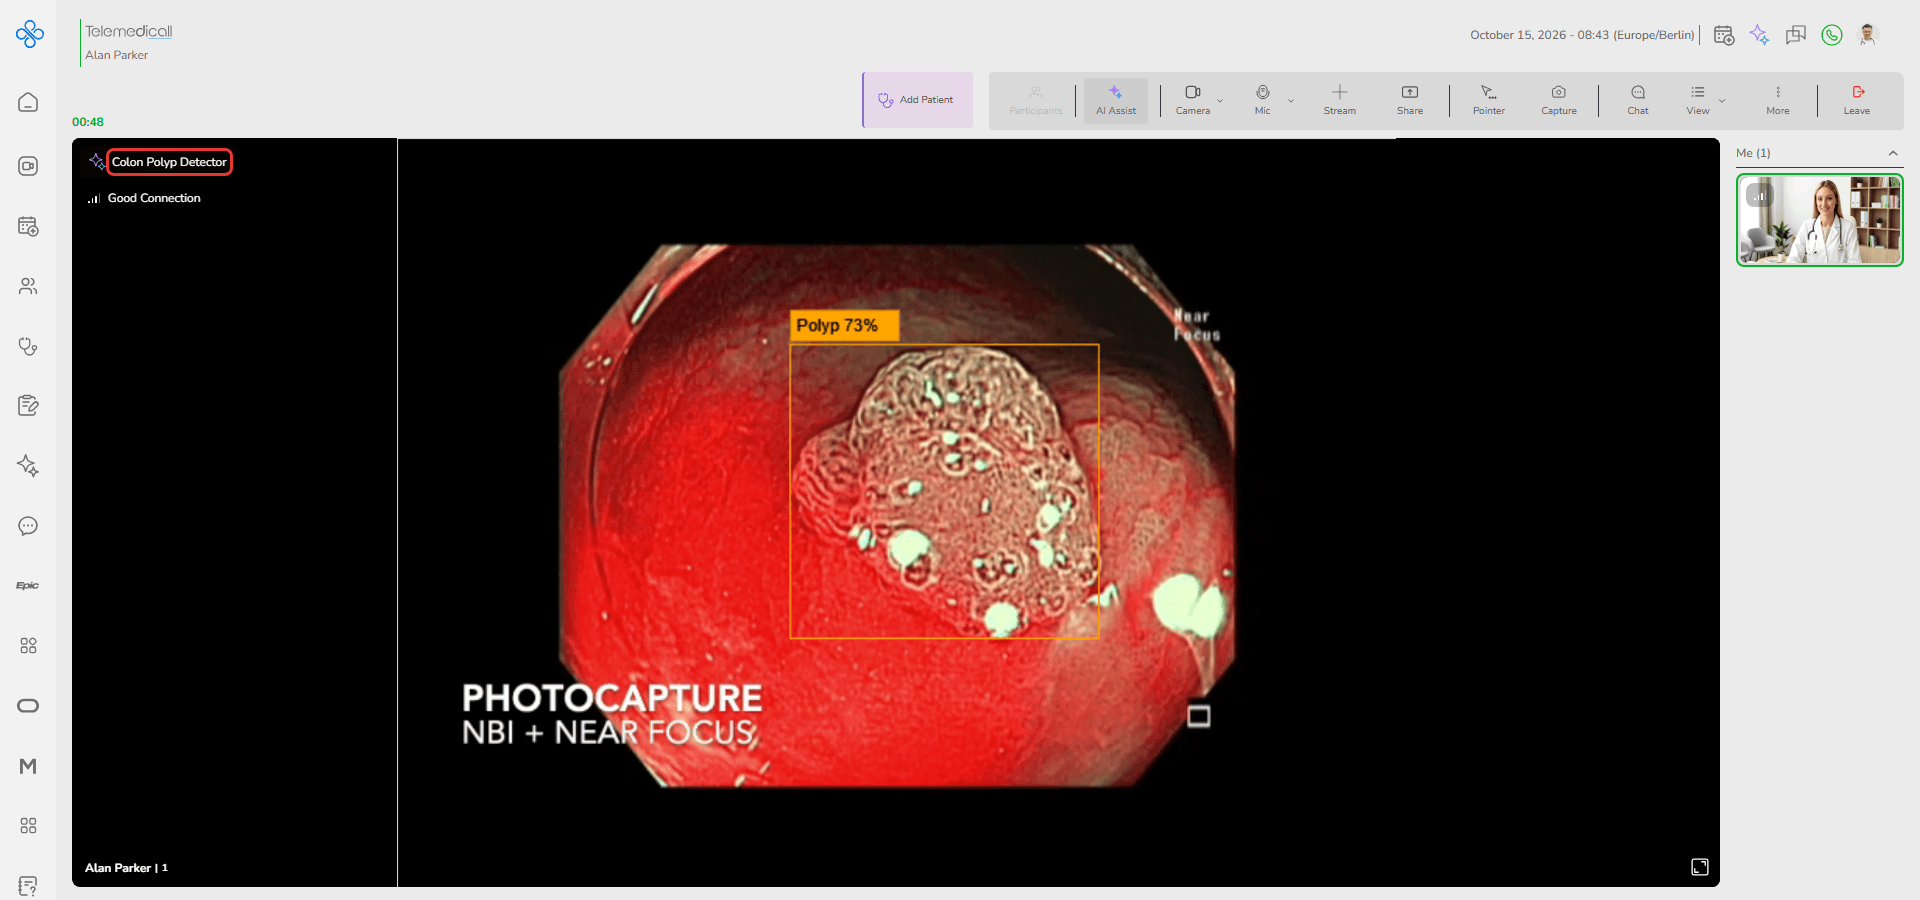
Colon Polyp Detector
This model detects and highlights colon polyps in the video.
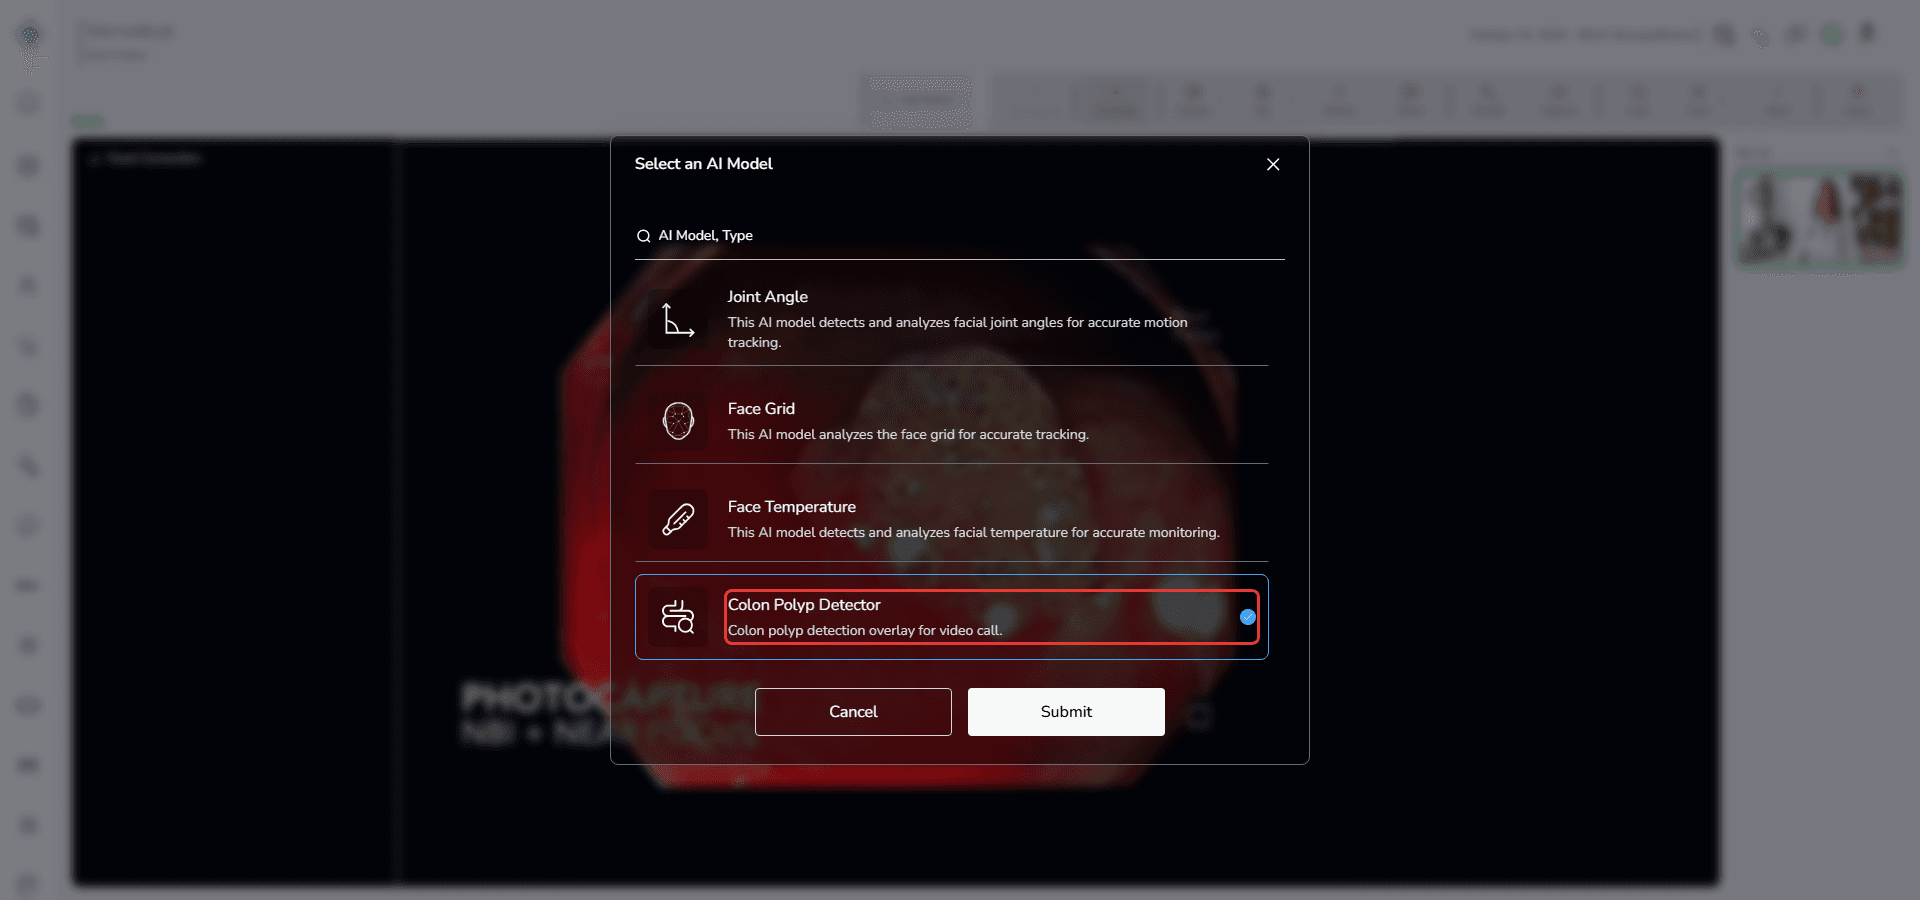
It supports screening and visual assessment.
Detected areas are marked directly on the video.
Joint Angle
This model detects and analyzes joint angles of the face.
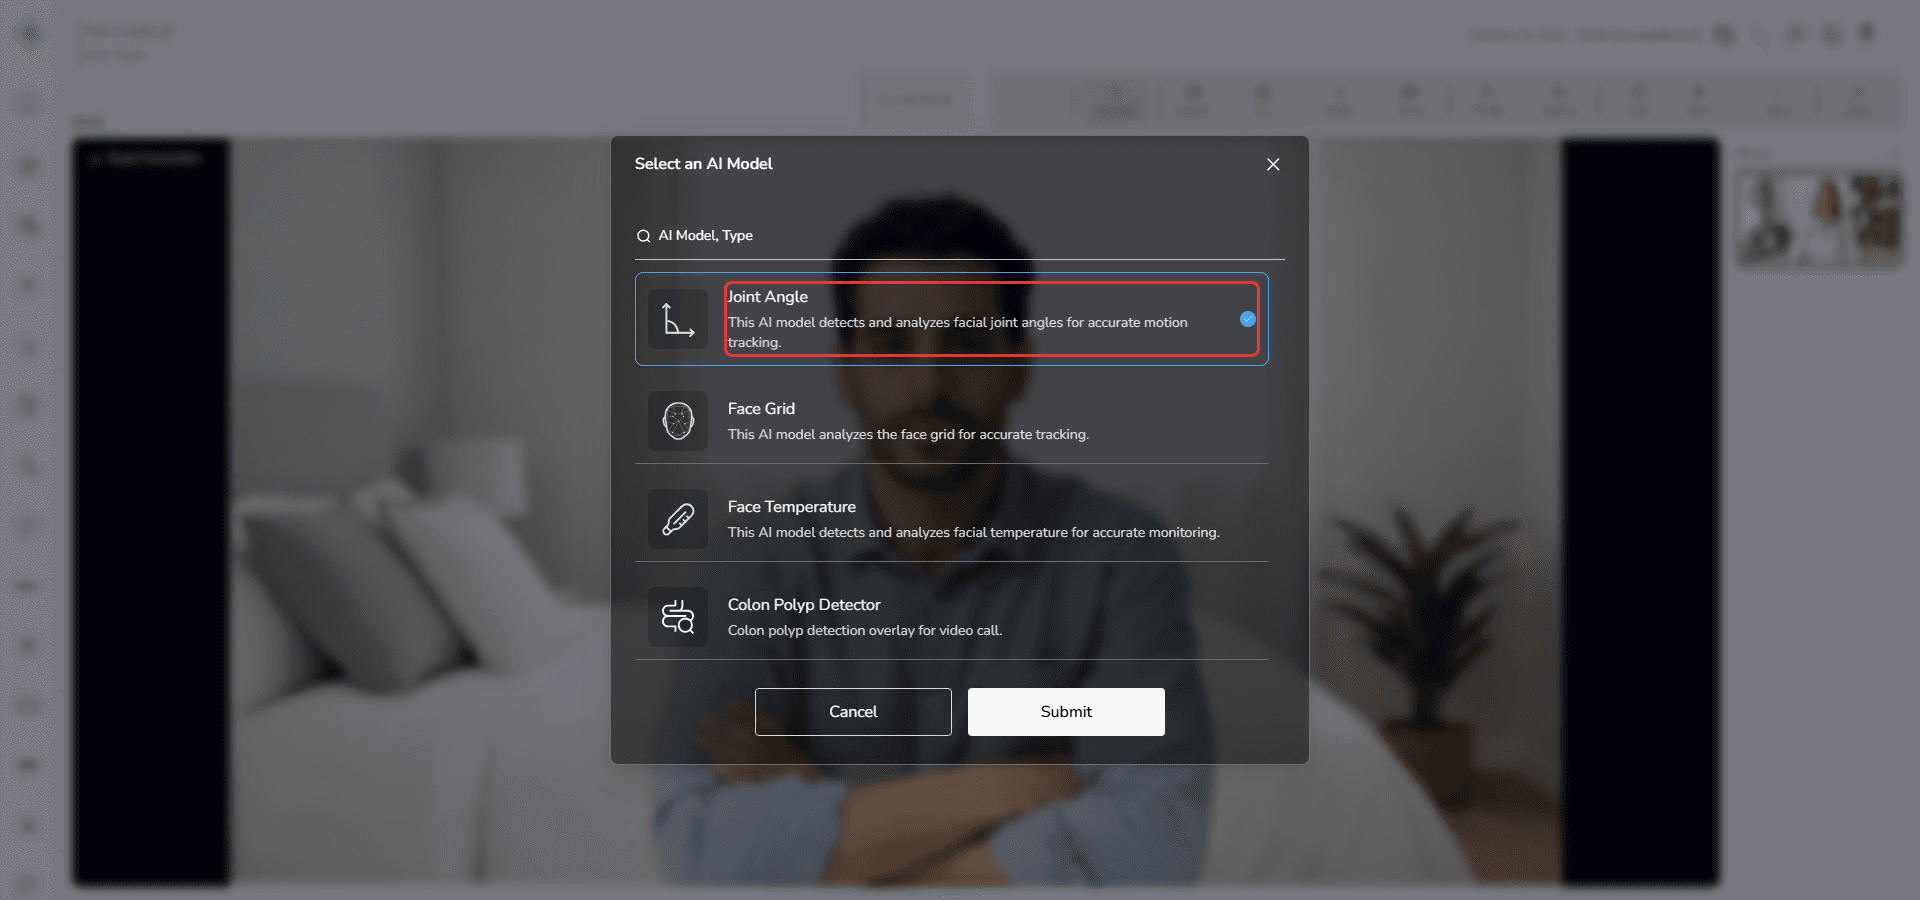
It helps you track movement and positioning accurately.
After activation, angles are displayed on the video for analysis.
Face Temperature
This model analyzes facial temperature.
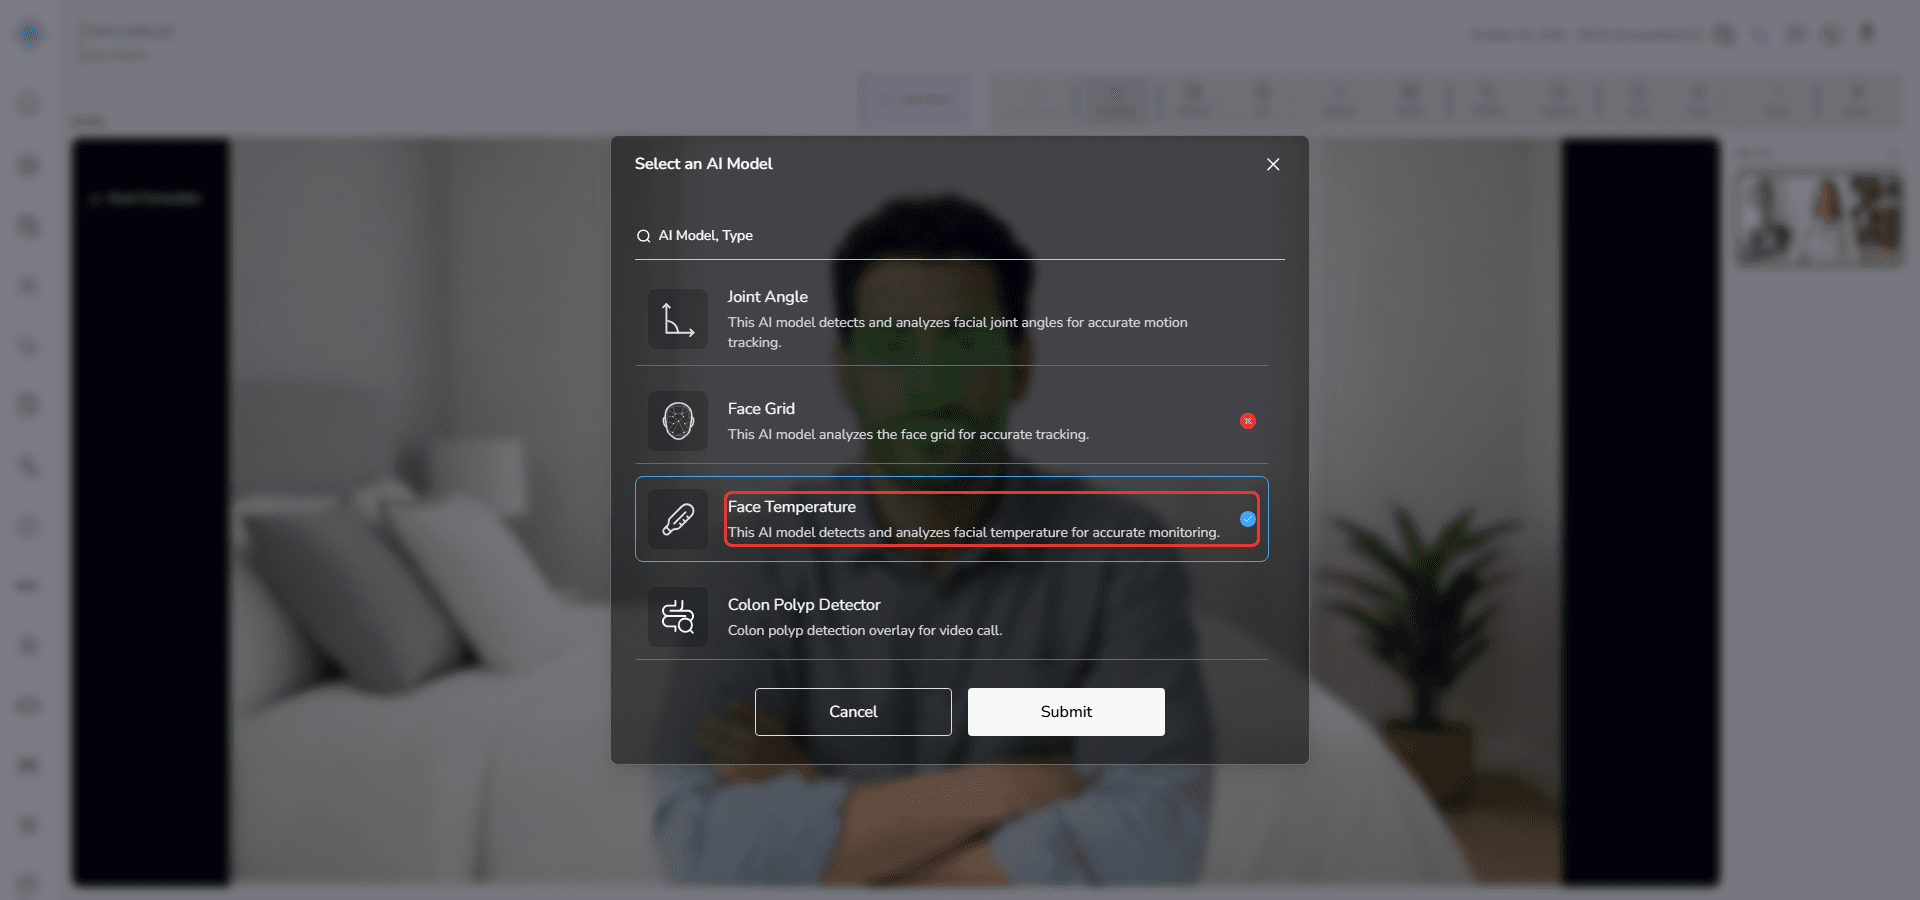
It helps monitor temperature variations visually on the face.
After activation, temperature indicators appear on the video.
Fields (Field Descriptions)
| Field | Description | Behavior |
|---|---|---|
| Tabs | Used to switch between categories | Displays items related to the selected category |
| Search Bar | Searches apps and models | Filters results instantly |
| Get | Activates an app or model | Makes the item available in the platform |
| Open | Opens the selected app page | Redirects you to the app |
| Connect | Opens the EMR connection modal | Allows connection to external EMR systems |
| Disconnect | Removes the active EMR connection | External EMR becomes unavailable |
| Enable | Activates an AI model | Makes the model available during calls |
| Disable | Temporarily deactivates apps or models | Removes access until enabled again |
| More Actions | Opens additional management options | Displays available actions for the selected item |
| Settings | Opens integration settings | Allows editing of connection details |
| Remove | Completely deletes the app or integration | Removes access and sidebar visibility |
| Select | Chooses a Generative AI engine | The selected engine becomes Active |
Behavior & Expected Outcome
- Apps become available in the sidebar after they are activated.
- Disabled apps are removed from the sidebar.
- Removed apps must be installed again before use.
- Connected EMR systems become accessible directly from Telemedical.
- AI models only appear during calls when they are enabled.
- The AI button during calls displays only enabled AI models.
- Search results update while typing.
- Data and Service tabs are currently unavailable.
- Buttons change automatically based on the current status of the app or model.
Common Errors + Fixes
| Issue | Cause | Fix |
|---|---|---|
| Get button does not work | Temporary system issue | Refresh the page and try again |
| App does not appear in sidebar | App is disabled or not activated | Open the app modal and activate the app |
| Connect button fails | Invalid connection information | Verify the EMR connection details |
| Open button is unavailable | Connection is incomplete | Complete the EMR connection setup |
| AI model does not appear during calls | Model is disabled | Enable the model from the Models-AI tab |
| Search does not return results | Incorrect search keyword | Use a different keyword or clear the search |
| Update option is unavailable | No update exists | Try again later when a new version is released |
| Removed app is missing | The app was deleted | Get the app again from the Apps page |