Share
Overview
In the Share tab, you can give other providers or consultants access to your patient’s information.
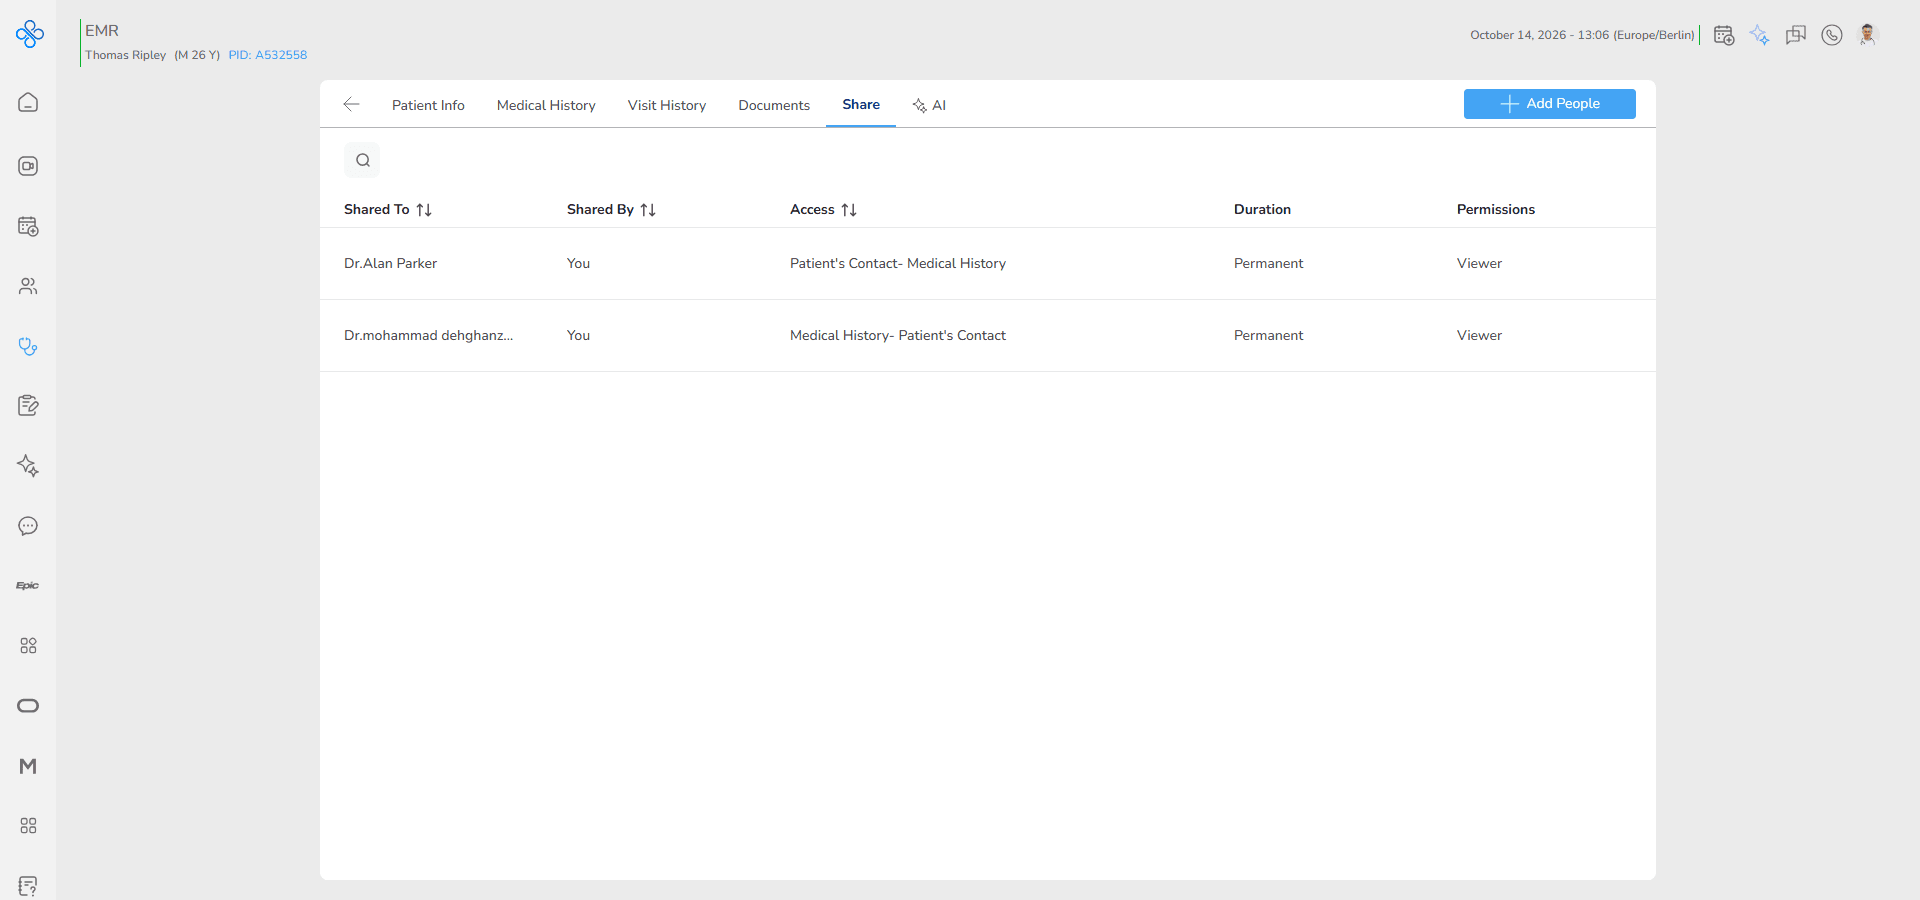
This helps you work with other healthcare professionals when needed.
You can control:
- Who can access the patient
- What information they can access
- How long the access stays active
- What level of access they have
From this tab, you can:
- Add a new provider or consultant and give access
- View all people who already have access
- Edit or remove access at any time
You have full control over this section.
Only you as the patient owner can manage sharing for this patient.
Access
Follow these steps to open the Share tab for a patient.
Steps
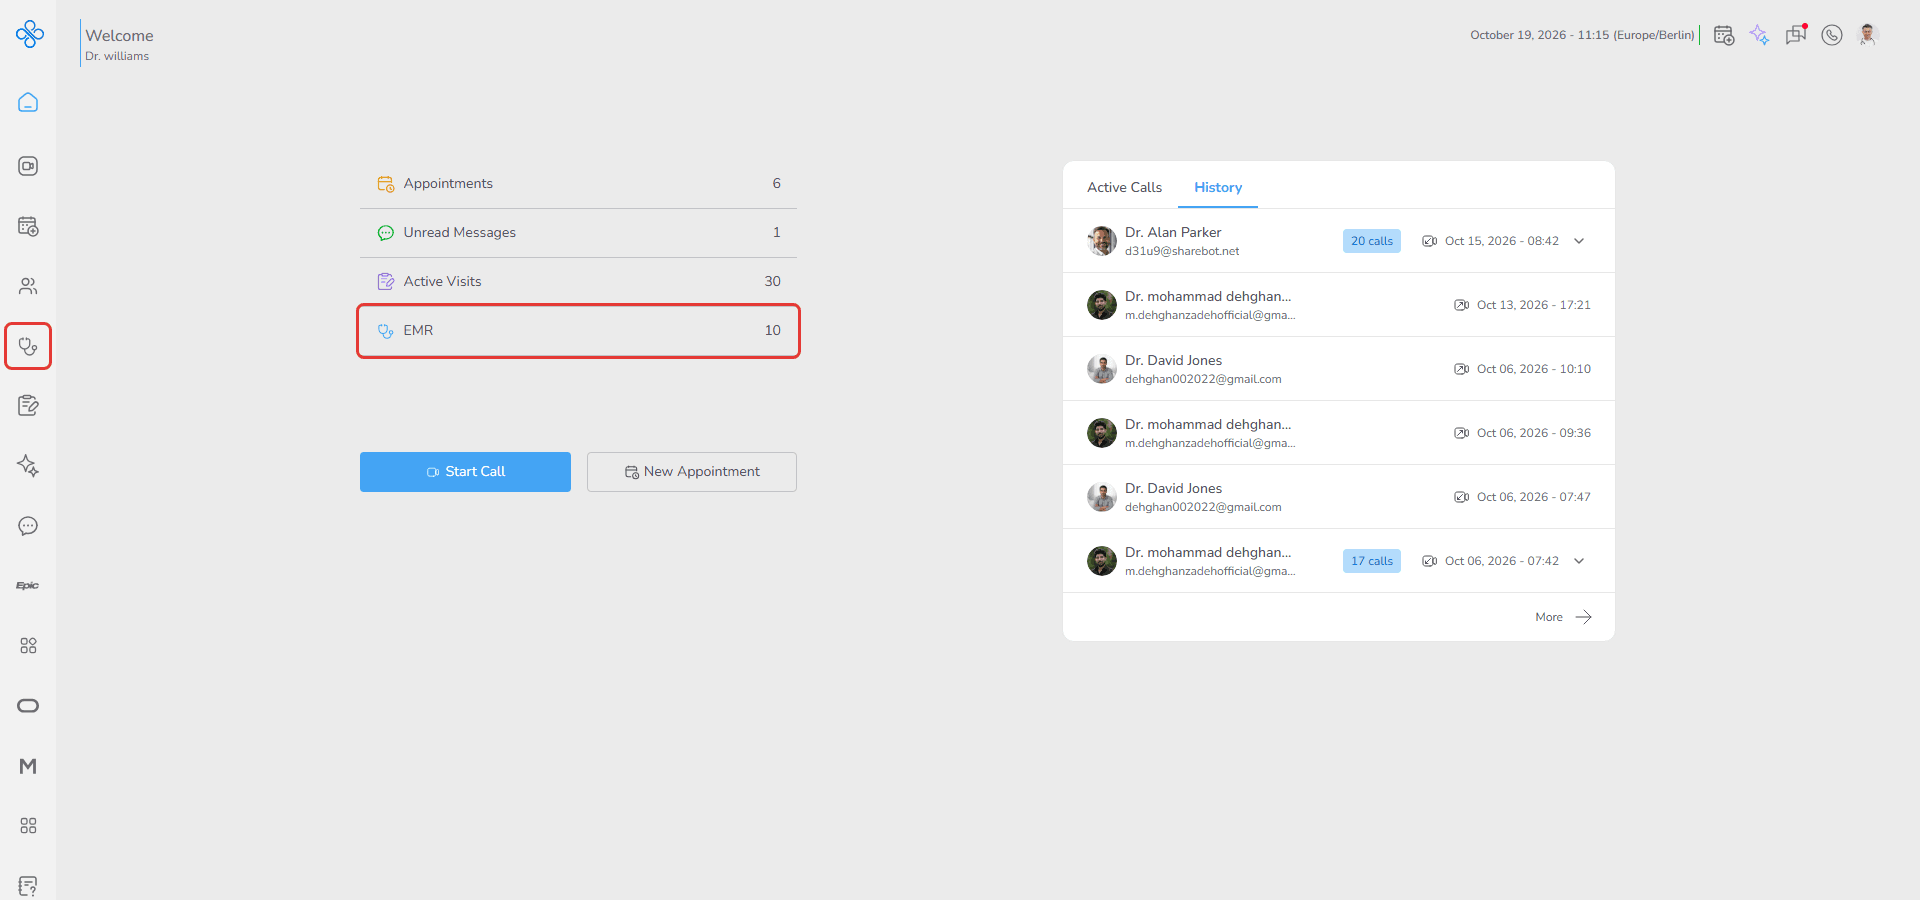
1. Go to EMR from the sidebar or Dashboard shortcut
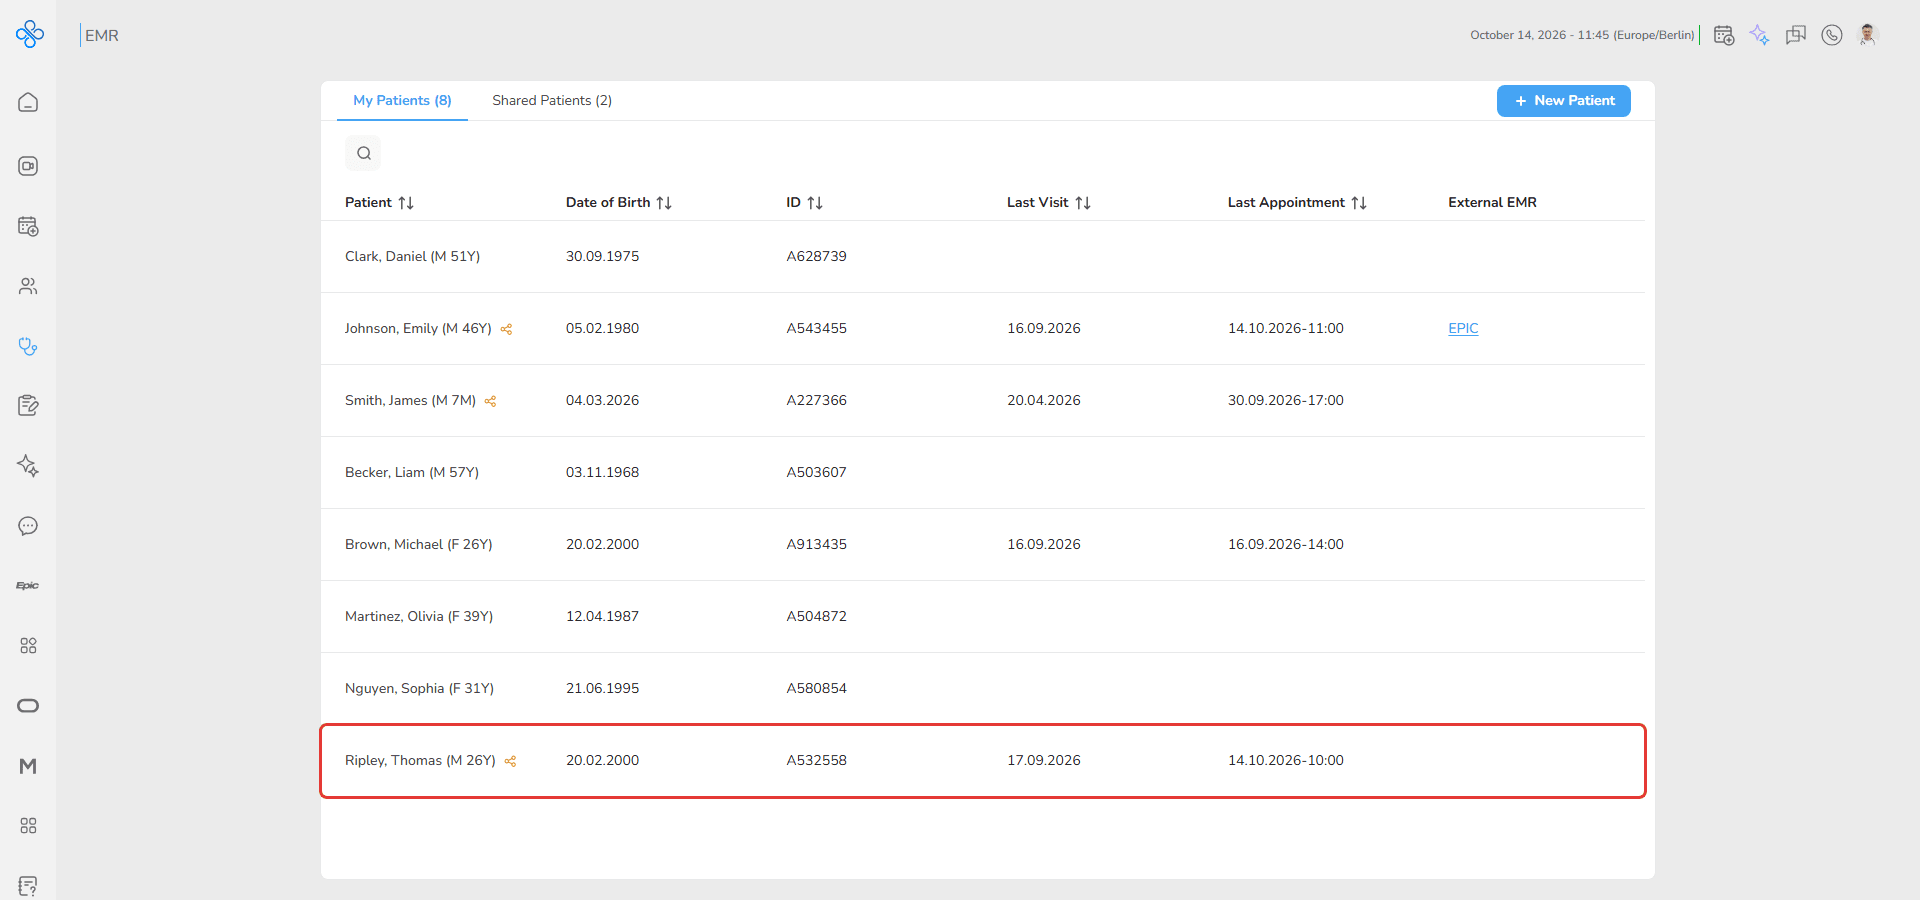
2. Select a patient from the list and open the patient file
3. Navigate to the Share tab
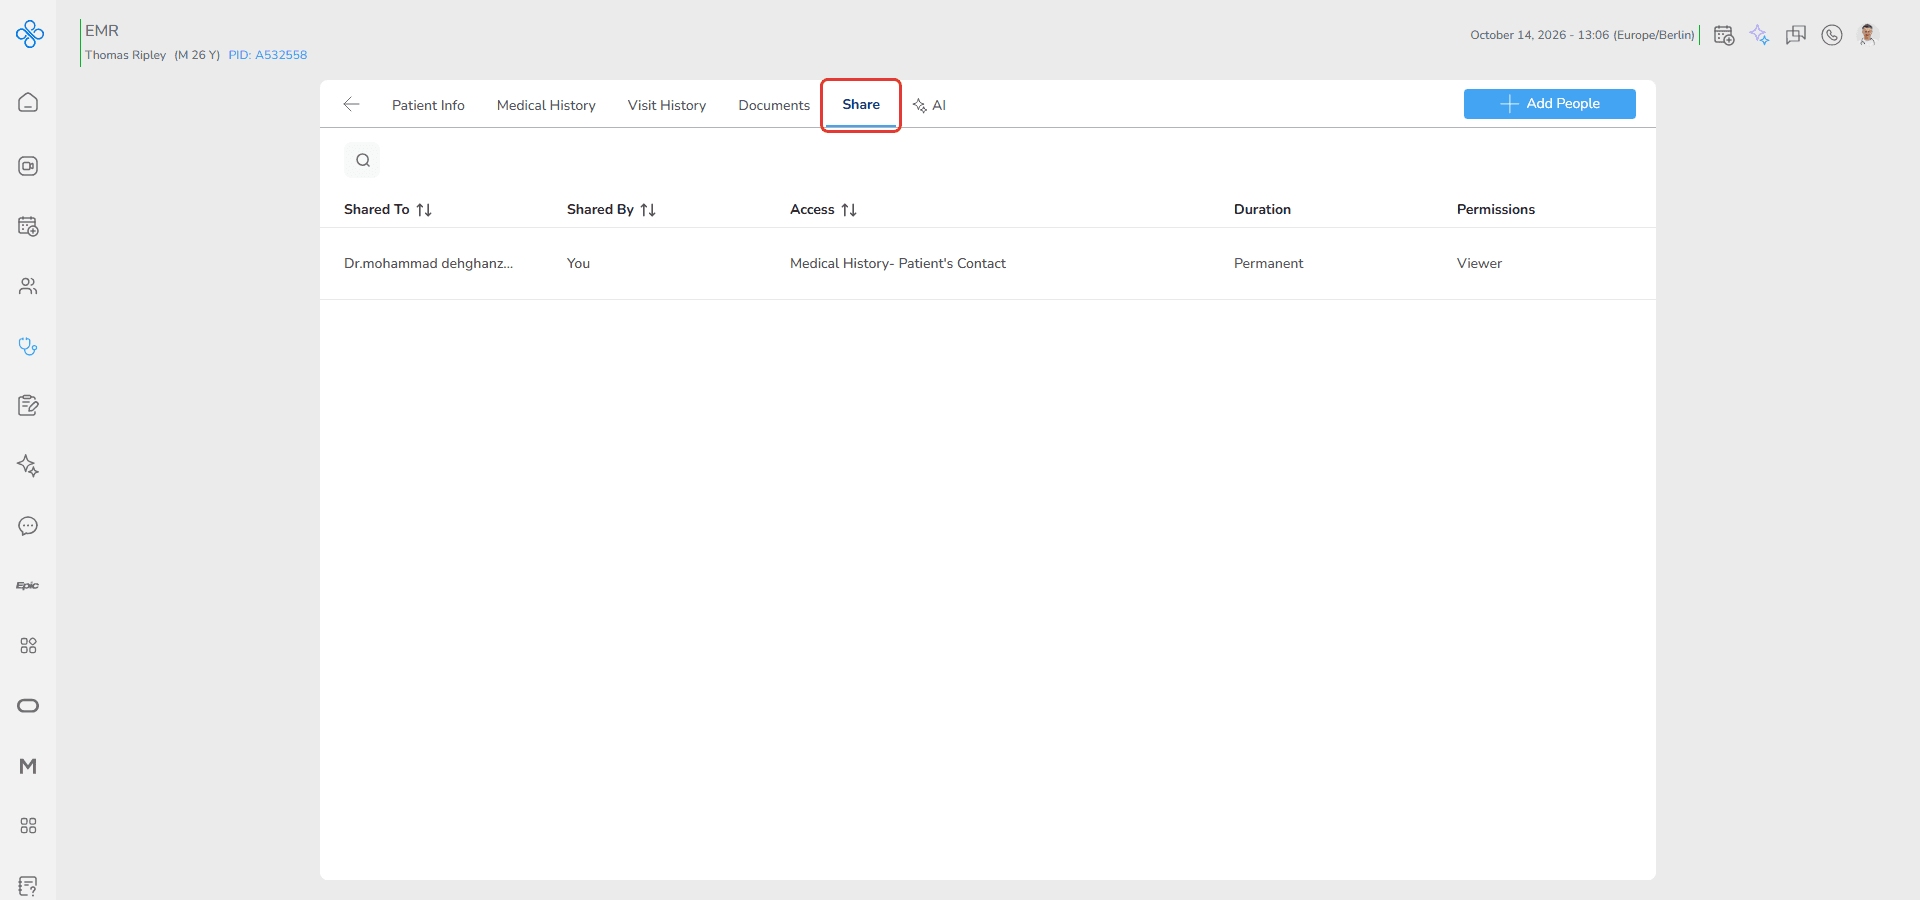
The tab lists every provider who currently has access to this patient.
How to add a new person
To start using the Share tab, the first step is to give access to another provider or consultant.
You can do this using the Add People option.
Follow these steps to add a new person:
1. Click the Add People button at the top right
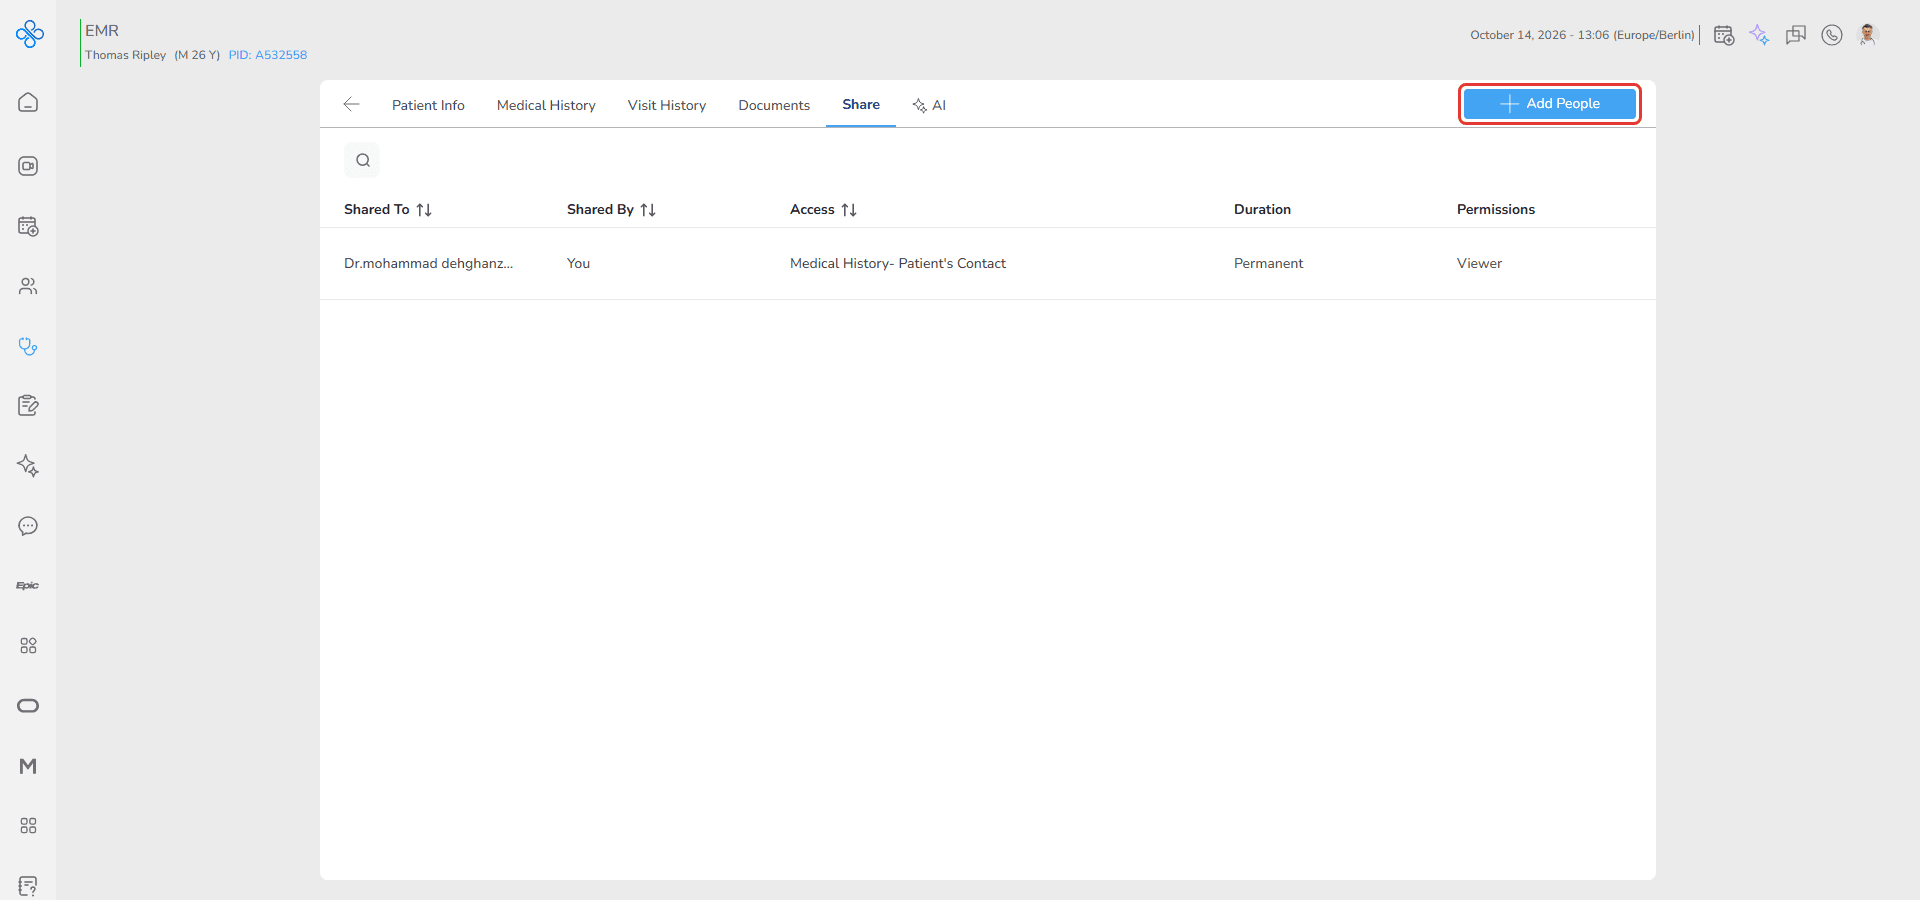
A modal will open
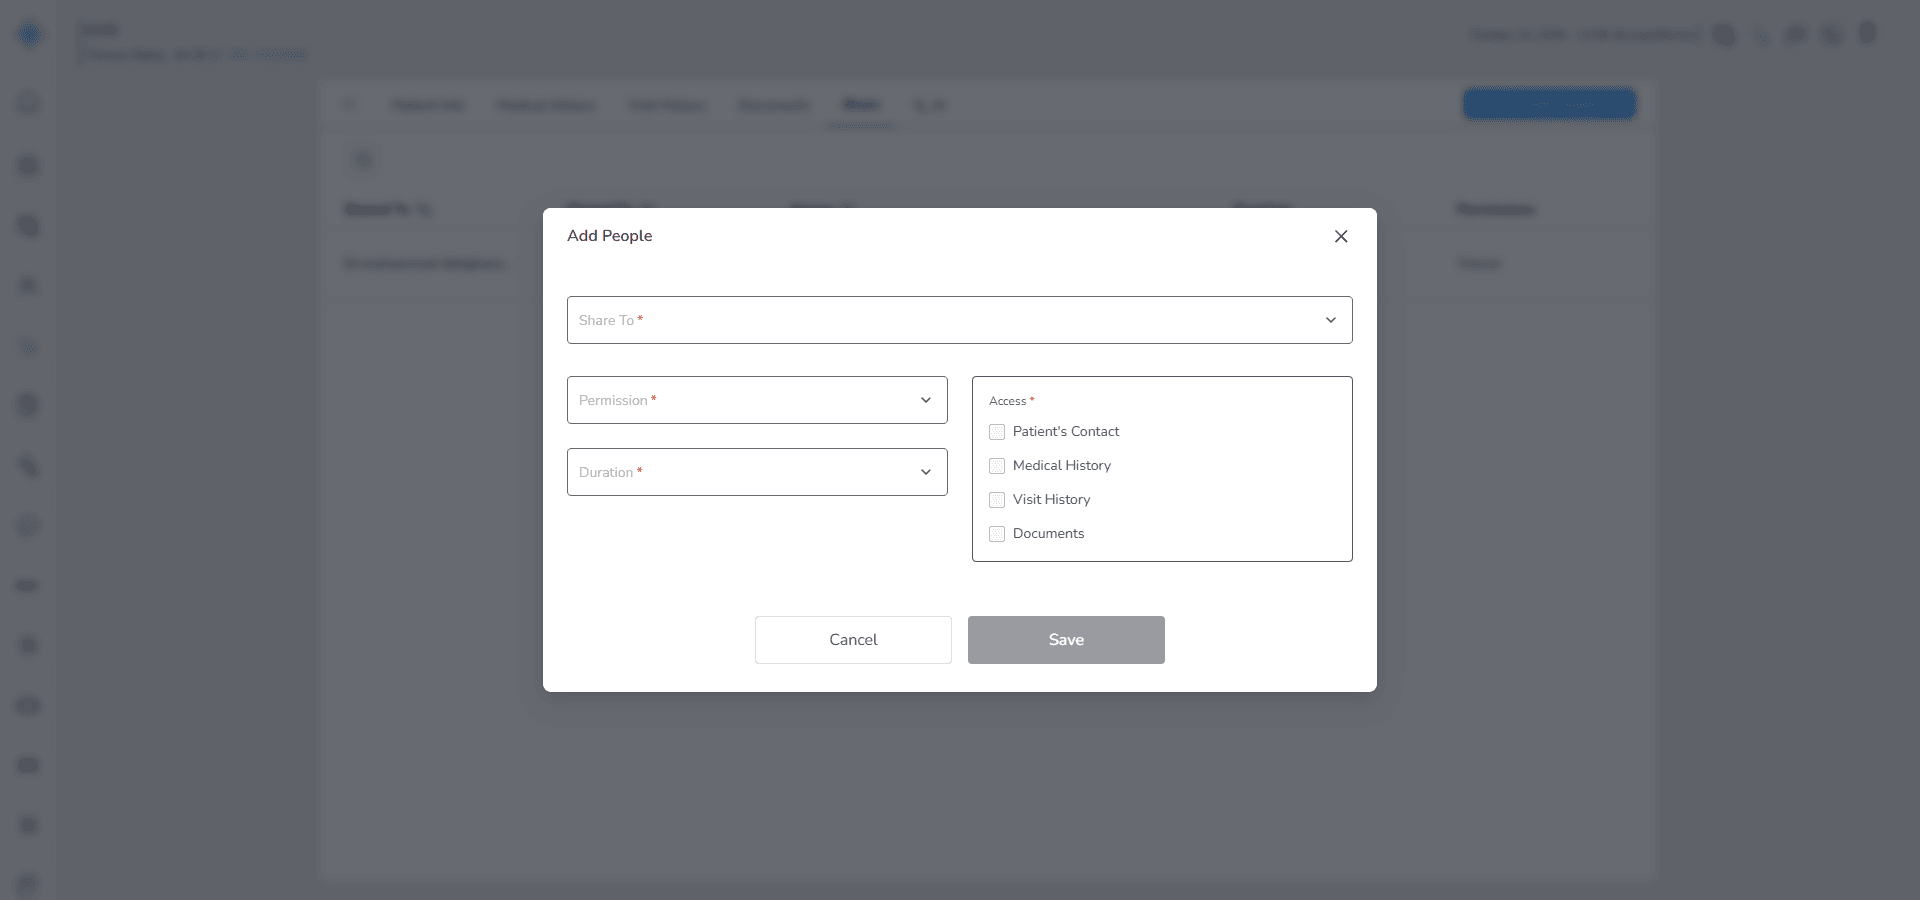
2. Select the provider or consultant in the Share To field
This is the person you want to give access to. After saving, this provider will be able to open the patient based on the access you define.
3. Choose which patient data you want to share under Access
You can control exactly what this person can see.
For example, you can allow access to Patient's Contact, Medical History, Visit History, or Documents.
If a section is not selected, the provider will not be able to view it.
4. Select the duration of access
Choose Permanent if you want the access to stay active without time limit.
Choose In Visit if you want the access to be limited to a specific visit.
5. If you choose In Visit, select a visit from the Visit List
This option appears only when In Visit is selected.
The provider will only have access during the selected visit.
After the visit ends, access will be removed automatically.
6. Select the permission level
Choose Viewer if the provider should only view the information without making changes.
Choose Editor if the provider should be able to edit and update the shared information.
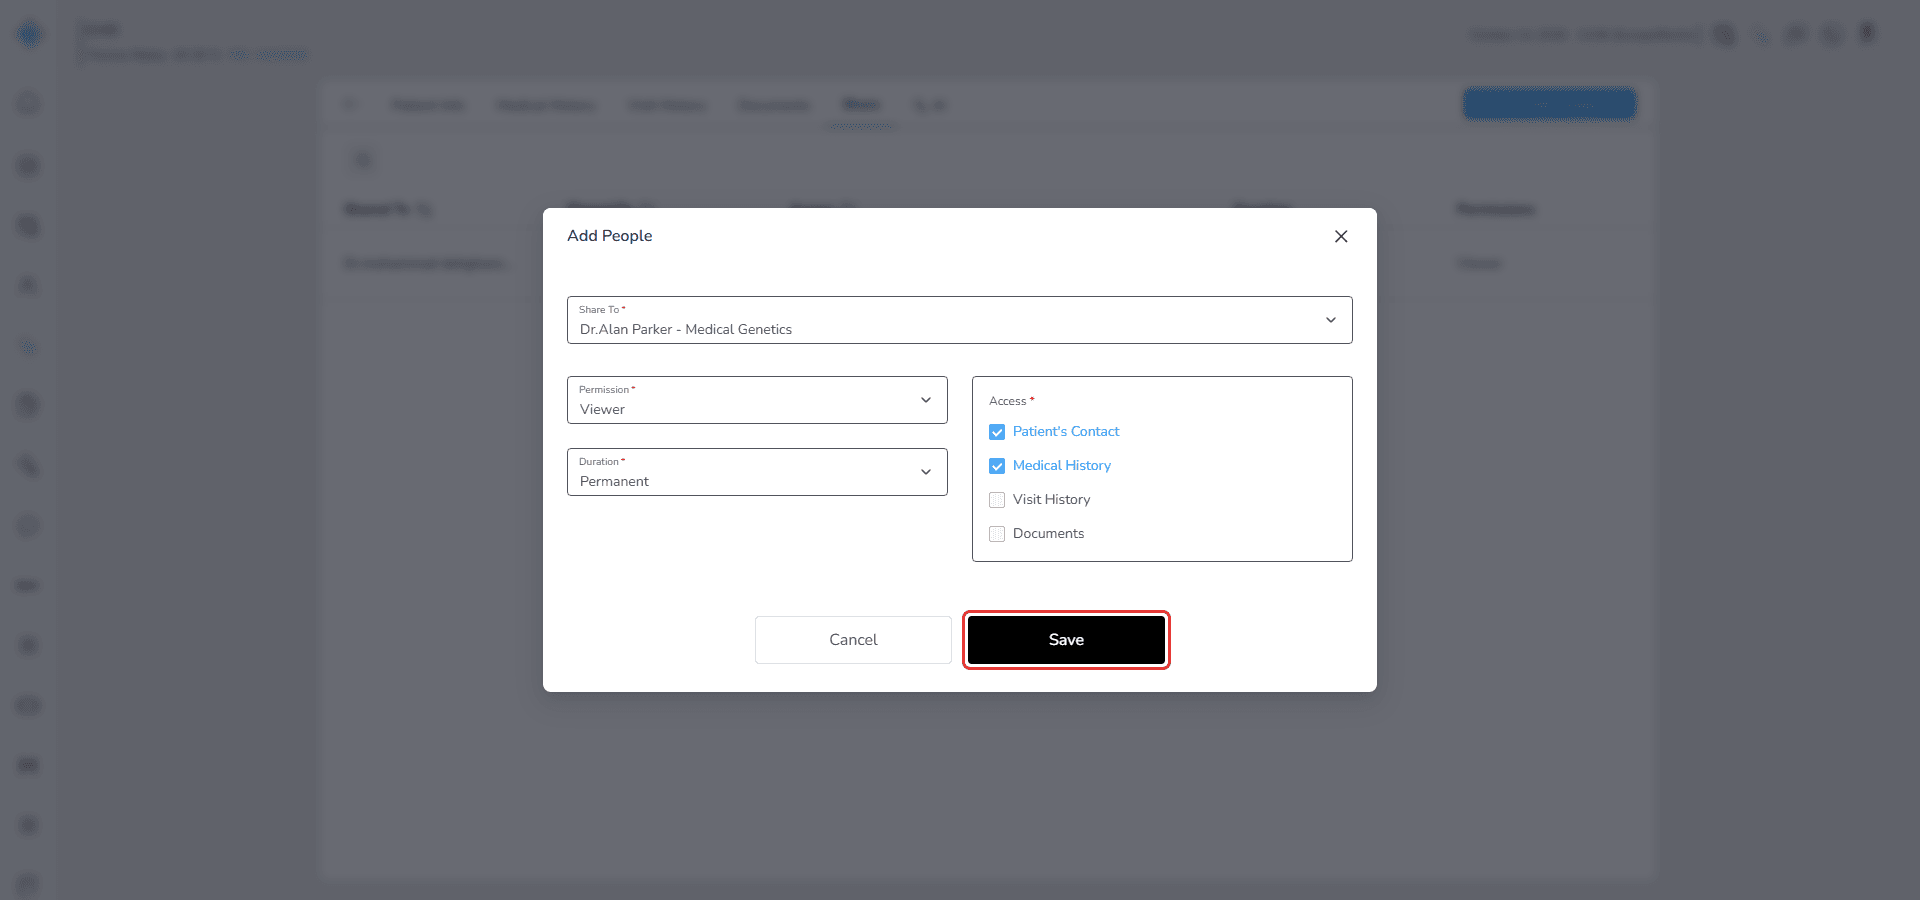
7. Click Save
The new access will appear immediately in the list.
You can use the search bar at the top of the tab to quickly find a specific provider in the shared list.
You can also sort the list using the Shared To or Shared by columns to organize providers more easily.
The selected provider can access the patient based on the settings you defined.
How to manage shared access
After you add people, you can manage their access at any time from the Shared Access List.
This is where you control existing access and make changes when needed.
When you hover over each provider in the list, a More Actions button (⋮) appears between the Shared To and Shared By columns.
Follow these steps to manage access:
- Locate the provider you want to manage in the list
- Click the More Actions button (⋮)
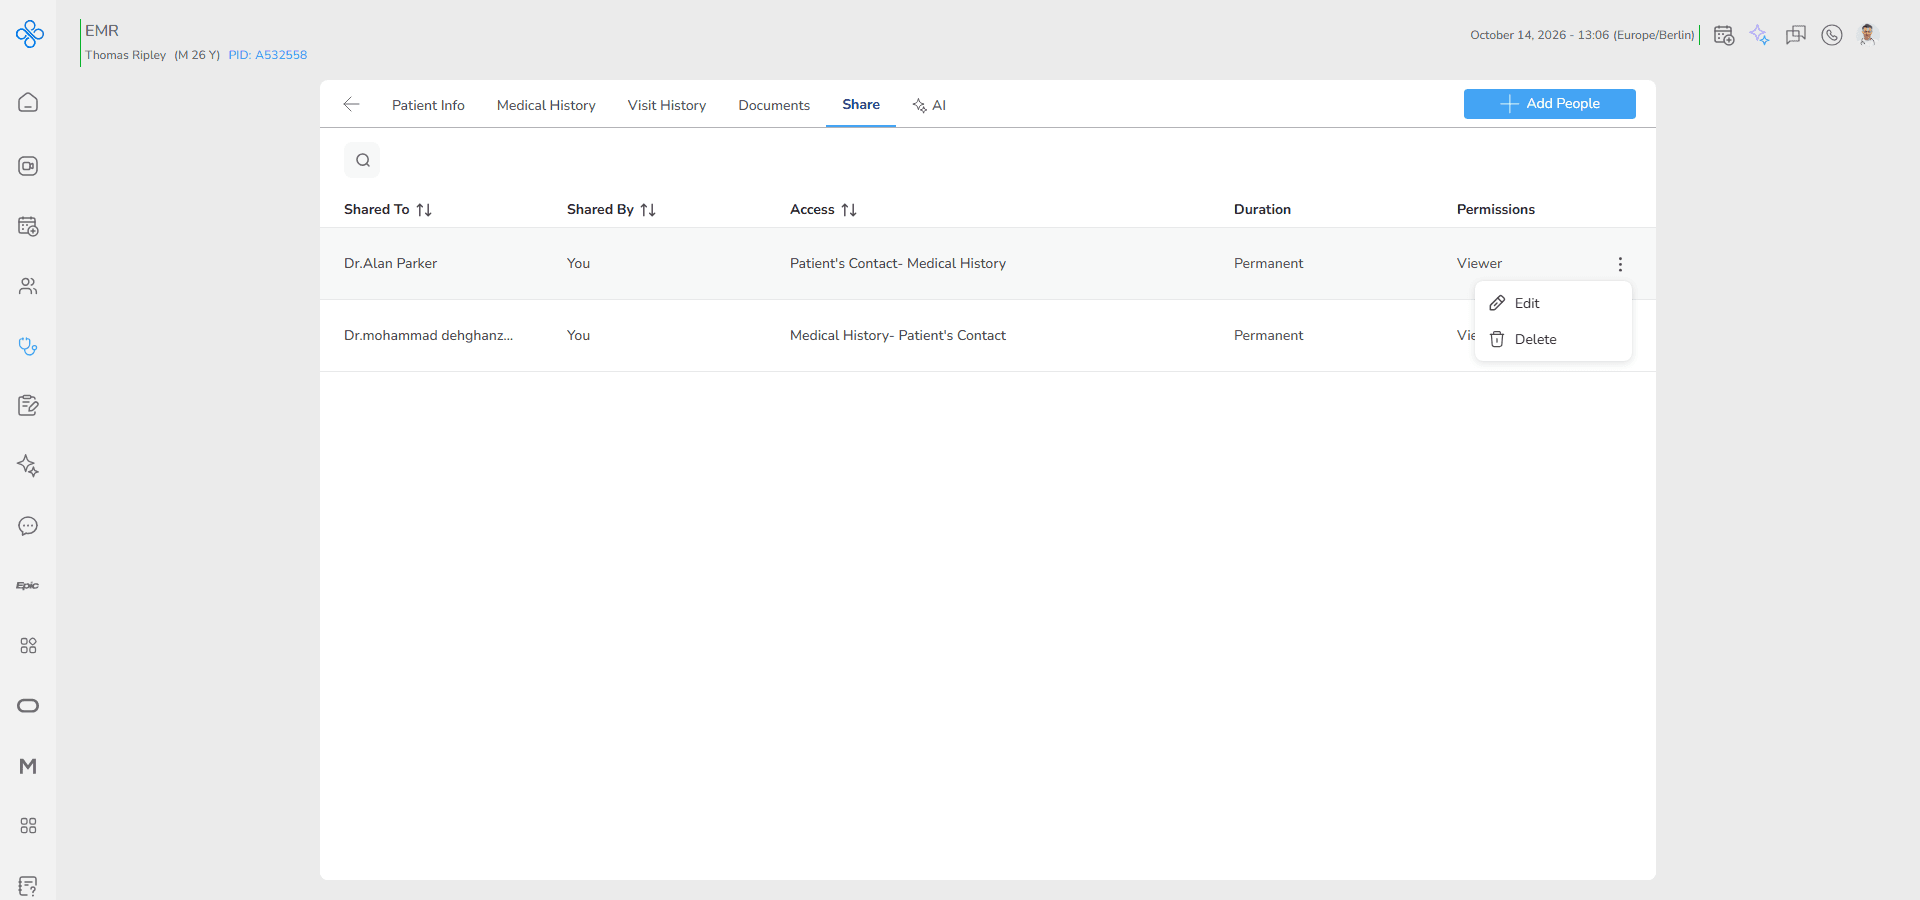
You will see two options: Edit and Delete
Edit access
Select Edit if you want to change the current access settings
When you click Edit, a modal will open
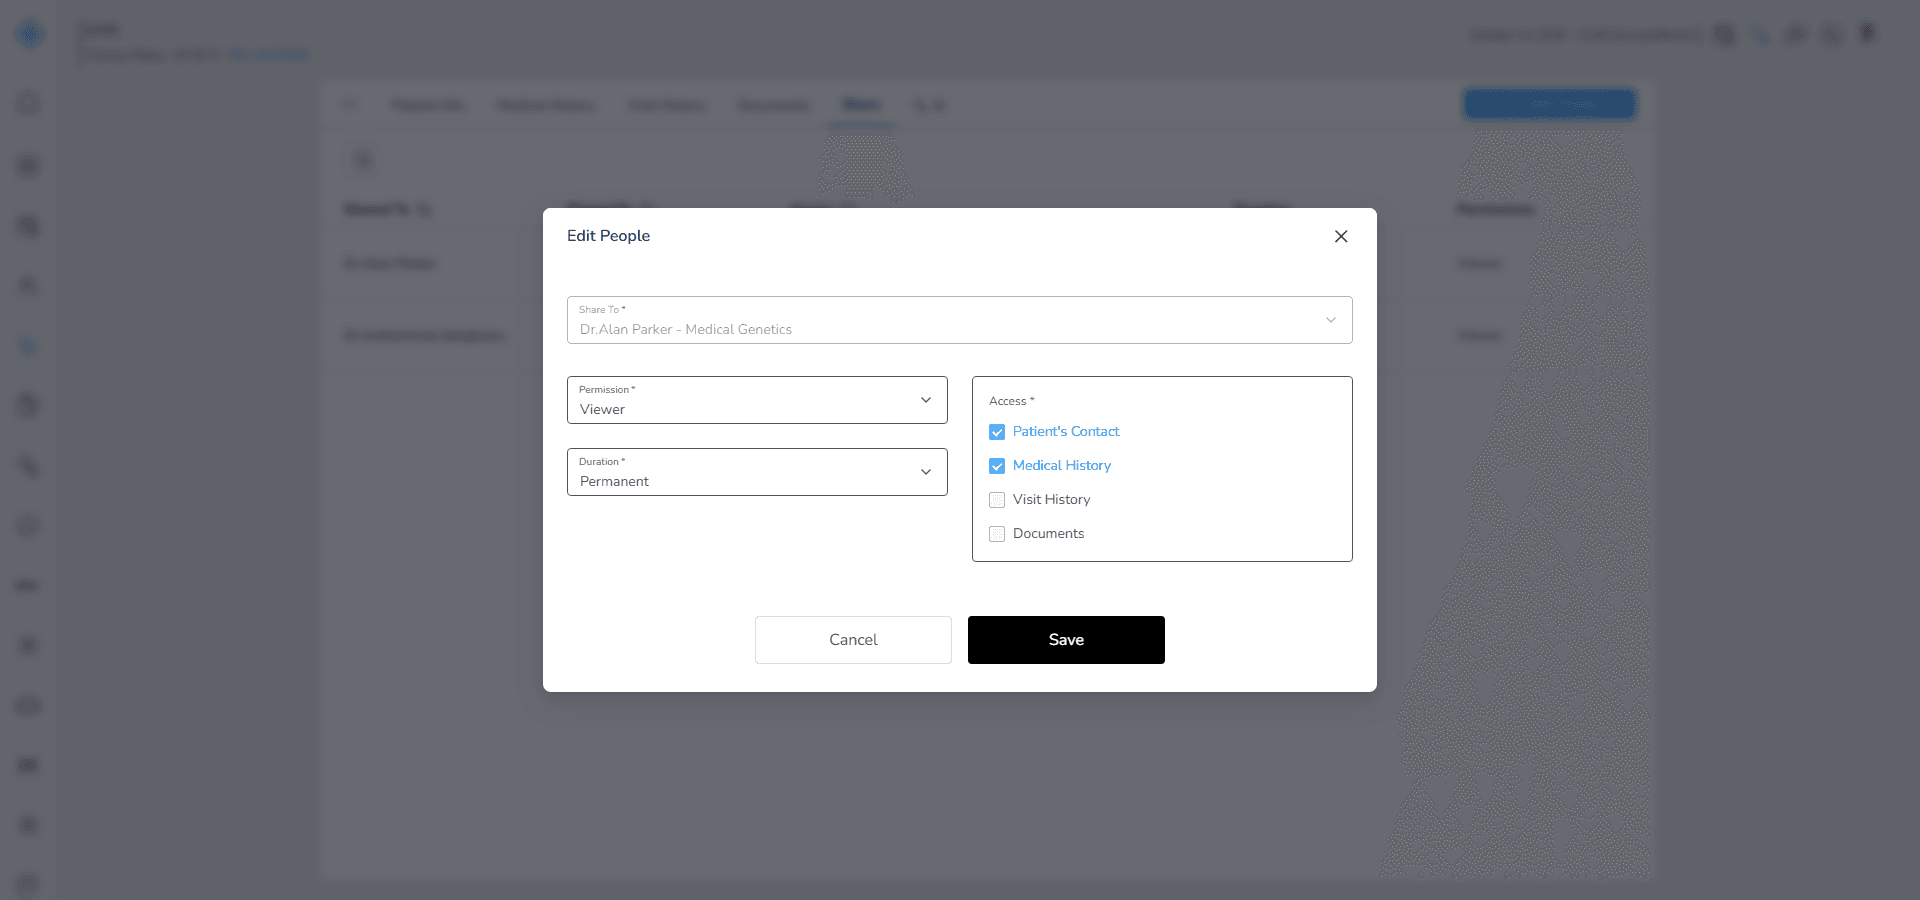
This modal is the same as the Add People form, but it is already filled with the current information
Here you can update:
The shared data sections such as Patient's Contact, Medical History, Visit History, or Documents
The duration of access
The visit selection if In Visit is used
The permission level such as Viewer or Editor
After making changes, click Save
The updates are applied immediately
The provider will continue to have access based on the new settings
Delete access
Select Delete if you want to completely remove access for that provider
After clicking Delete, a confirmation modal will appear
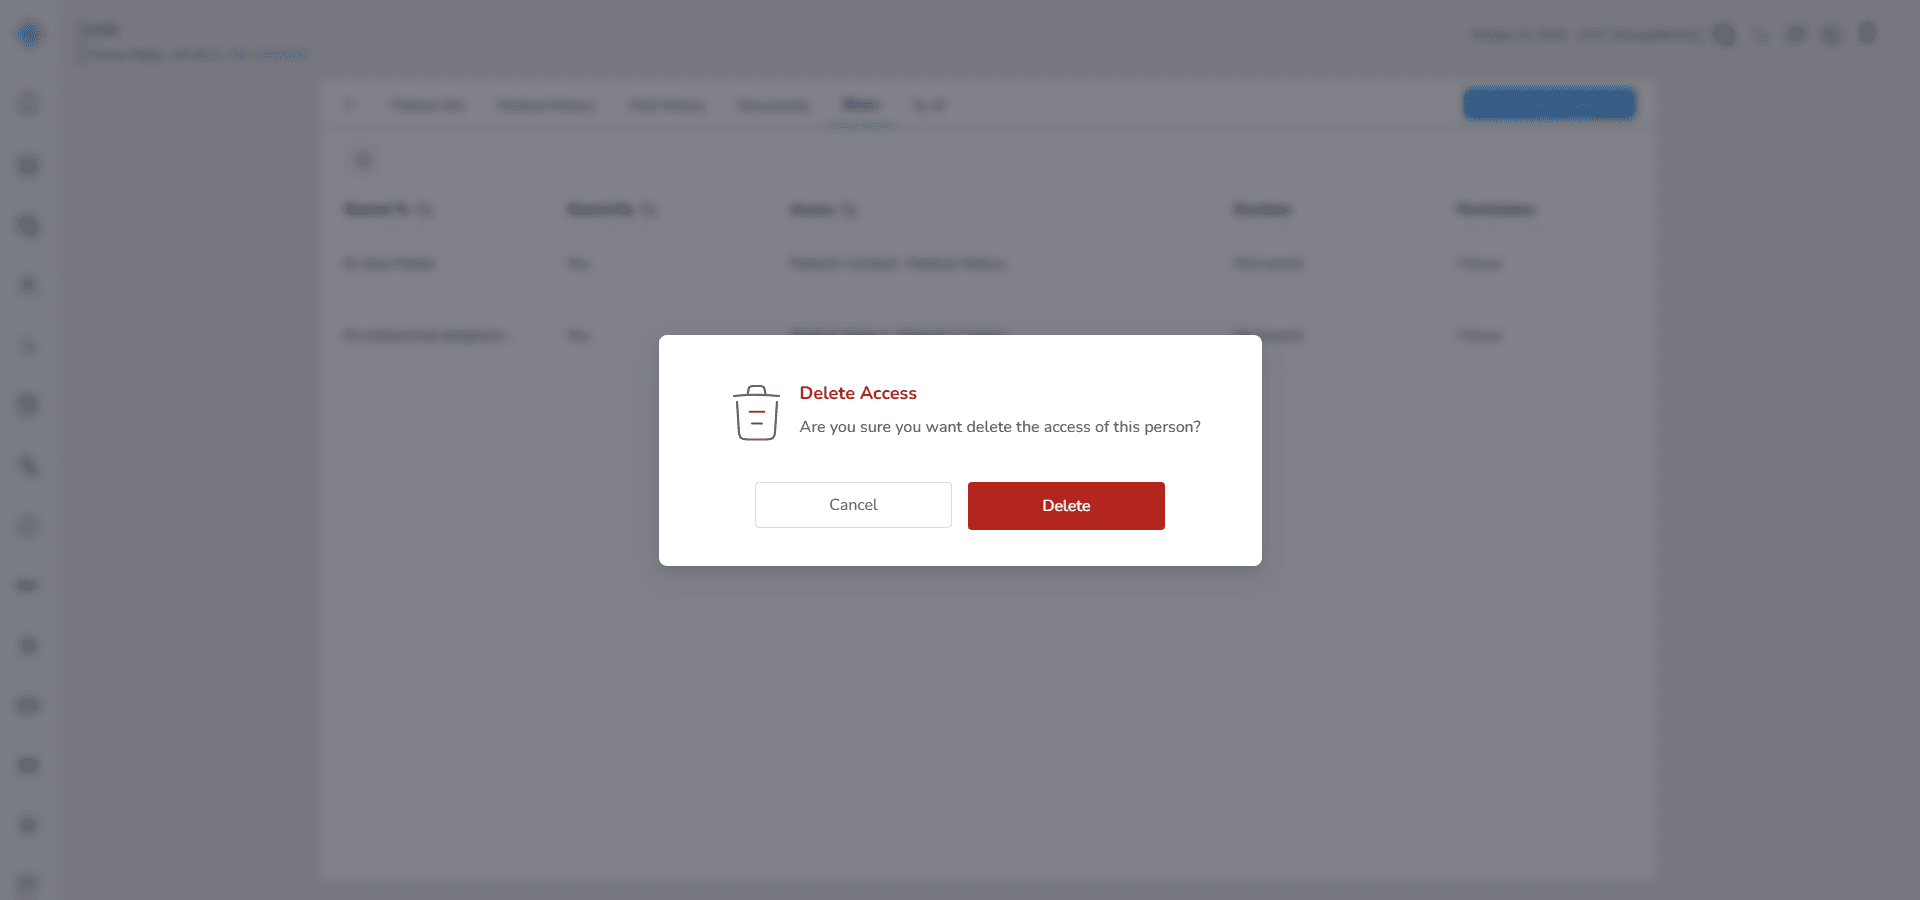
This step is important to prevent accidental removal
Click Delete in the confirmation modal to proceed
Once confirmed, access is removed immediately
The provider will no longer be able to open or view the patient
You can repeat these actions at any time to keep access updated based on your needs
Fields (Field Descriptions)
| Field | Description |
|---|---|
| Share To | Select the provider or consultant who will receive access (shown as Shared To in the list) |
| Access | Choose which patient data can be accessed: Patient's Contact, Medical History, Visit History, Documents |
| Duration | Select Permanent for unlimited access or In Visit for limited access |
| Visit List | Appears only when In Visit is selected. Select the related visit |
| Permissions | Choose Viewer for read only access or Editor for edit access |
| Shared By | Displays the provider who granted access. This is always the patient owner |
Behavior & Expected Outcome
- Only the patient owner can add, edit, or remove access
- Access becomes active immediately after saving
- If In Visit is selected, access is automatically removed after the visit ends
- A provider can be added multiple times with different access settings
- All shared users are displayed in the list with their access details
- Editing updates access instantly
- Deleting removes access immediately
Common Errors + Fixes
| Issue | Cause | Fix |
|---|---|---|
| Cannot see Share tab | You are not the patient owner | Make sure you are logged in as the provider who created the patient |
| Add People button not working | Temporary system or loading issue | Refresh the page and try again |
| Cannot save new access | Required fields are missing or not selected | Make sure Share To, Permission, Duration, and Access are selected |
| Visit List not visible | Duration is not set to In Visit | Select In Visit to display the Visit List |
| Changes not applied after edit | Page did not refresh or update visually | Refresh the page to confirm the changes |
| Provider still has access after delete | Delete action was not confirmed | Make sure you click Delete in the confirmation modal |
| Cannot edit or delete access | You do not have permission | Only the patient owner can manage shared access |