New Patient Creation
Overview
Creating a patient record is the first and most important step when working inside the Patients section.
Before you can schedule appointments, start visits or manage clinical activity, the patient must exist in the system. This guide walks you through adding a new patient in a clear and structured way.
Patient creation happens through a guided modal that separates required identity details from optional supporting information. This approach helps you enter essential data first while still allowing you to enrich the record later.
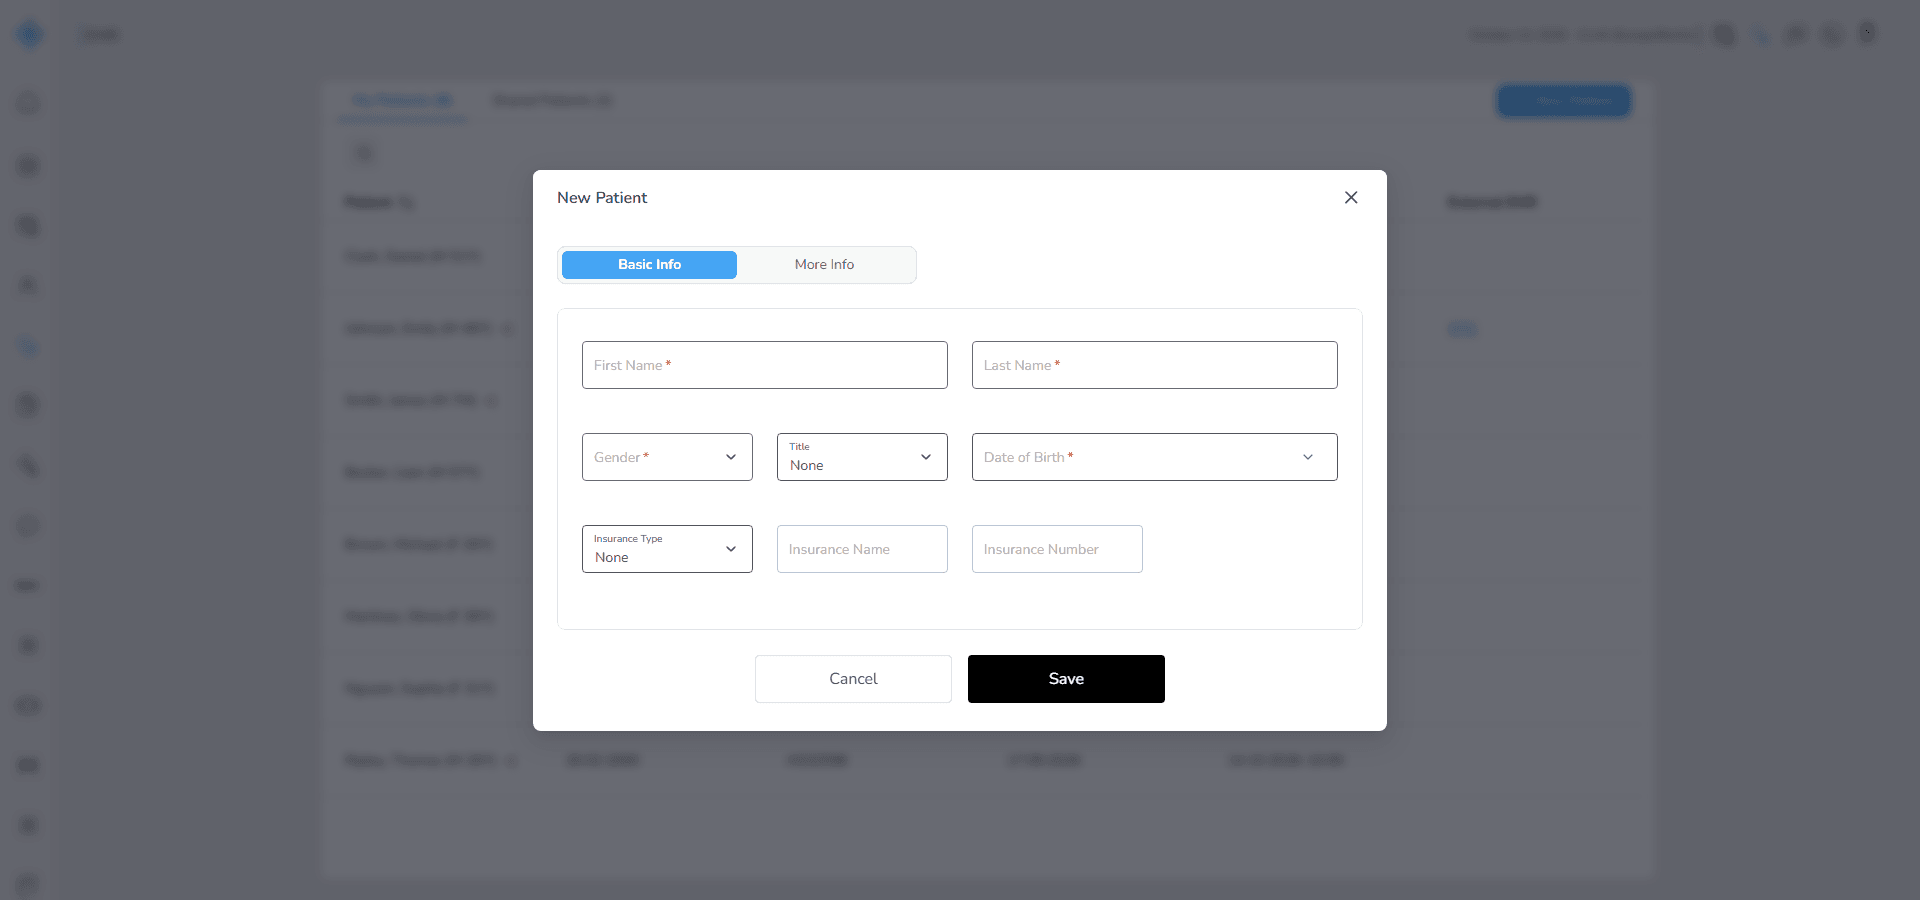
The modal includes two sections:
Basic Info
This section collects the required identifying details such as name gender and date of birth. These fields must be completed before moving forward.
More Info
This section contains optional information grouped into Contact Info Family Doctor and Emergency Contact. It becomes available only after the required Basic Info fields are completed.
Once saved the patient is automatically added to the My Patients tab and becomes available for scheduling visits or appointments.
Access
Follow this path to start creating a patient:
1. Open EMR via the sidebar or the EMR shortcut on the Dashboard
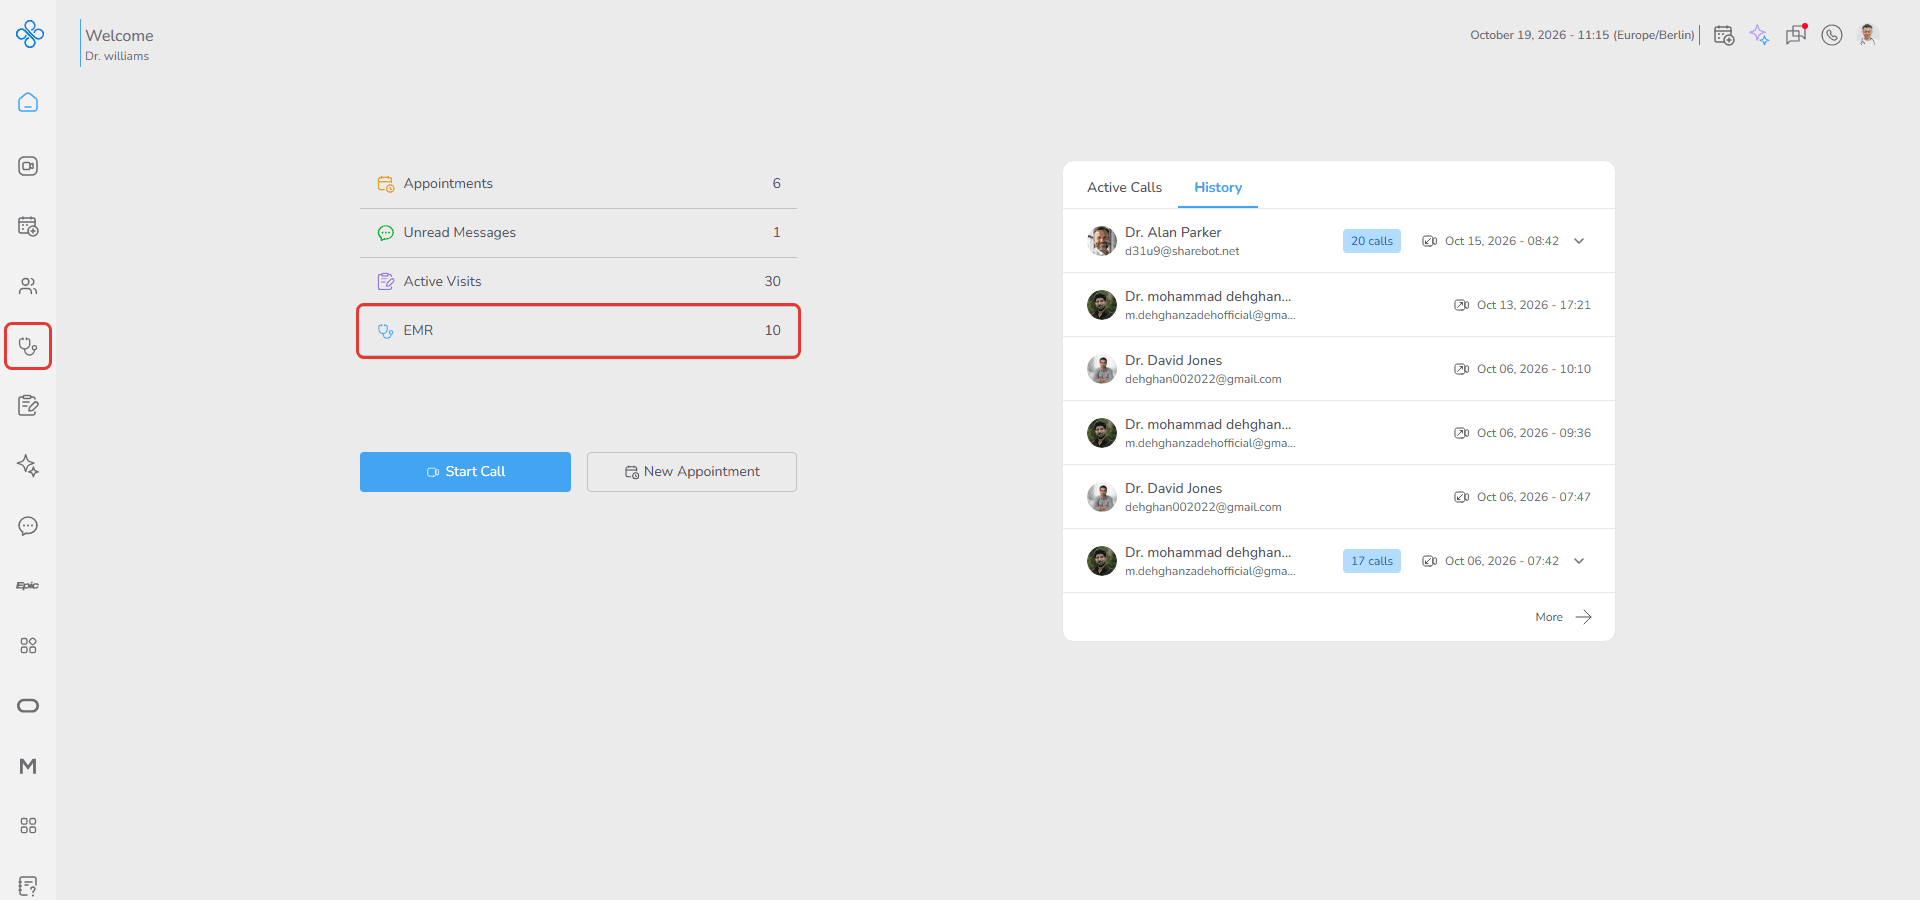
This brings you to the main patient workspace where all records are listed and managed.
2. Click the New Patient button in the top right corner of the Patients page.
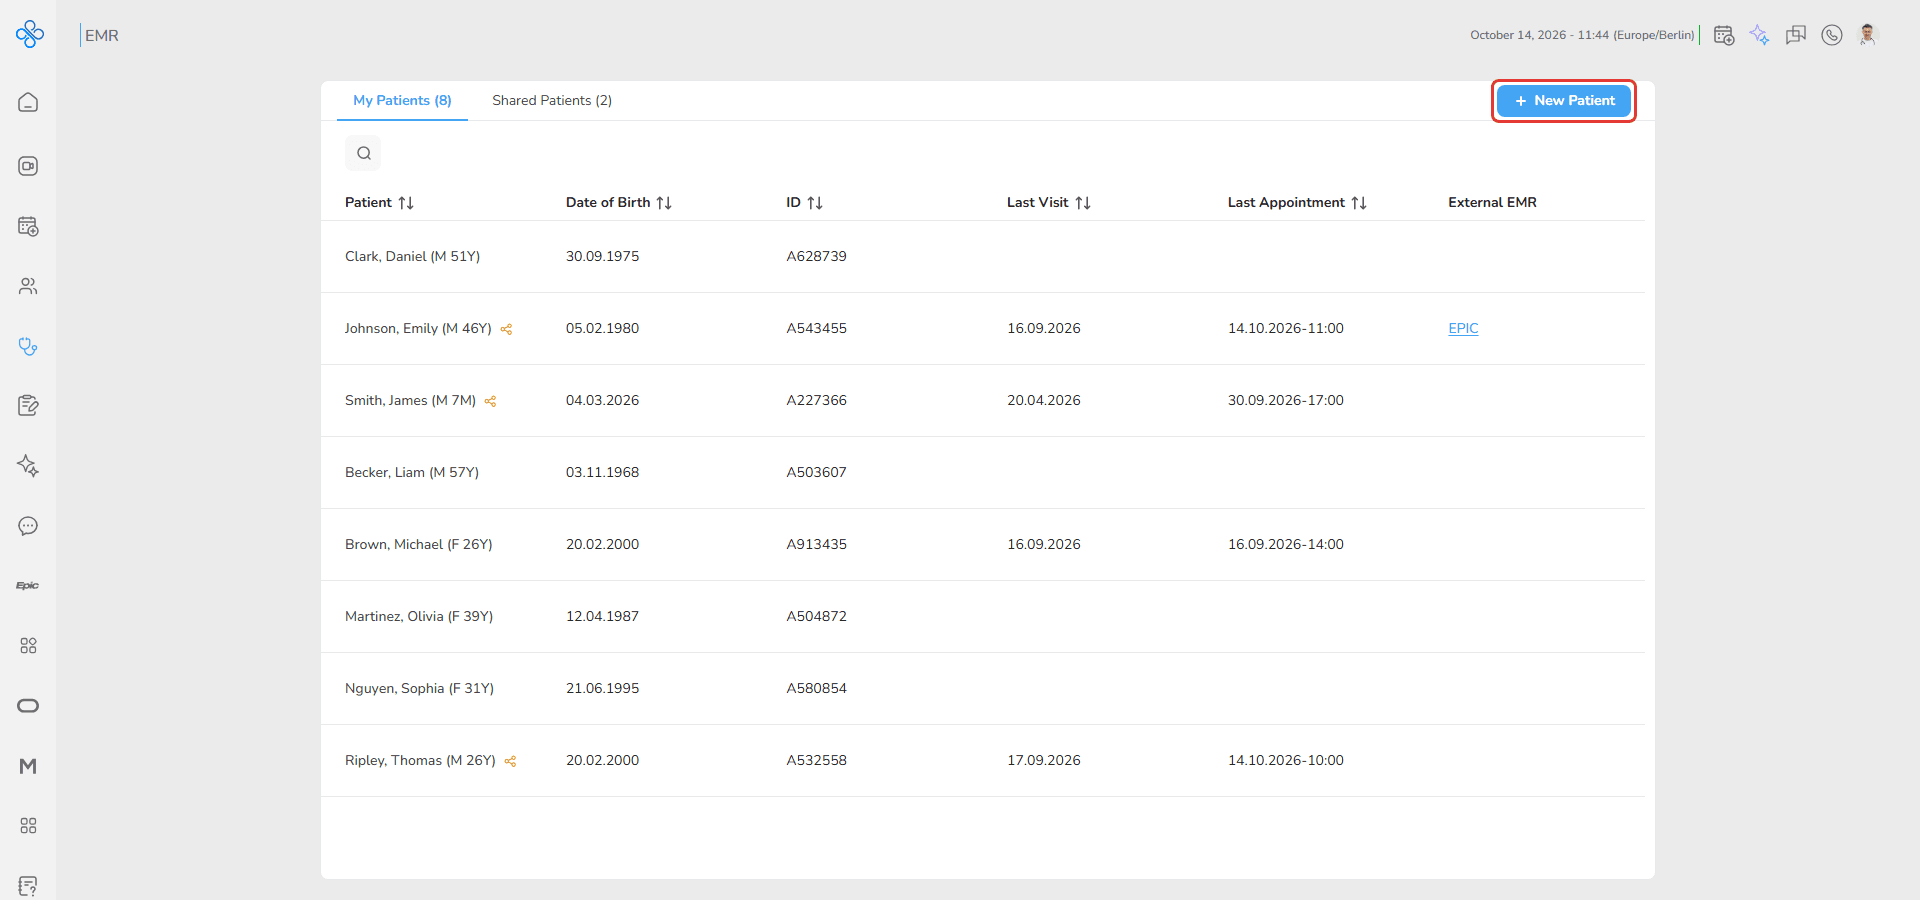
Selecting this button opens the patient creation modal and begins the registration process.
Steps
Step 1: Start the patient creation process
From the Patients workspace select +New Patient button.
This launches the New Patient modal which guides you through entering patient details in the correct order.
You will see two tabs at the top of the modal:
- Basic Info
- More Info
Basic Info is selected by default because it contains the mandatory information required to register the patient.
Step 2: Complete Basic Info
This step establishes the patient identity inside the system so accuracy matters here.
Enter the required fields:
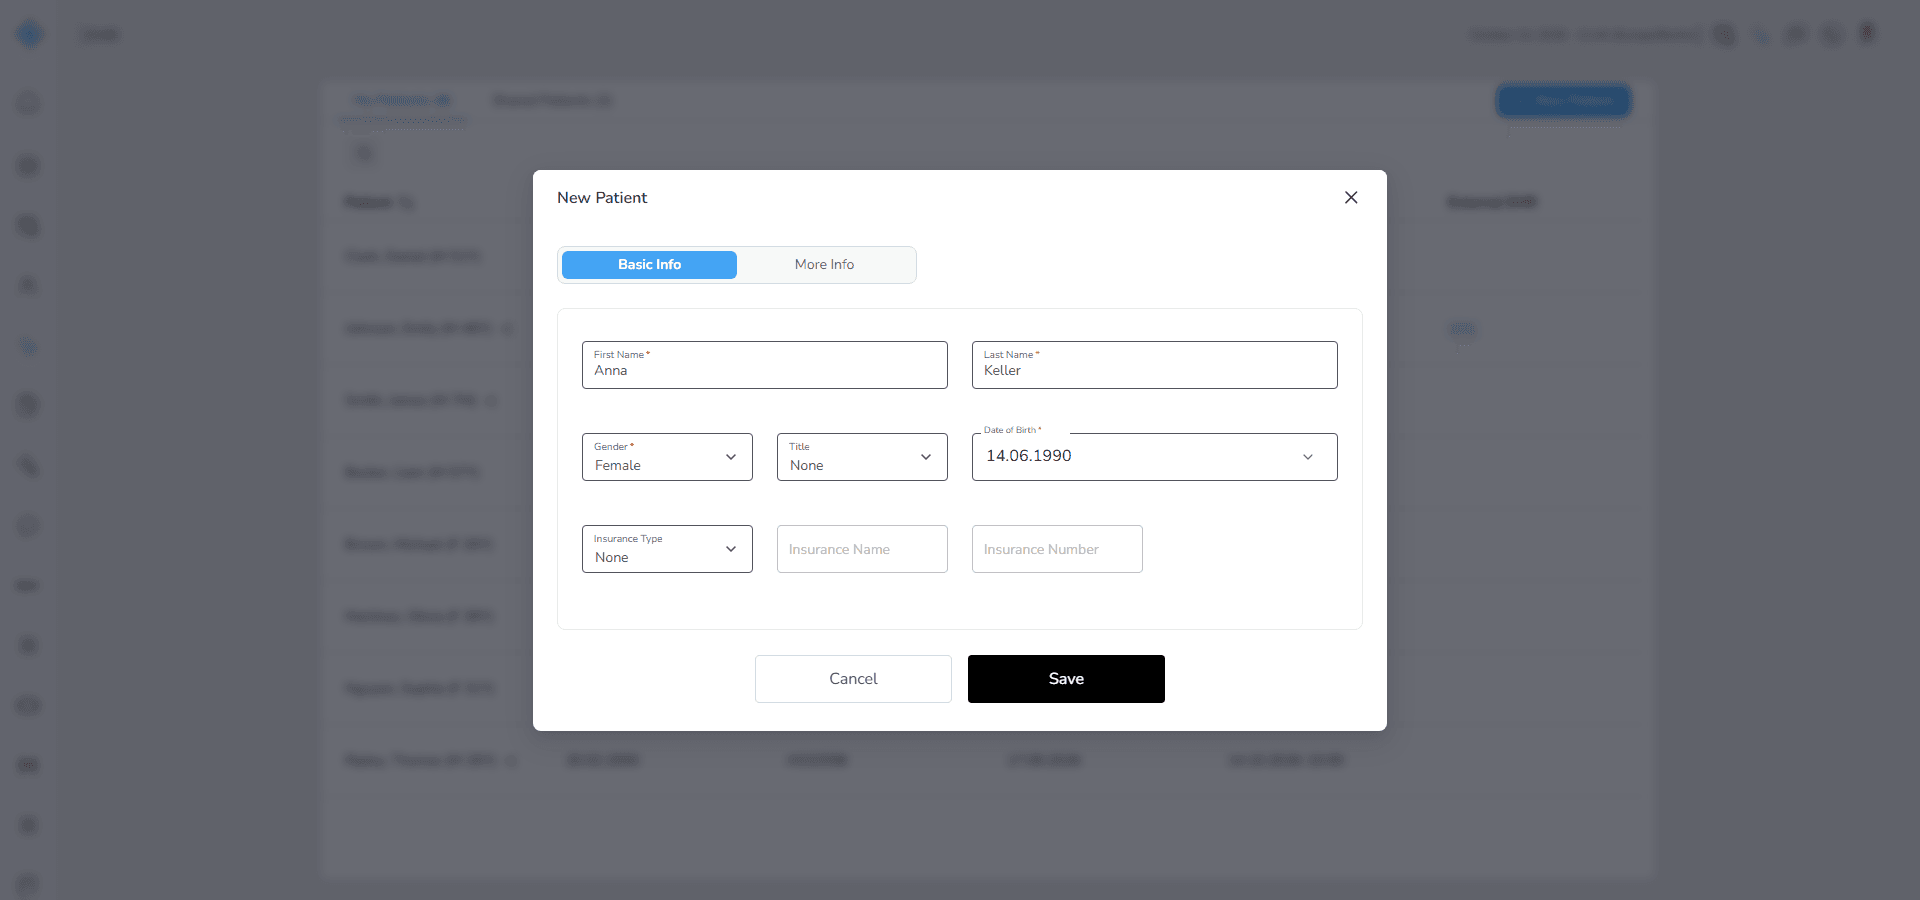
First Name
Last Name
Gender
Date of Birth
If insurance information is available you can add it at this stage. This is optional but recommended when relevant.
Note:
Important guidance More Info cannot be accessed until all required Basic Info fields are completed. This ensures that the patient record has a valid foundation before additional details are added.
Step 3: Add optional details in More Info
After completing the required fields switch to the More Info tab to enrich the record.
This section is organized into groups to keep information clear and easy to maintain.
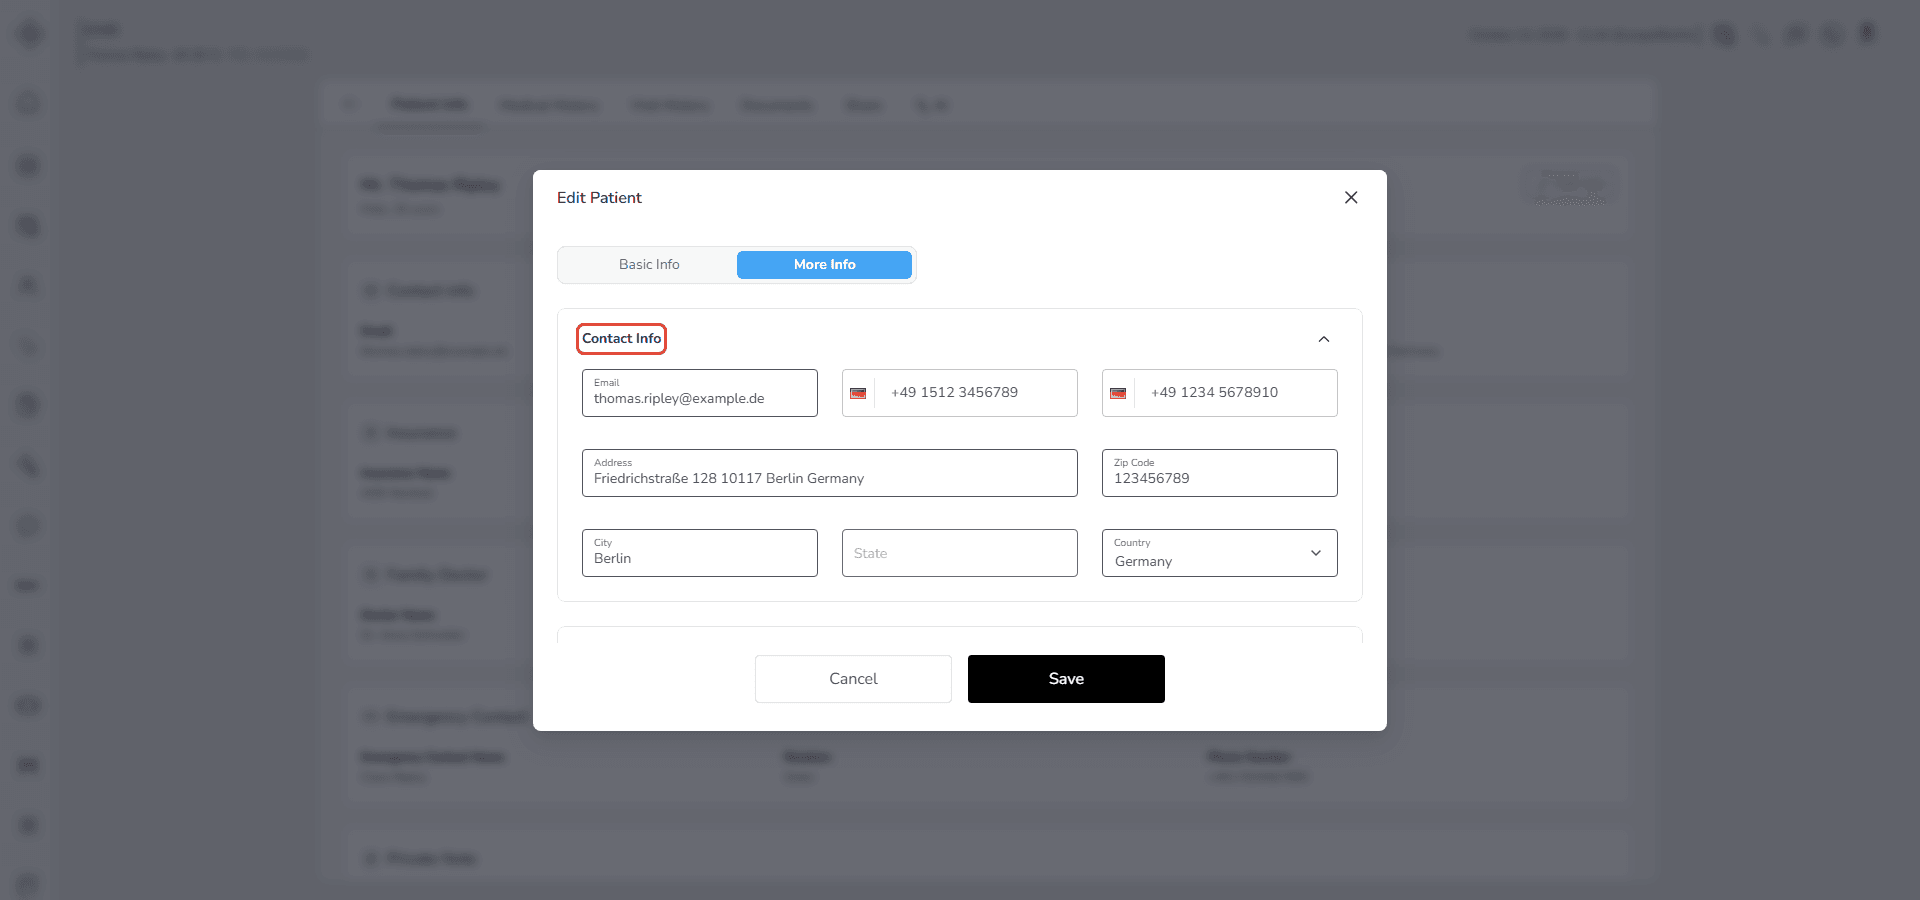
Contact Info
Add communication details such as email mobile number and address.
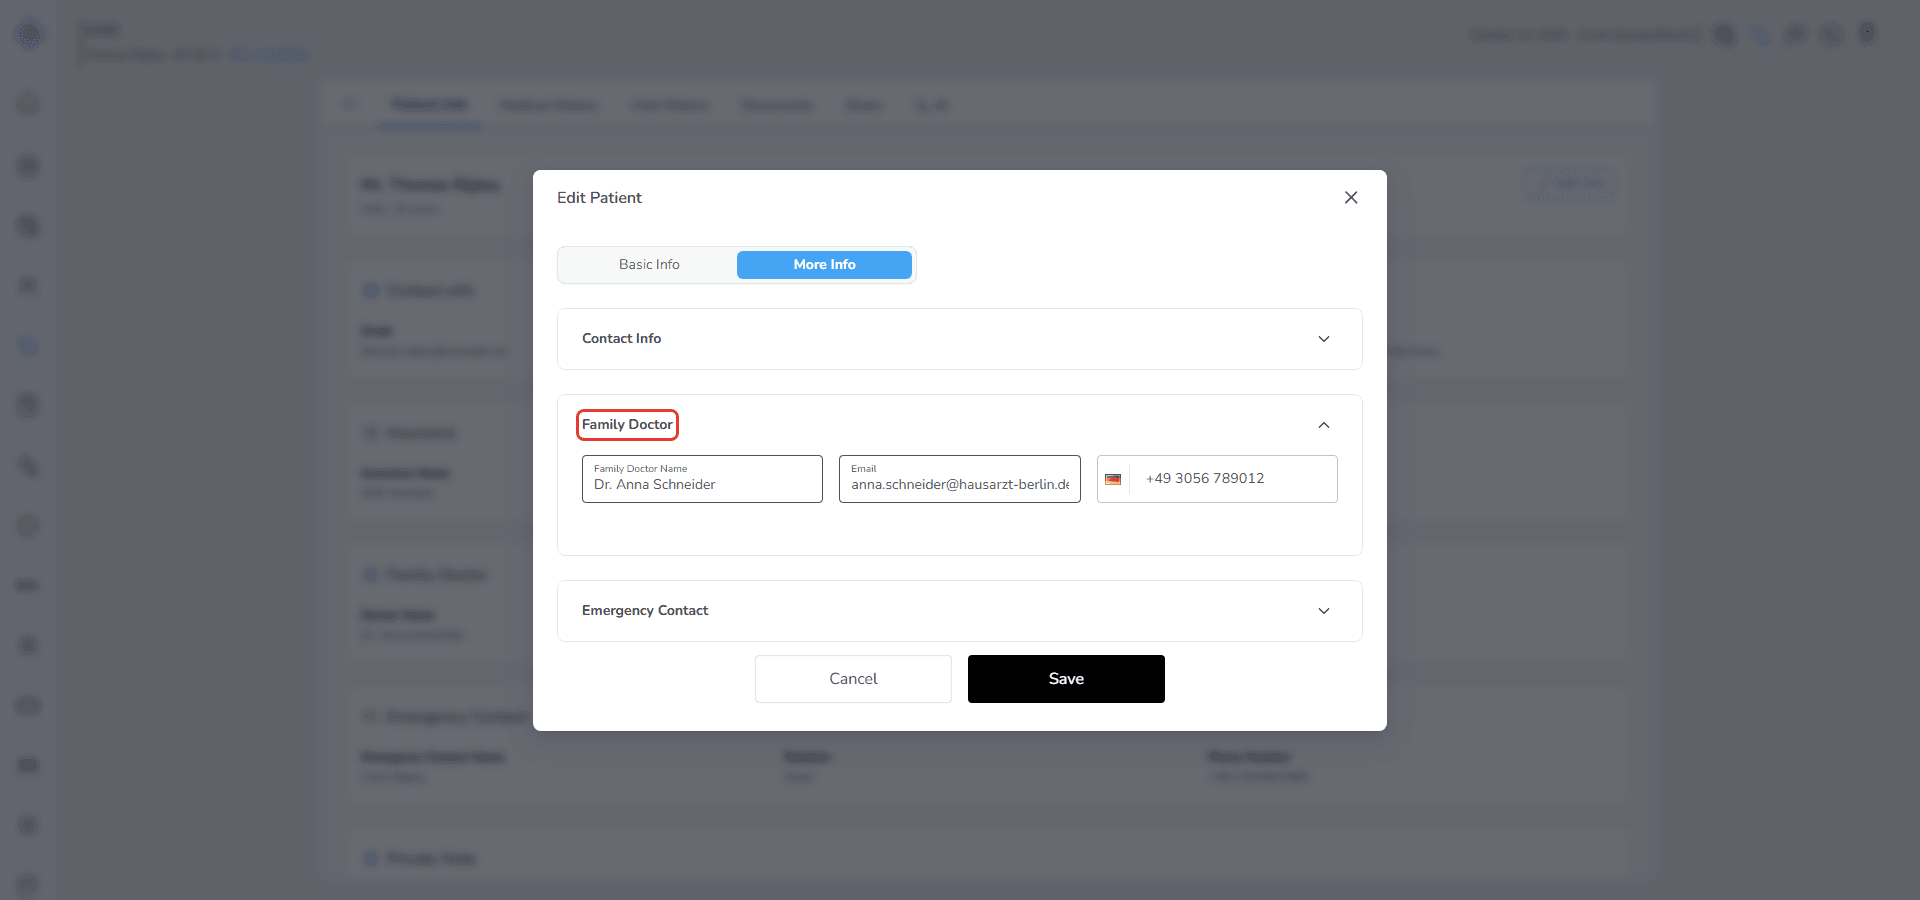
Family Doctor
Record the primary doctor associated with the patient including name email and phone number.
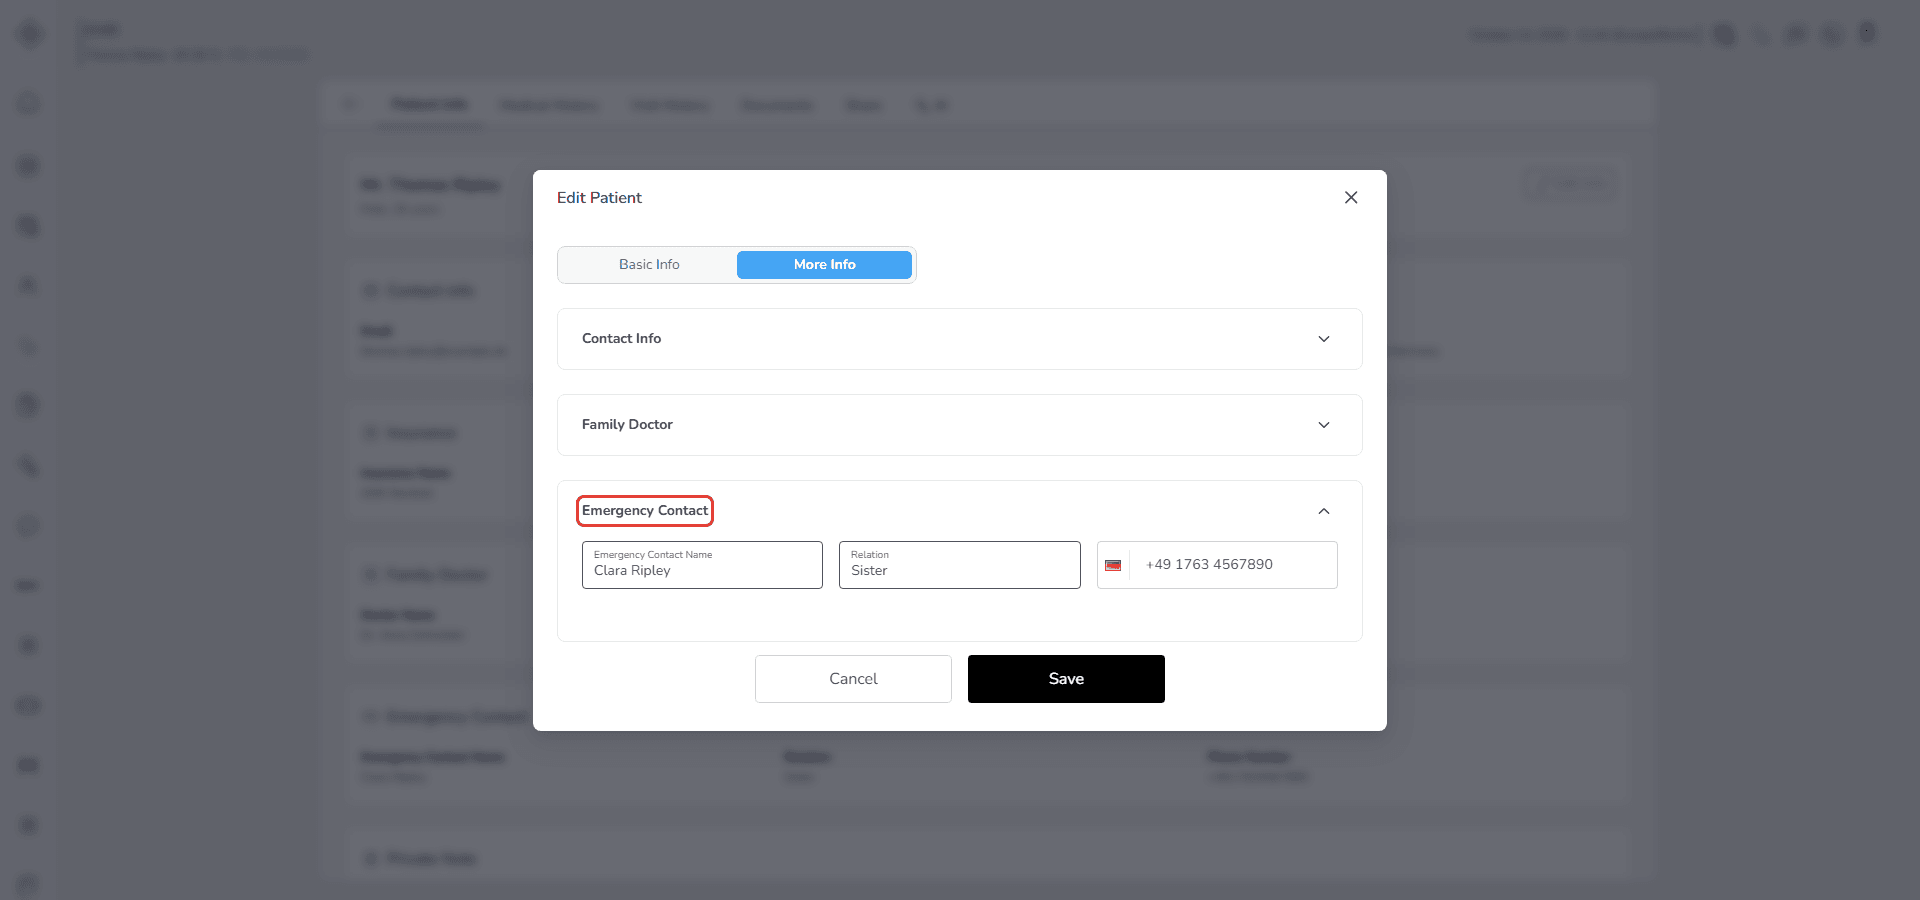
Emergency Contact
Provide details for a responsible contact person including name relation and phone number.
These fields are optional and can be completed later if the information is not available at the time of creation.
Step 4: Save the patient record
Once all necessary information has been entered select Save.
The modal closes and the system immediately registers the patient.
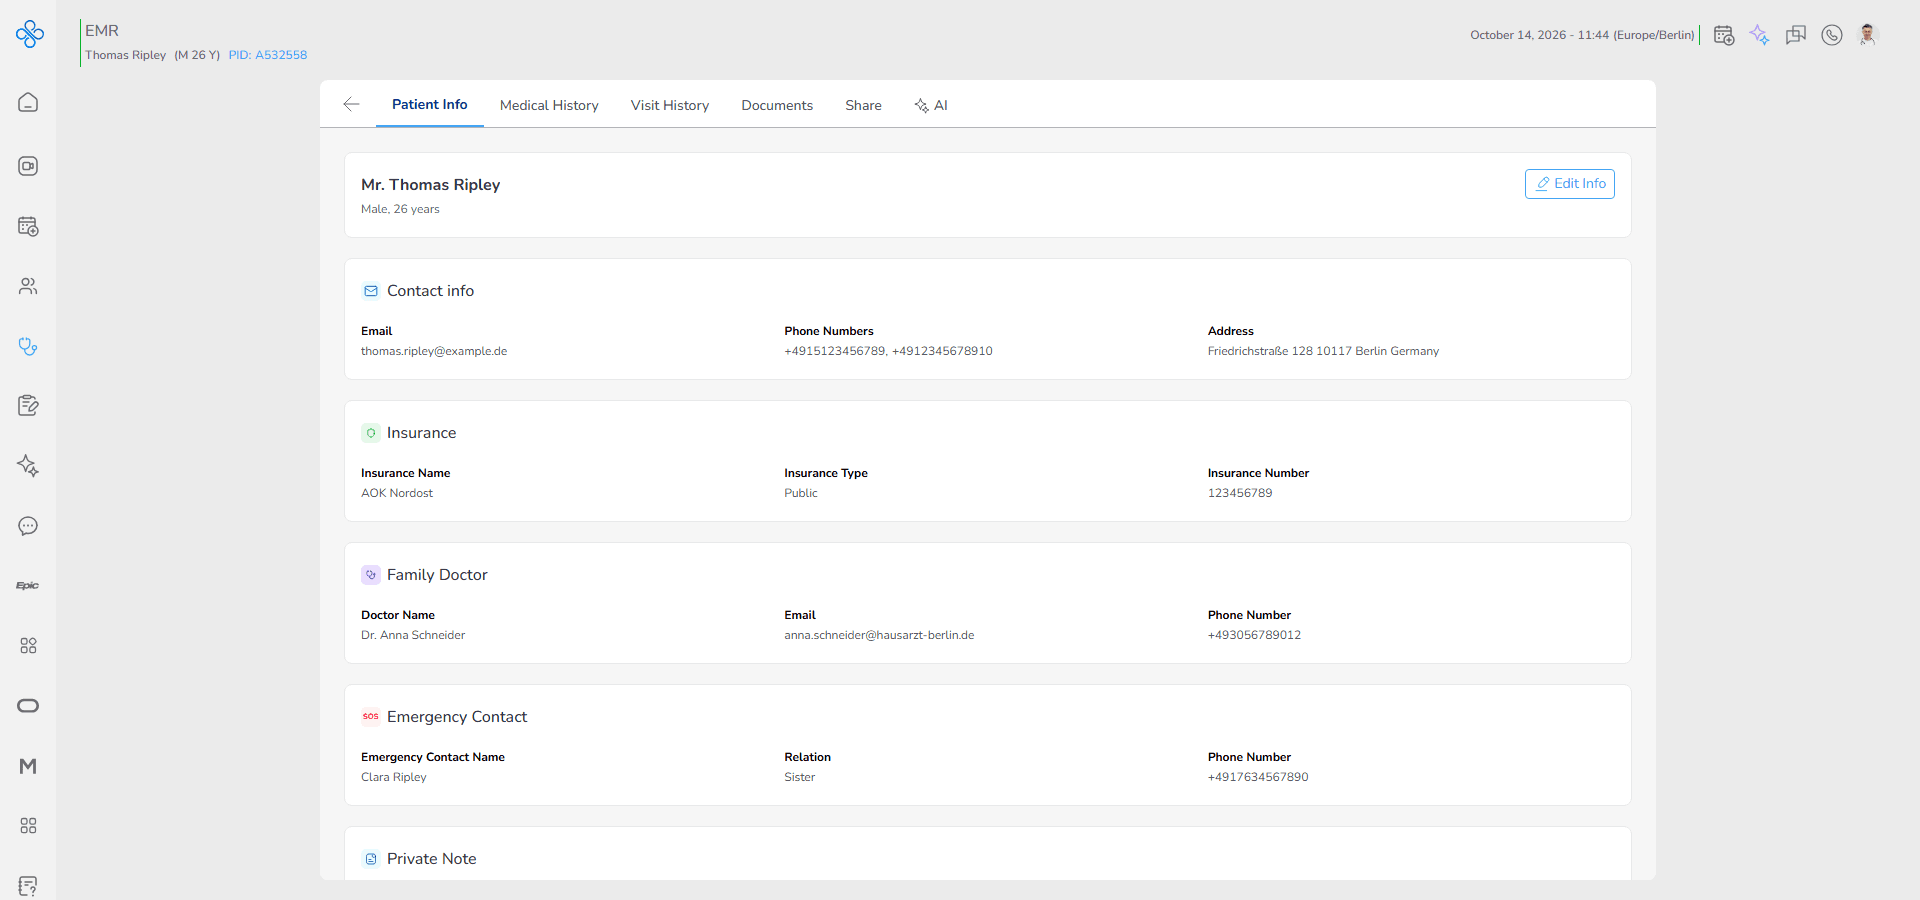
The newly created patient is added to the My Patients tab and you are automatically redirected to the patient record page where the Patient Info tab opens displaying the patient’s initial details.
(For more information, refer to the Review & Manage Patients guide.)
Fields (Field Descriptions)
| Field Group | Field | Description |
|---|---|---|
| Basic Info | First Name* | Patient’s first name (required). |
| Last Name* | Patient’s last name (required). | |
| Gender* | Patient’s gender (required, dropdown). | |
| Title | Optional title (e.g., Mr., Mrs., Dr.). | |
| Date of Birth* | Patient’s birthdate (required, Day/Month/Year). | |
| Insurance Type | Type of insurance (dropdown). | |
| Insurance Name | Name of insurance provider. | |
| Insurance Number | Patient’s insurance number. | |
| More Info → Contact | Patient’s email address. | |
| Mobile | Mobile phone number. | |
| Landline | Home or office phone number. | |
| Address | Street address. | |
| Zip Code | Postal code. | |
| City | City of residence. | |
| State | State or province. | |
| Country | Country of residence. | |
| More Info → Family Doctor | Name of Family Doctor | Full name of family doctor. |
| Family doctor’s email. | ||
| Phone Number | Family doctor’s phone number. | |
| More Info → Emergency Contact | Name | Emergency contact person’s name. |
| Relation | Relation to the patient (e.g., Parent, Sibling). | |
| Phone Number | Emergency contact person’s phone number. |
Behavior & Expected Outcome
- Opening the New Patient modal always starts in the Basic Info tab to guide correct data entry order
- Completing required identity fields activates access to the More Info tab
- Saving the form creates the patient instantly and closes the modal
- Newly created patients appear immediately in the My Patients list
- The record becomes searchable right away using name date of birth insurance ID or ID number
- Once created the patient can be used for scheduling appointments starting visits or editing details
Common Errors + Fixes
| Issue | Cause | Fix |
|---|---|---|
| Missing required field | First Name, Last Name, Gender, or DOB is empty. | Fill all required fields before saving. |
| Invalid date format | Incorrect input in Date of Birth fields. | Select valid values from dropdowns. |
| Duplicate patient entry | Patient with same ID already exists. | Verify if patient already exists before adding. |
| Invalid email format | Wrongly typed email in Contact or Family Doctor. | Enter a valid email format (e.g., [email protected]) |
| Invalid phone number format | Entered value does not match phone number format. | Enter numeric values, including country code if required. |
| Save action failed | Server or network issue. | Retry saving or check internet connection. |