Provider Consultation Appointment
Overview
The Provider Consultation appointment type is used when you want to schedule a remote consultation with another specialist (consultant).
After selecting this appointment type from the appointment type selection modal, a new page opens.
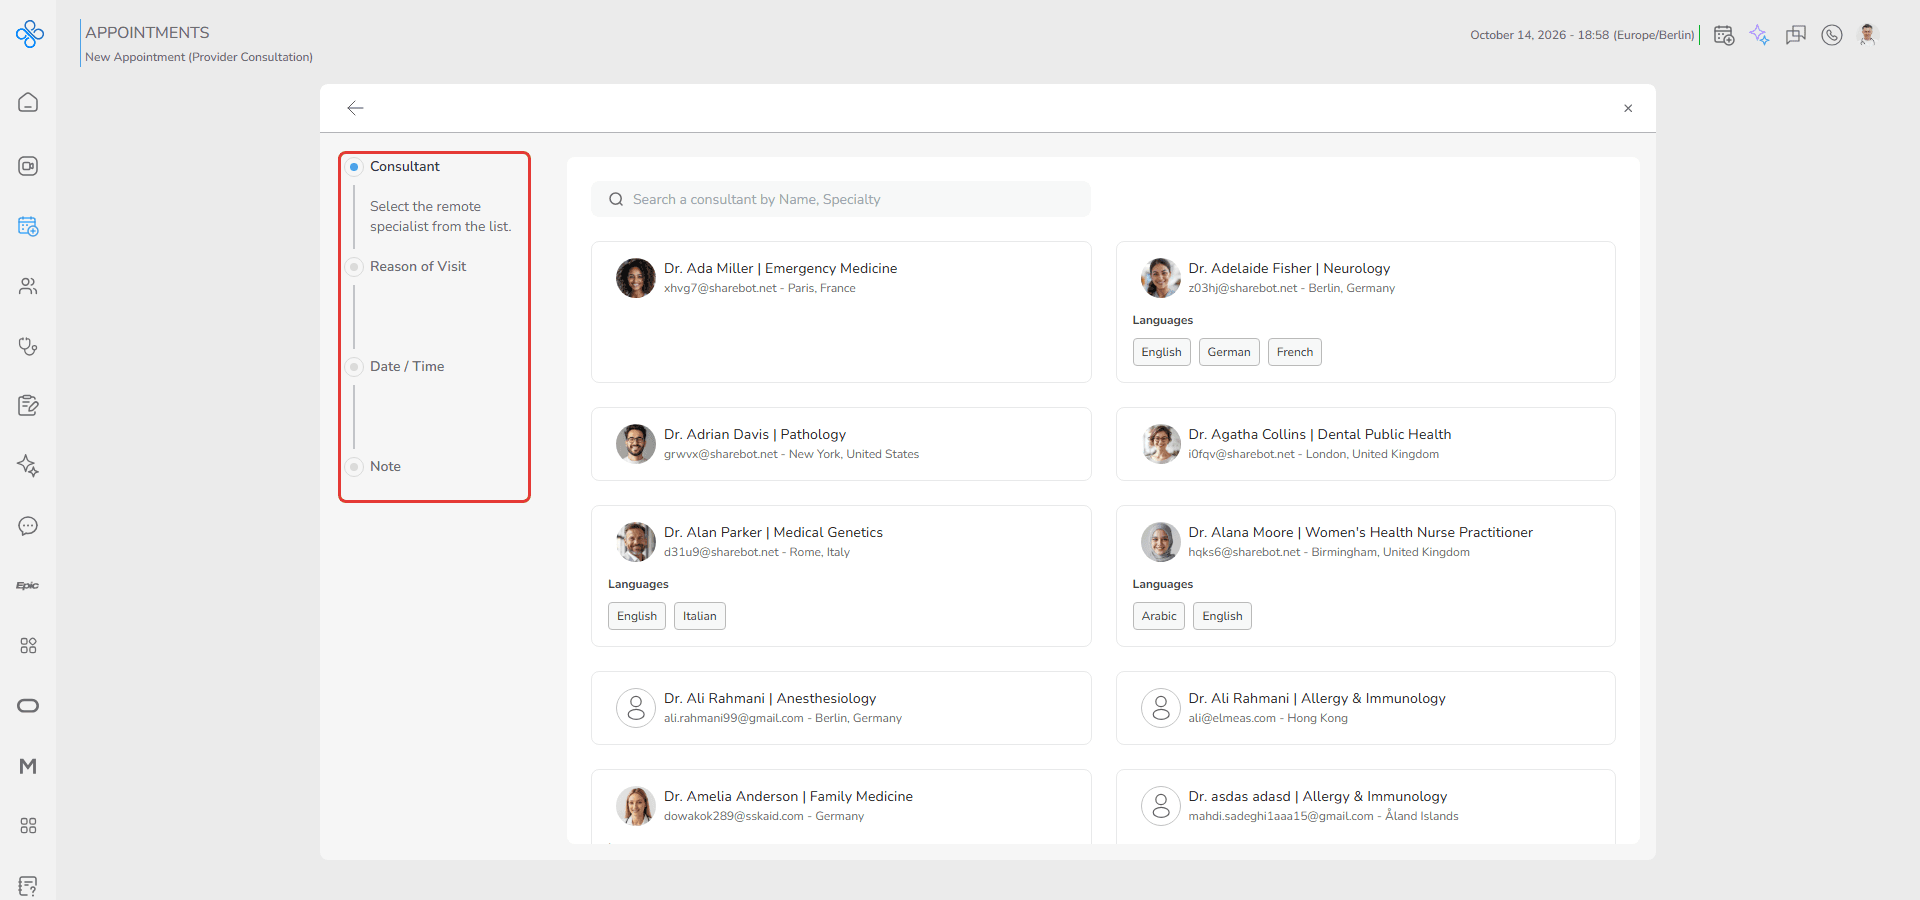
On this page, you will see a progress bar on the left side, which guides you through the appointment creation process step by step.
Each step must be completed in order, and the progress bar helps you understand:
- Where you are in the process
- What information is required next
Following the steps below, you will first select a consultant, then define the reason for the visit, choose an available date and time, and finally add an optional note before submitting the appointment.
Steps
Step 1: Select Consultant
In this step, you choose the specialist (consultant) you want to consult with.
A list of available consultants is displayed on the page.
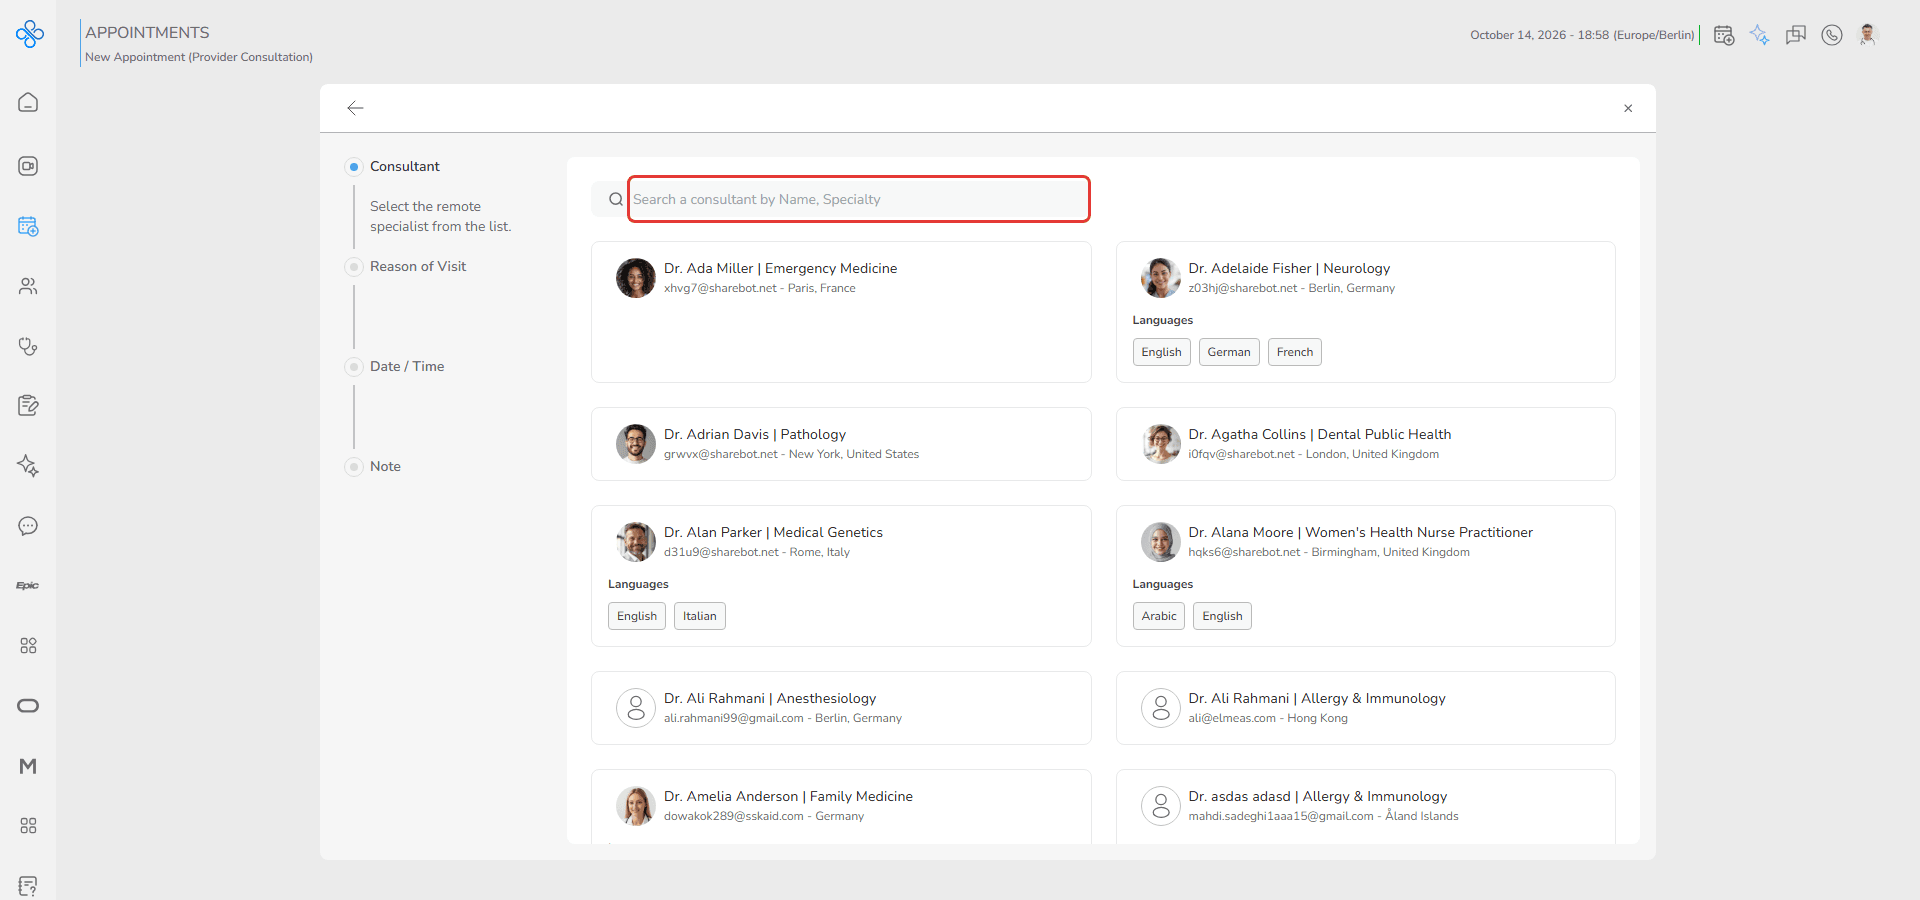
At the top of the list, there is a Search bar that allows you to quickly find a consultant by name or specialty.
Instruction text under the step:
“Select the remote specialist from the list.”
How it works:
- You can scroll through the list or use the search bar to find the consultant you are looking for.
- Each consultant card shows the name, specialty, email, location and spoken languages.
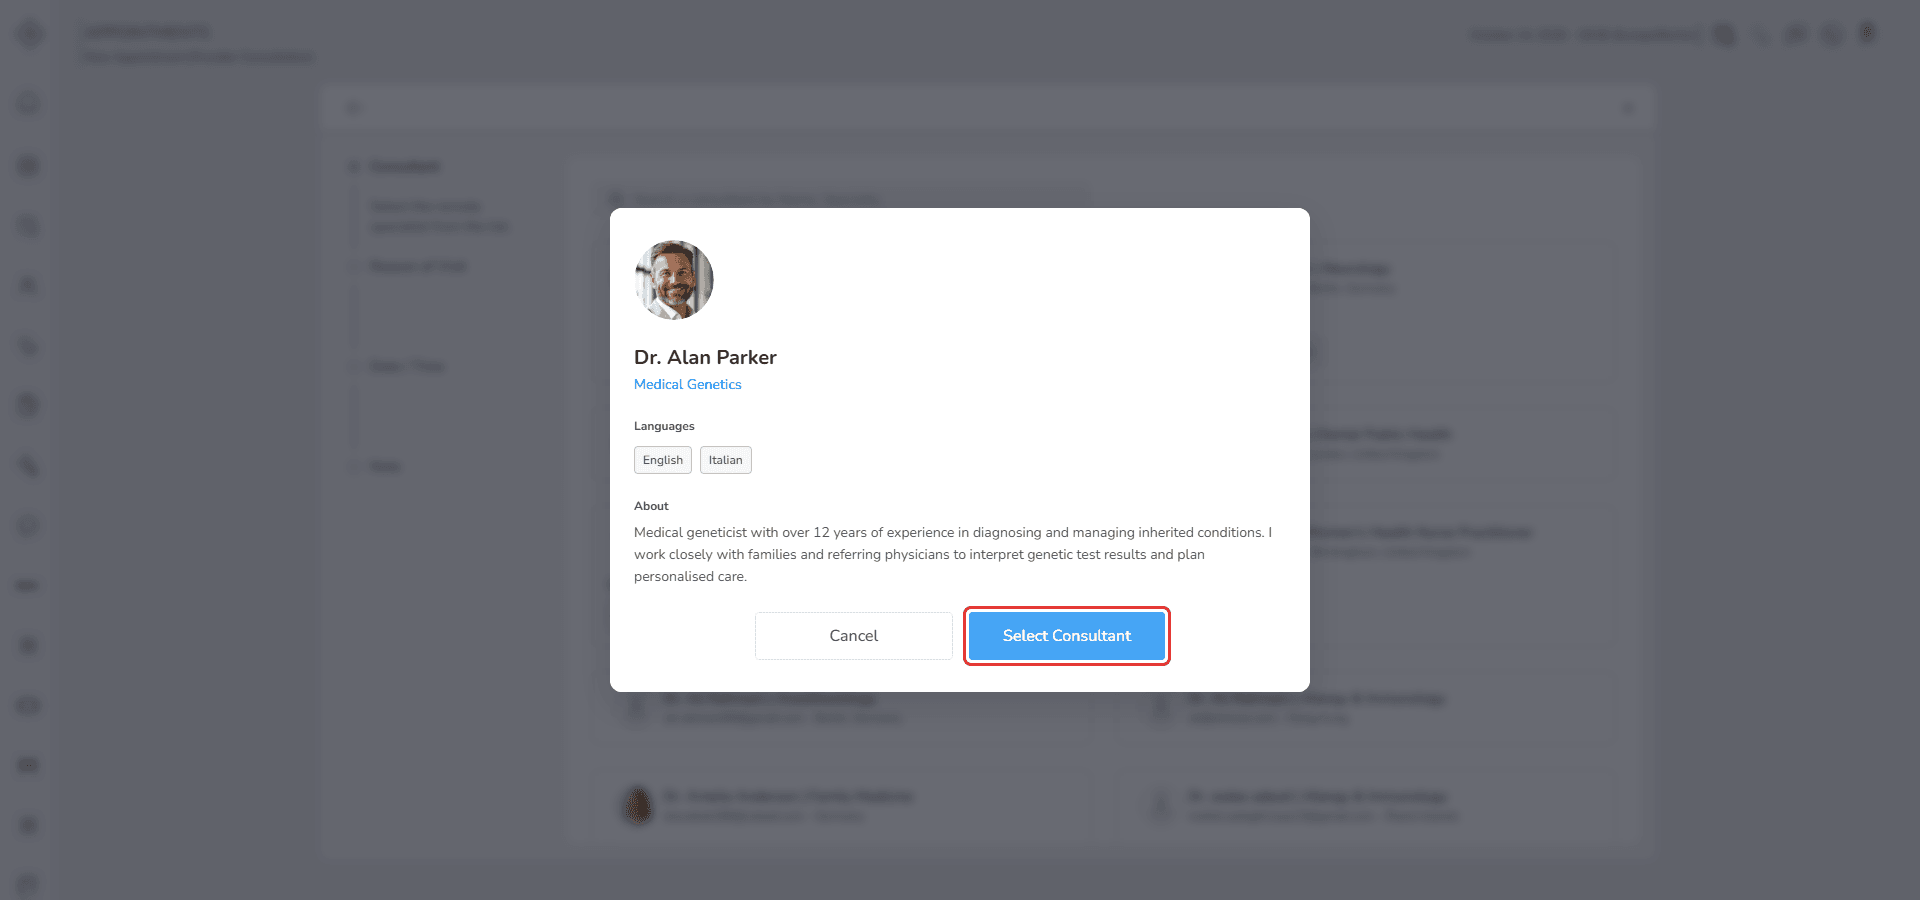
- Clicking on a consultant opens a window with their details:
The window shows the consultant’s specialty, languages and About text, with a Select Consultant button.
How selection works:
- Click on a consultant to open their details.
- Review the information shown in the window.
- Click Select Consultant to choose that consultant (or Cancel to go back to the list).
- You are automatically taken to the next step.
- You can use Back if you want to change your selection or exit the flow.
Step 2: Reason of Visit
In this step, you specify why this consultation is being scheduled.
- Instruction text shown under the step:
- “Select a reason of appointment from the list.”
- A list of available visit reasons appears.
- These options are based on the consultant you selected in Step 1.
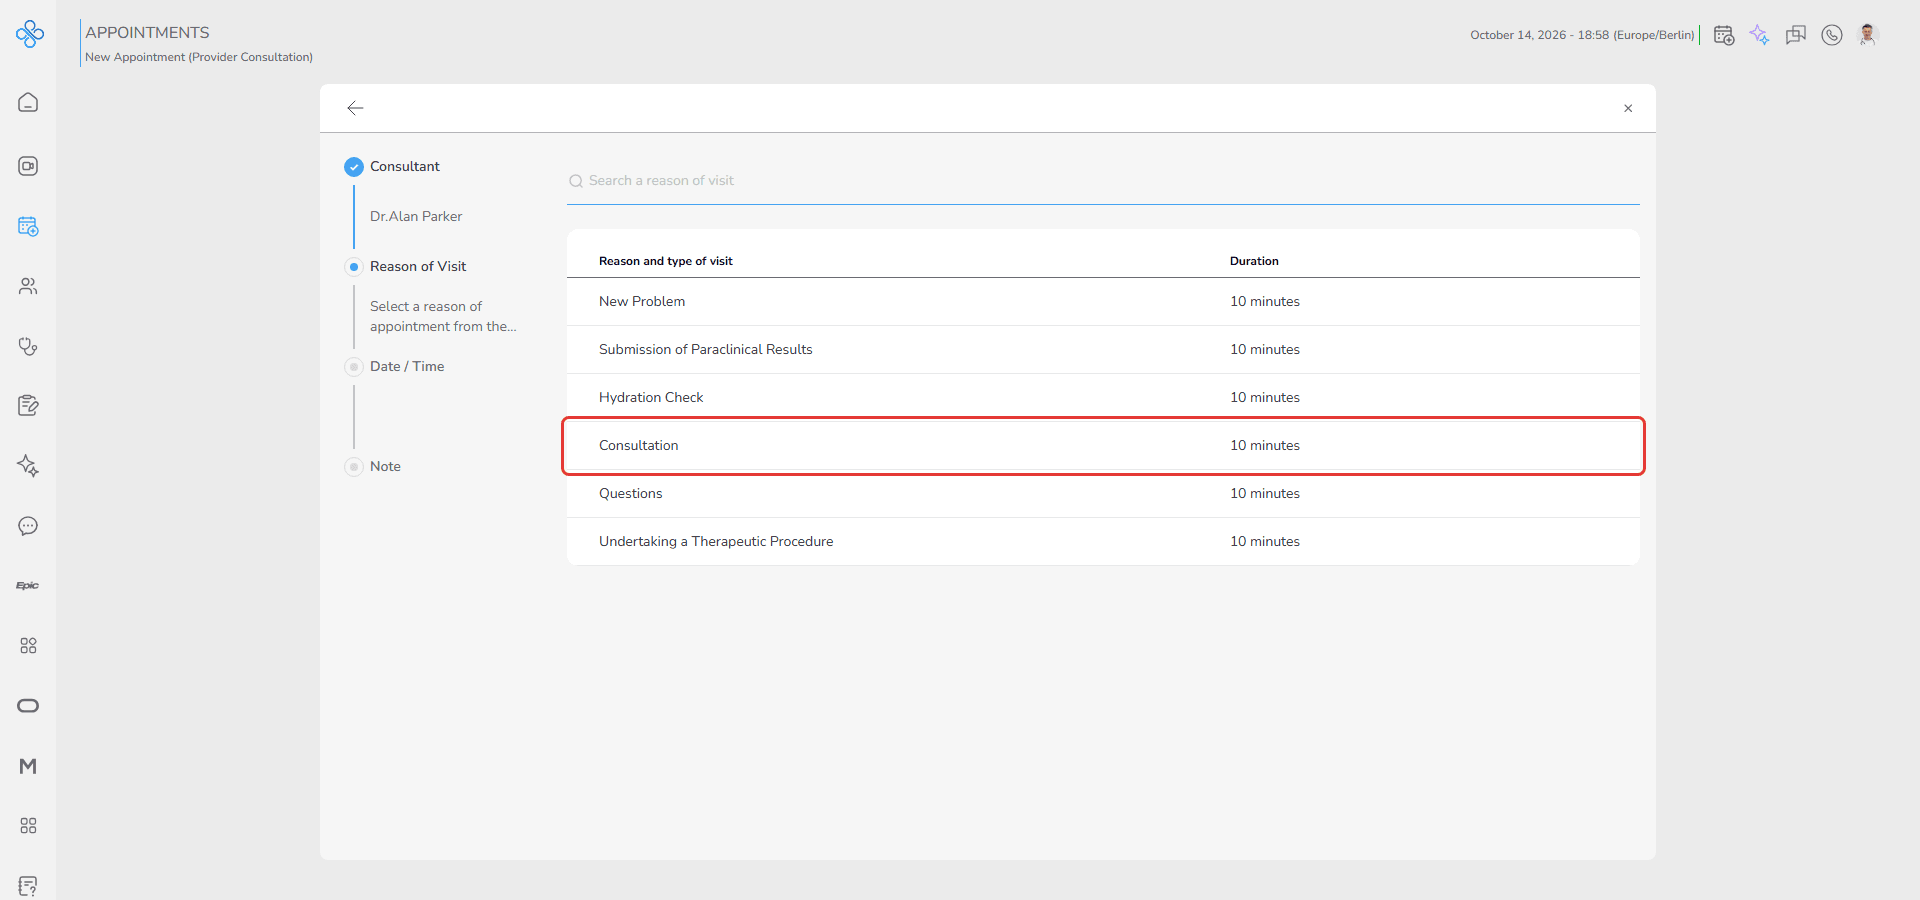
- Click on one reason to select it.
- You are automatically taken to the next step.
- Use Back to return to the previous step if you need to make changes.
Step 3: Date / Time
In this step, you choose when the consultation will take place.
- Instruction text shown:
- “Select an available time of remote Provider.”
- A calendar and a list of available time slots for the selected consultant are displayed.
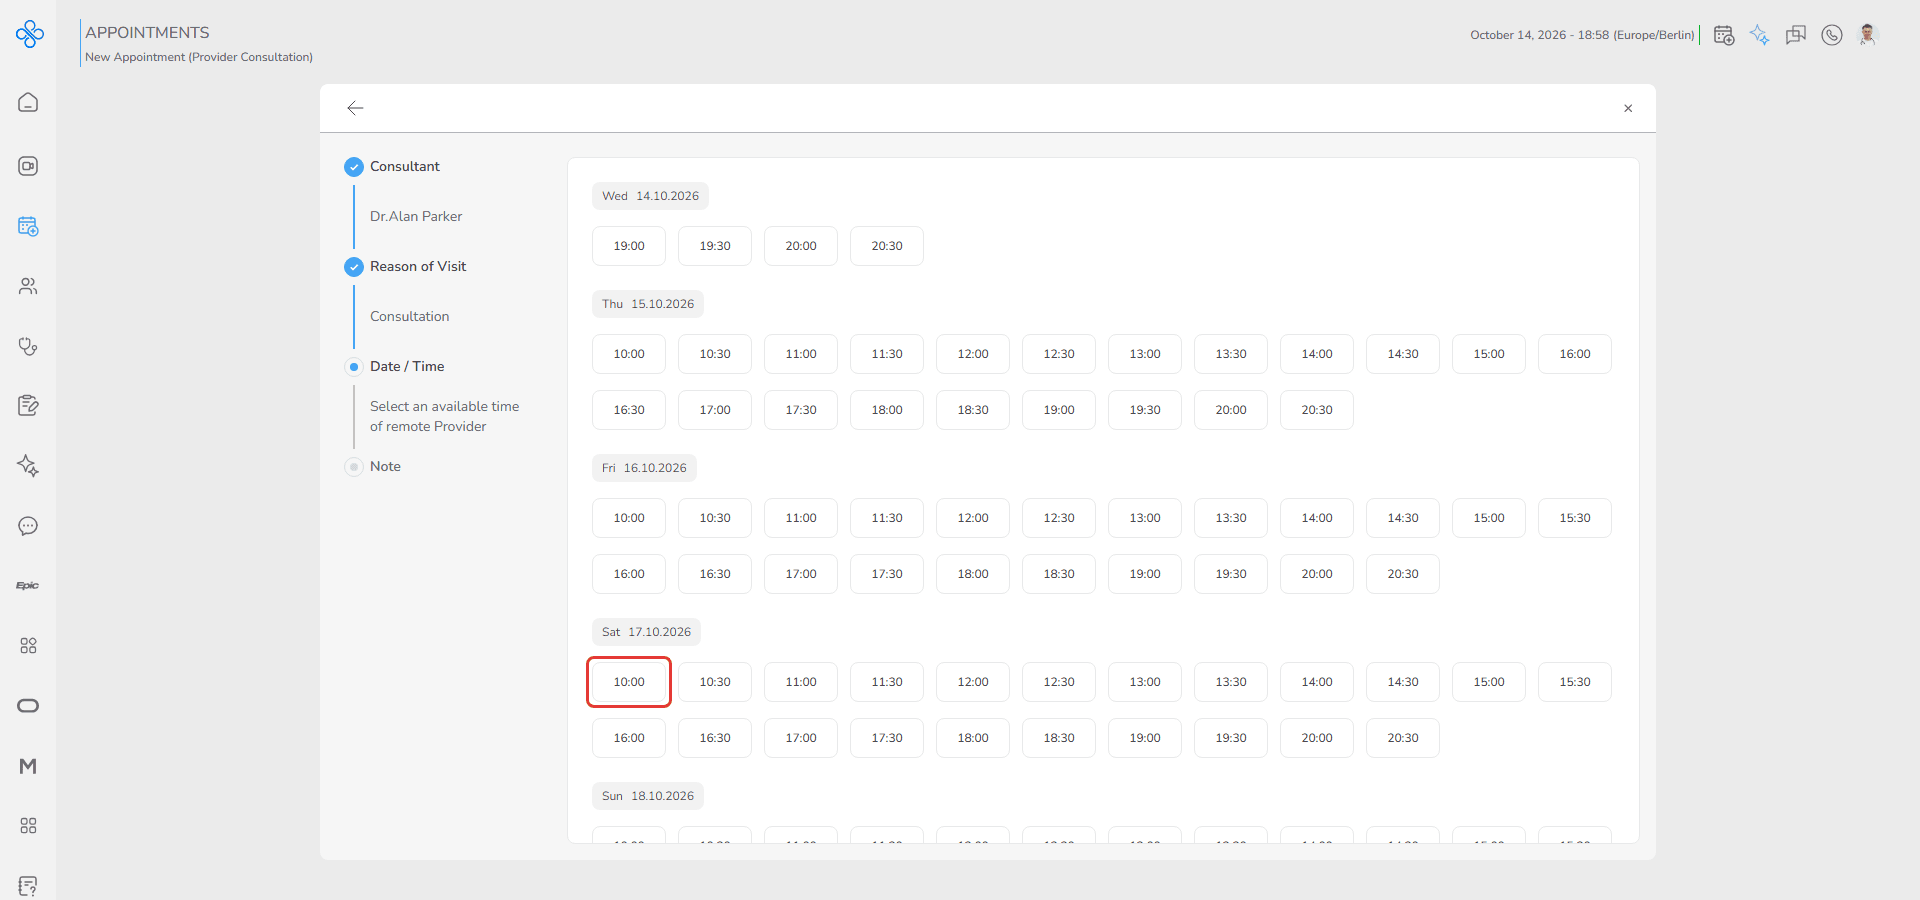
- Only free and available time slots can be selected.
- Click on a time slot to select it.
- You are automatically taken to the next step.
- Use Back to return to the previous step if you need to make changes.
Step 4: Note
In this step, you can add extra information or context for the consultation.
- Instruction text shown: “Write a note for this appointment.”
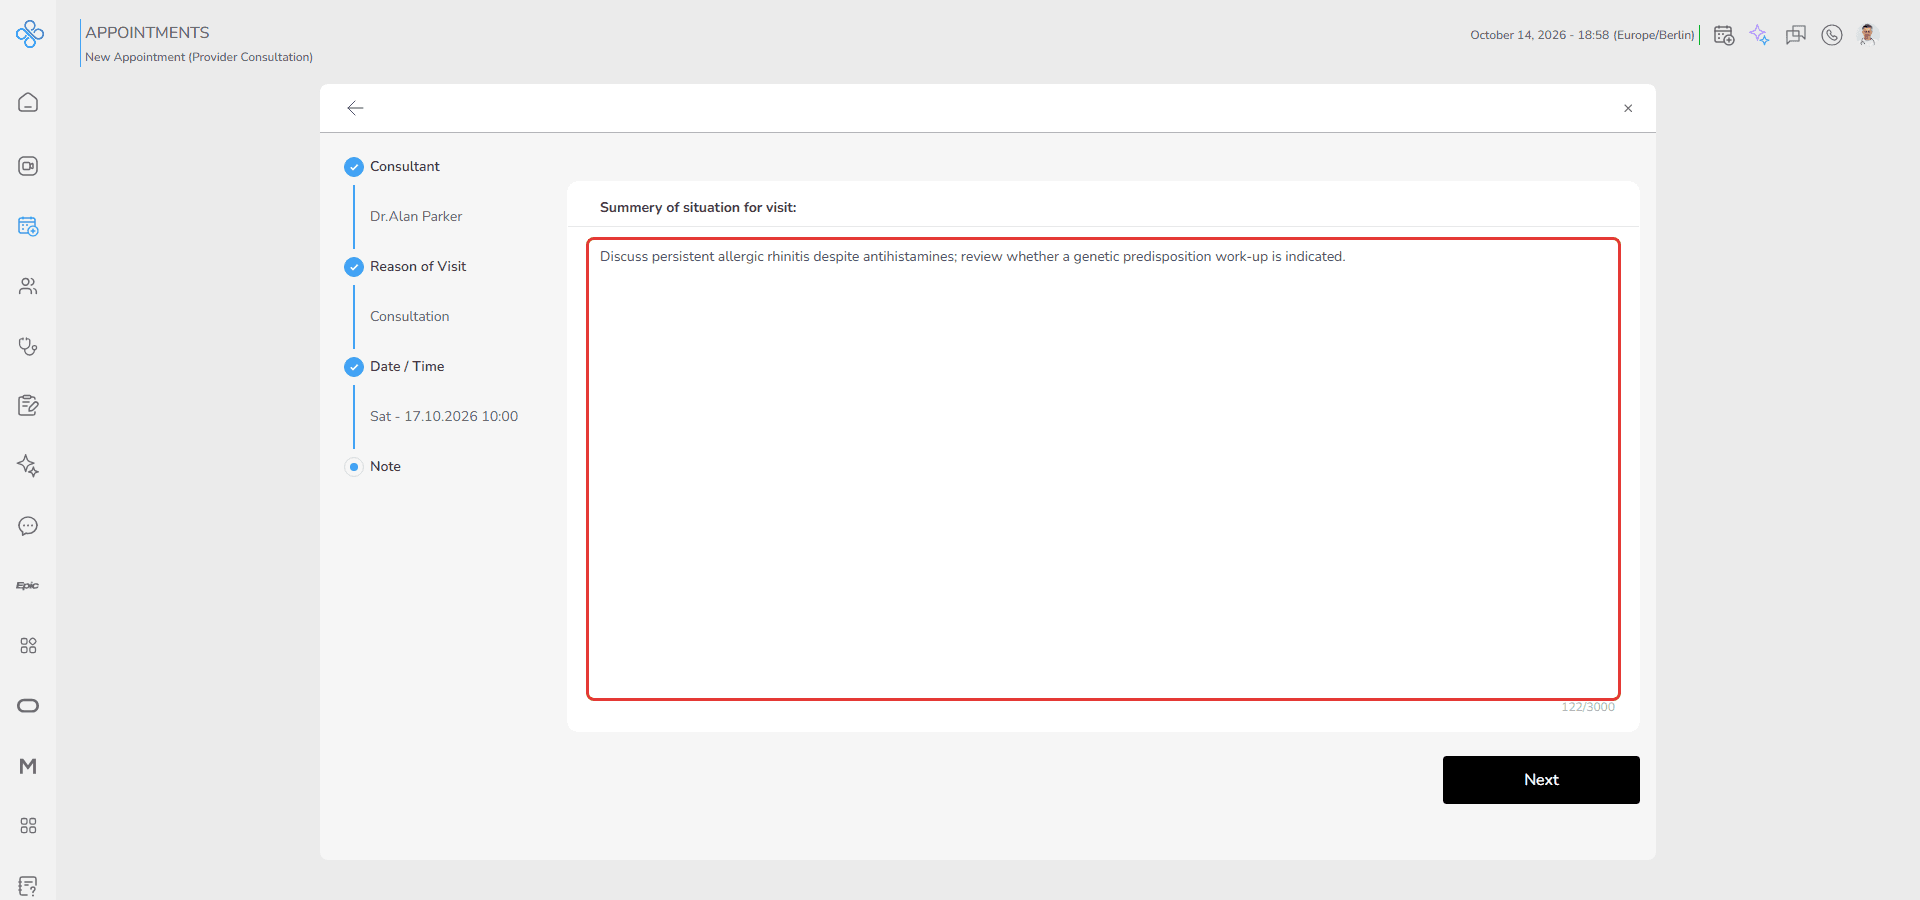
- A text area is provided where you can write additional details.
- You can enter up to 3000 characters.
- Once you start typing, the placeholder instruction disappears.
- This step is optional.
- You can leave it empty if no additional explanation is needed.
- Click Next to continue to the Review & Submit step.
- You can also use Back to return to the previous step and make changes.
Final Step: Review & Submit
Before creating the appointment, you will see an Appointment Summary Screen that includes:
- Appointment Type (Provider Consultation)
- Consultant Name
- Provider (you)
- Date and Time
- Duration
- Note (if entered)
Review all details carefully.
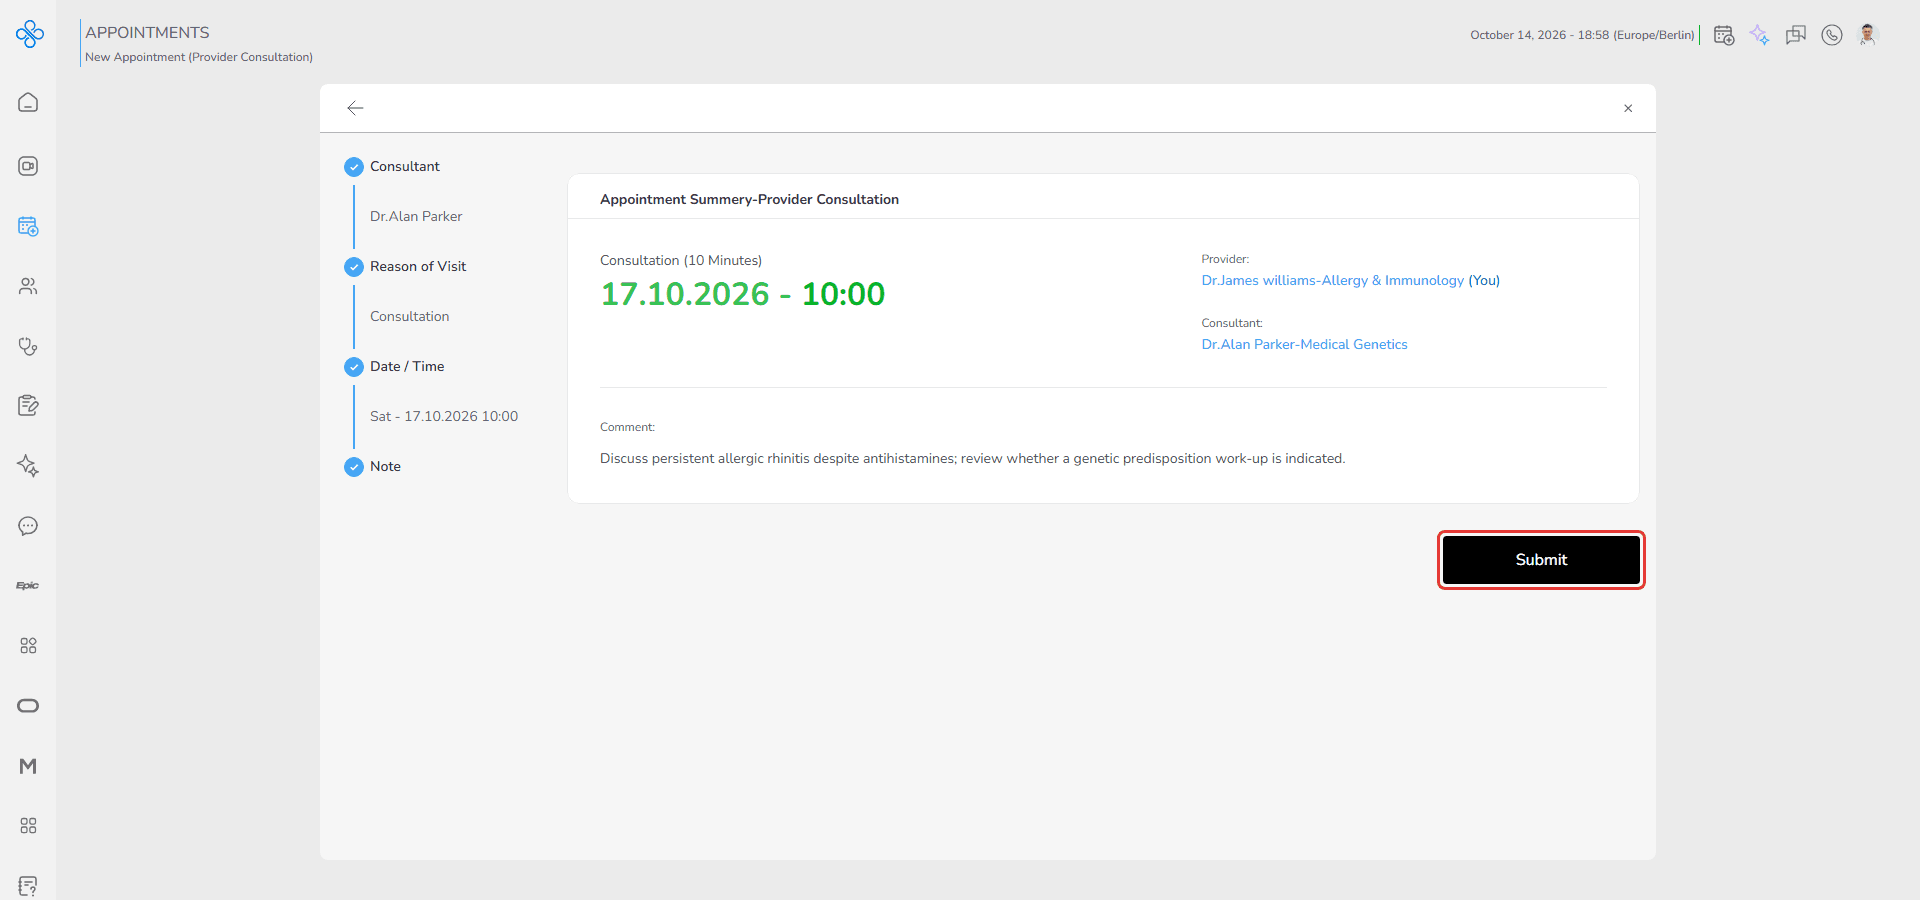
When everything looks correct:
- Click Submit to confirm the appointment.
After submission:
- The appointment is added to your schedule.
- The appointment is also added to the consultant’s schedule.
- Both parties can now see and manage the consultation from their Appointment lists.
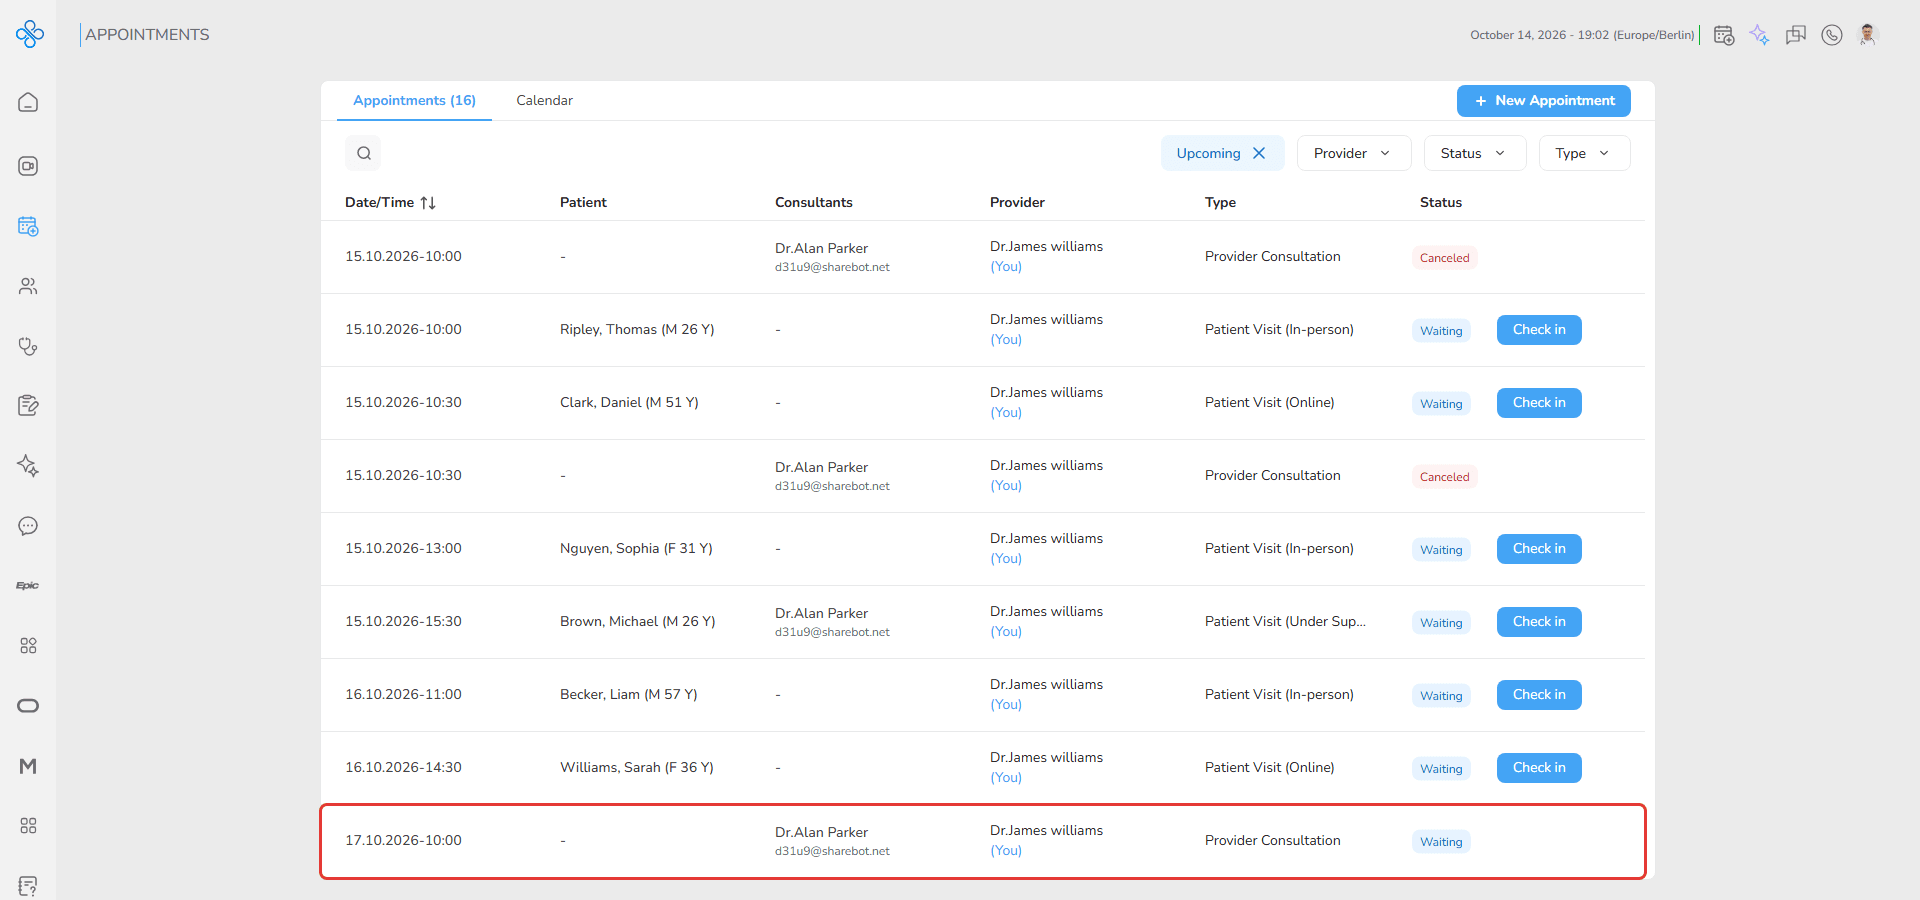
After creating this type of appointment, you can view and manage all your appointments in the Review & Manage Appointments section.
Fields (Field Descriptions)
| Step | Field | Description |
|---|---|---|
| Consultant | Consultant List | Displays available consultants. |
| Reason of Visit | Reason List | Shows available reasons based on consultant specialty. |
| Date / Time | Calendar & Slots | Available timeslots for the consultant. |
| Note | Text Field | Free-text note (up to 3000 characters). |
Behavior & Expected Outcome
- Progress bar updates dynamically: completed steps turn blue with a check mark.
- Next and Back buttons allow navigation between steps.
- Selection (consultant, reason, timeslot) always highlights in blue and updates the progress bar.
- Appointment is only created after the Submit button is pressed.
Common Errors + Fixes
| Issue | Cause | Fix |
|---|---|---|
| Consultant Not Selected | User tries to proceed without choosing a consultant. | Select a consultant from the list. |
| Reason Not Selected | No visit reason chosen. | Select a reason of visit. |
| No Time Selected | Proceeding without a time slot. | Pick one of the available time slots. |
| Invalid Note Length | Note exceeds 3000 characters. | Shorten the note to meet character limits. |
| Submission Failed | Network/server error. | Retry after checking connection or contact support. |