Profile
Overview
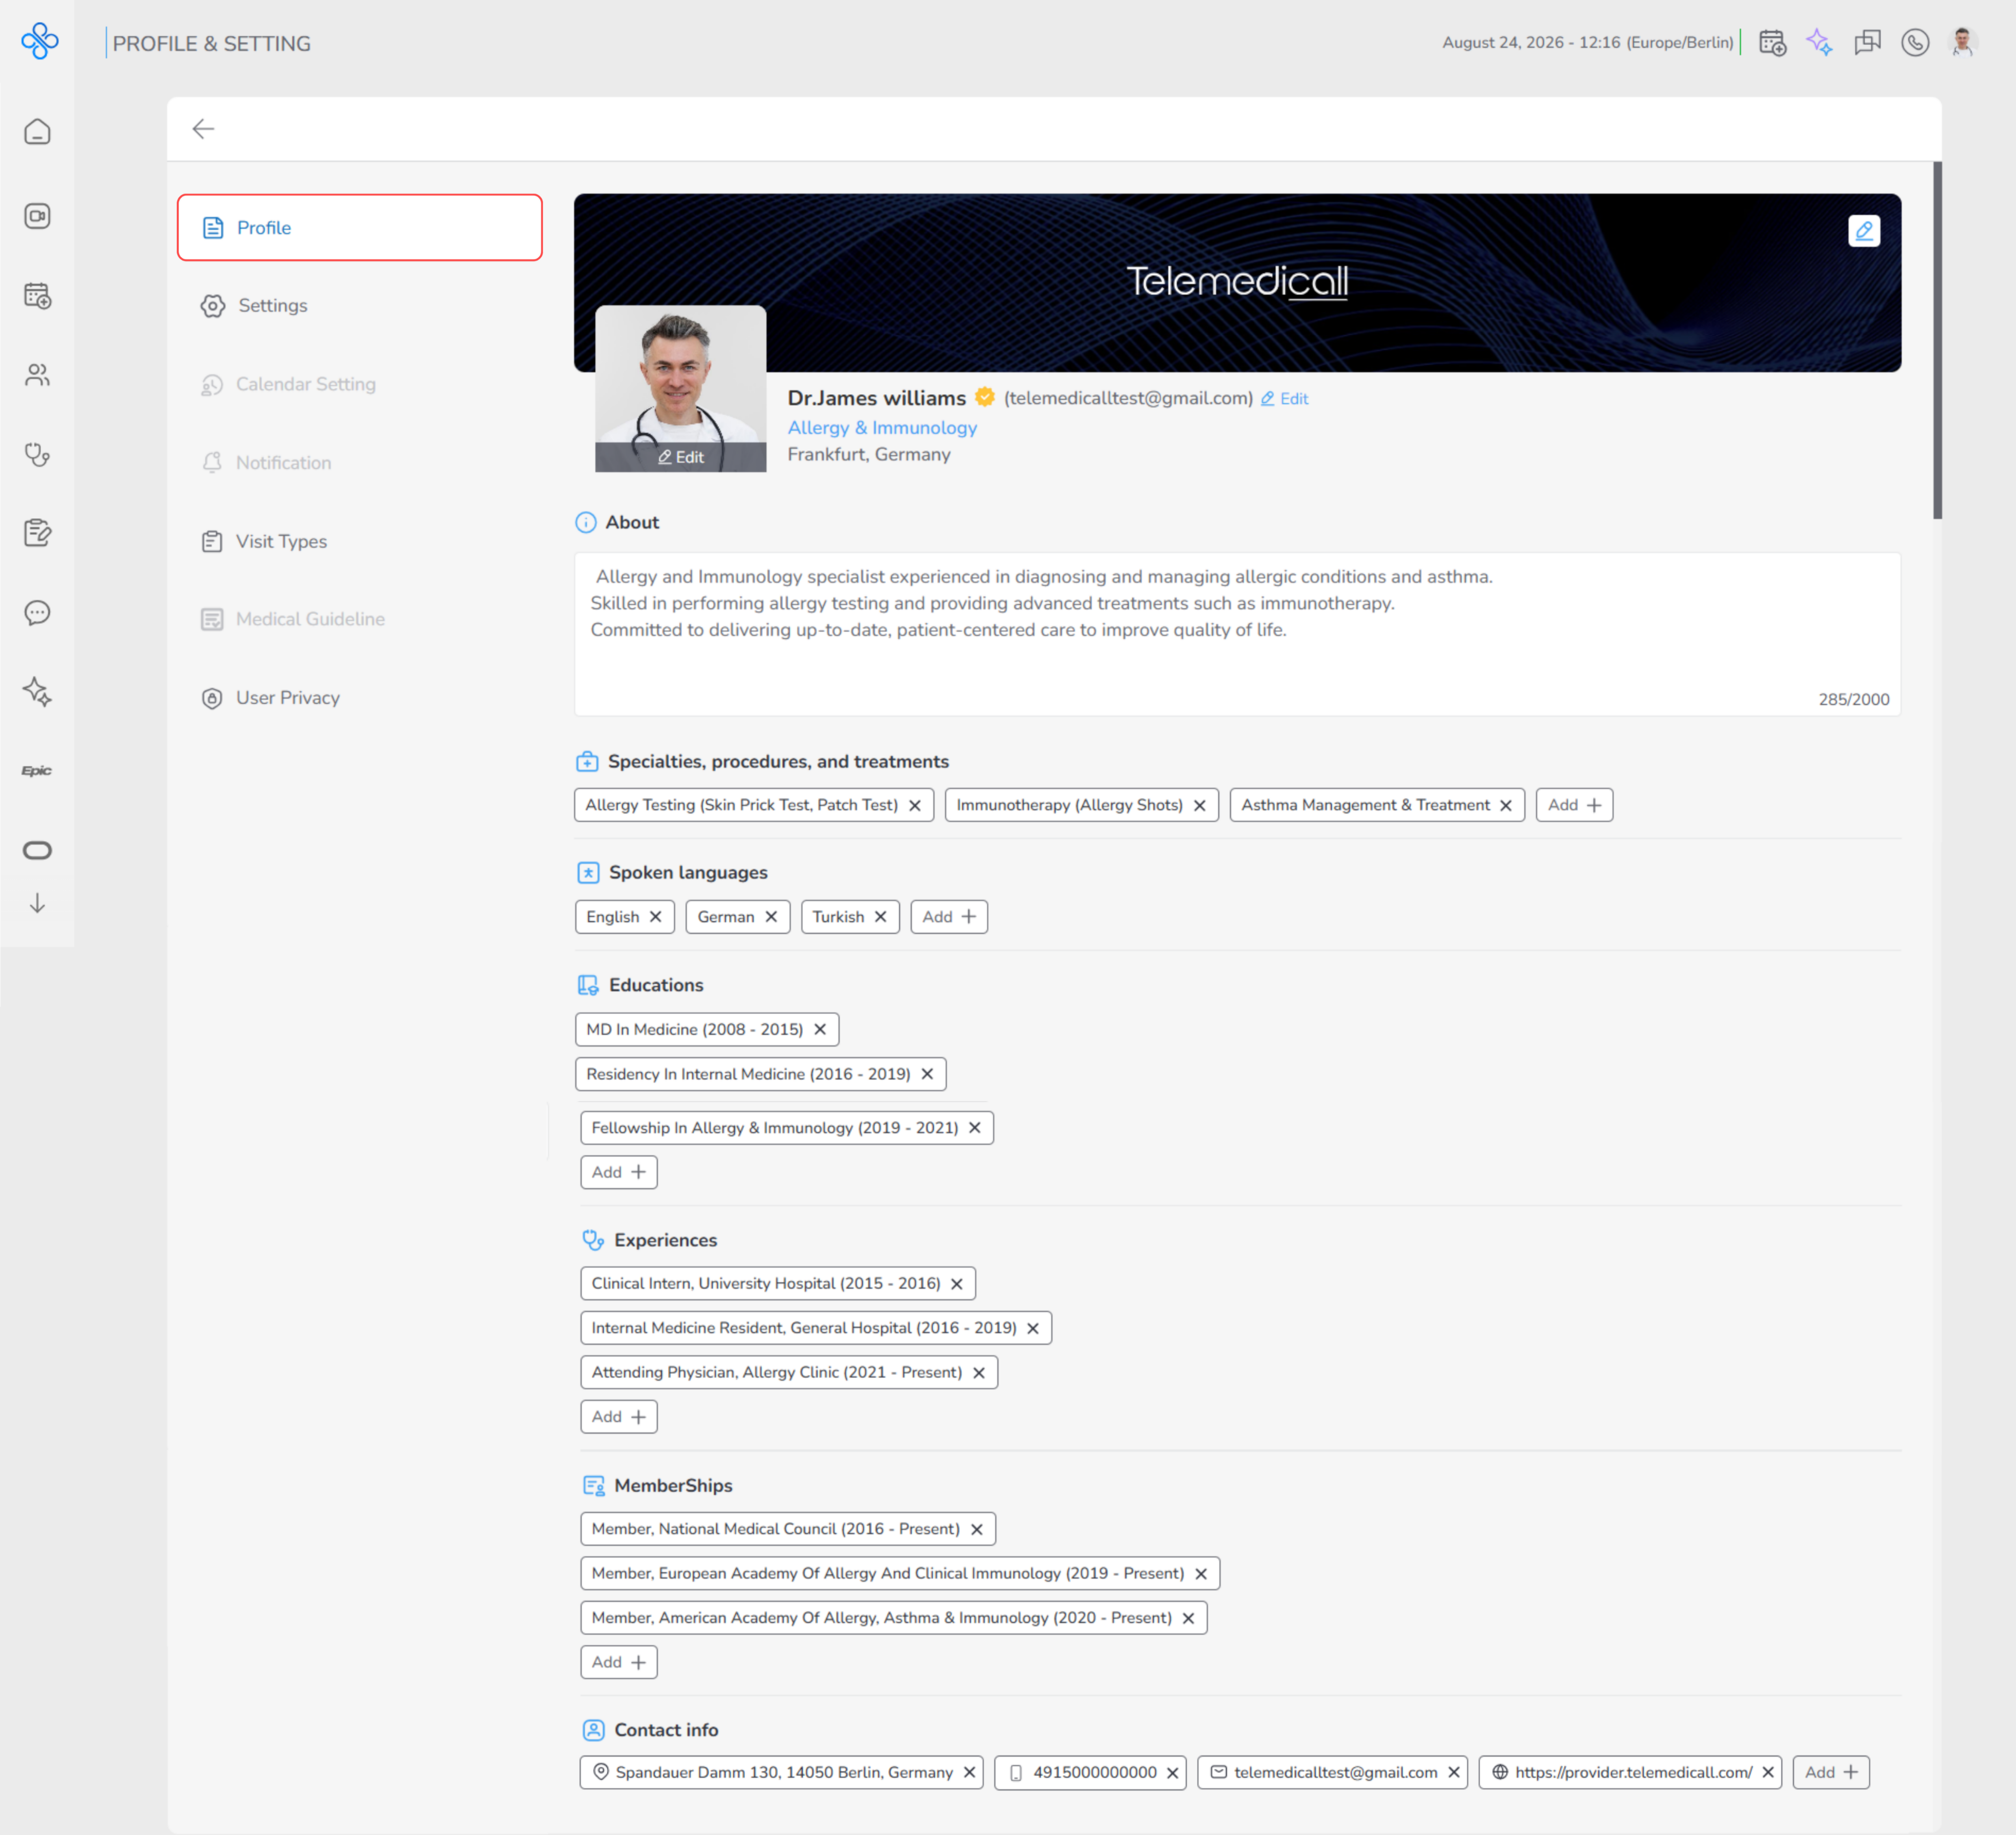
The Profile section is where you introduce yourself as a provider on the platform. It acts as your professional profile, helping other providers and patients understand who you are, what you specialize in, and how to contact you. In this section, you can manage your basic personal information, profile photo, specialties, spoken languages, education, work experience, memberships, and contact details. All information is displayed in a clear and structured format, and you can add, edit, or remove items at any time. It is recommended to start by completing your basic information and profile photo, then continue with your professional background such as specialties, education, and experience. This helps ensure your profile looks complete and trustworthy.
Steps
- Basic Information
In the Basic Information section, you can enter and update your basic personal and professional details, such as your name, title, gender, date of birth, location, occupation, and specialty. This information is displayed on your public provider profile and is visible to patients and other providers. Keeping these details accurate and up to date helps others better identify you and understand your professional background.
- How to add/edit basic information
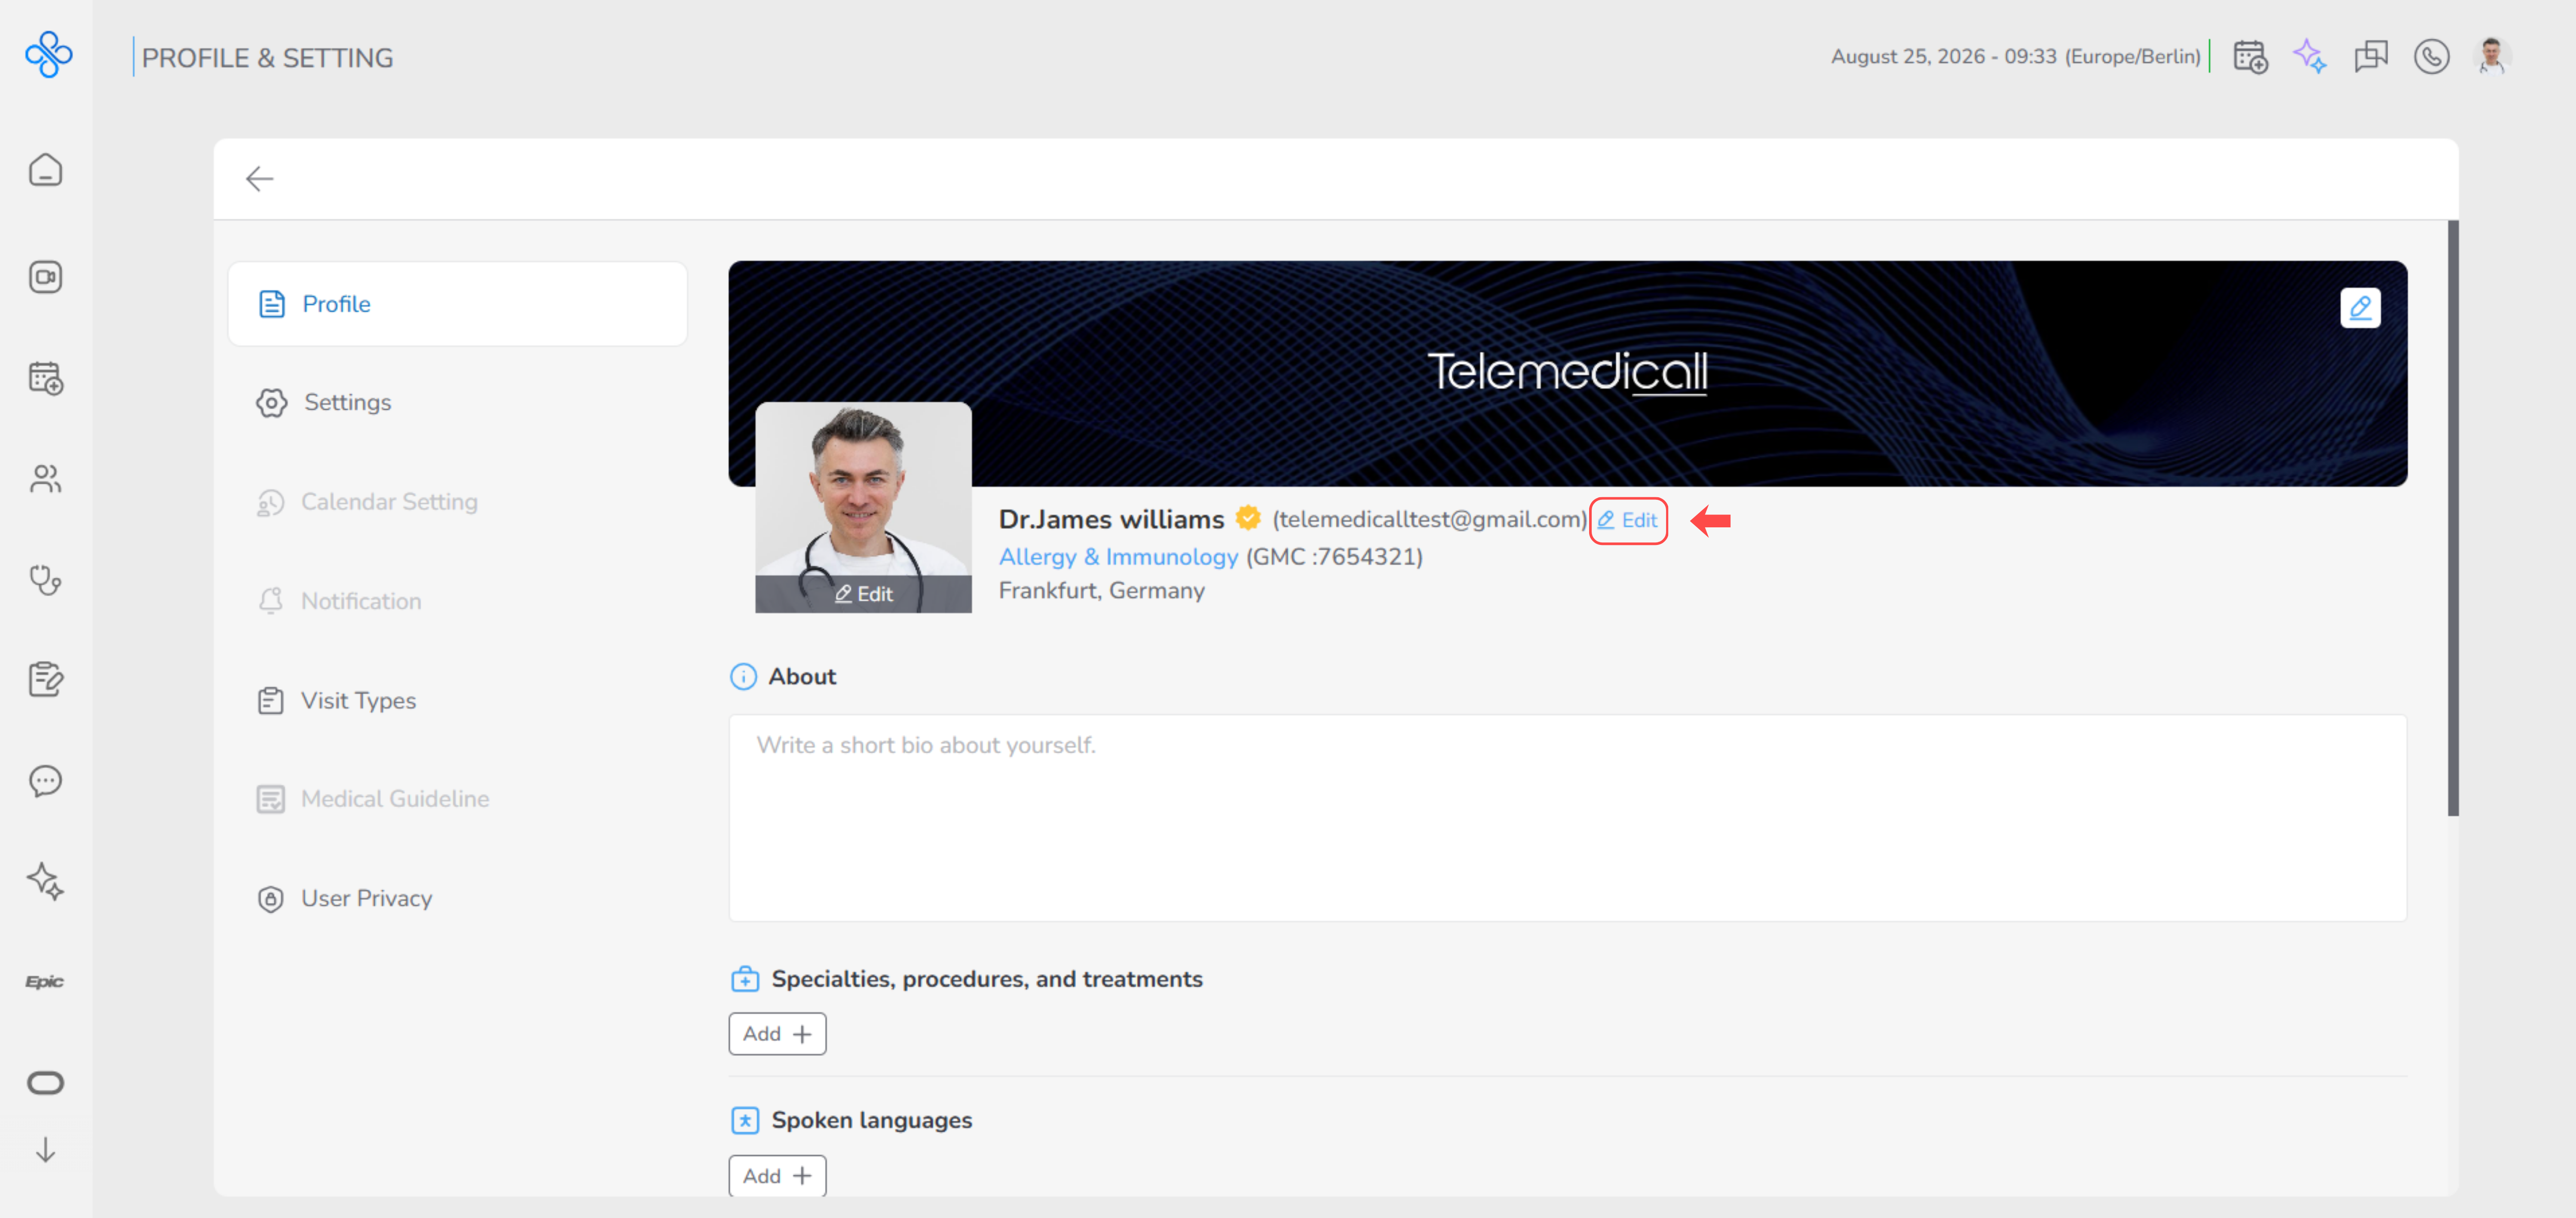
- Click the Edit button next to the provider’s name.
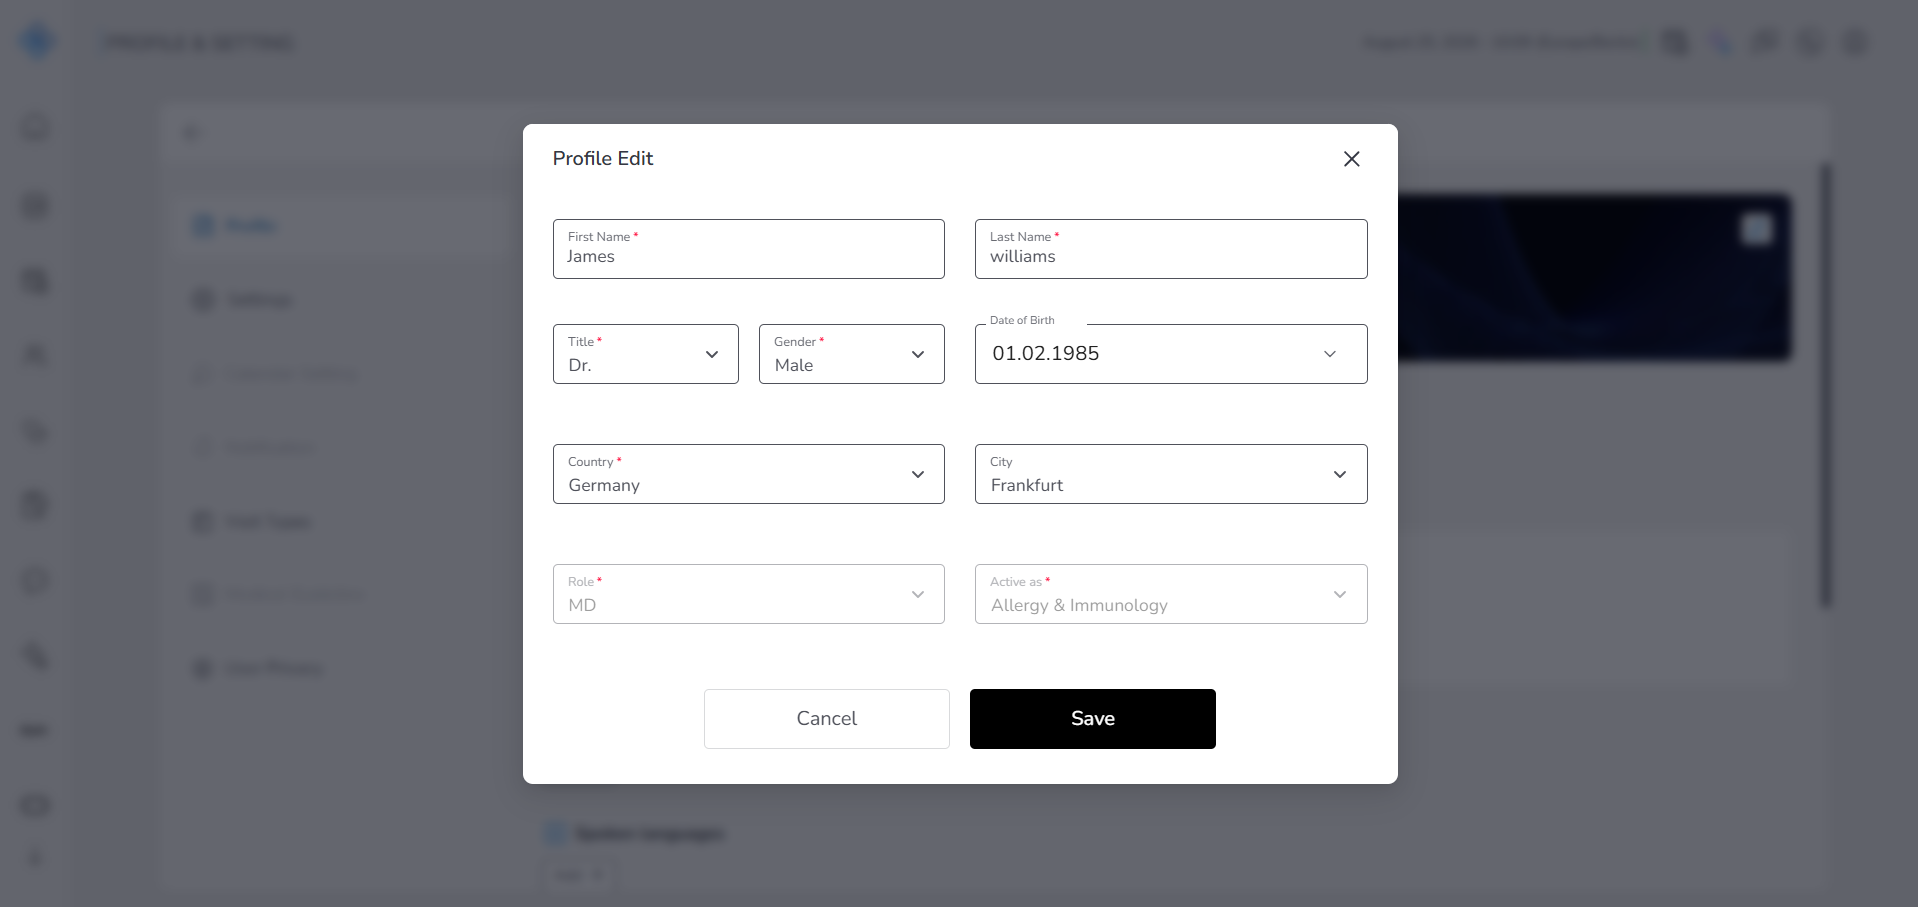
- A modal window opens containing required fields:
- First Name*
- Last Name*
- Title*
- Gender*
- Date of Birth*
- Country*
- City
- Role*
- Active as*
- Fill in details and click Save.
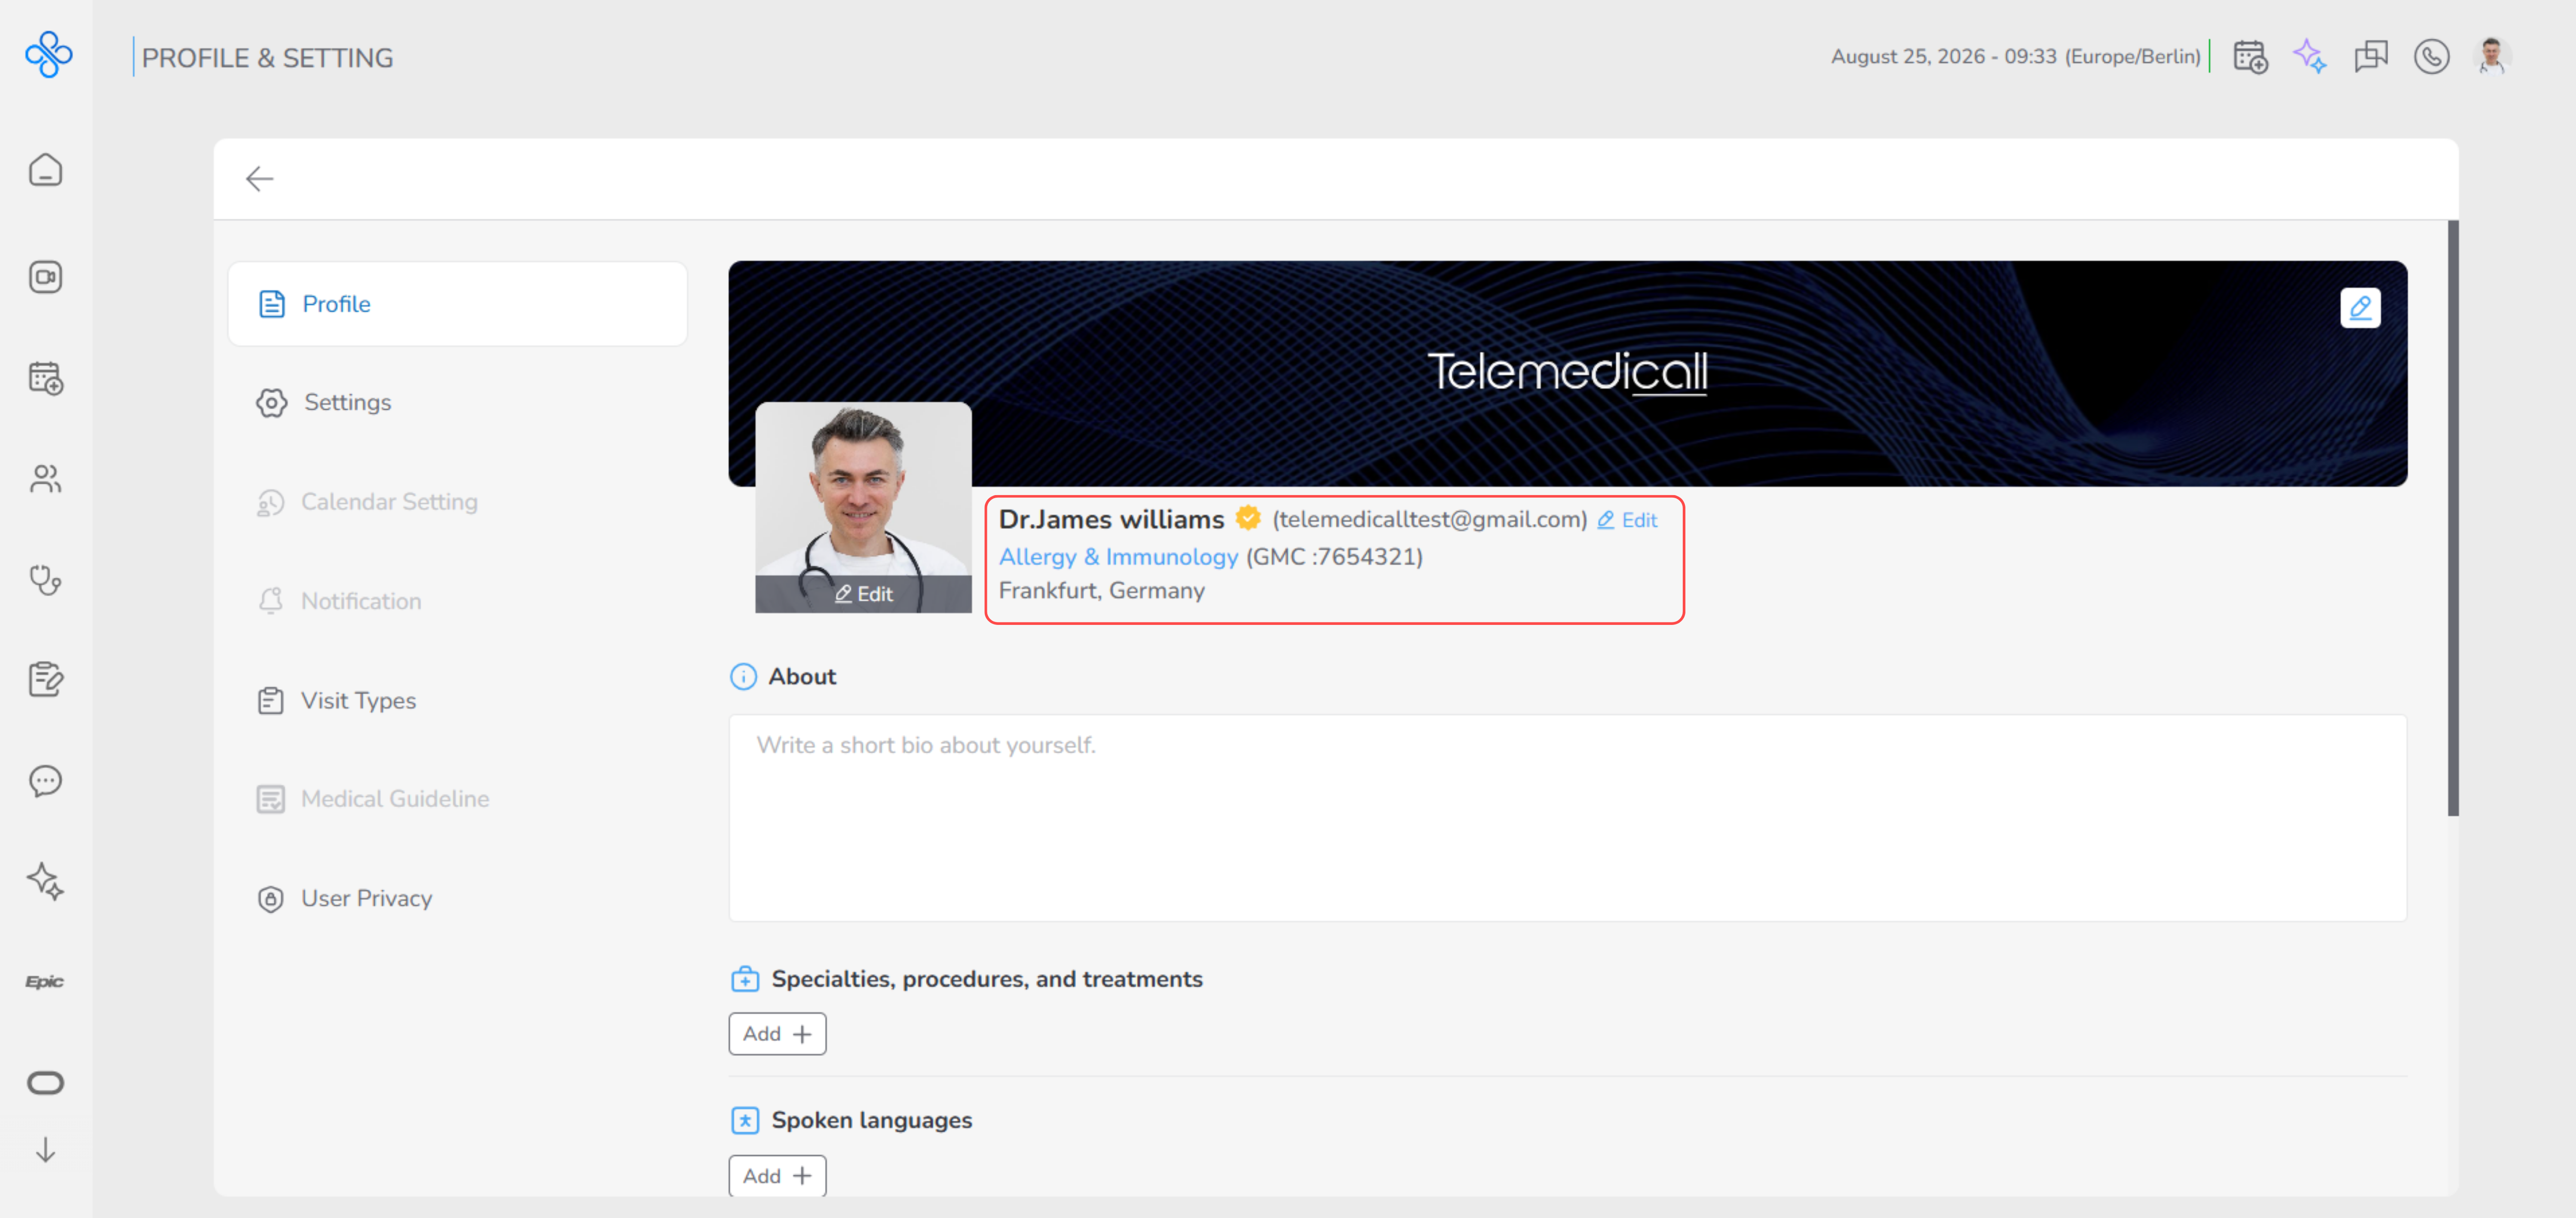
- After saving, the updated information will be displayed next to your name on your profile page
- Profile Photo / Banner
In the Profile Photo / Banner section, you can upload and edit your profile photo and banner image. These images are shown on your public provider profile and help create a more professional and welcoming first impression for patients and other providers. Keeping your photos clear and up to date makes your profile more recognizable and trustworthy.
- How to add/edit Profile Photo / Banner
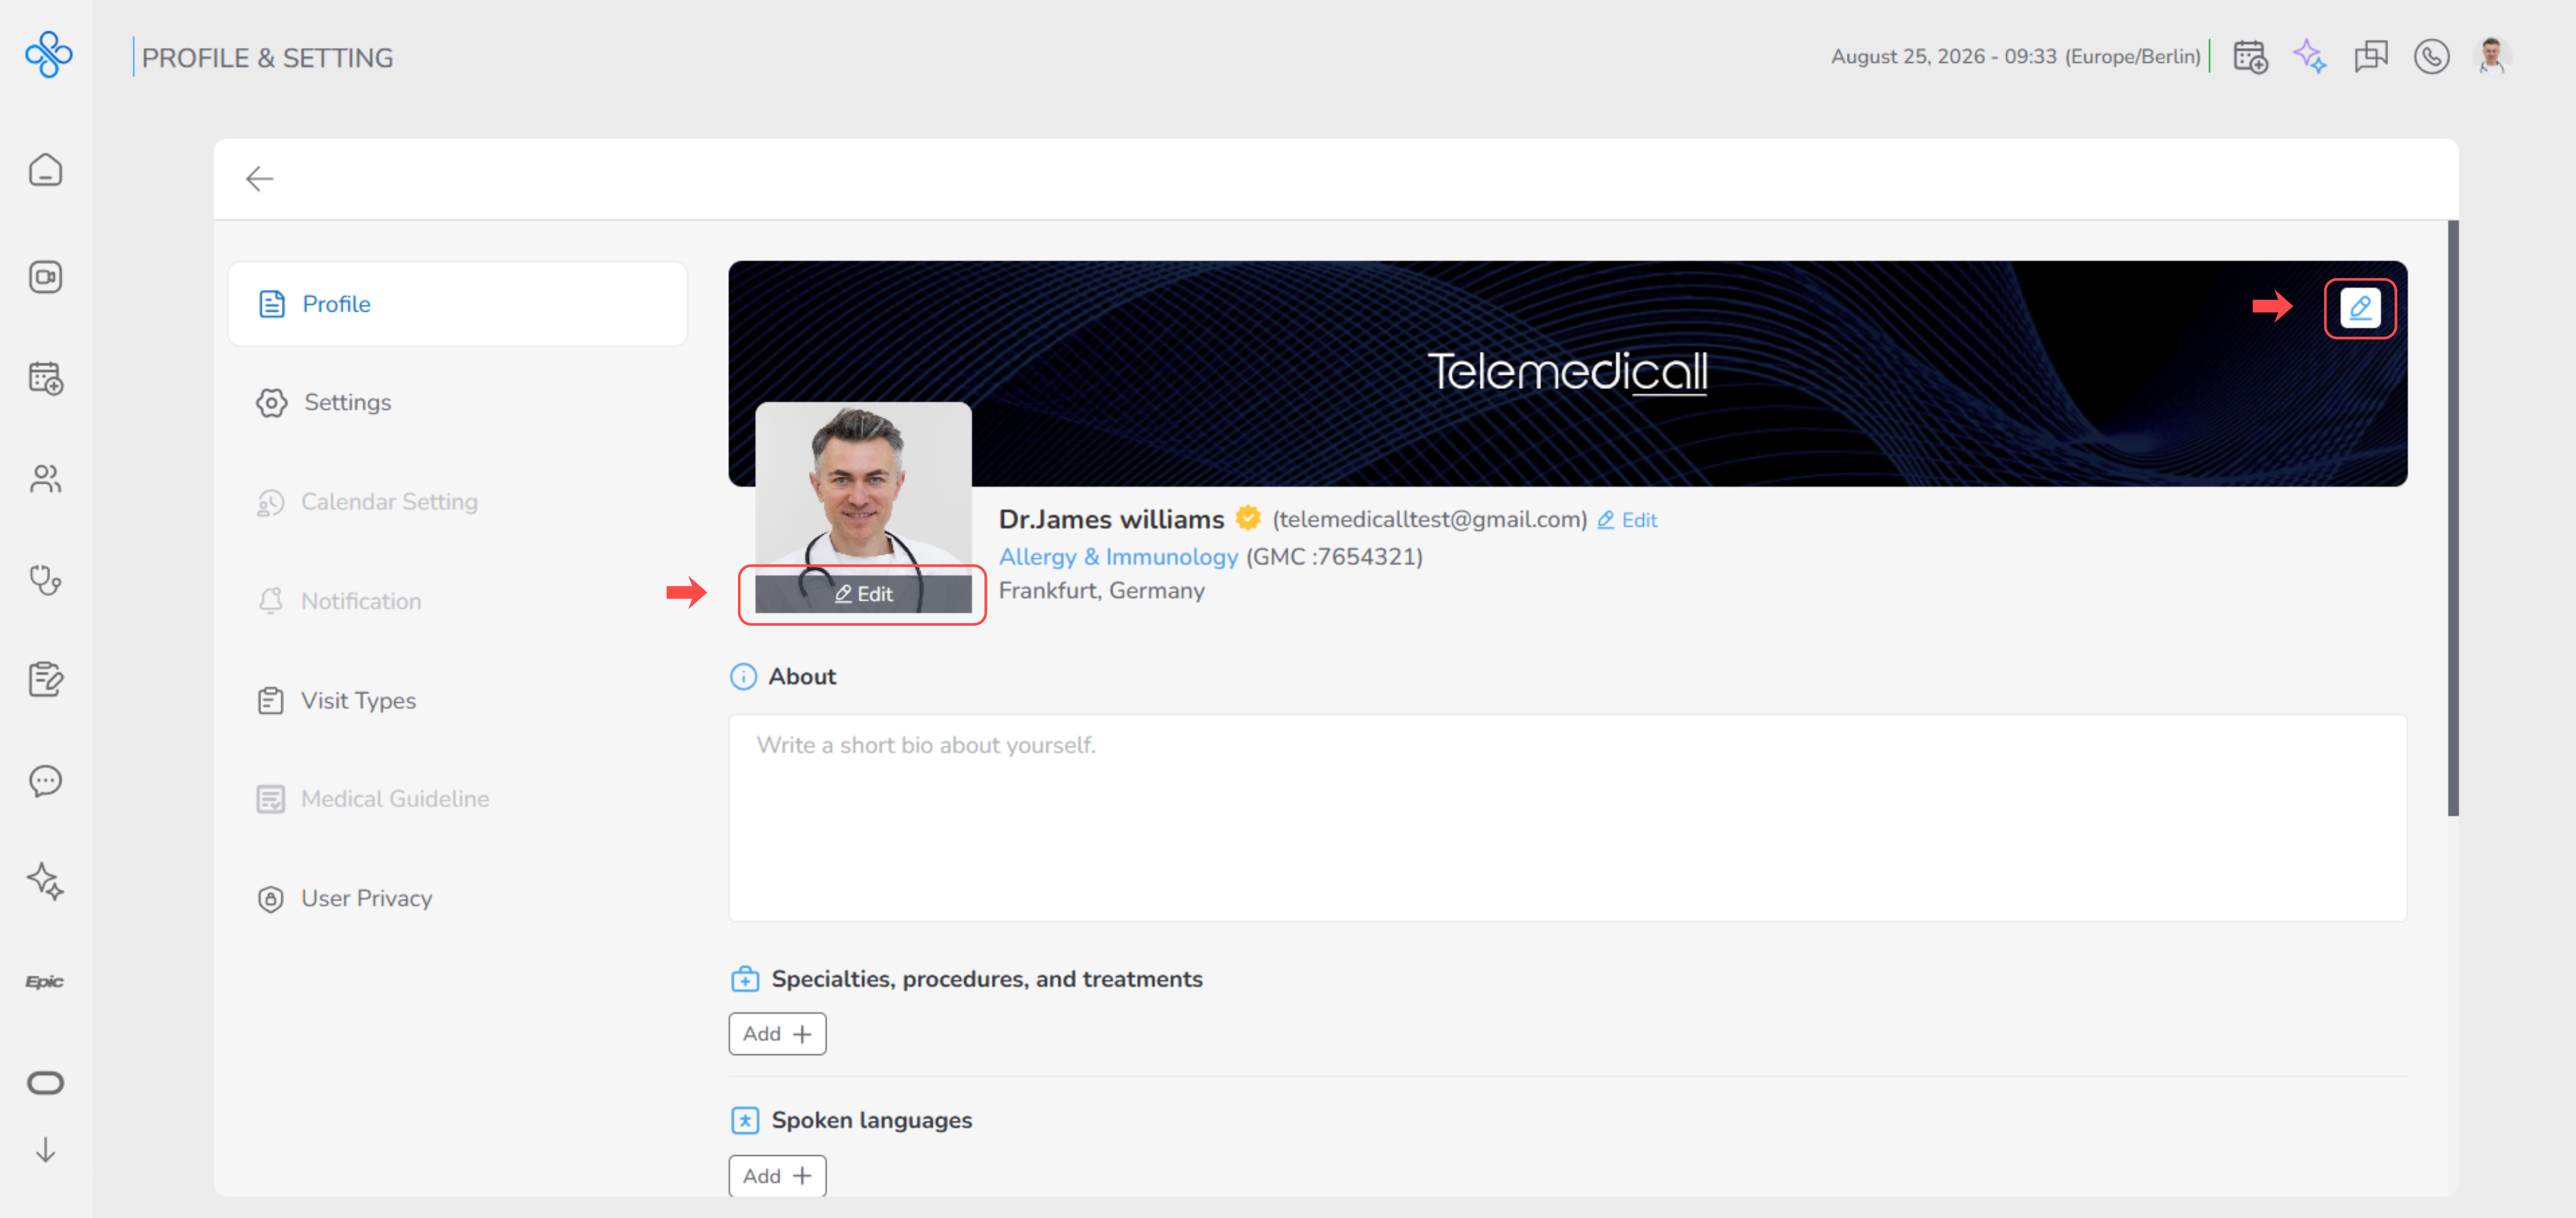
- Hover over the profile photo or banner.
- Click the Edit on the profile photo to update your profile picture, or click the Edit (pencil icon) on the banner to edit the banner image.
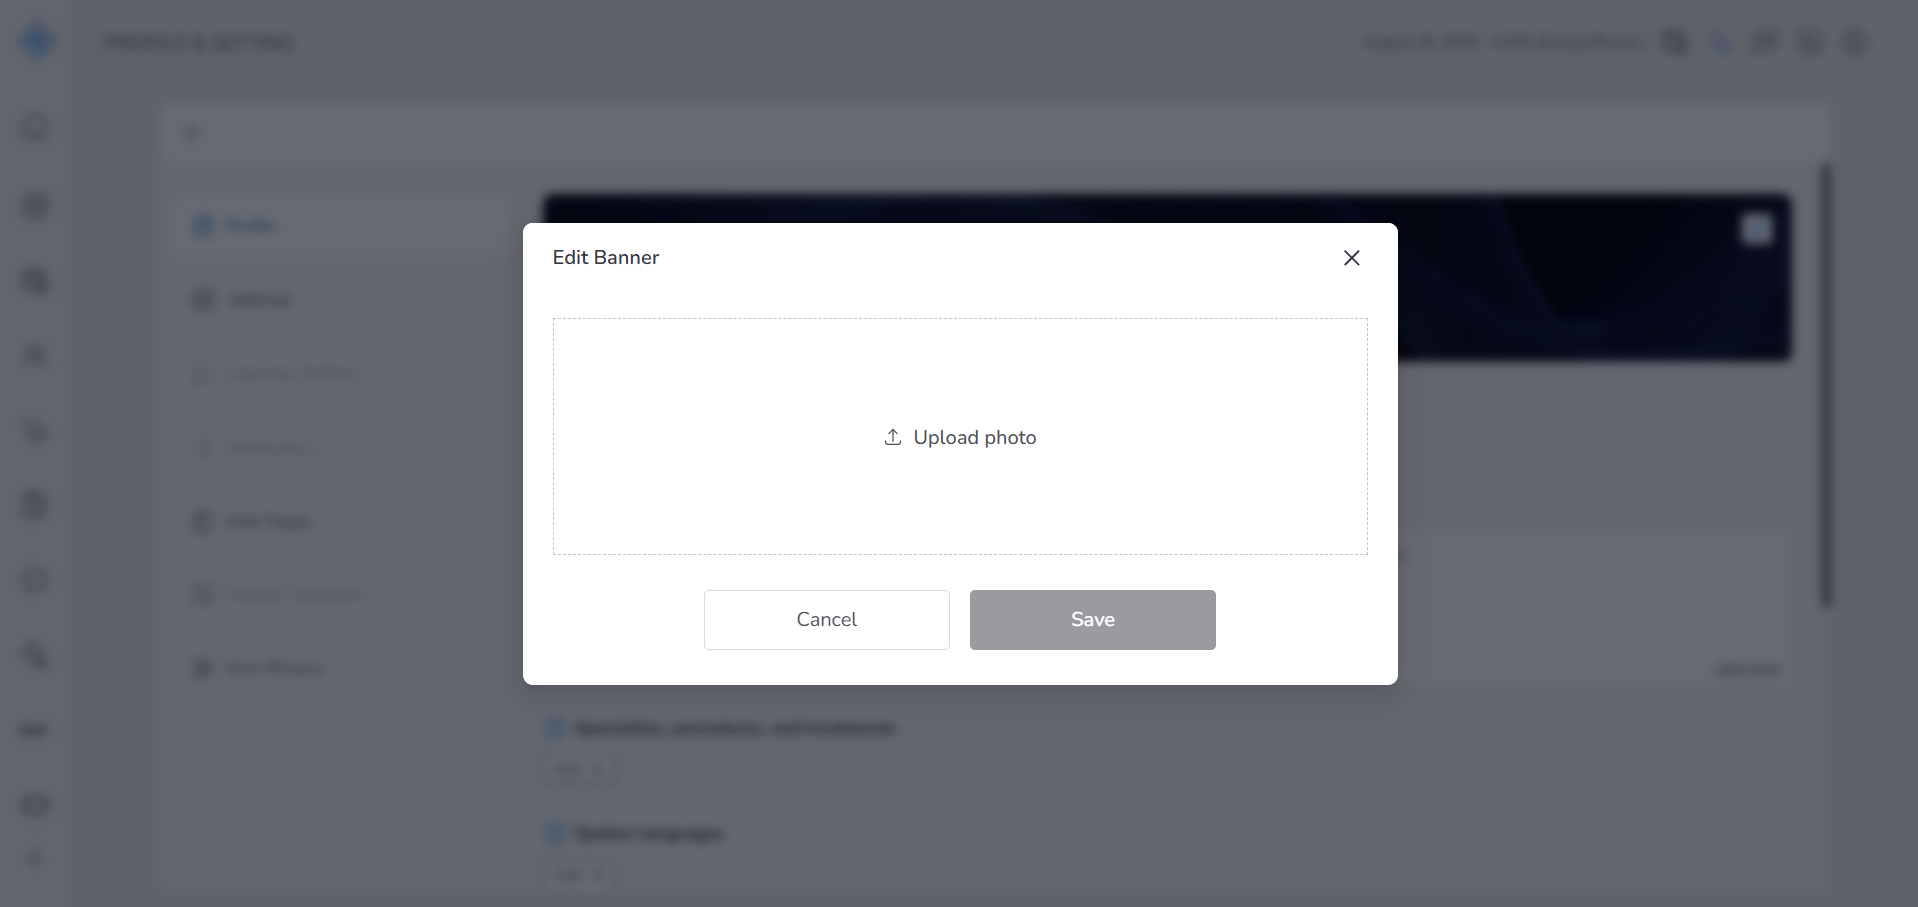
- A dedicated Edit Photo modal opens.
- Click Upload Photo to select and upload an image from your device.
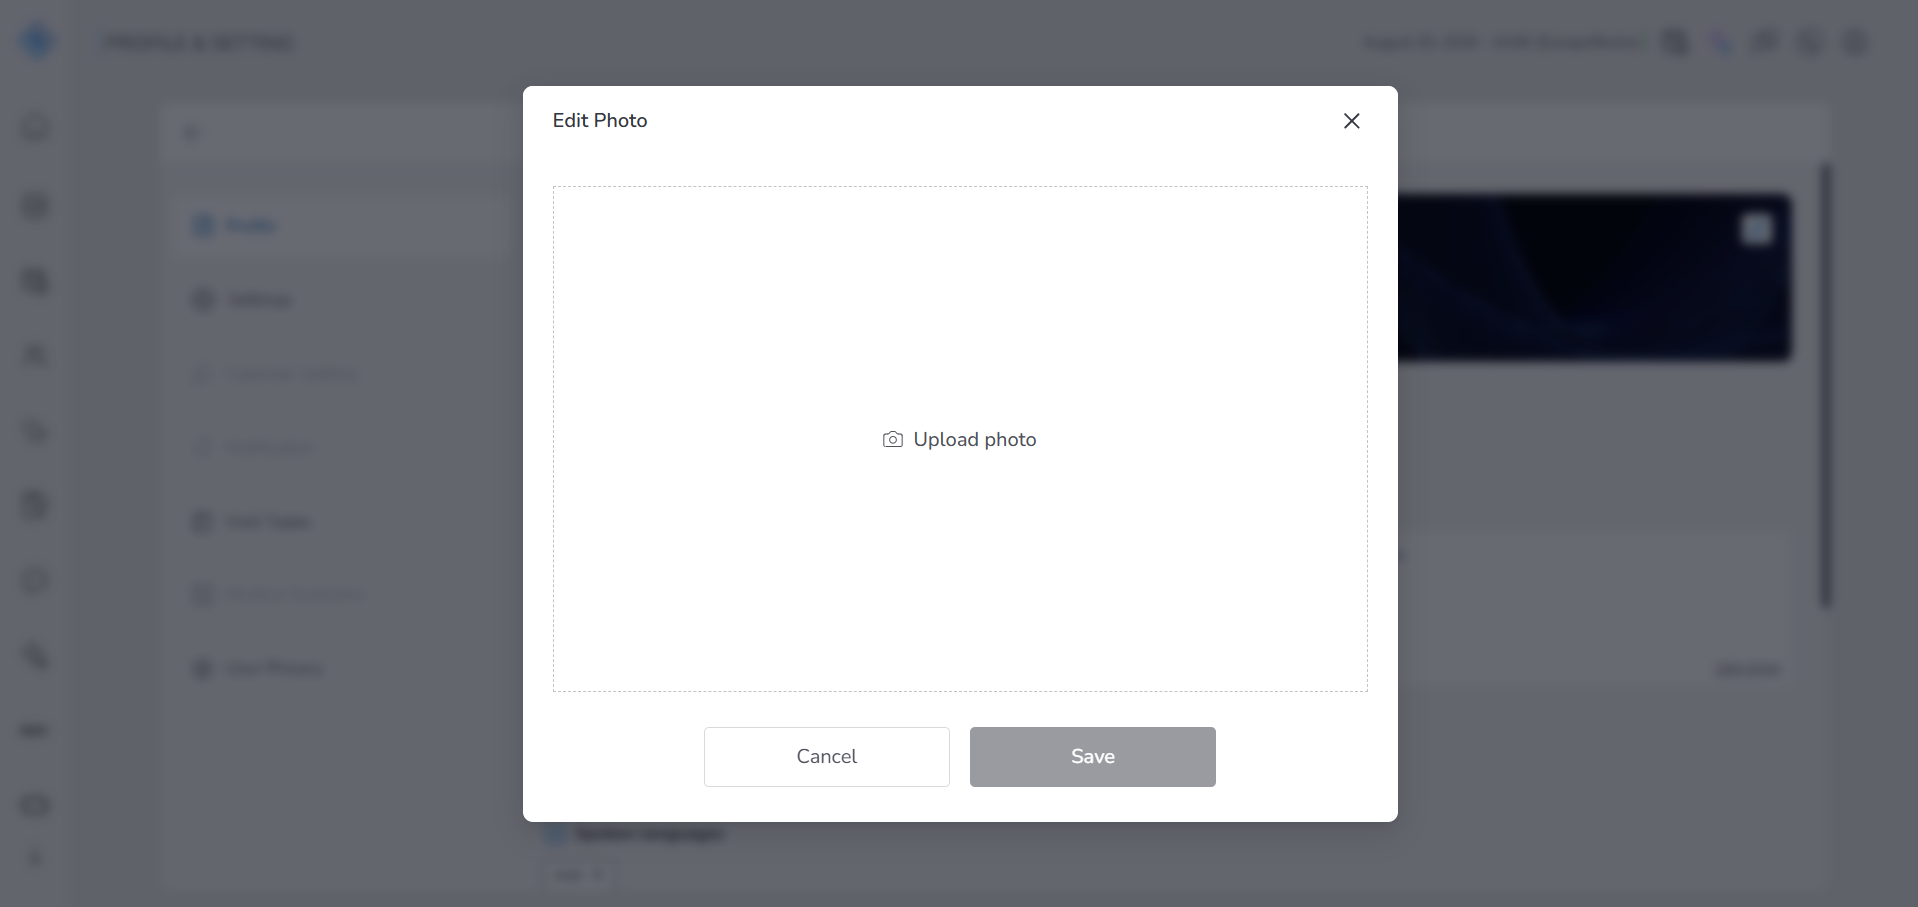
- After uploading, you can:
- Crop the image to adjust how it appears.
- Upload a new image using the Upload (upward arrow) icon at the top of the modal.
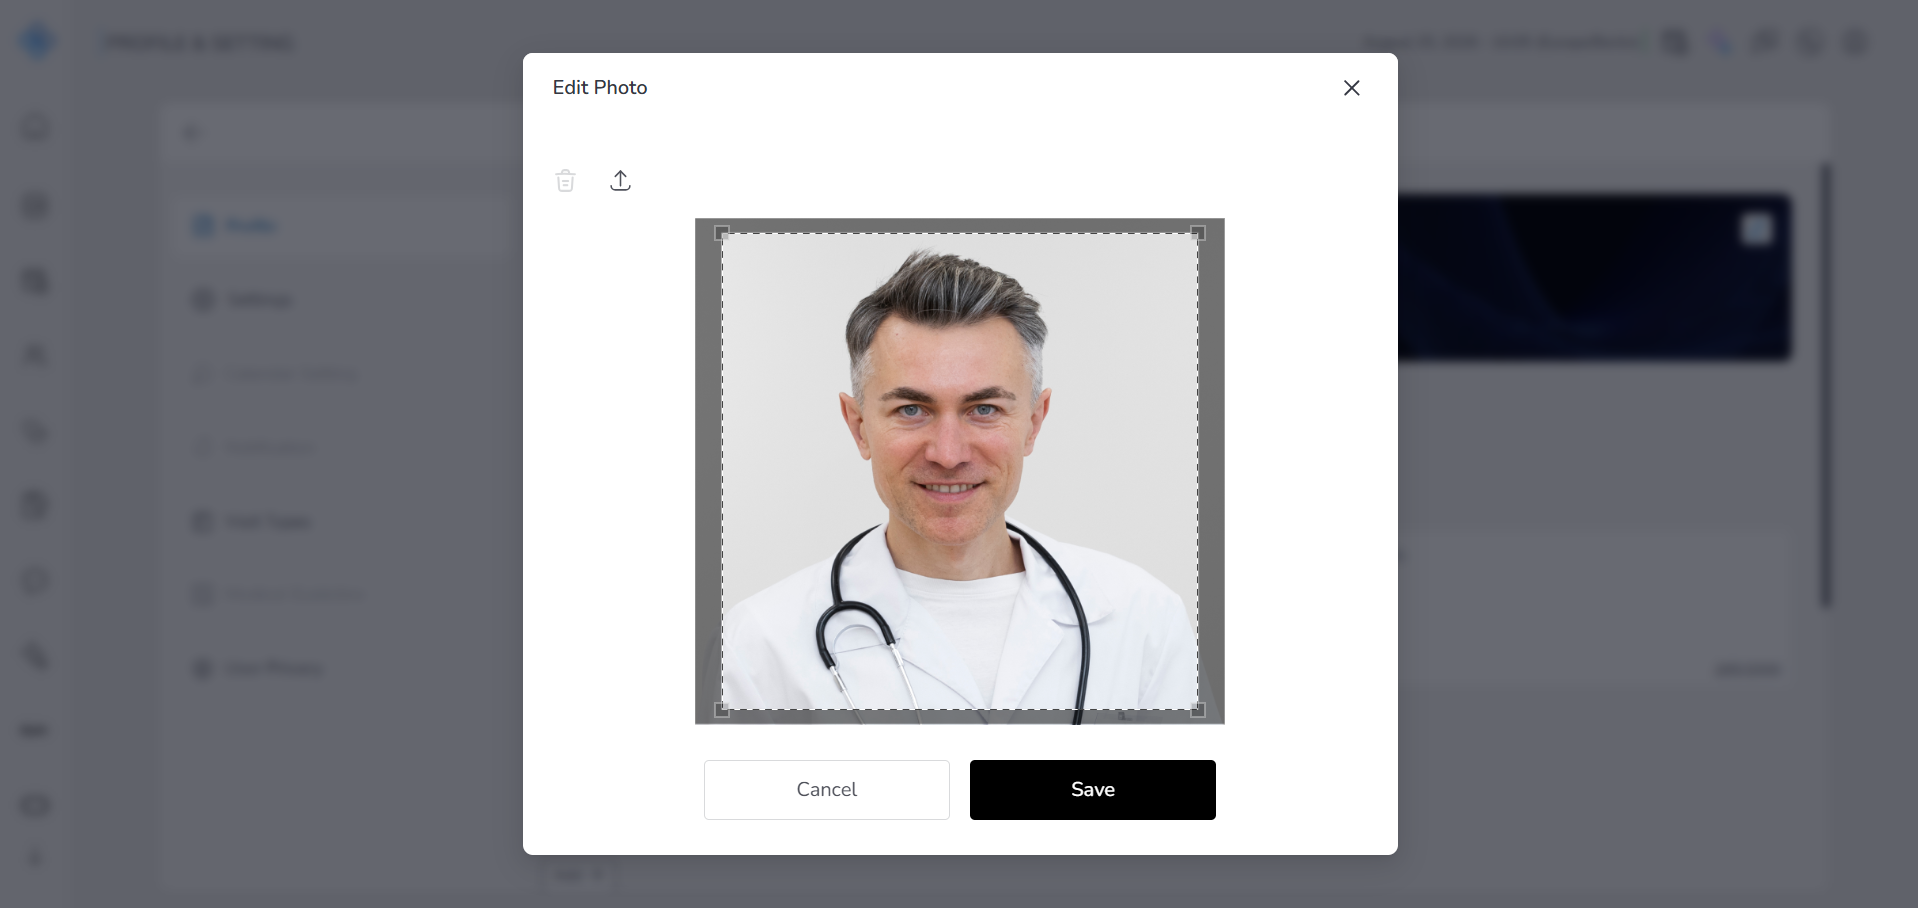
Once satisfied, save your changes to update your profile photo or banner.
Replace or Remove an Existing Photo
- To change or remove an existing photo, click the Edit button again
- (or the pencil icon for the banner).
-
The Edit Photo modal opens again.
- Inside the modal:
- Click the Delete (trash) icon to remove the current photo.
- Click the Upload (upward arrow) icon to upload a new image.
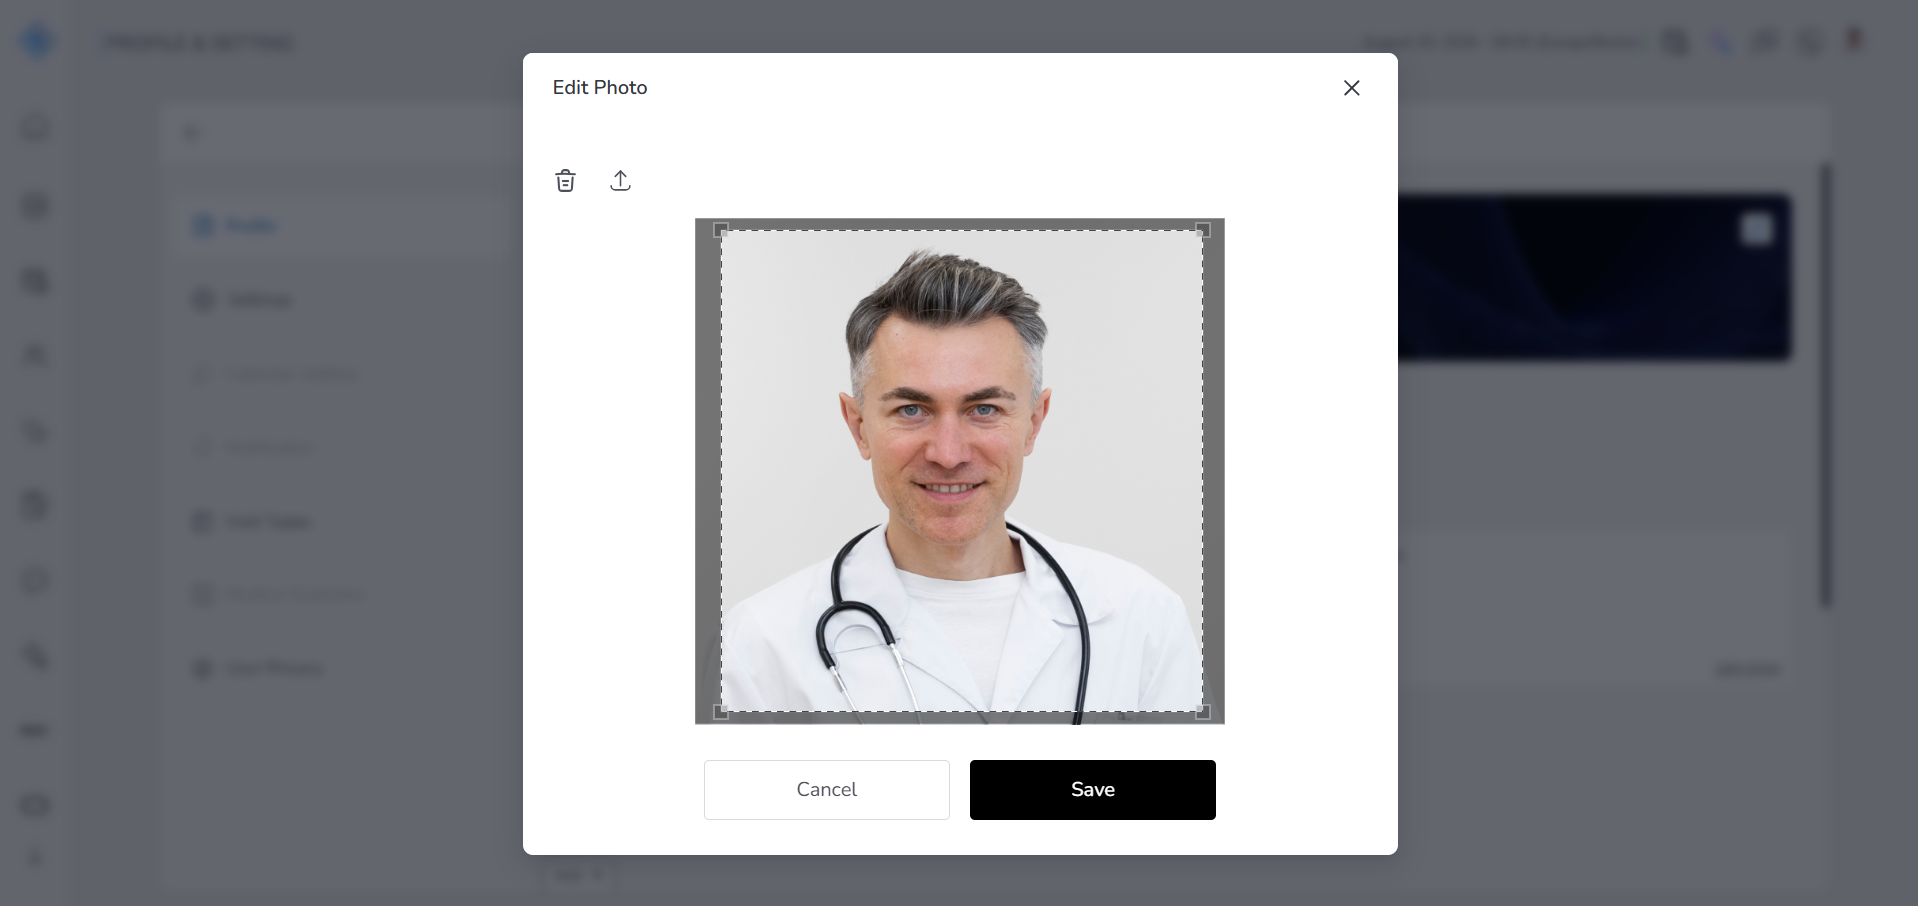
- Inside the modal:
-
Crop the image as needed and click Save to apply the changes.
-
About Section
In the About section, you can introduce yourself and share information about your background, experience, and the way you work. This description is shown on your public provider profile and helps patients and other providers get to know you better. A clear and friendly About section builds trust and makes it easier for others to connect with you or book an appointment.
- How to fill about field:
- Click on the About field to write or update your personal description.
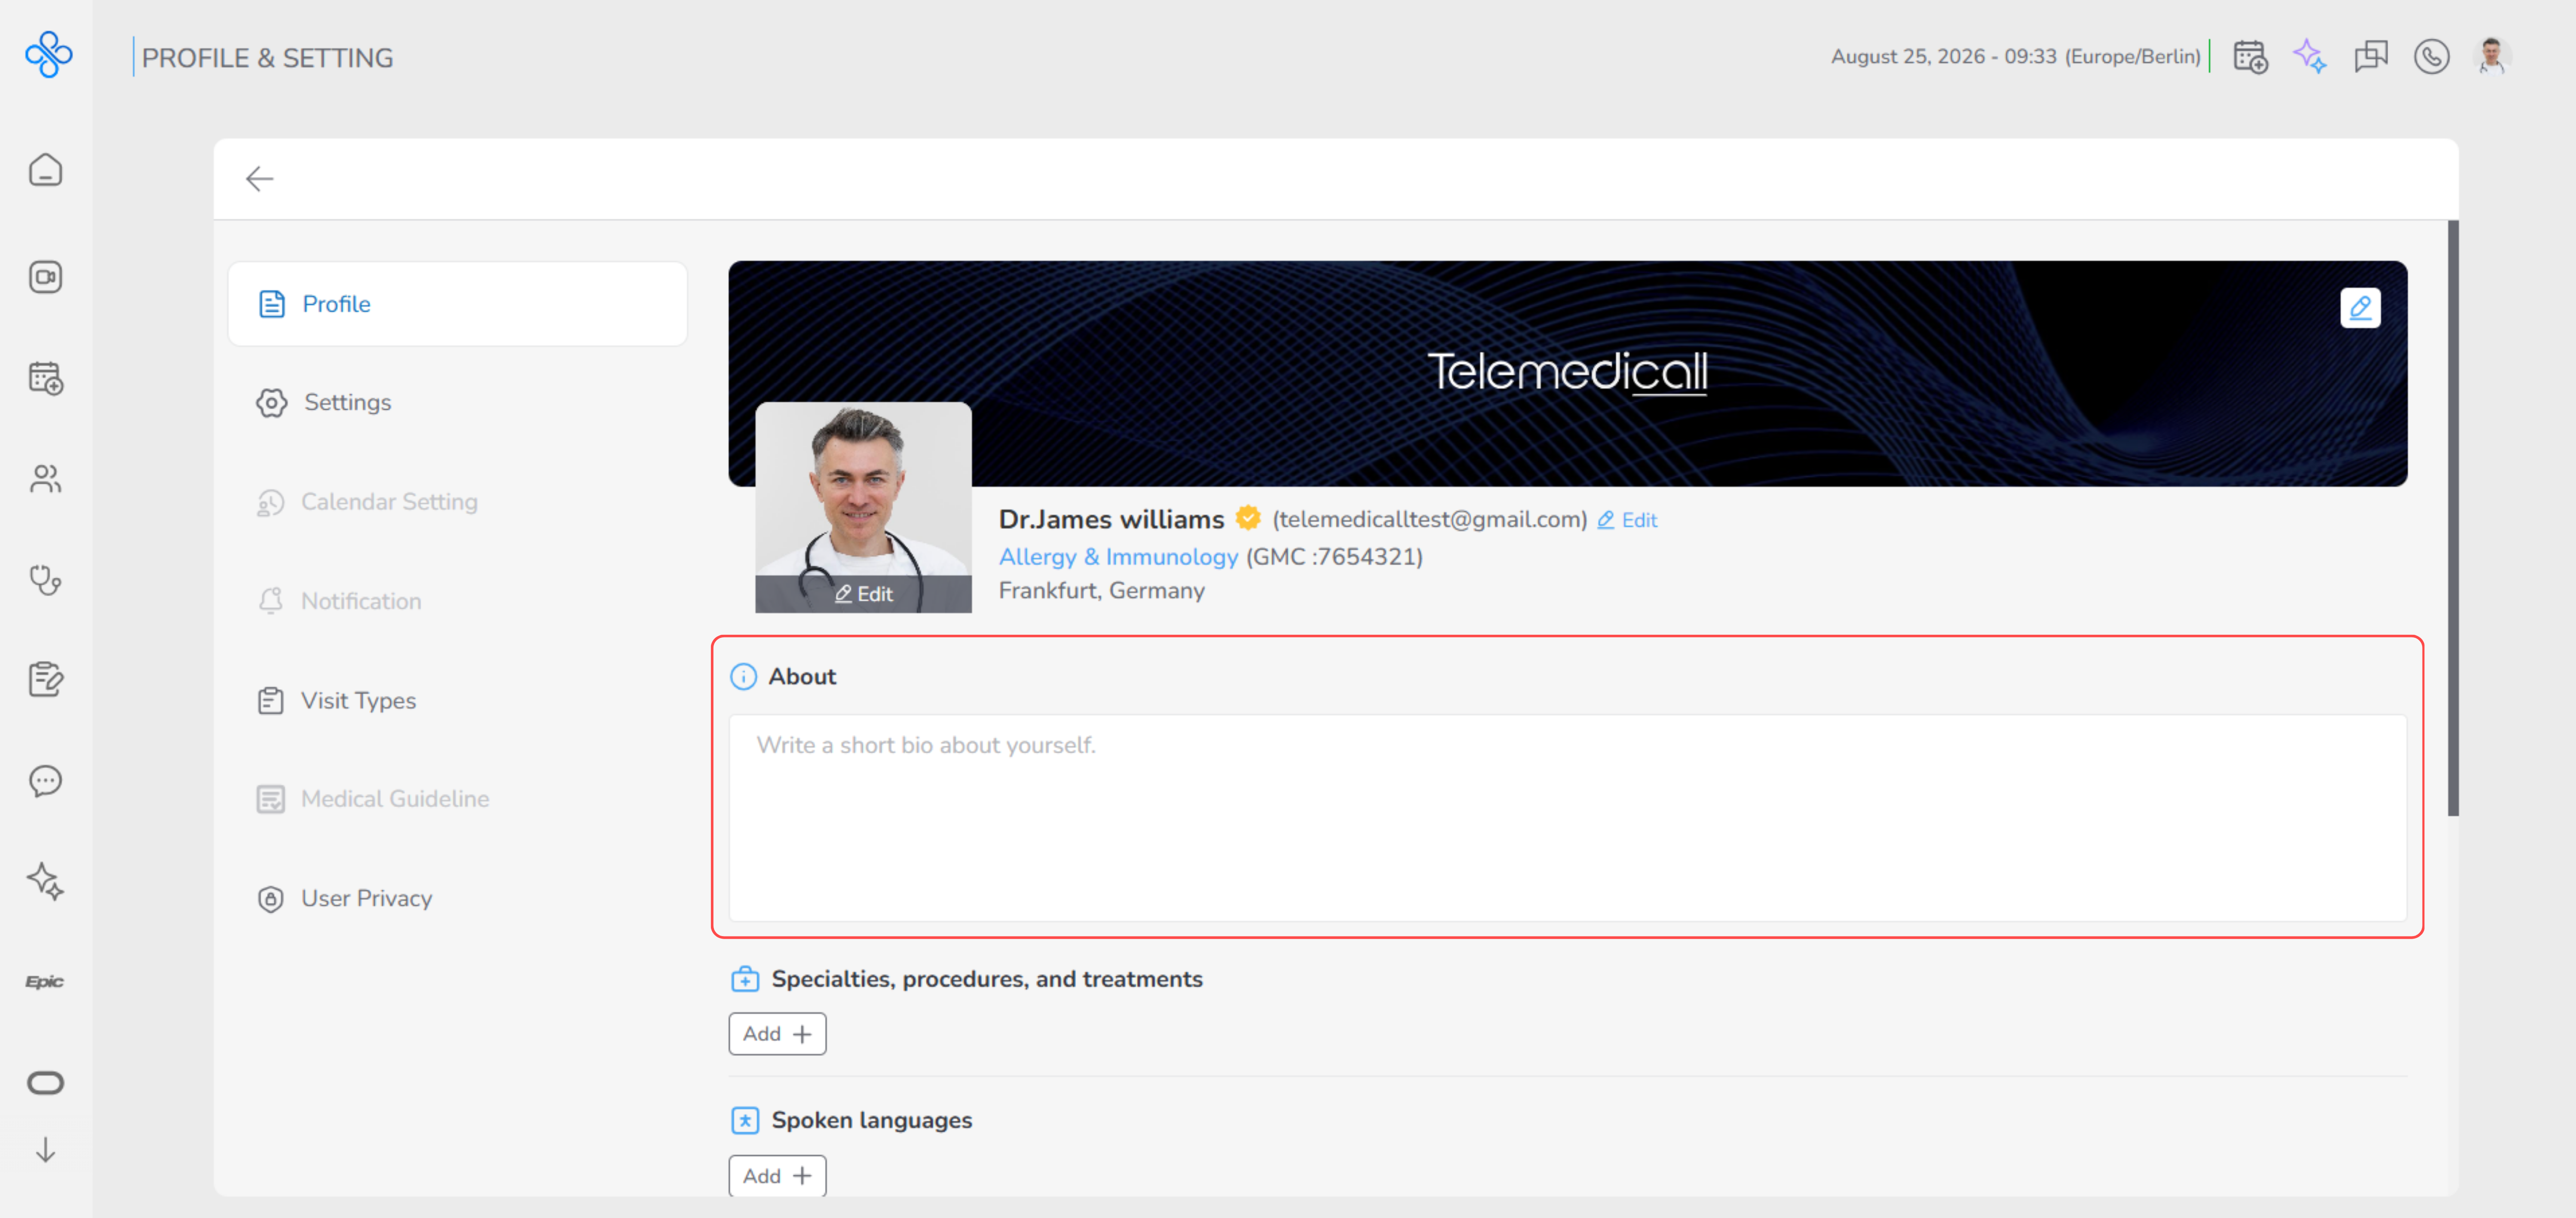
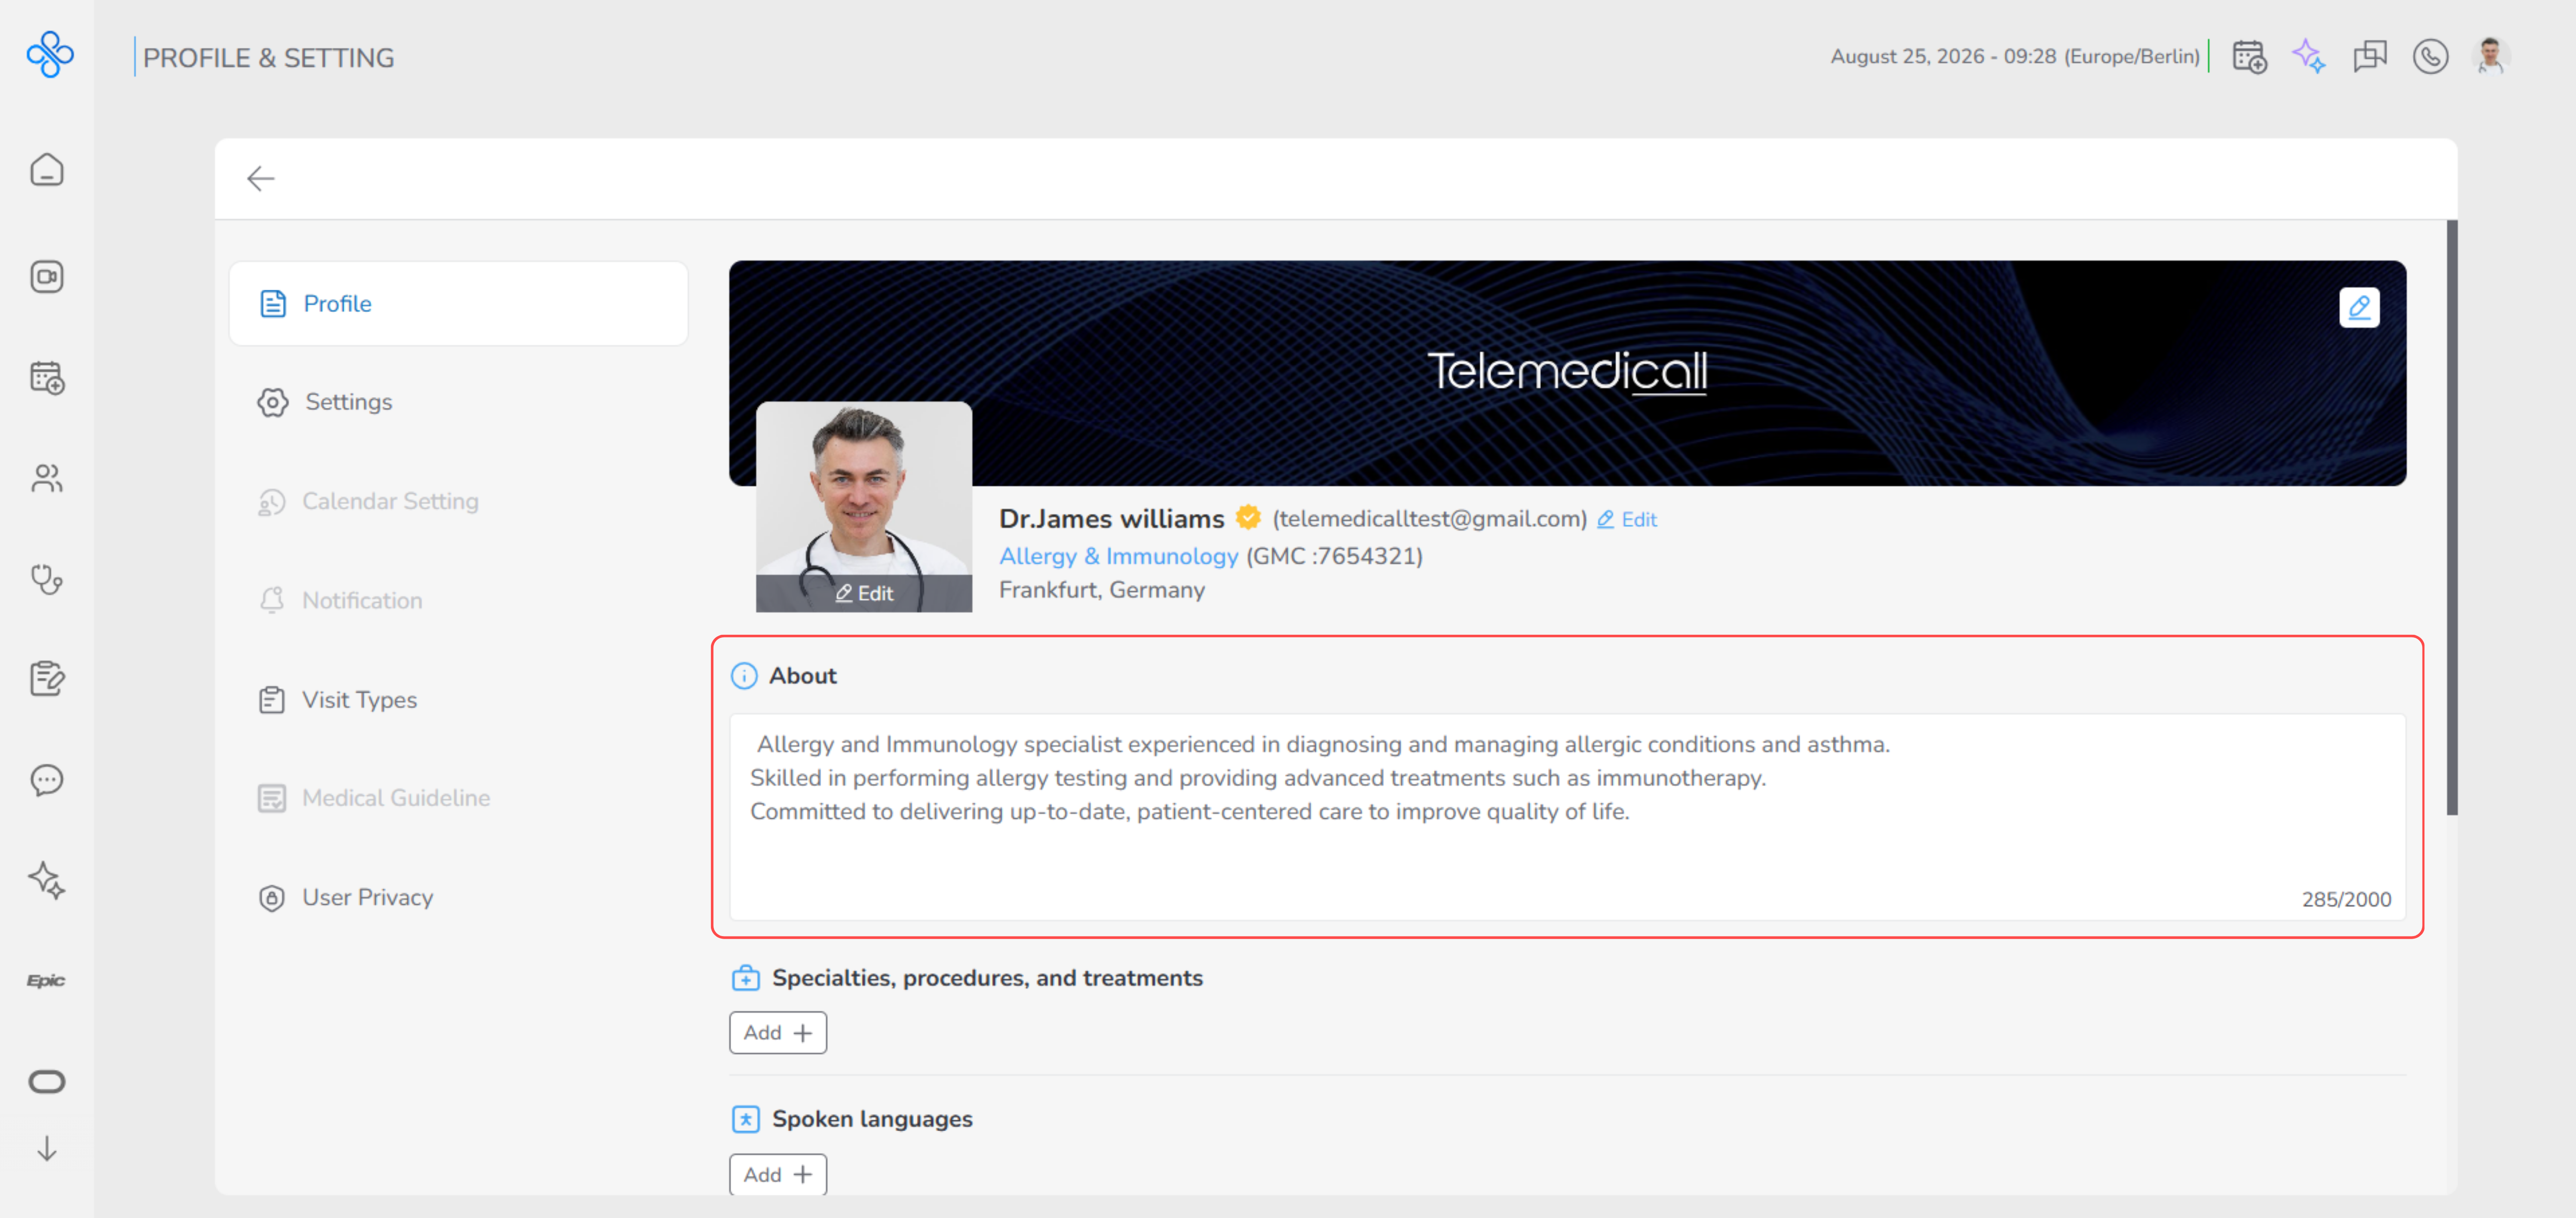
- In this section, you can briefly describe:
- Your expertise
- Your main areas of focus
- Your professional approach to care
-
All changes in this section are saved automatically, so there is no need to click a Save button.
-
Specialties, Procedures, and Treatments
This section allows you to add your medical specialties, procedures, and treatments so others can clearly understand what services you provide.
- How to add items:
- In the Specialties, Procedures, and Treatments section, click the Add + button.
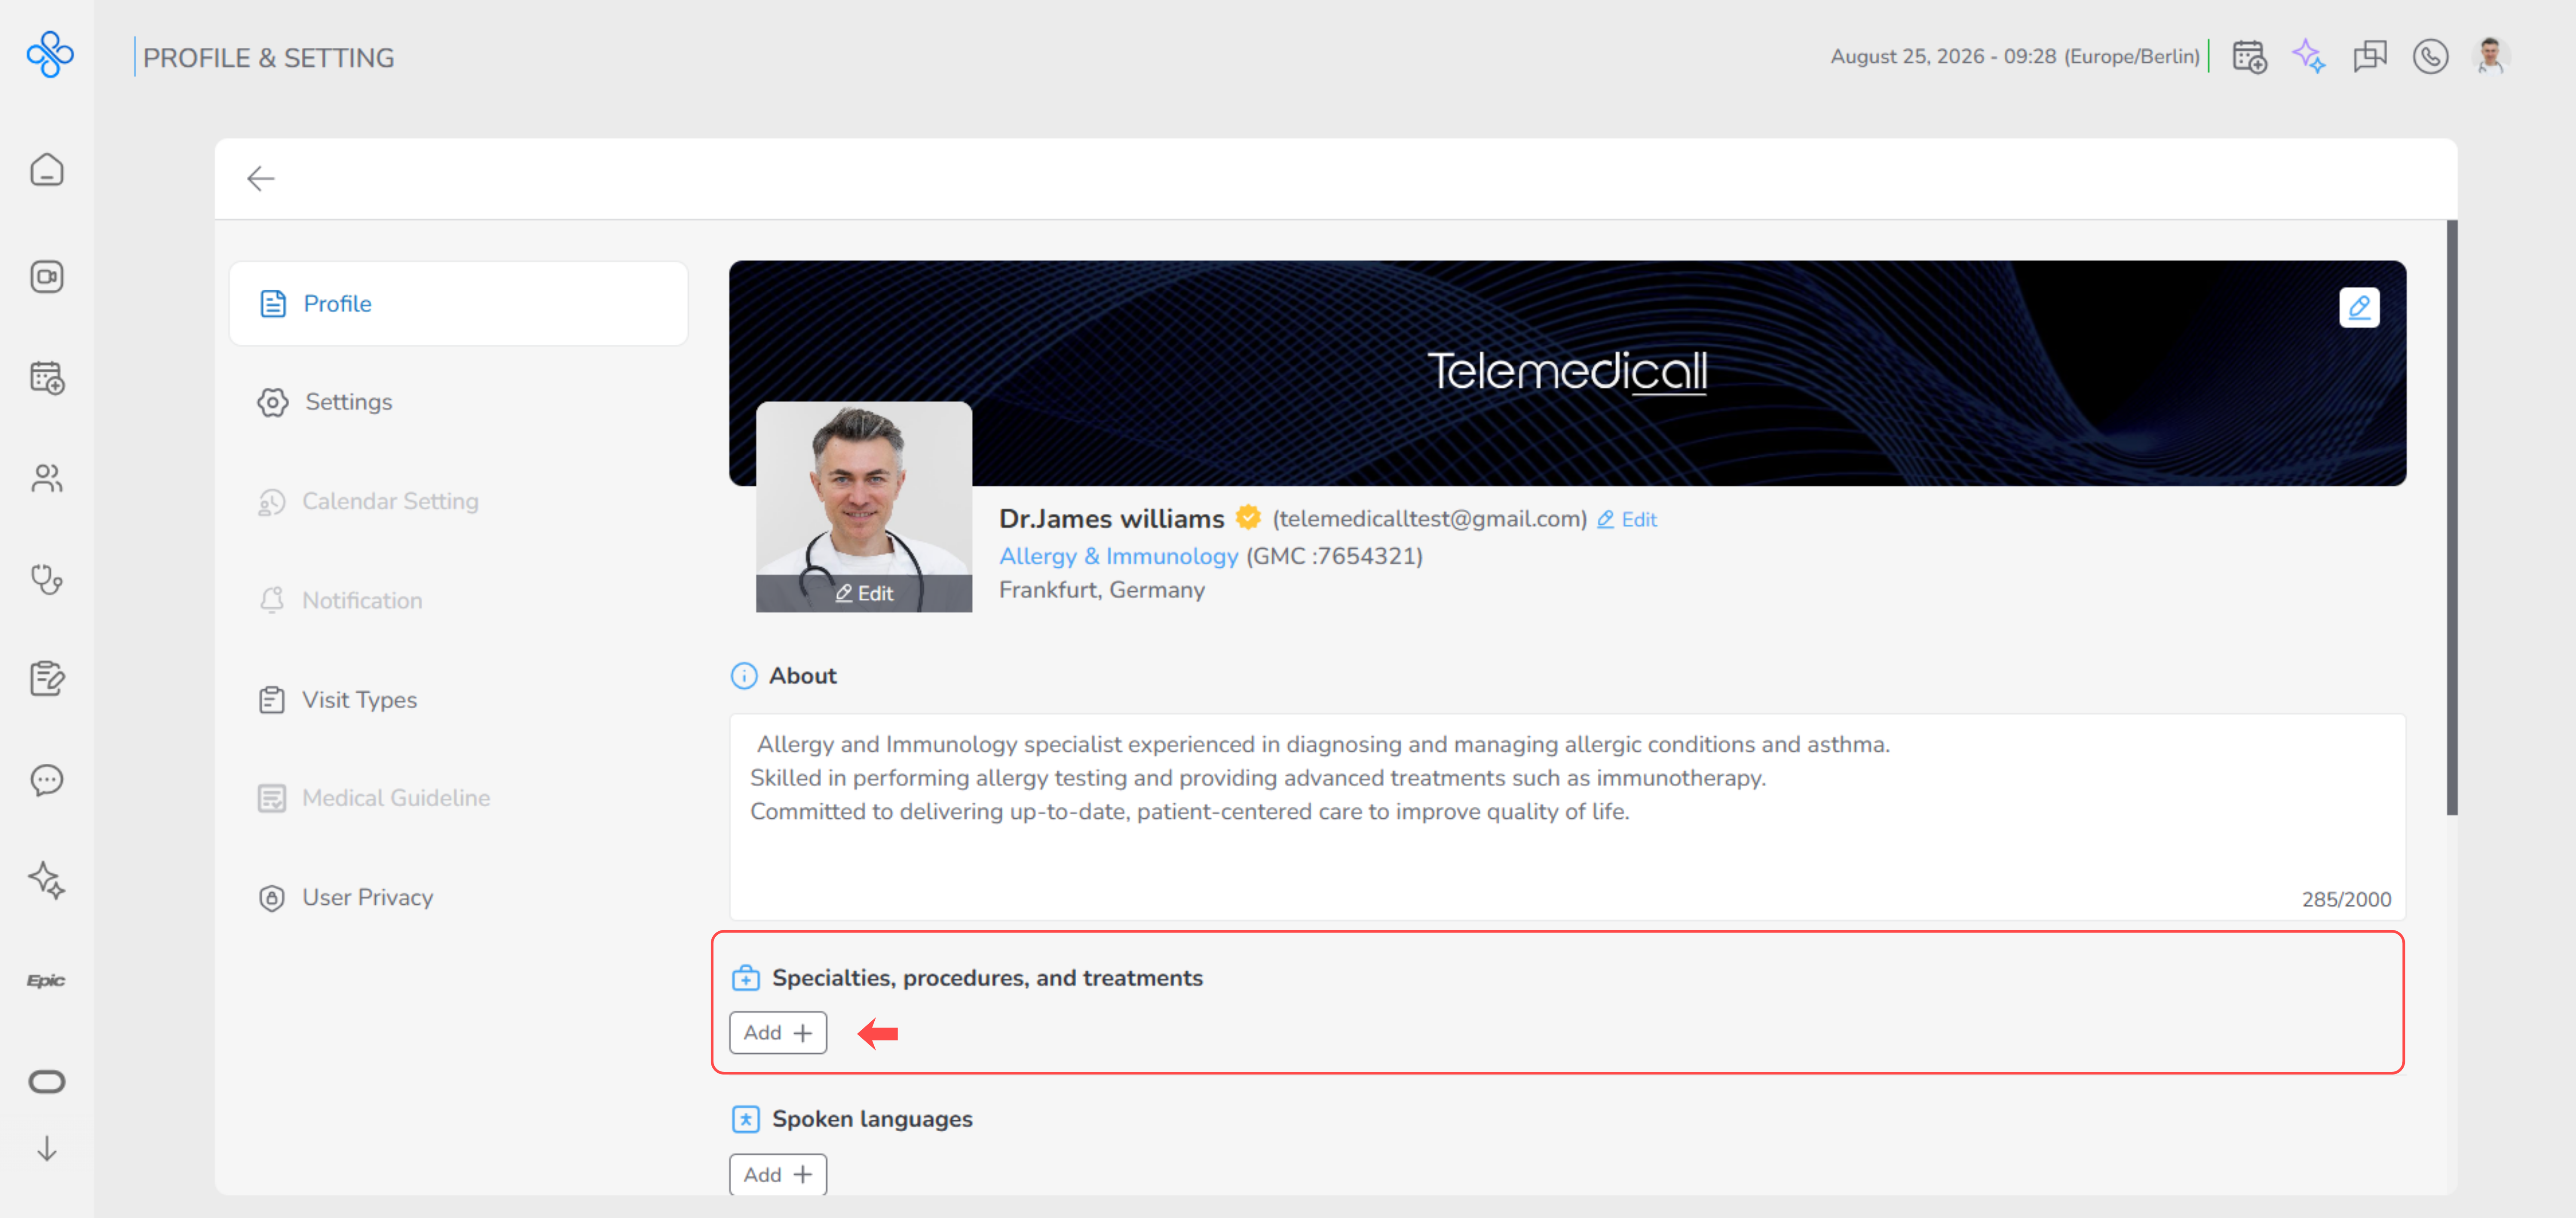
- A modal titled Specialties, Procedures, and Treatments opens.
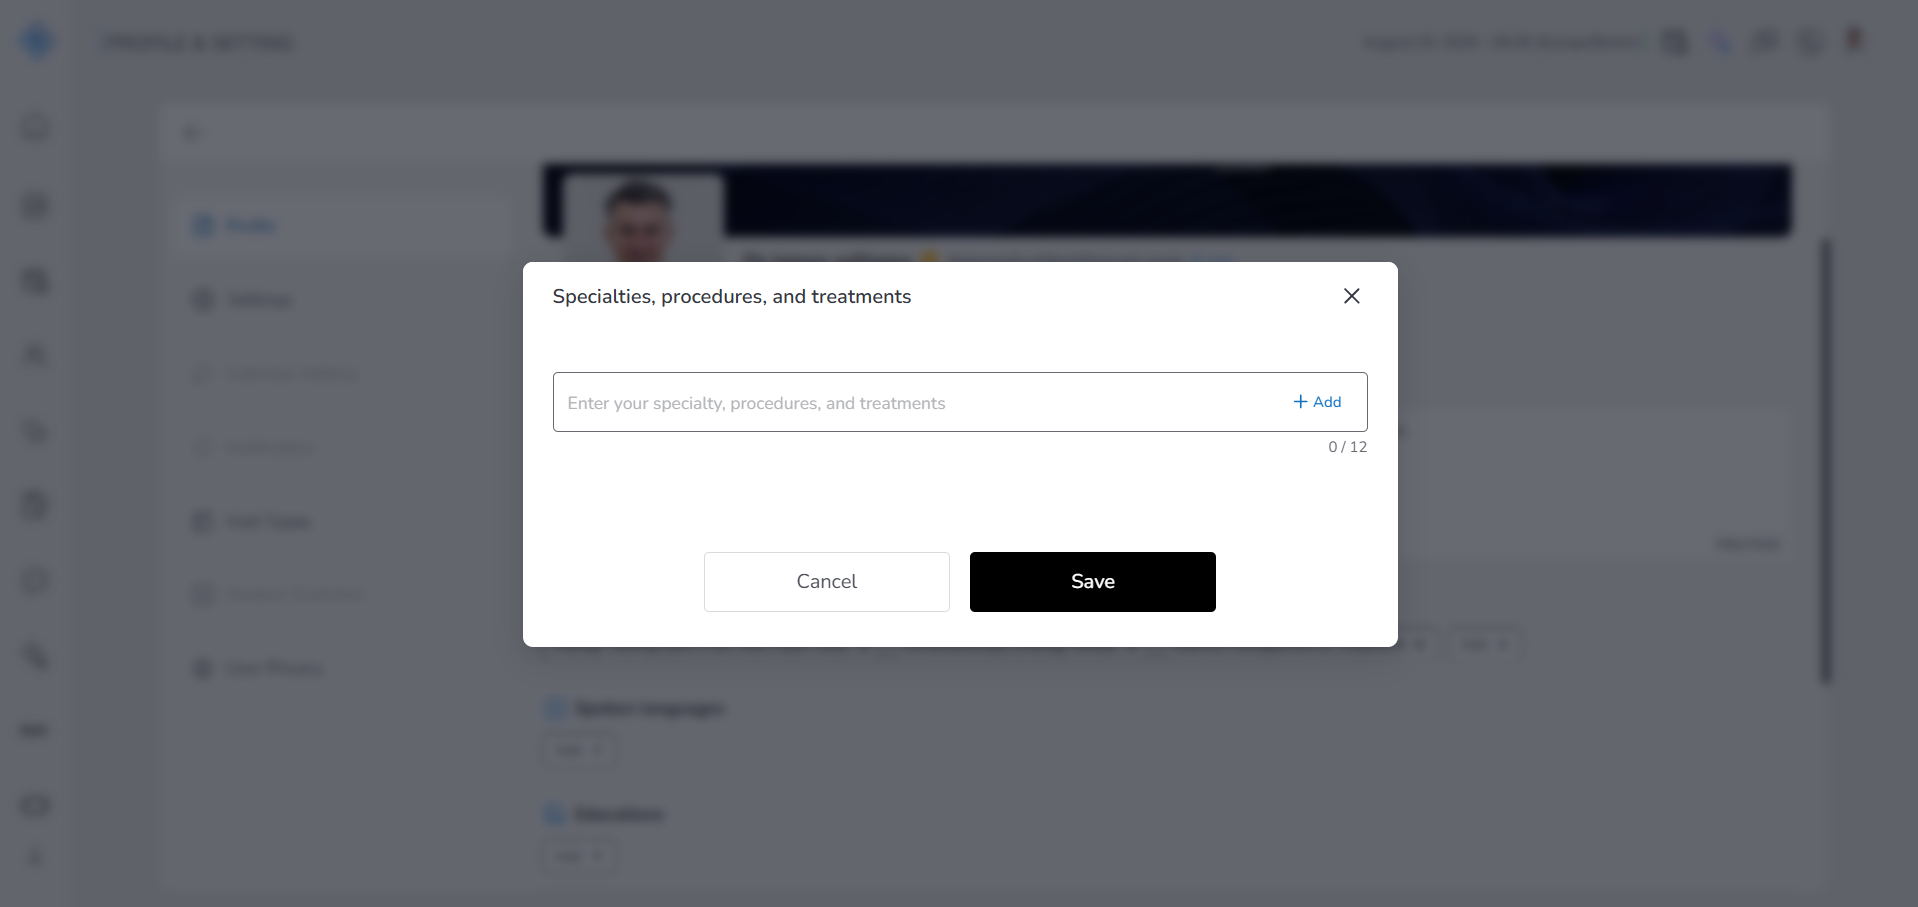
- Inside the modal, type the desired specialty, procedure, or treatment in the input field.
- Click the Add + button on the right side of the field.
- The entered item appears as a chip below the input field.
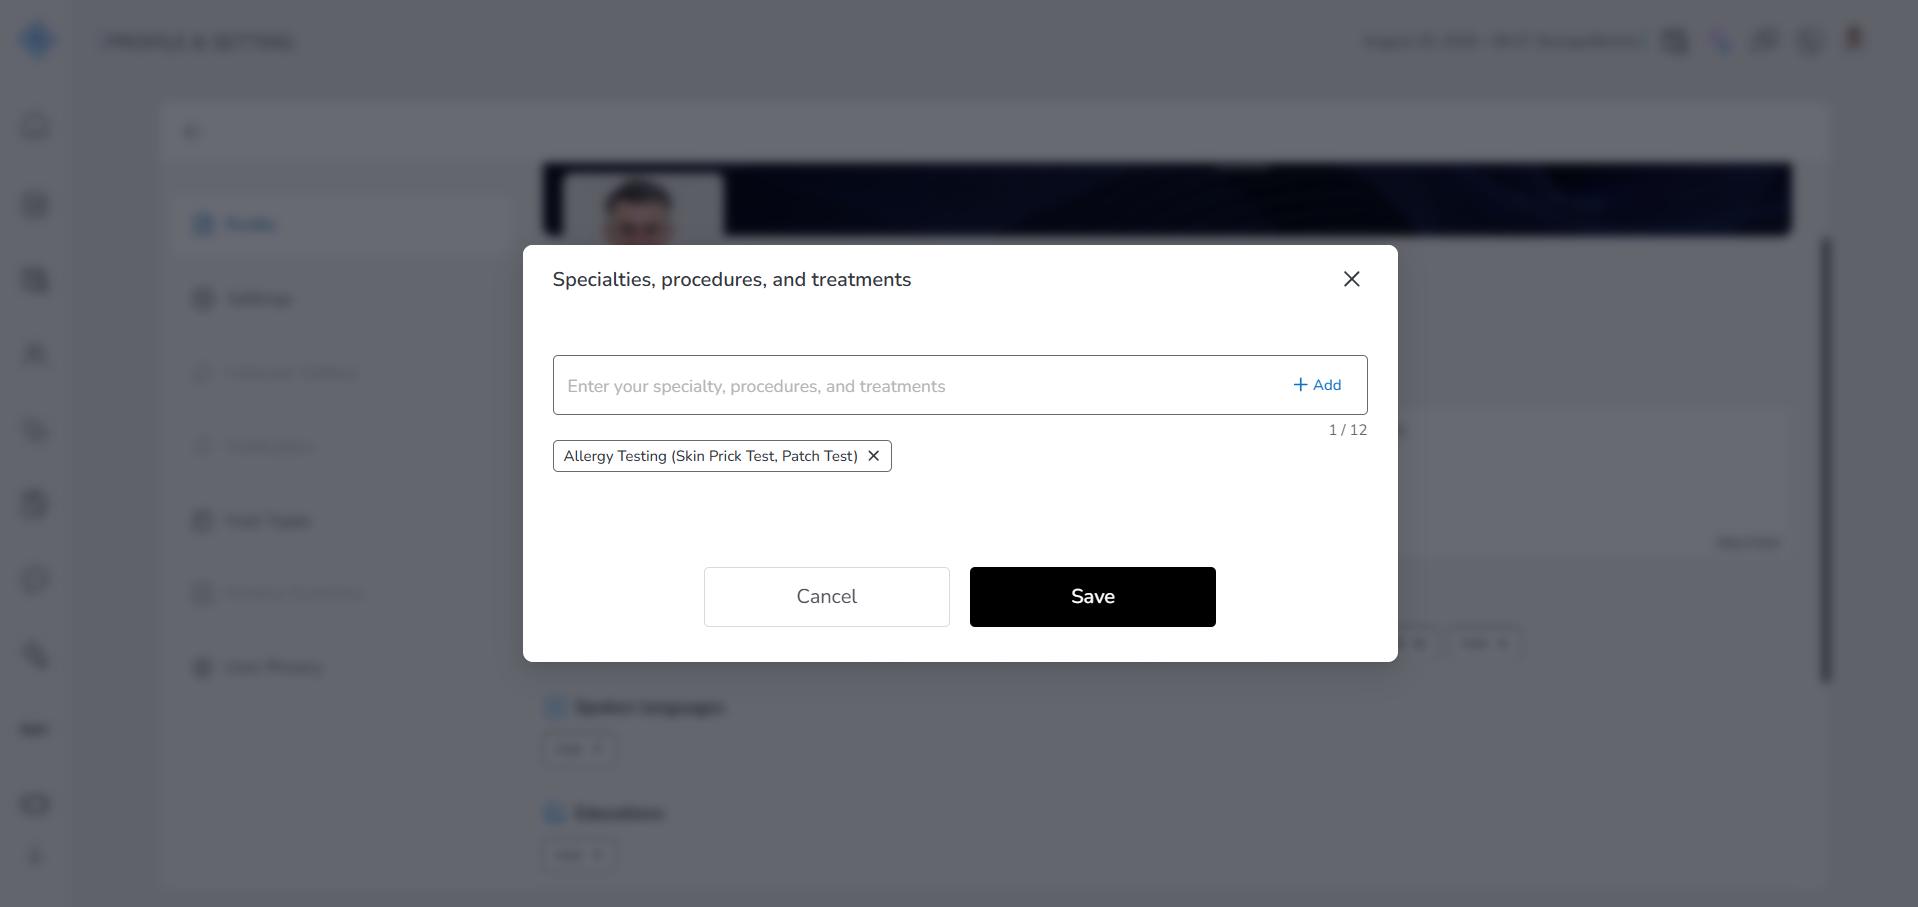
- Repeat these steps to add more items (up to a maximum of 12).
- Click Save to store the added items.
- If you do not want to apply the changes, click Cancel to close the modal without saving.
- After saving, you are returned to the Profile page, where all added specialties, procedures, and treatments are displayed as chips in the Specialties, Procedures, and Treatments section.
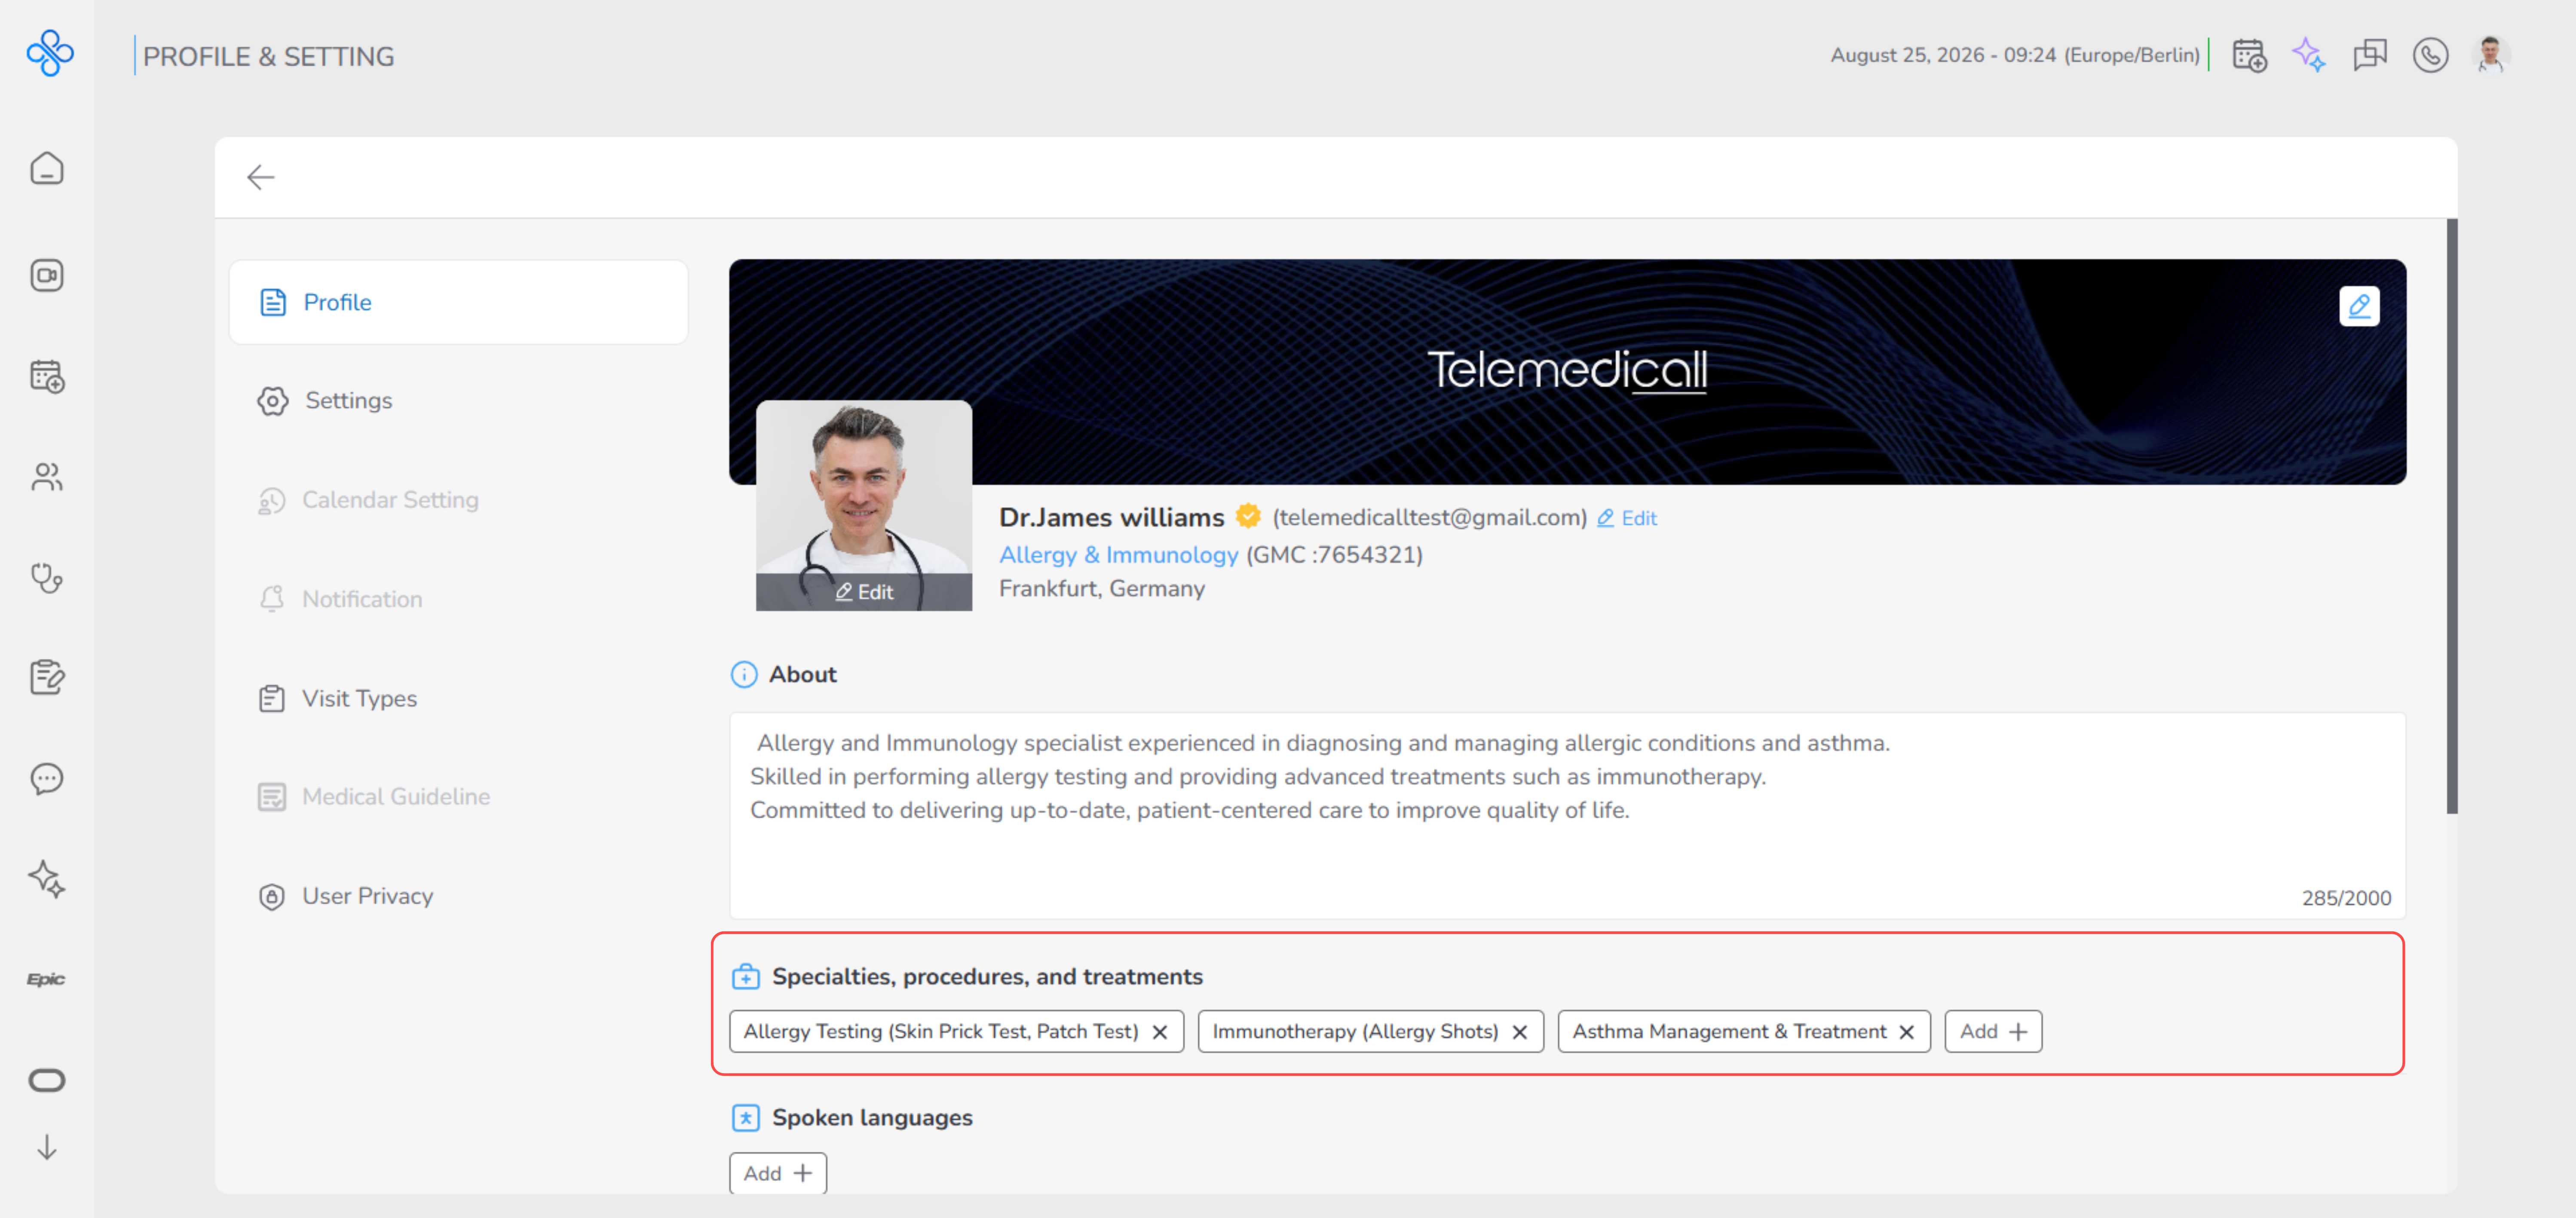
- Once the items appear on the Profile page, they are saved automatically, and no additional action is required.
- To remove a item, click the × icon on its chip.
- Spoken Languages
This section allows you to specify the languages you can communicate in, helping patients and other providers understand how they can interact with you.
- How to add spoken languages:
- In the Spoken Languages section on the Profile page, click Add +.
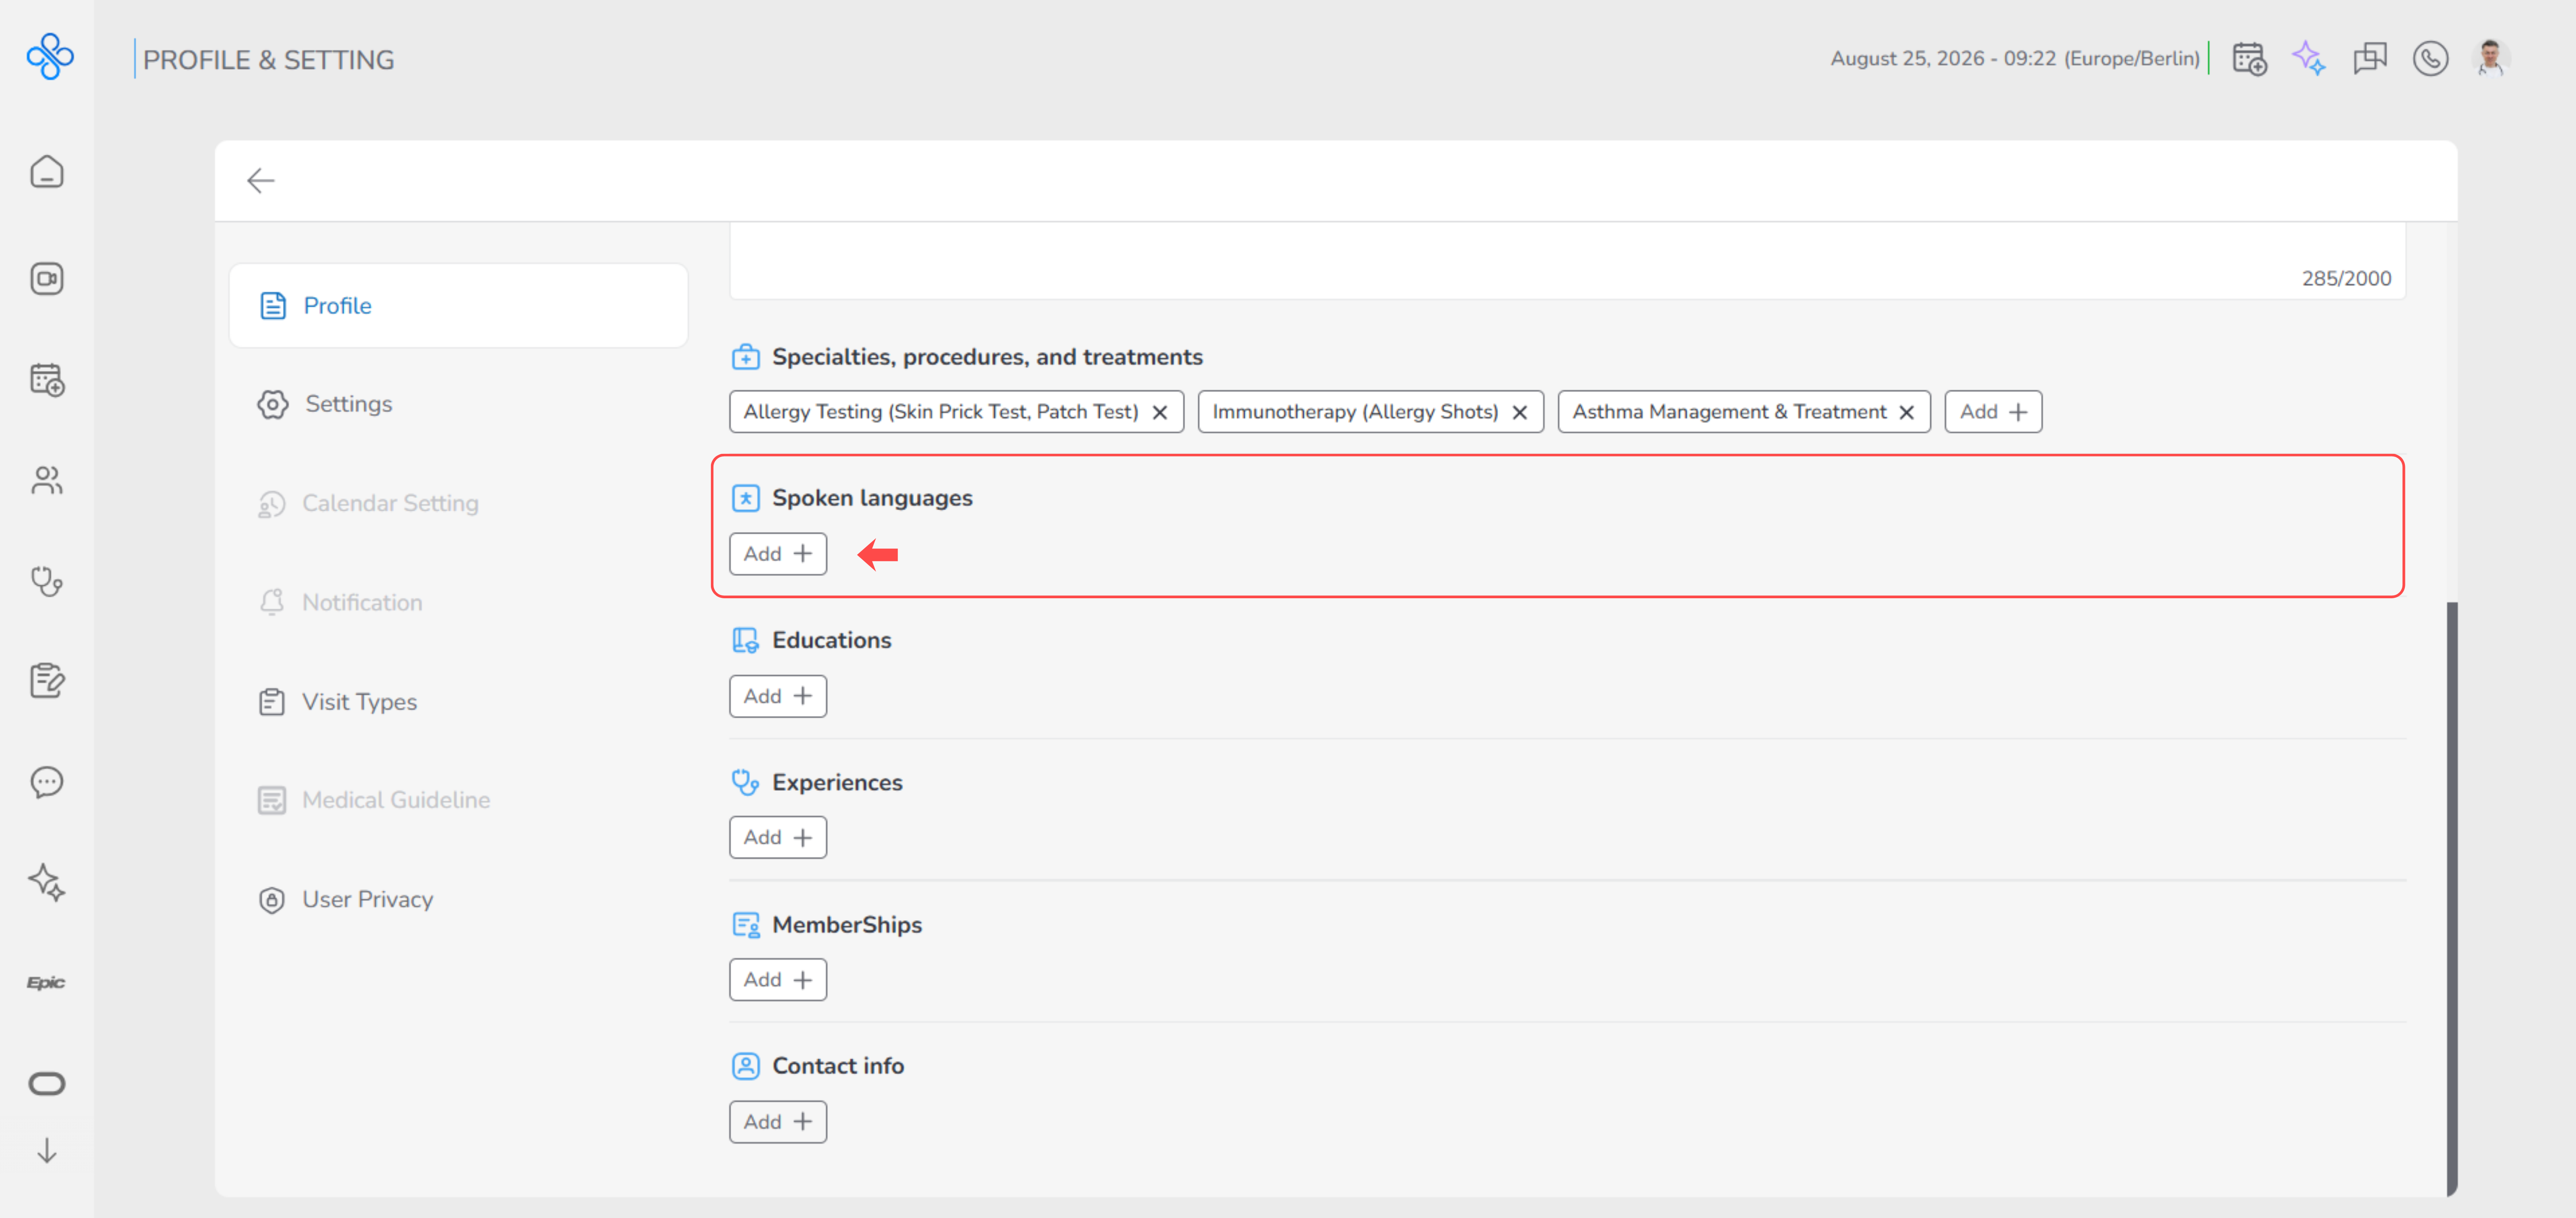
- A Spoken Languages modal opens.
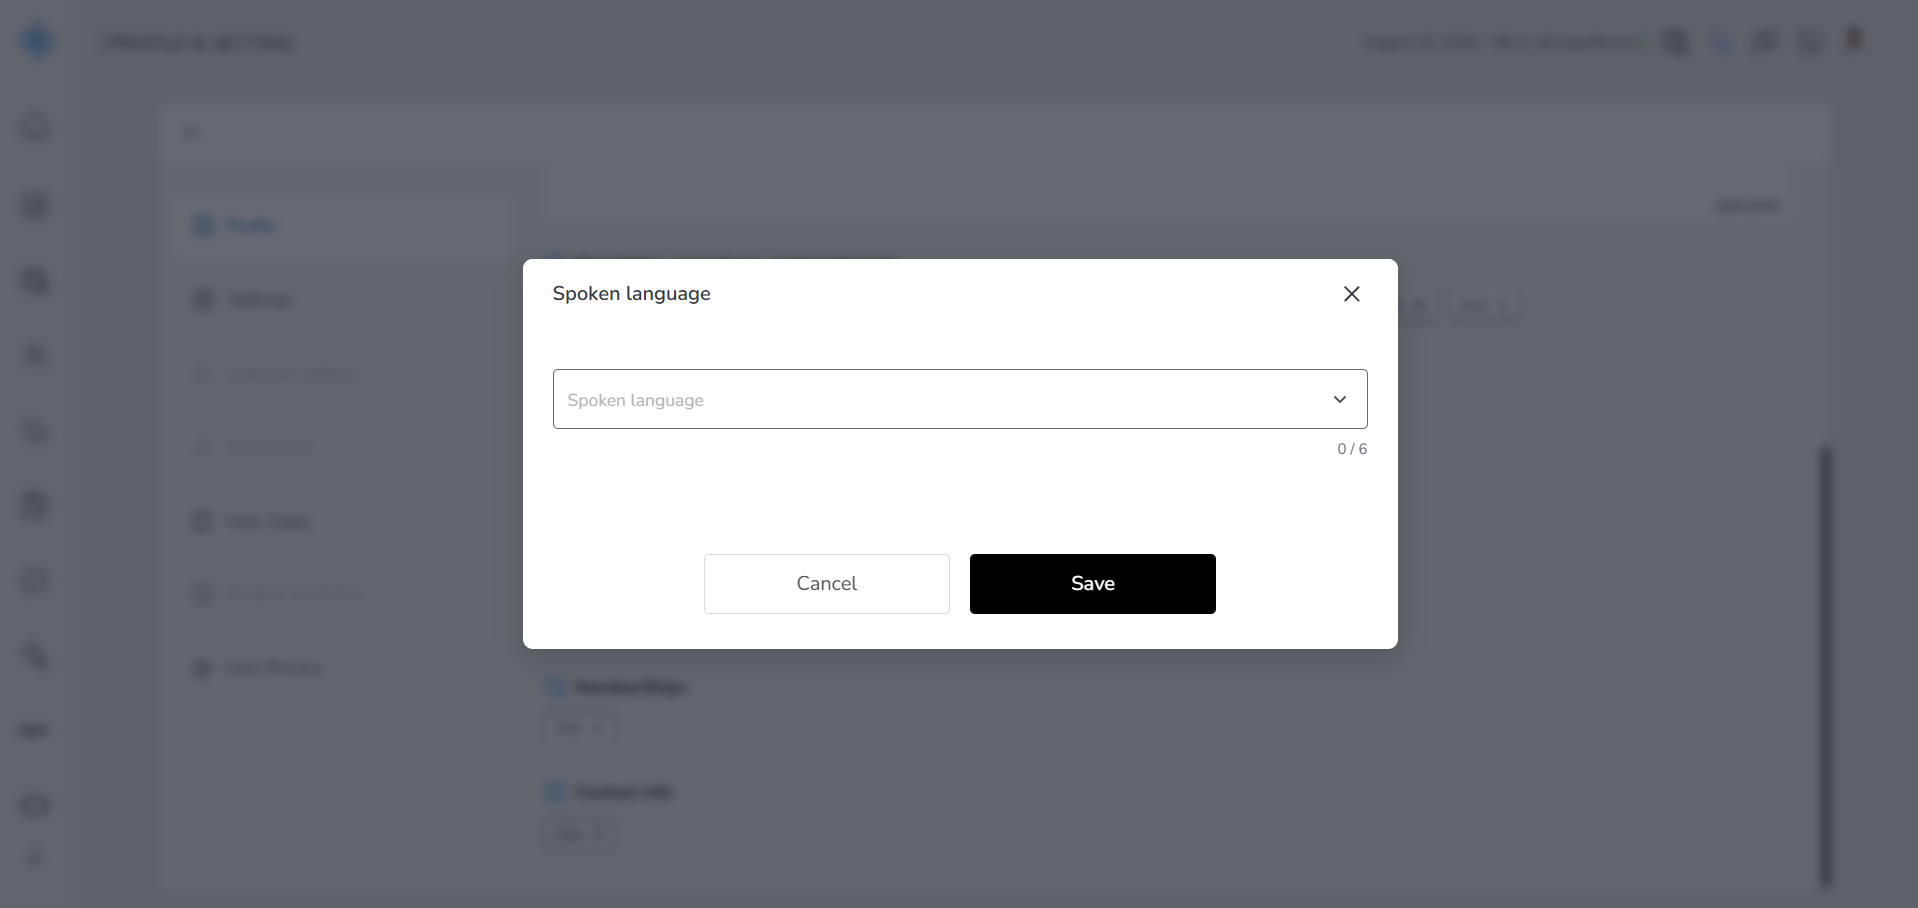
- Inside the modal, click on the language select dropdown.
- Choose one or more languages from the list.
- Each selected language appears as a chip inside the modal.
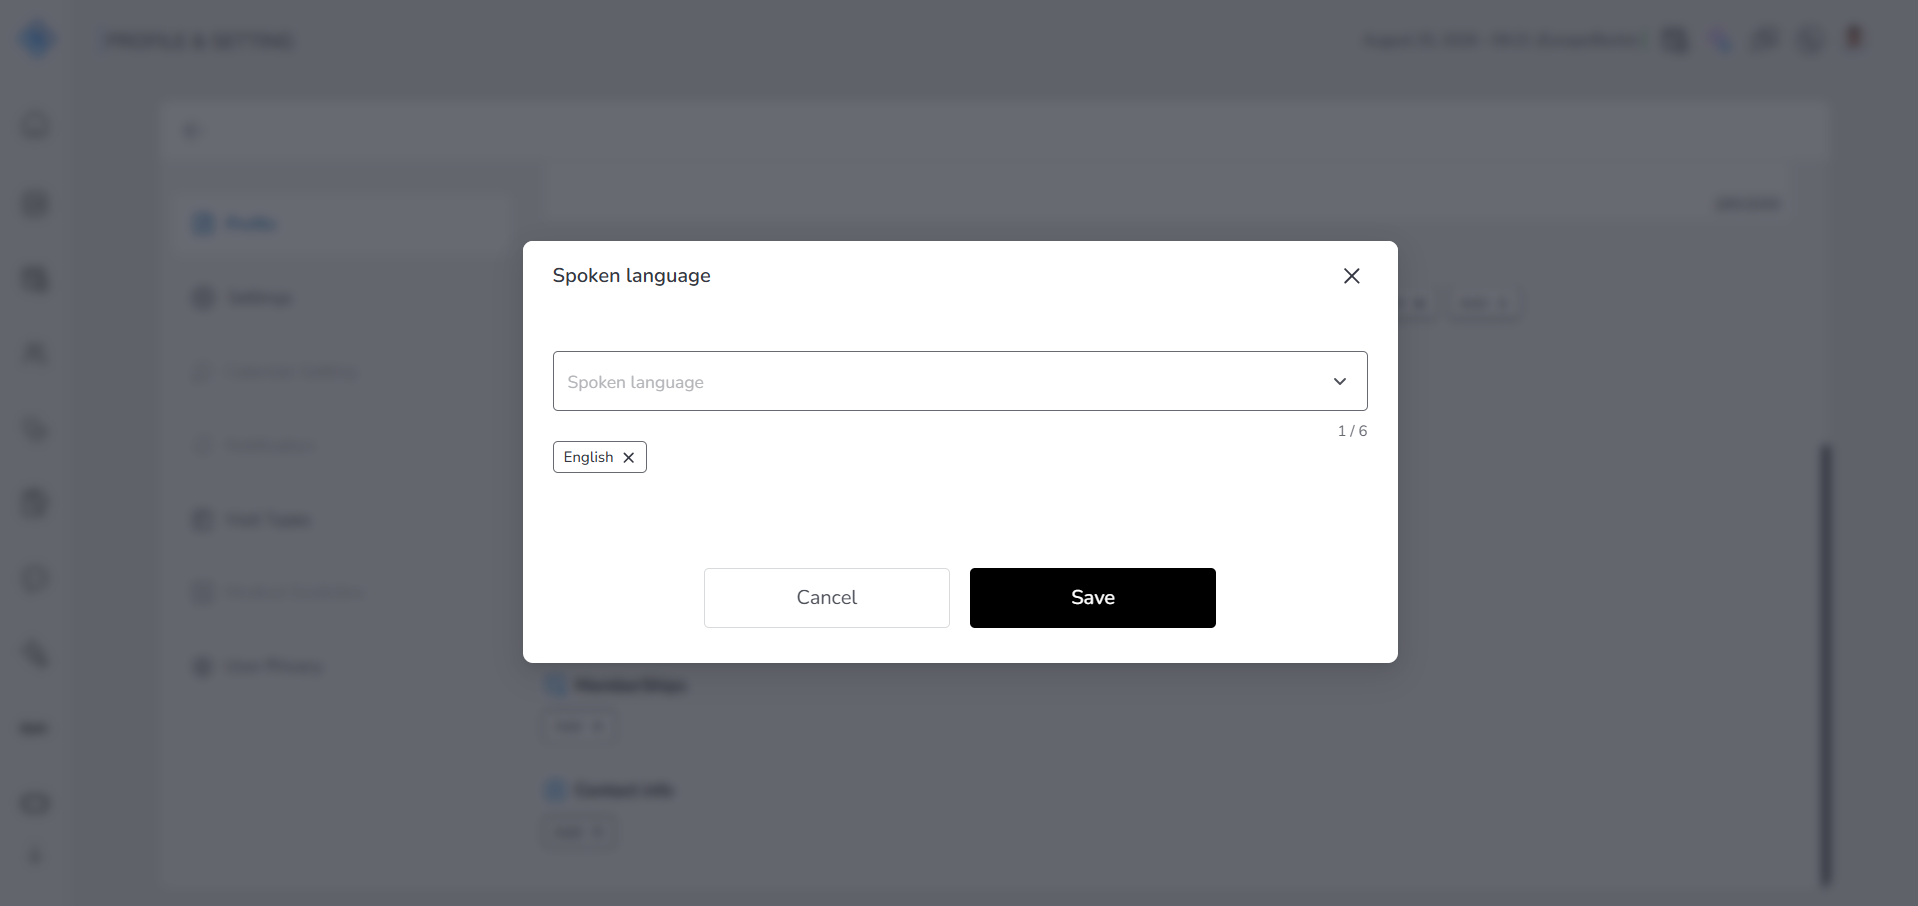
- You can select up to 6 languages in total.
- Click Save to confirm your selection
- – or click Cancel to close the modal without saving.
- After saving, you are returned to the Profile page, where all selected languages are displayed as chips in the Spoken Languages section.
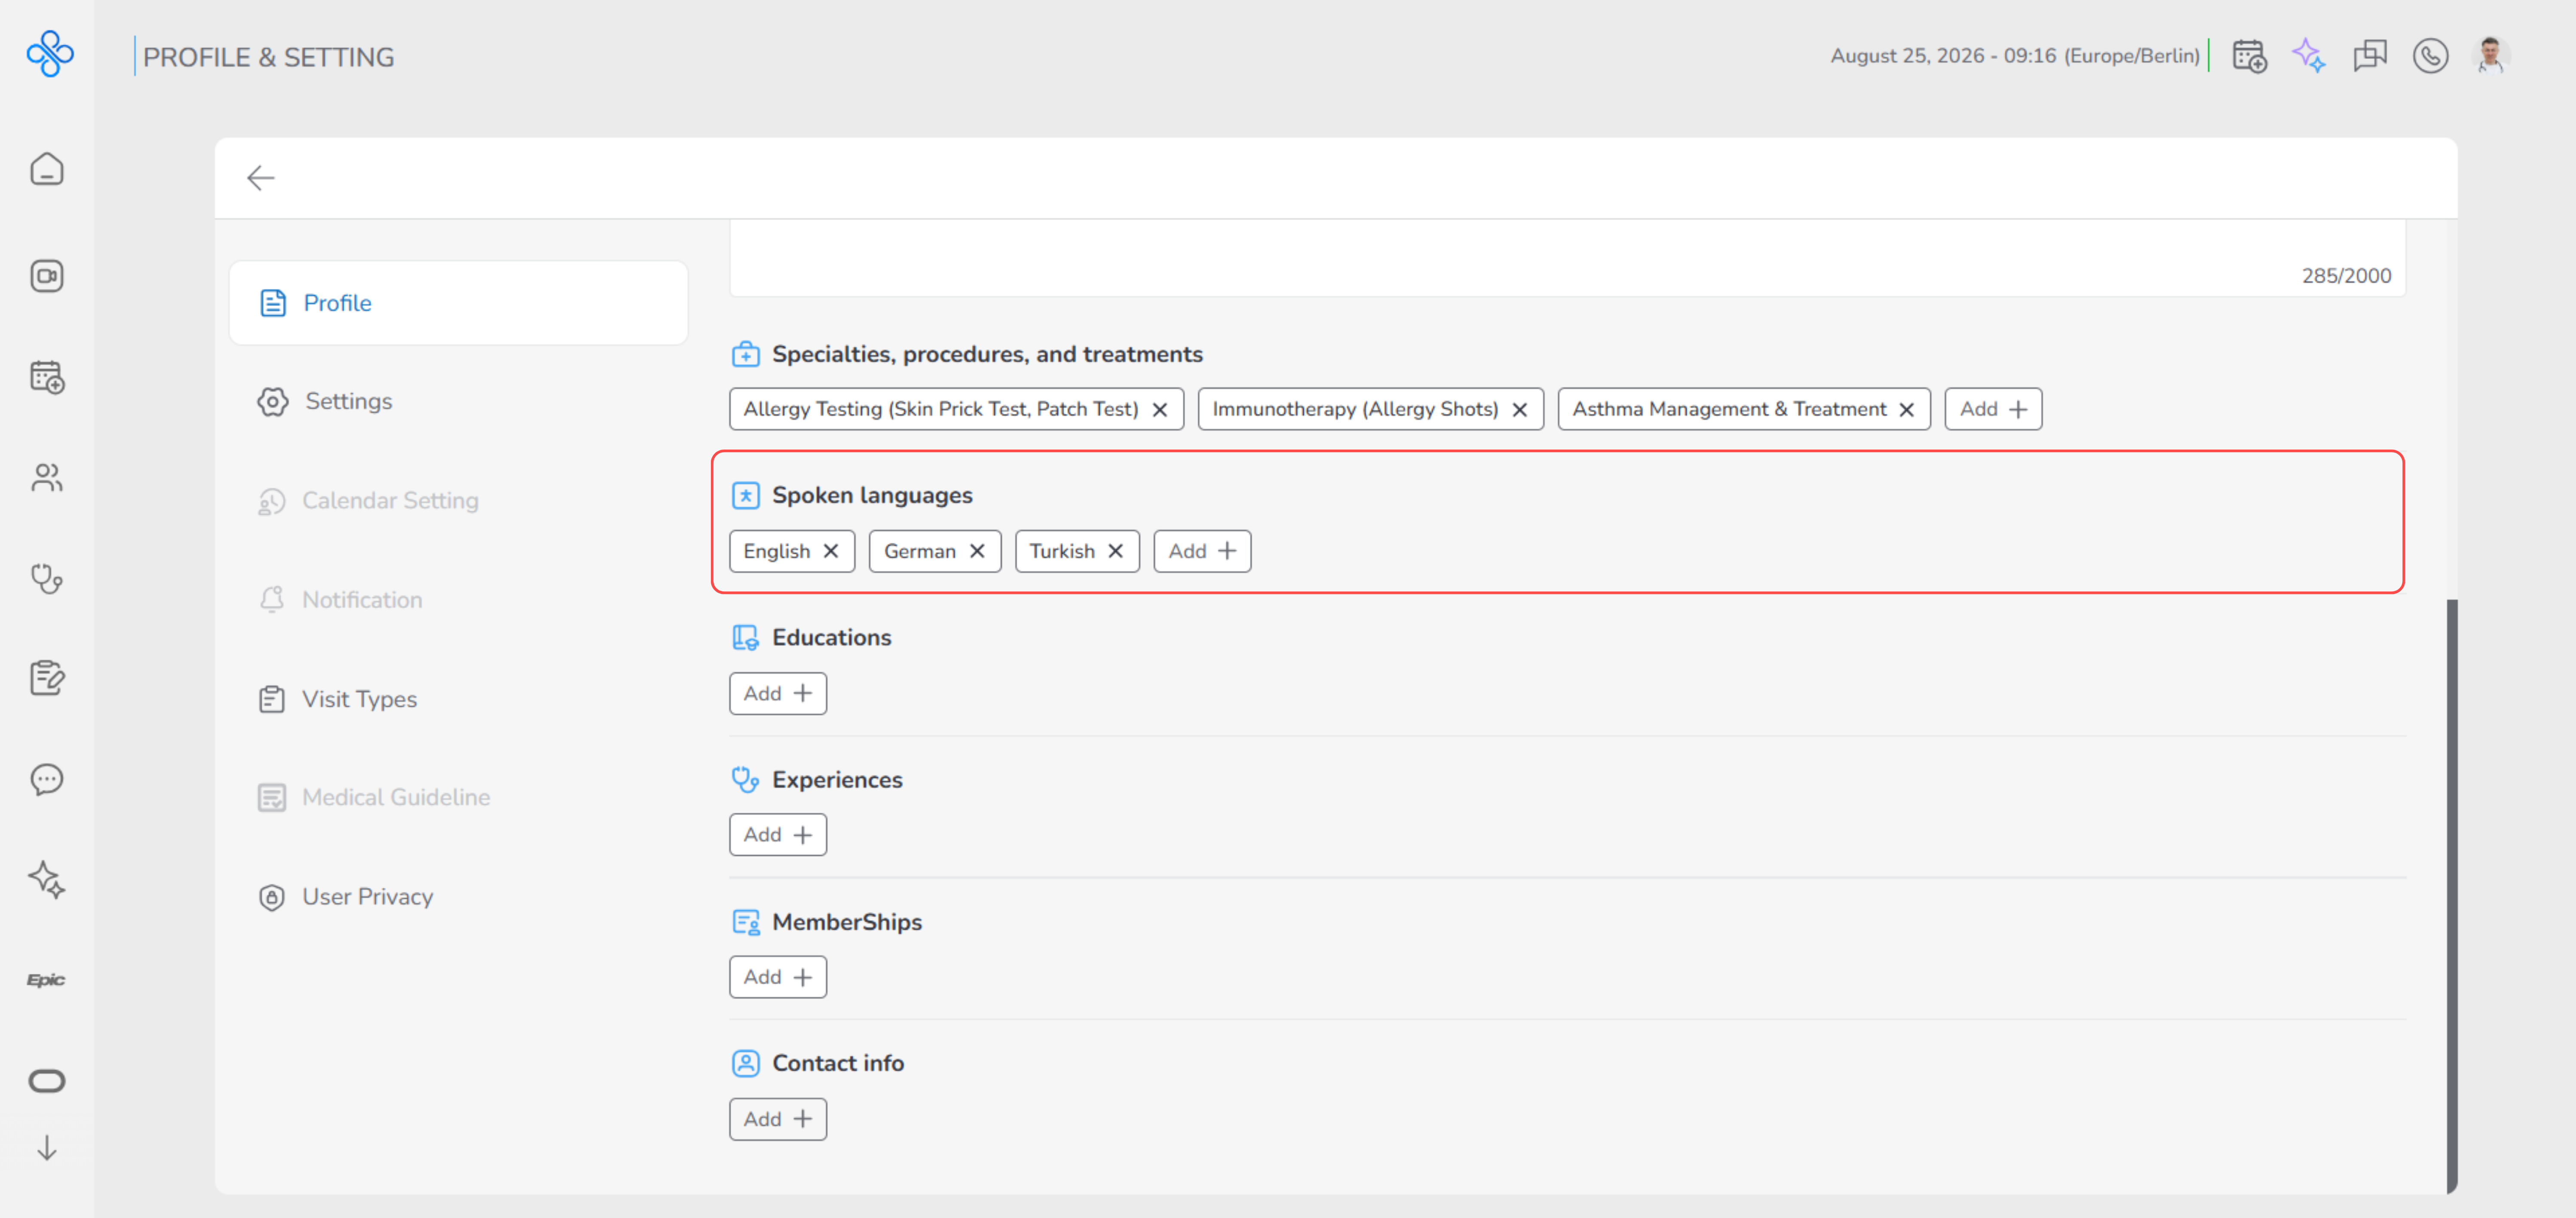
- Changes are saved automatically, and no additional save action is required on the profile page.
- To remove a language, click the × icon on its chip.
- Educations
The Educations section allows you to add and manage your academic background.
Here you can record your degrees, courses, or ongoing studies to help others better understand your qualifications and professional foundation.
All education entries are shown clearly on your profile and can be updated over time as your academic experience grows.
- In the Educations section of the Profile page, click Add +.
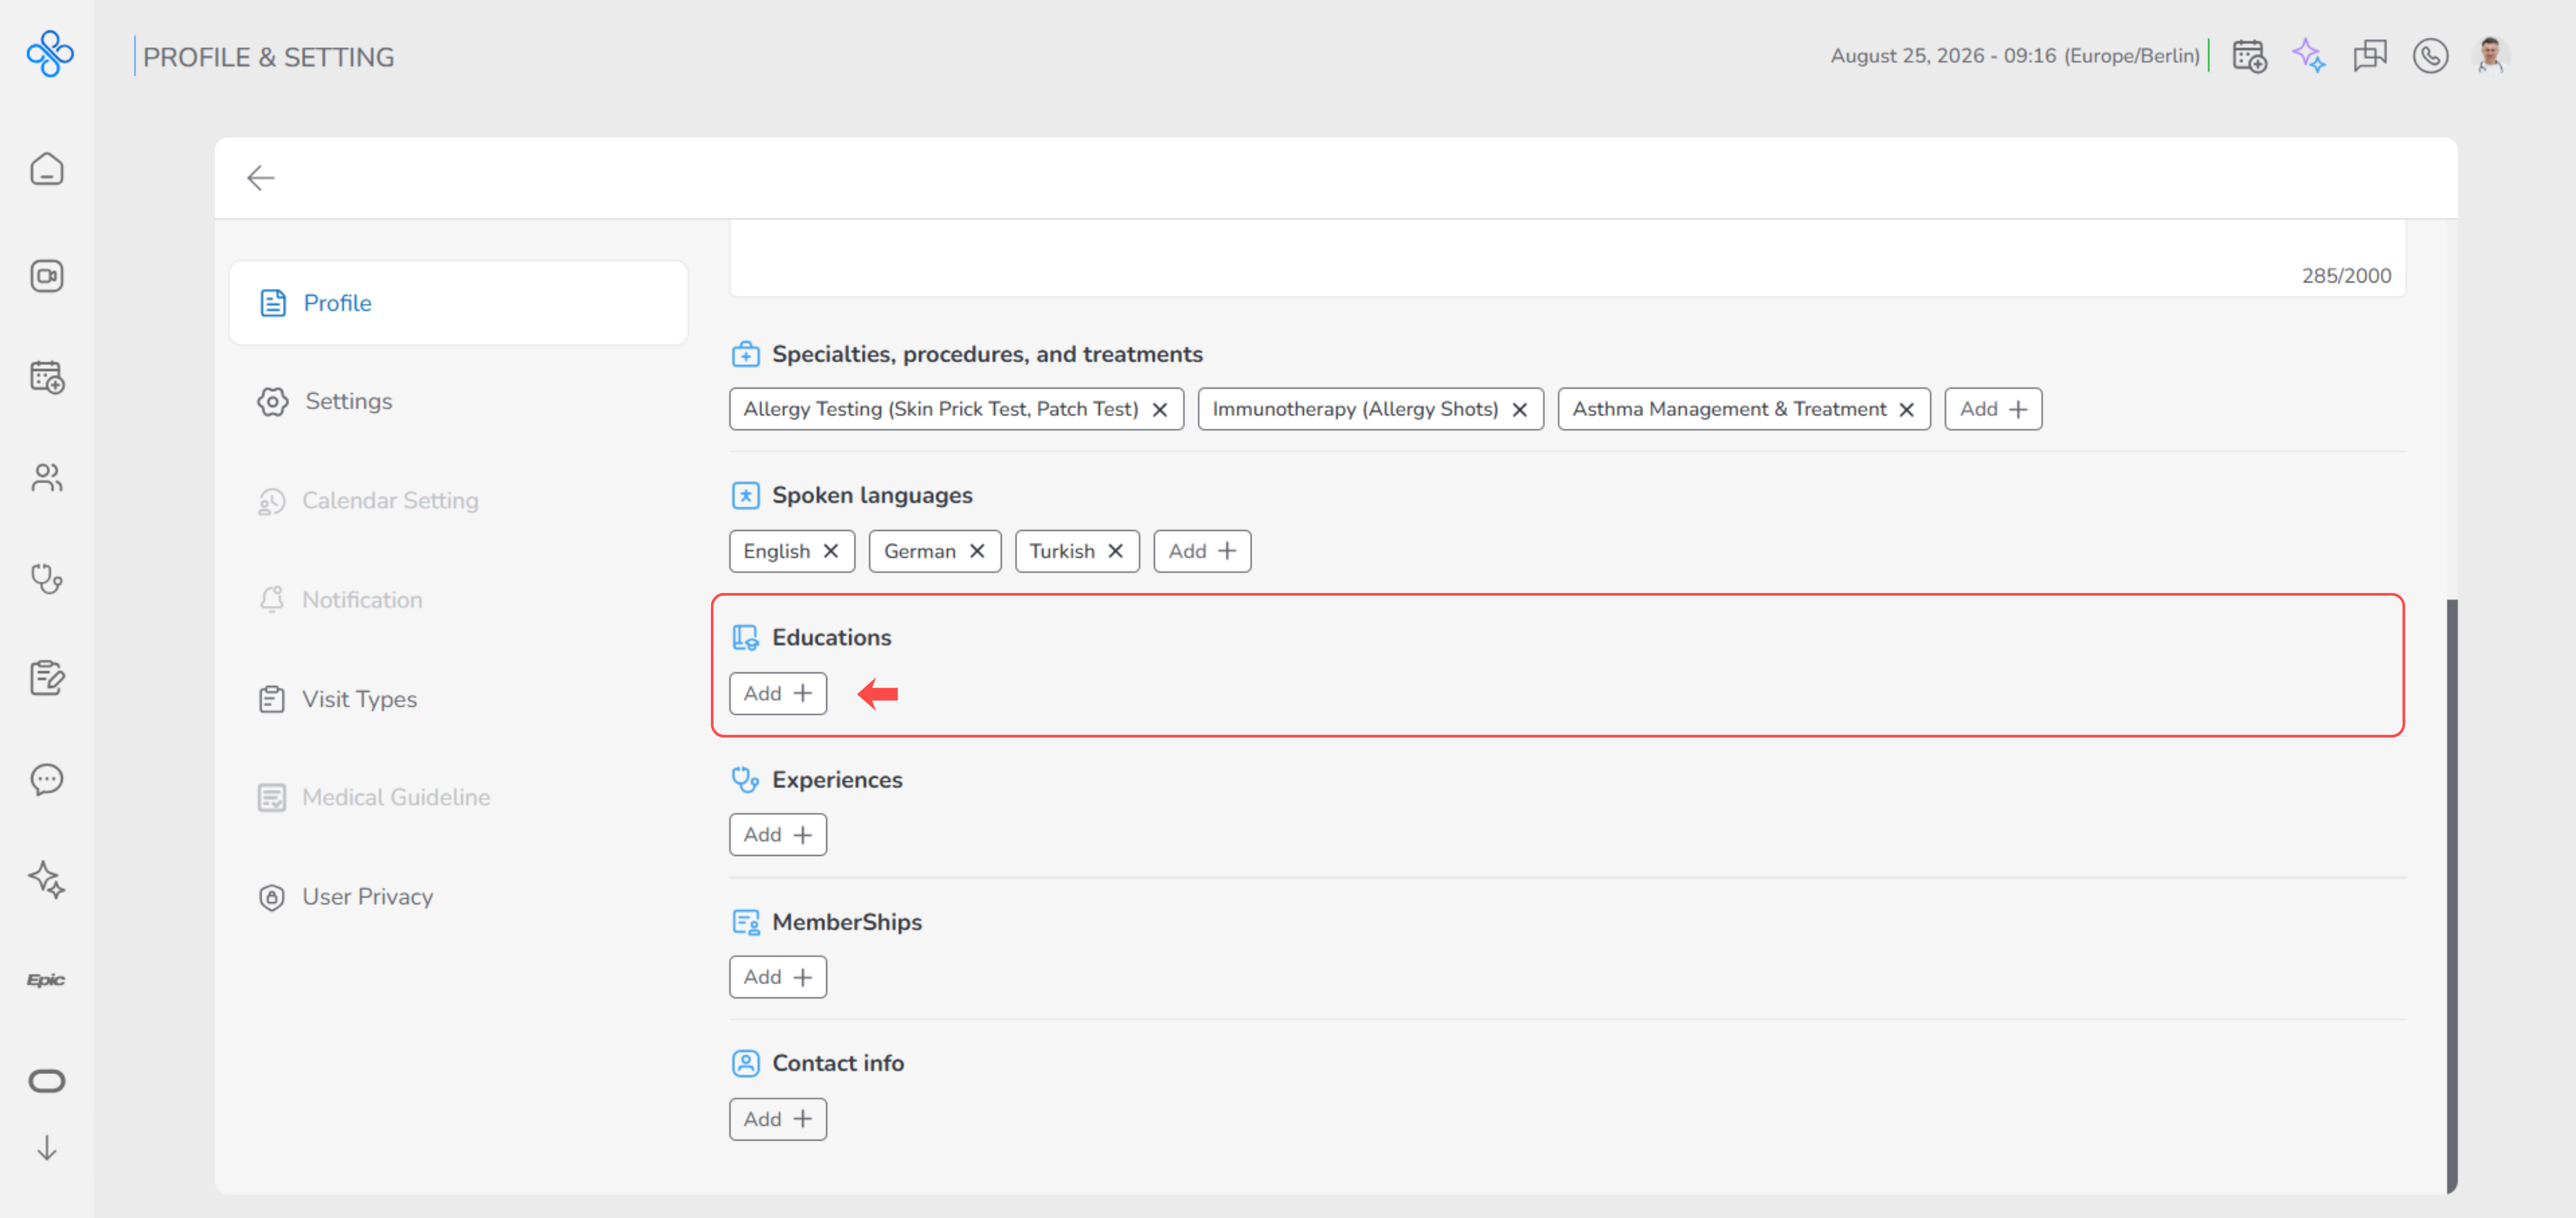
- The Add Education modal opens.
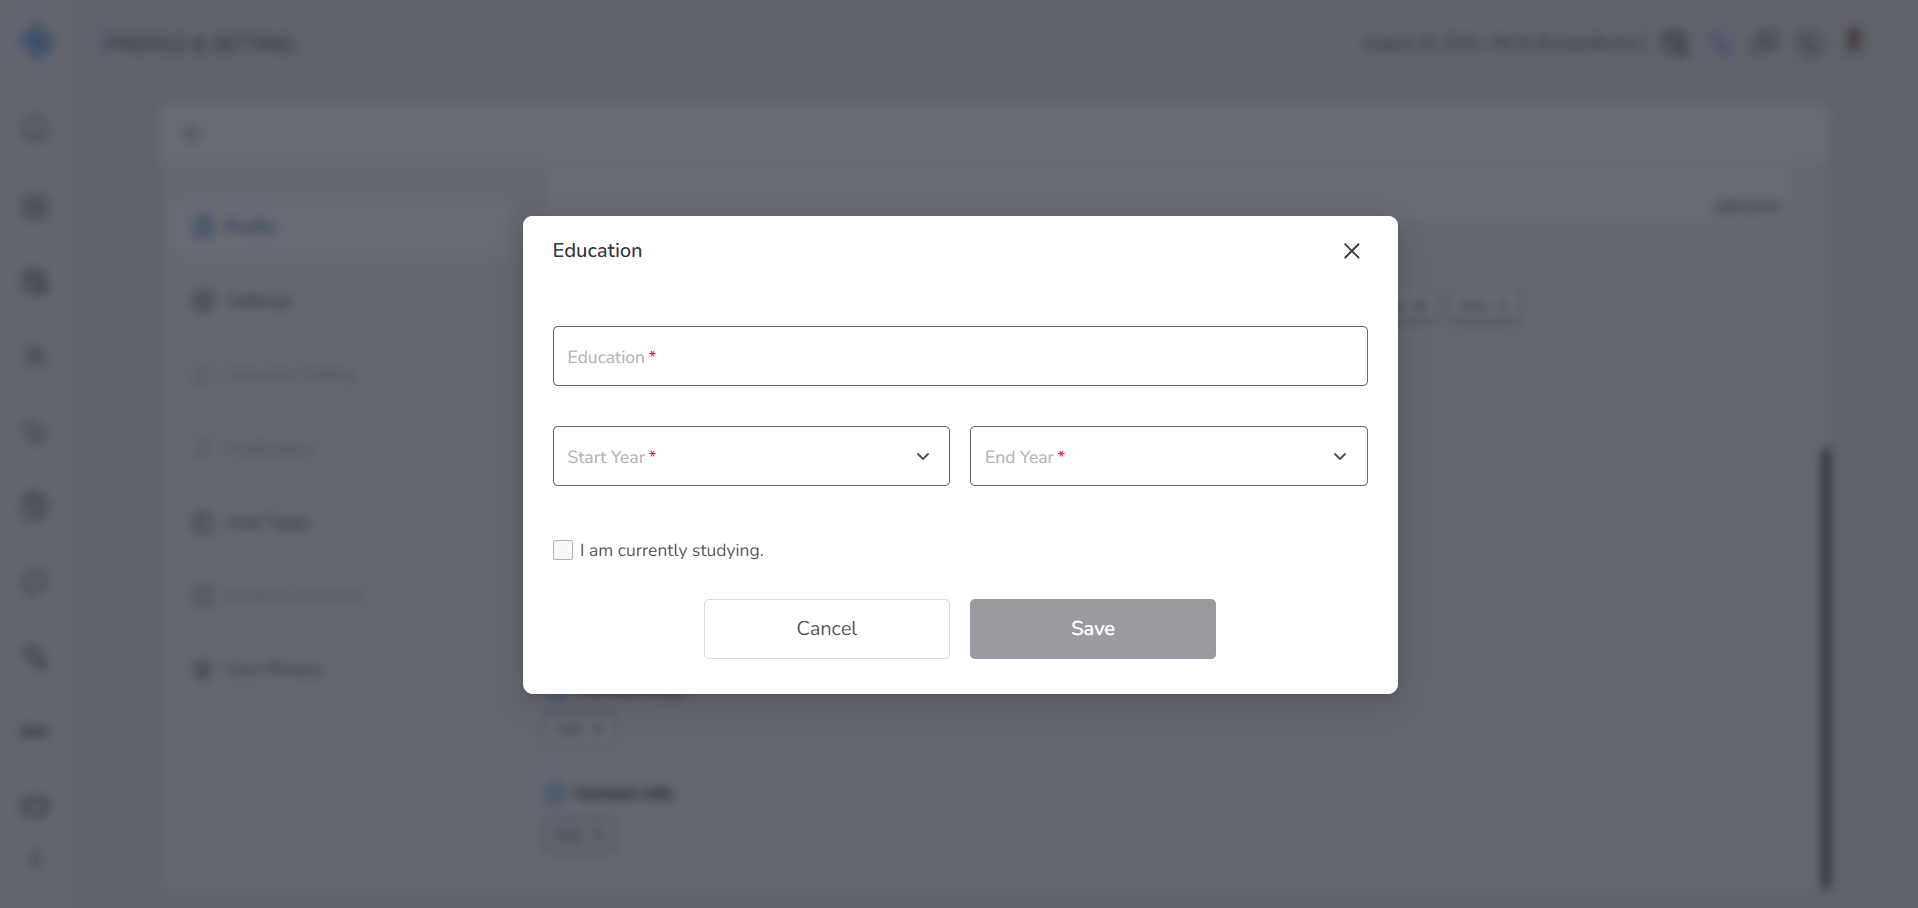
- Fill in the following fields:
- Education Title – Enter the name of your degree or program.
- Start Year – Select the year you started.
- End Year – Select the year you finished.
- (Optional)
- Check I am currently studying to indicate an ongoing education.
- When this option is selected, the End Year field is automatically disabled.
- Click Save to add the education record, or Cancel to close the modal without saving.
- After saving, you are returned to the Profile page, where the new education is displayed in the Educations section.
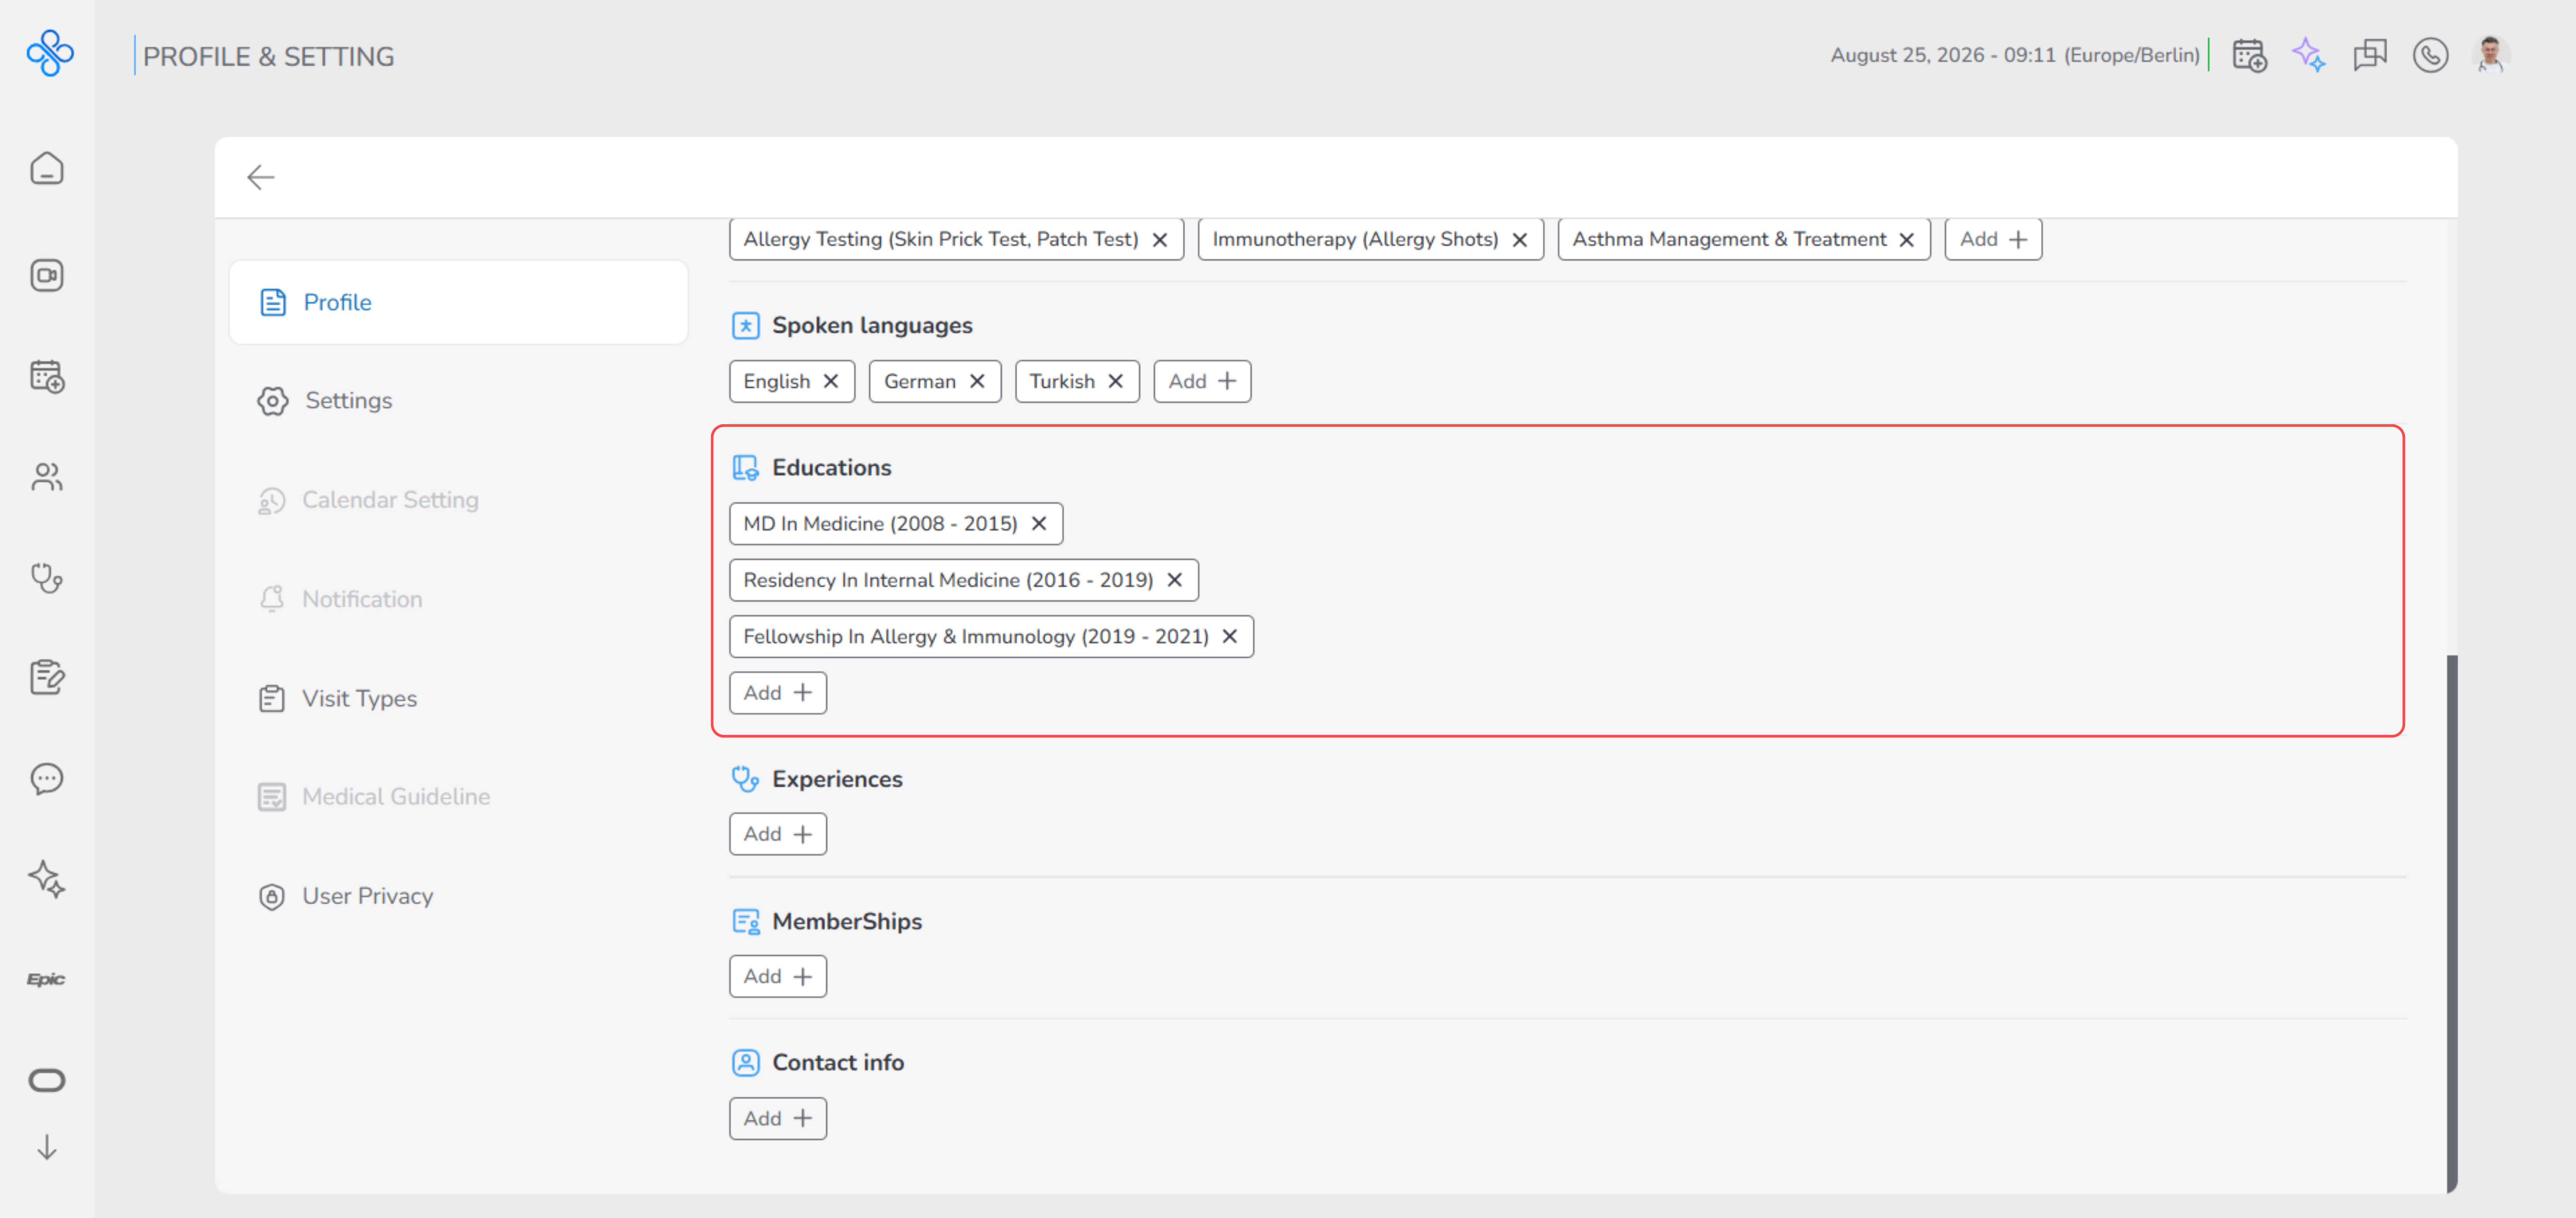
- You can repeat this process by clicking Add + again to add more education records.
- A maximum of 6 education records can be added.
- To remove a language, click the × icon on its chip.
- Experiences
The Experience section allows you to document your professional work history.
In this section, you can add details about your roles, positions, and workplaces to showcase your practical experience and career path.
Each experience you add appears on your profile, helping others understand your background, expertise, and current professional status.
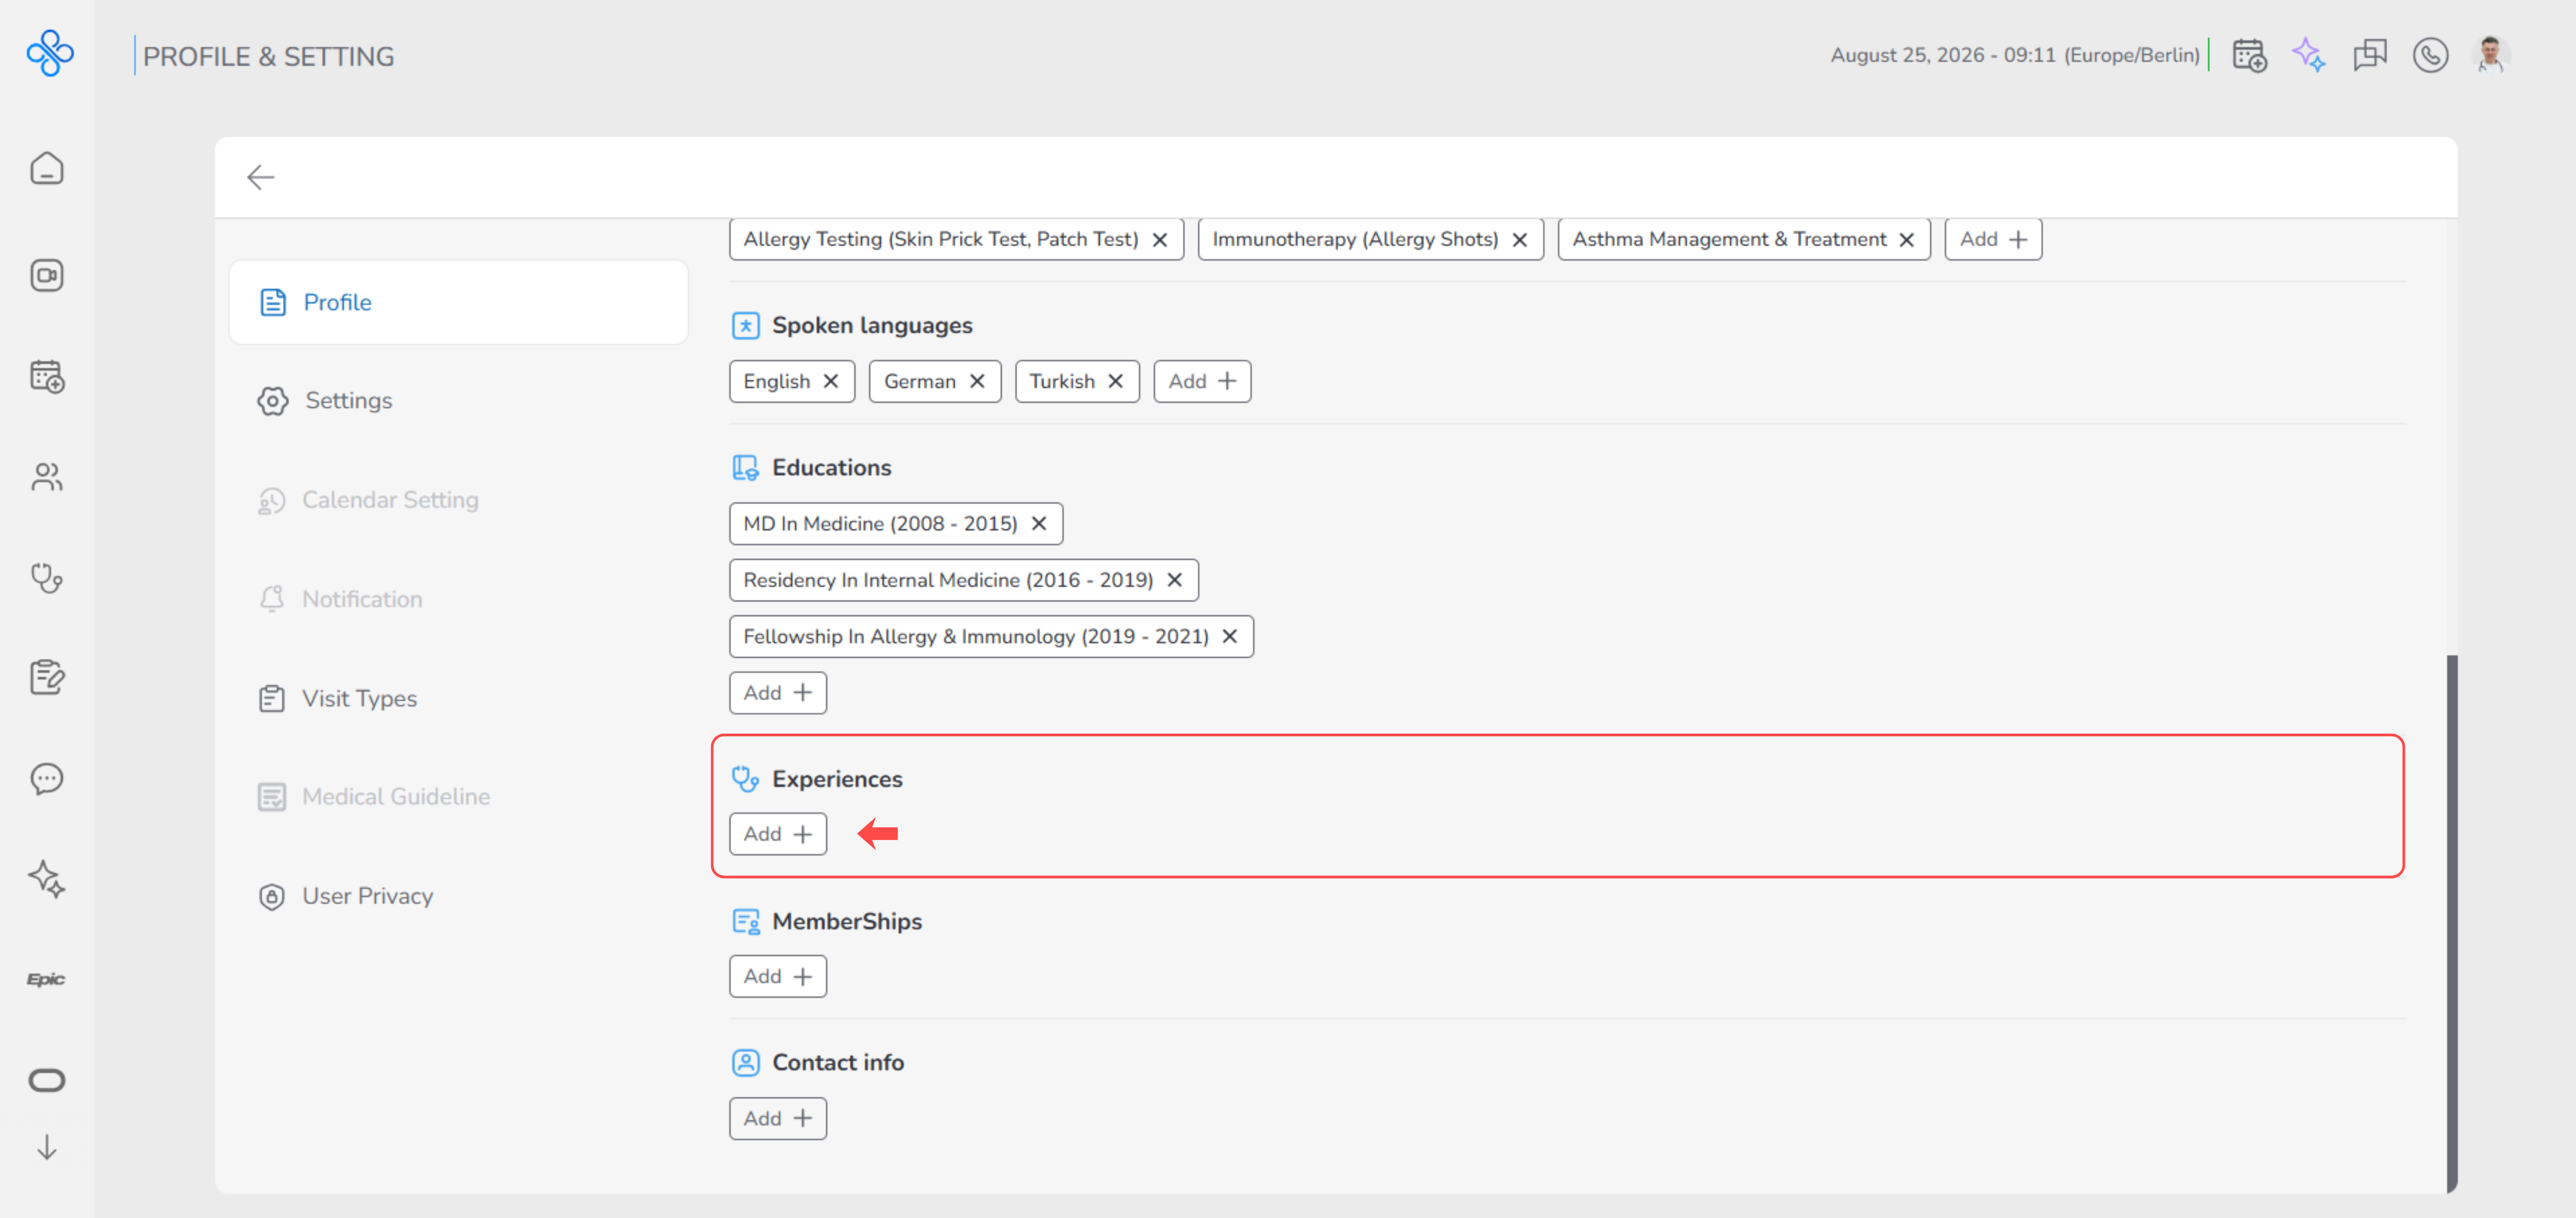
- In the Experience section of the Profile page, click Add +.
- The Add Job Experience modal opens.
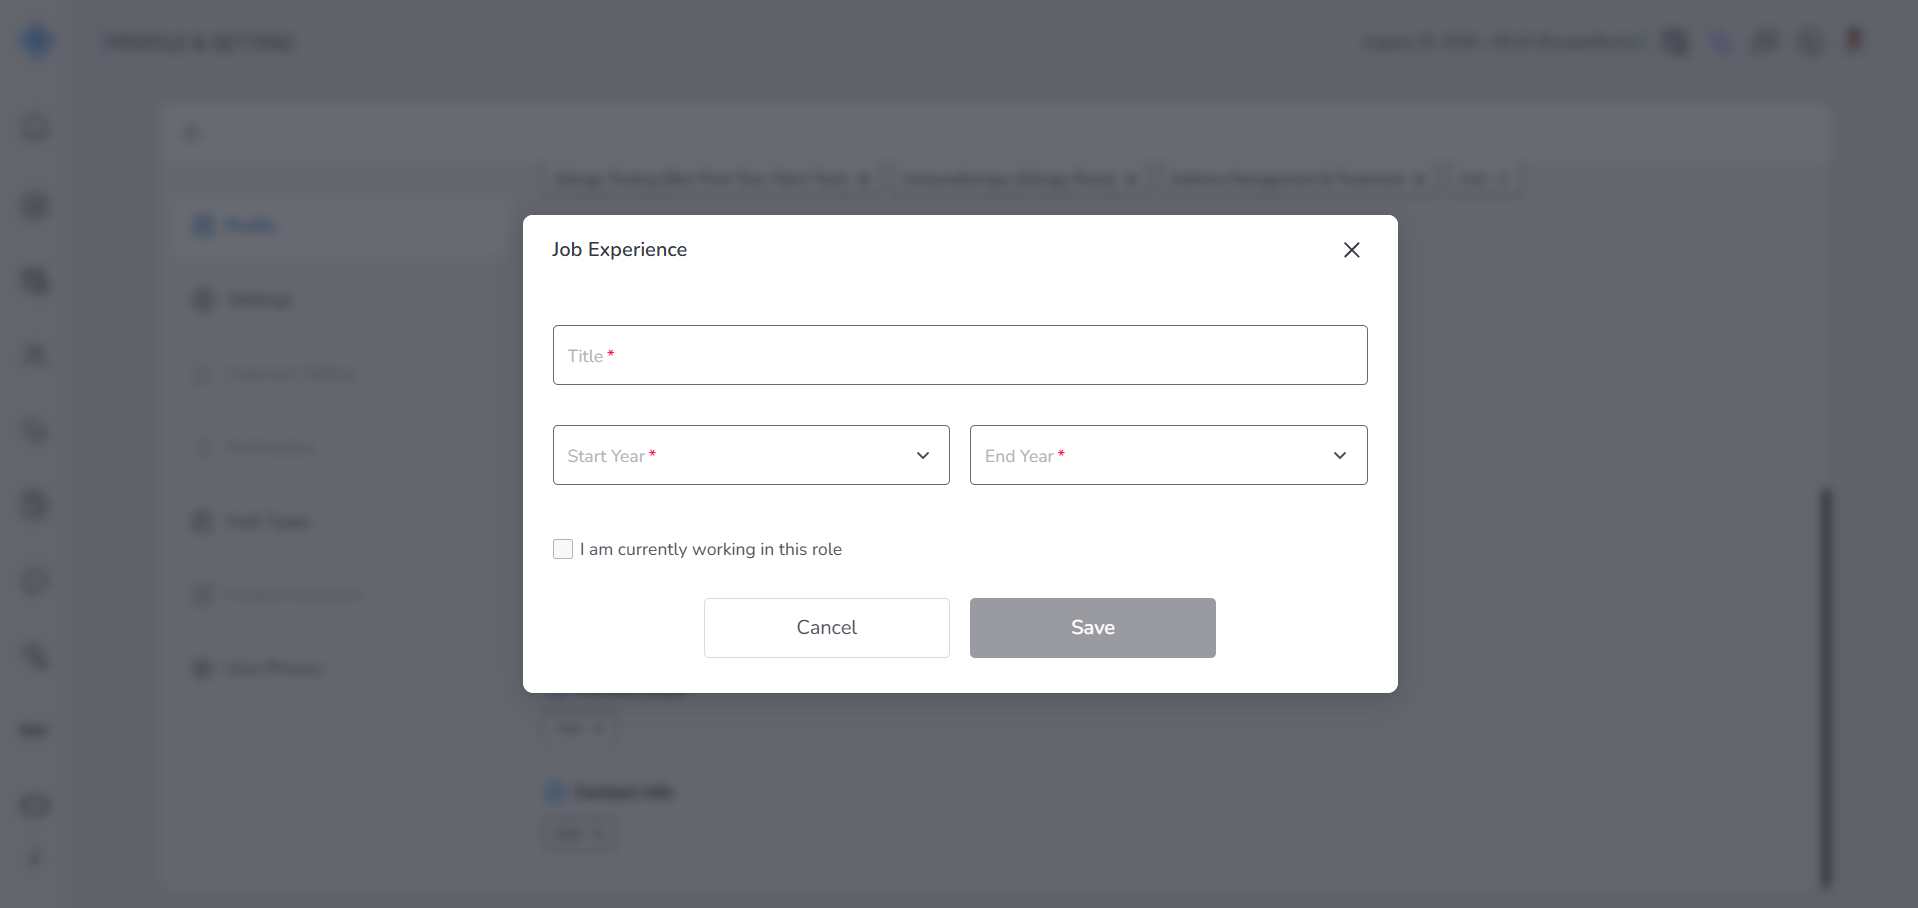
- Fill in the following fields:
- Experience Title – Enter the name of your role or position.
- Start Year – Select the year you started.
- End Year – Select the year you finished.
- (Optional)
- Check I am currently working in this role to disable the End Year field.
- Click Save to add the experience record, or Cancel to close the modal without saving.
- After saving, you are returned to the Profile page, where the new experience is displayed in the Experience section.
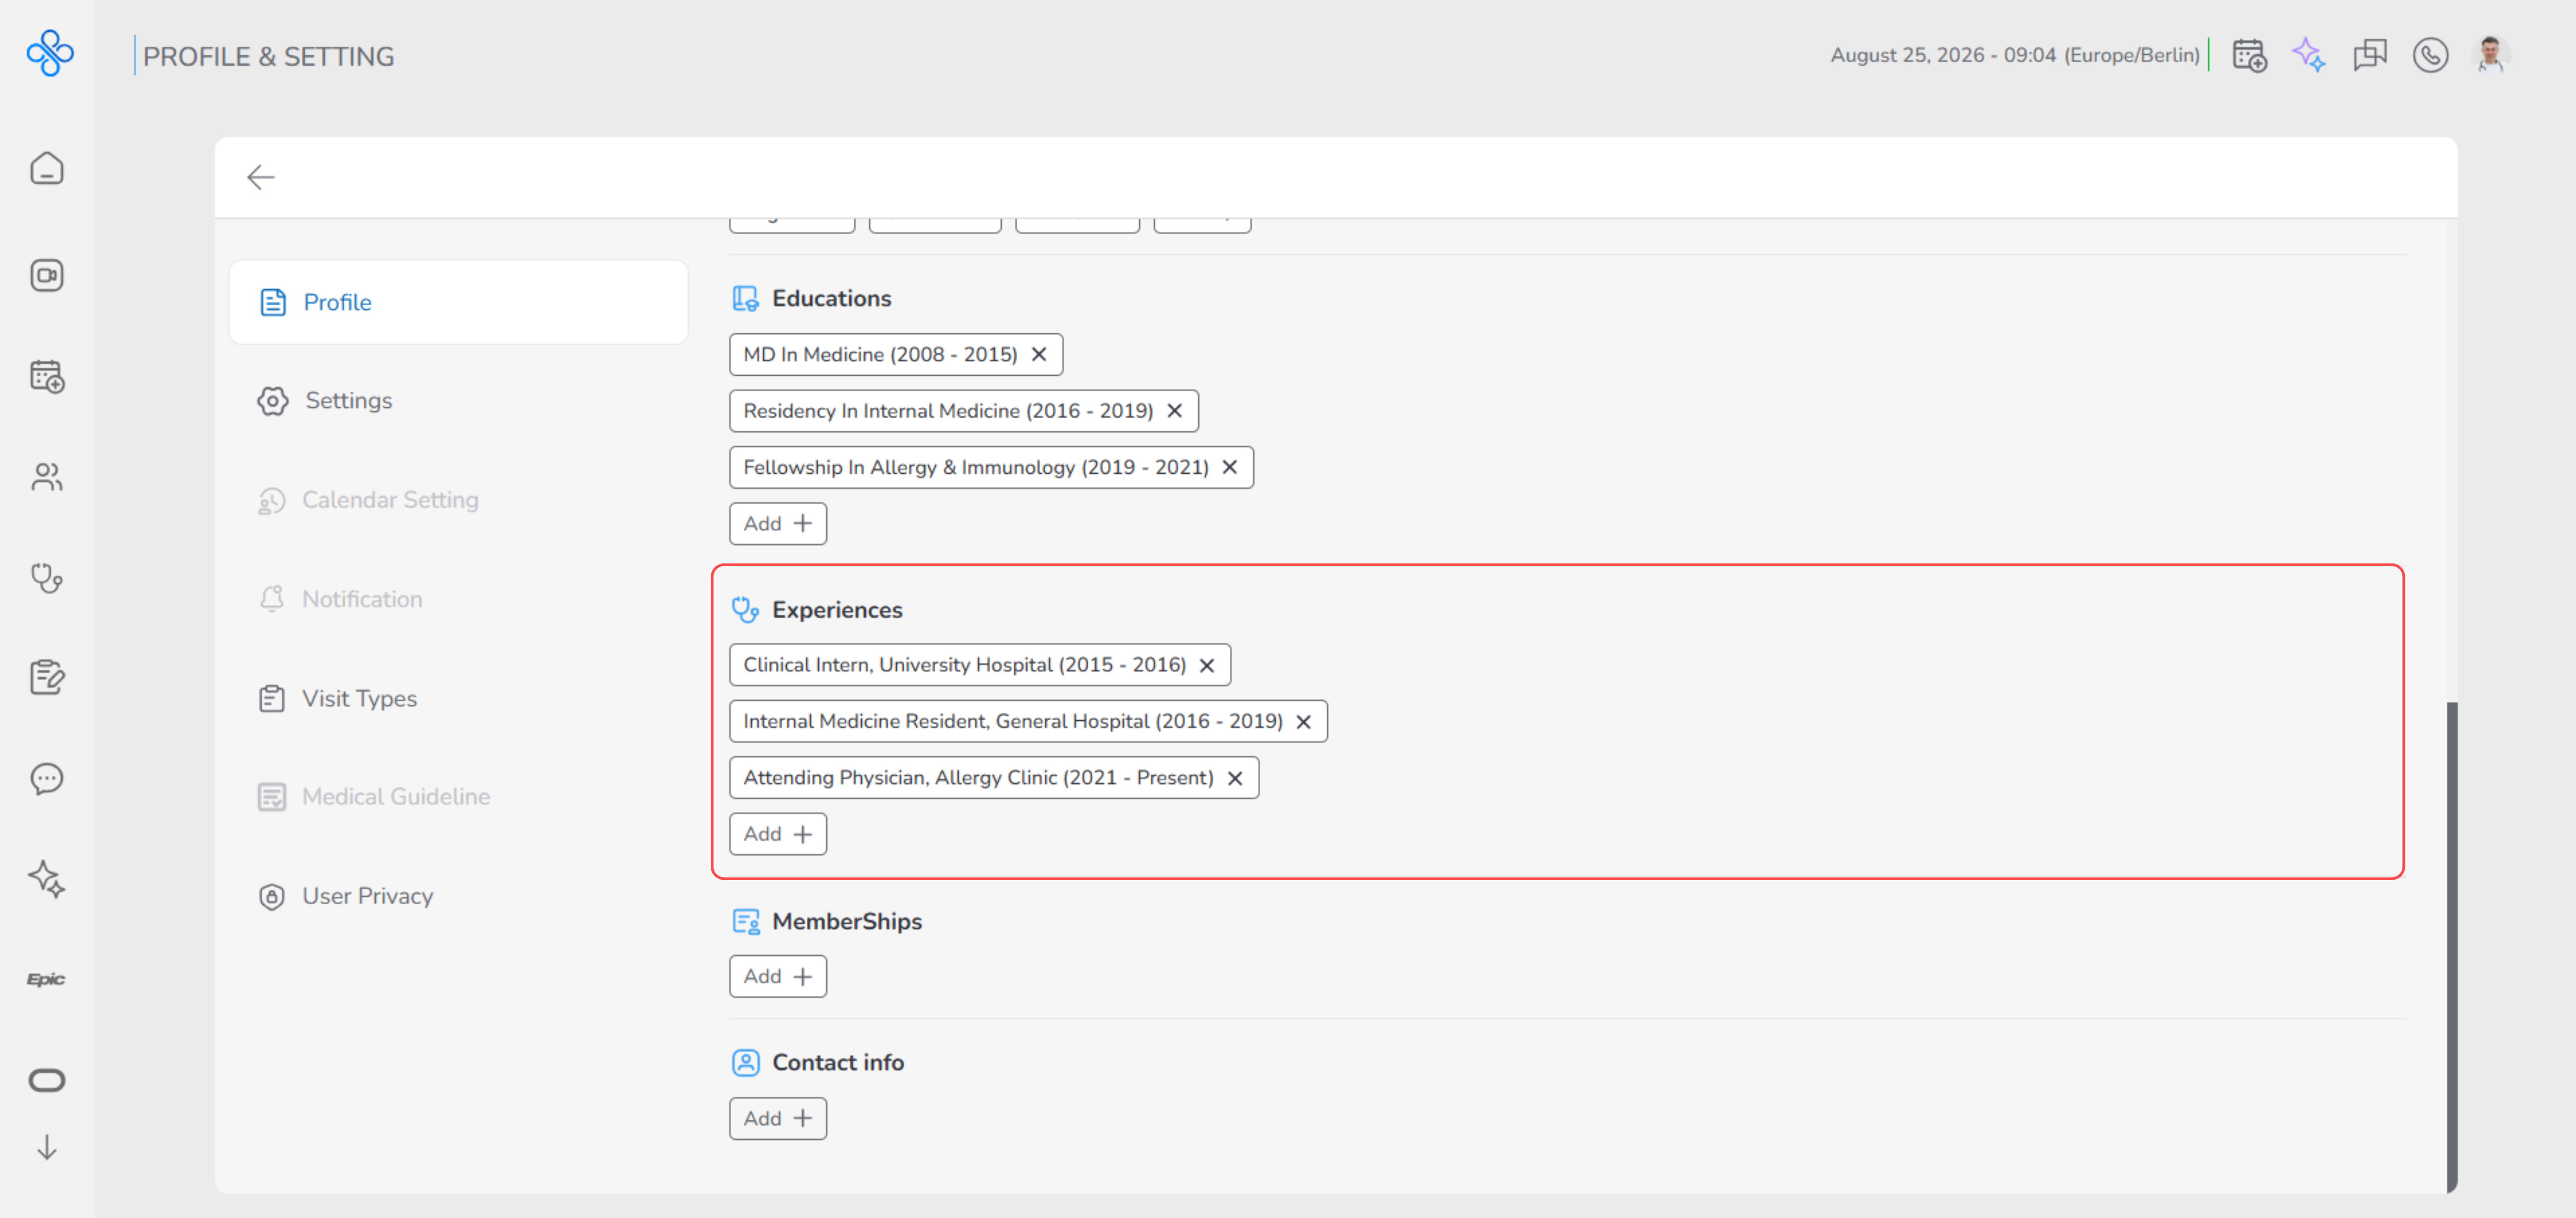
- You can repeat this process by clicking Add + again to add more experience records.
- A maximum of 6 experience records can be added.
- Memberships
The Memberships section allows you to add and manage your professional memberships, such as medical associations, organizations, or councils you are part of. Keeping this section updated helps present your professional background clearly and builds trust with patients and other providers.
- In the Memberships section of the Profile page, click Add +.
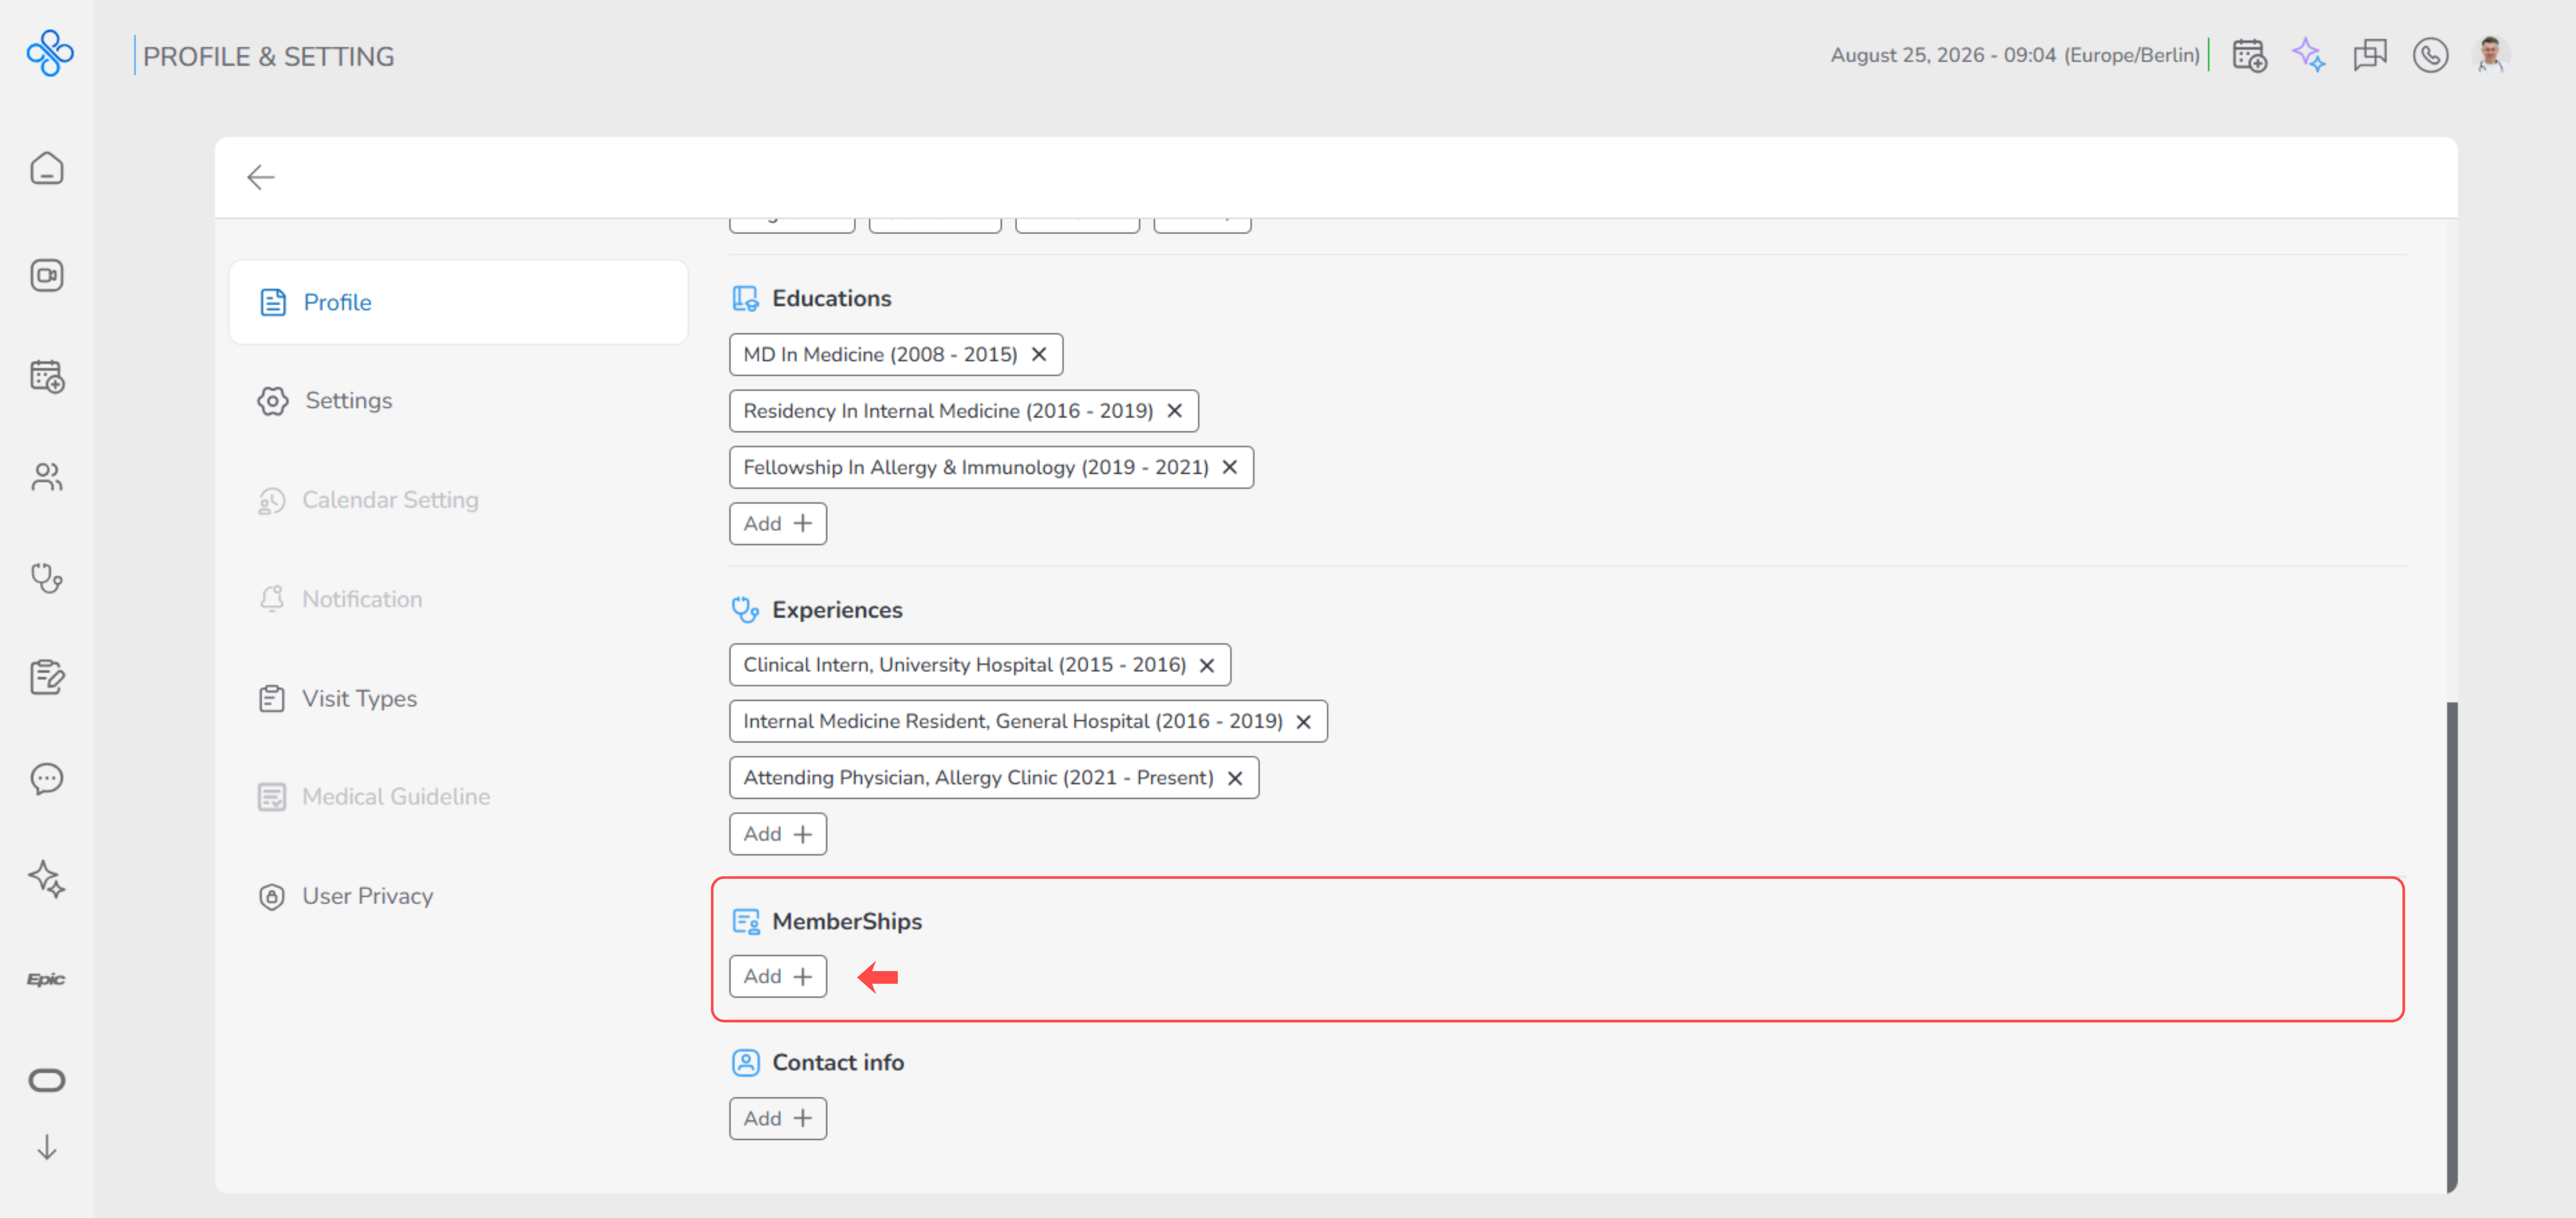
- The Add Memberships modal opens.
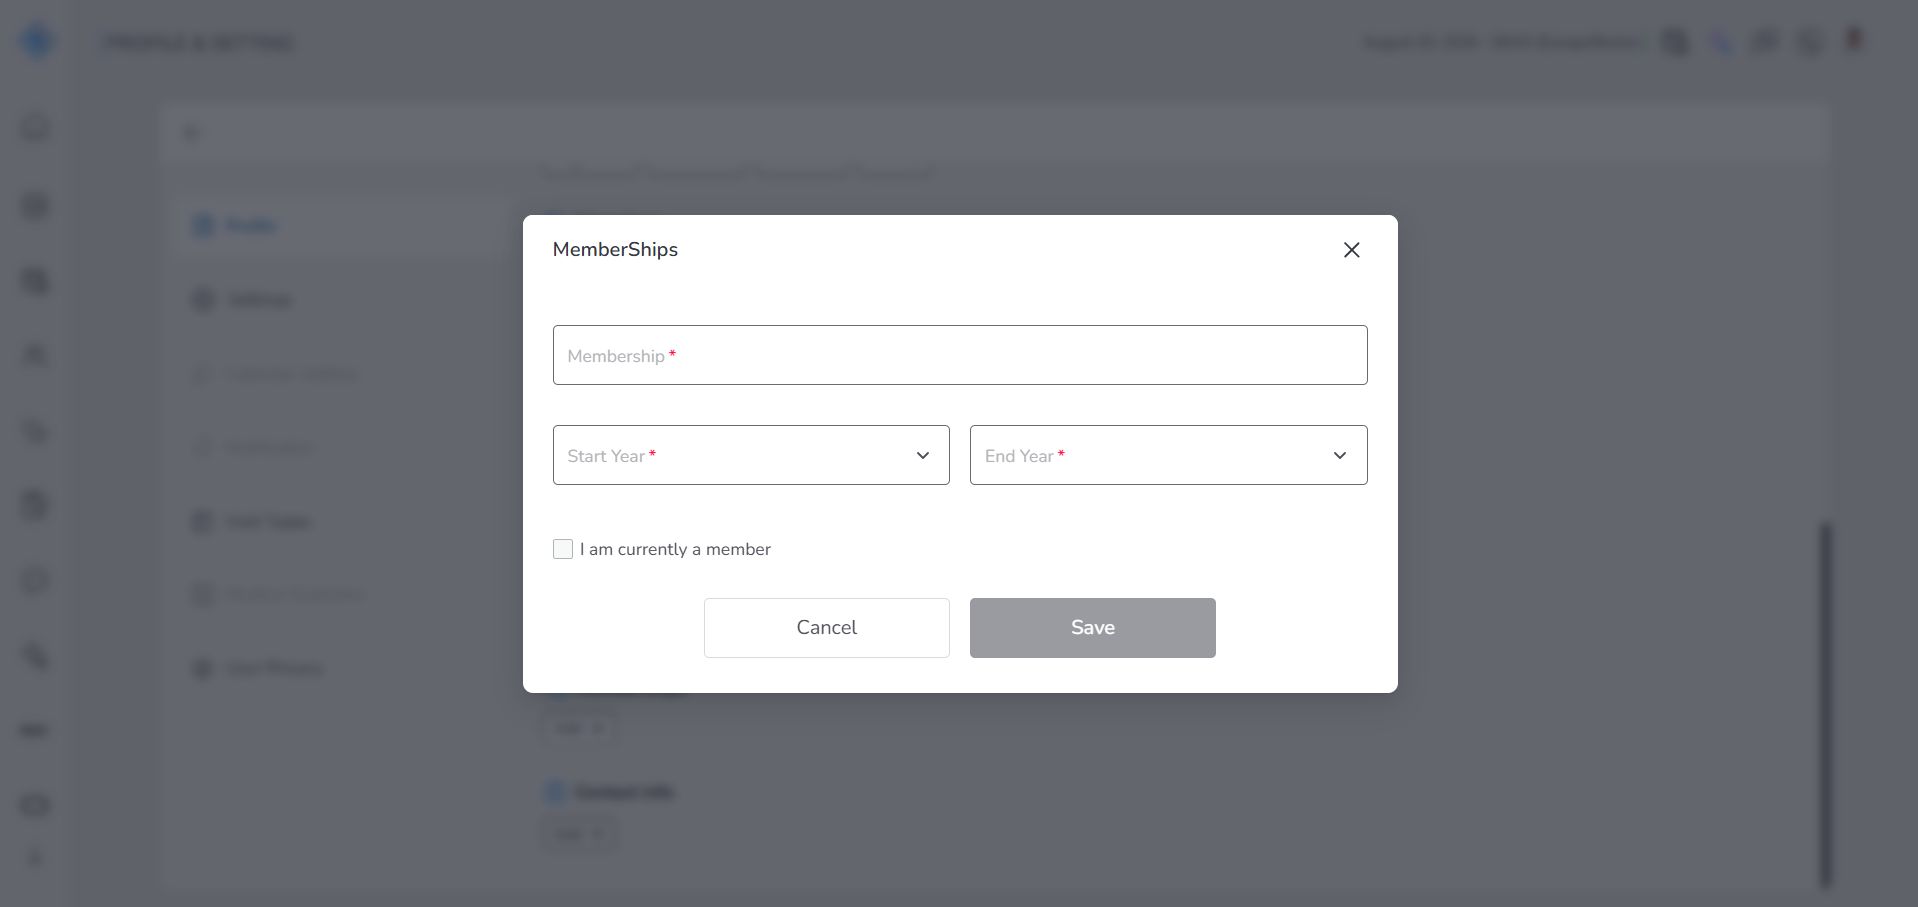
- Fill in the following fields:
- Education Title – Enter the name of the organization or association.
- Start Year – Select the year you started.
- End Year – Select the year you finished.
- (Optional)
- Check I am currently a member to indicate an active membership.
- When this option is selected, the End Year field is automatically disabled.
- Click Save to add the membership record, or Cancel to close the modal without saving.
- After saving, you are returned to the Profile page, where the new membership is displayed in the Memberships section.
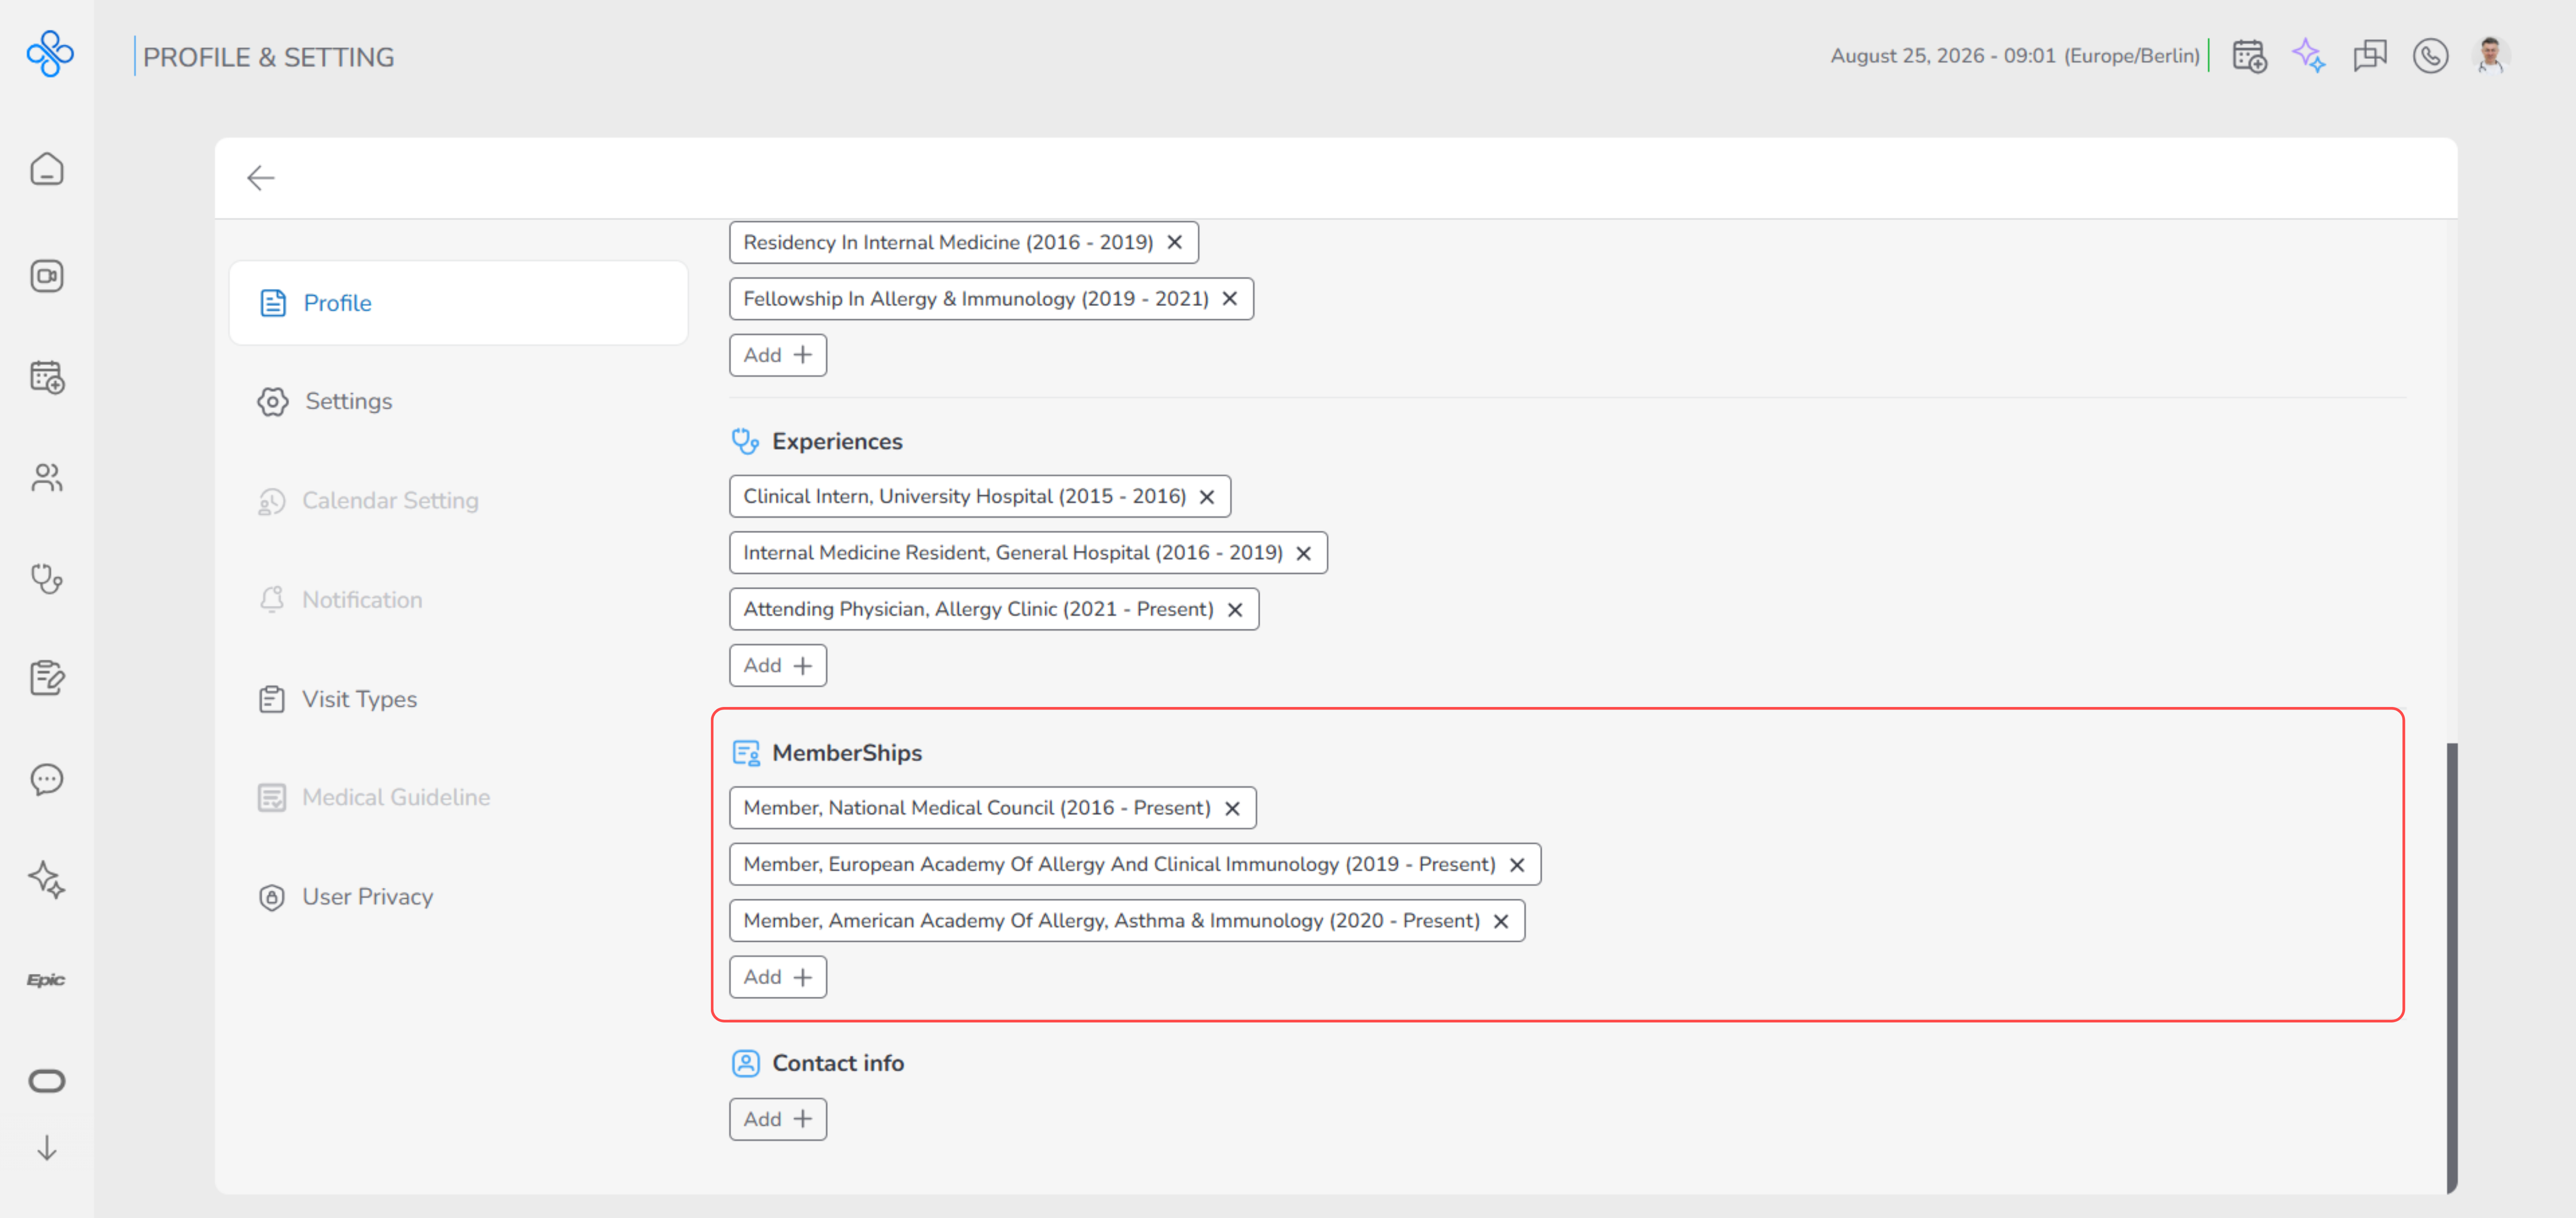
- You can repeat this process by clicking Add + again to add more membership records.
- A maximum of 6 Membership records can be added.
- Contact Info
The Contact Info section allows you to add and manage the different ways others can reach you, such as phone numbers, email, address, or social media profiles. This information helps patients, consultants, and collaborators contact you easily and keeps your professional profile complete and up to date.
- Click Add + in the Contact Info section on your Profile page.
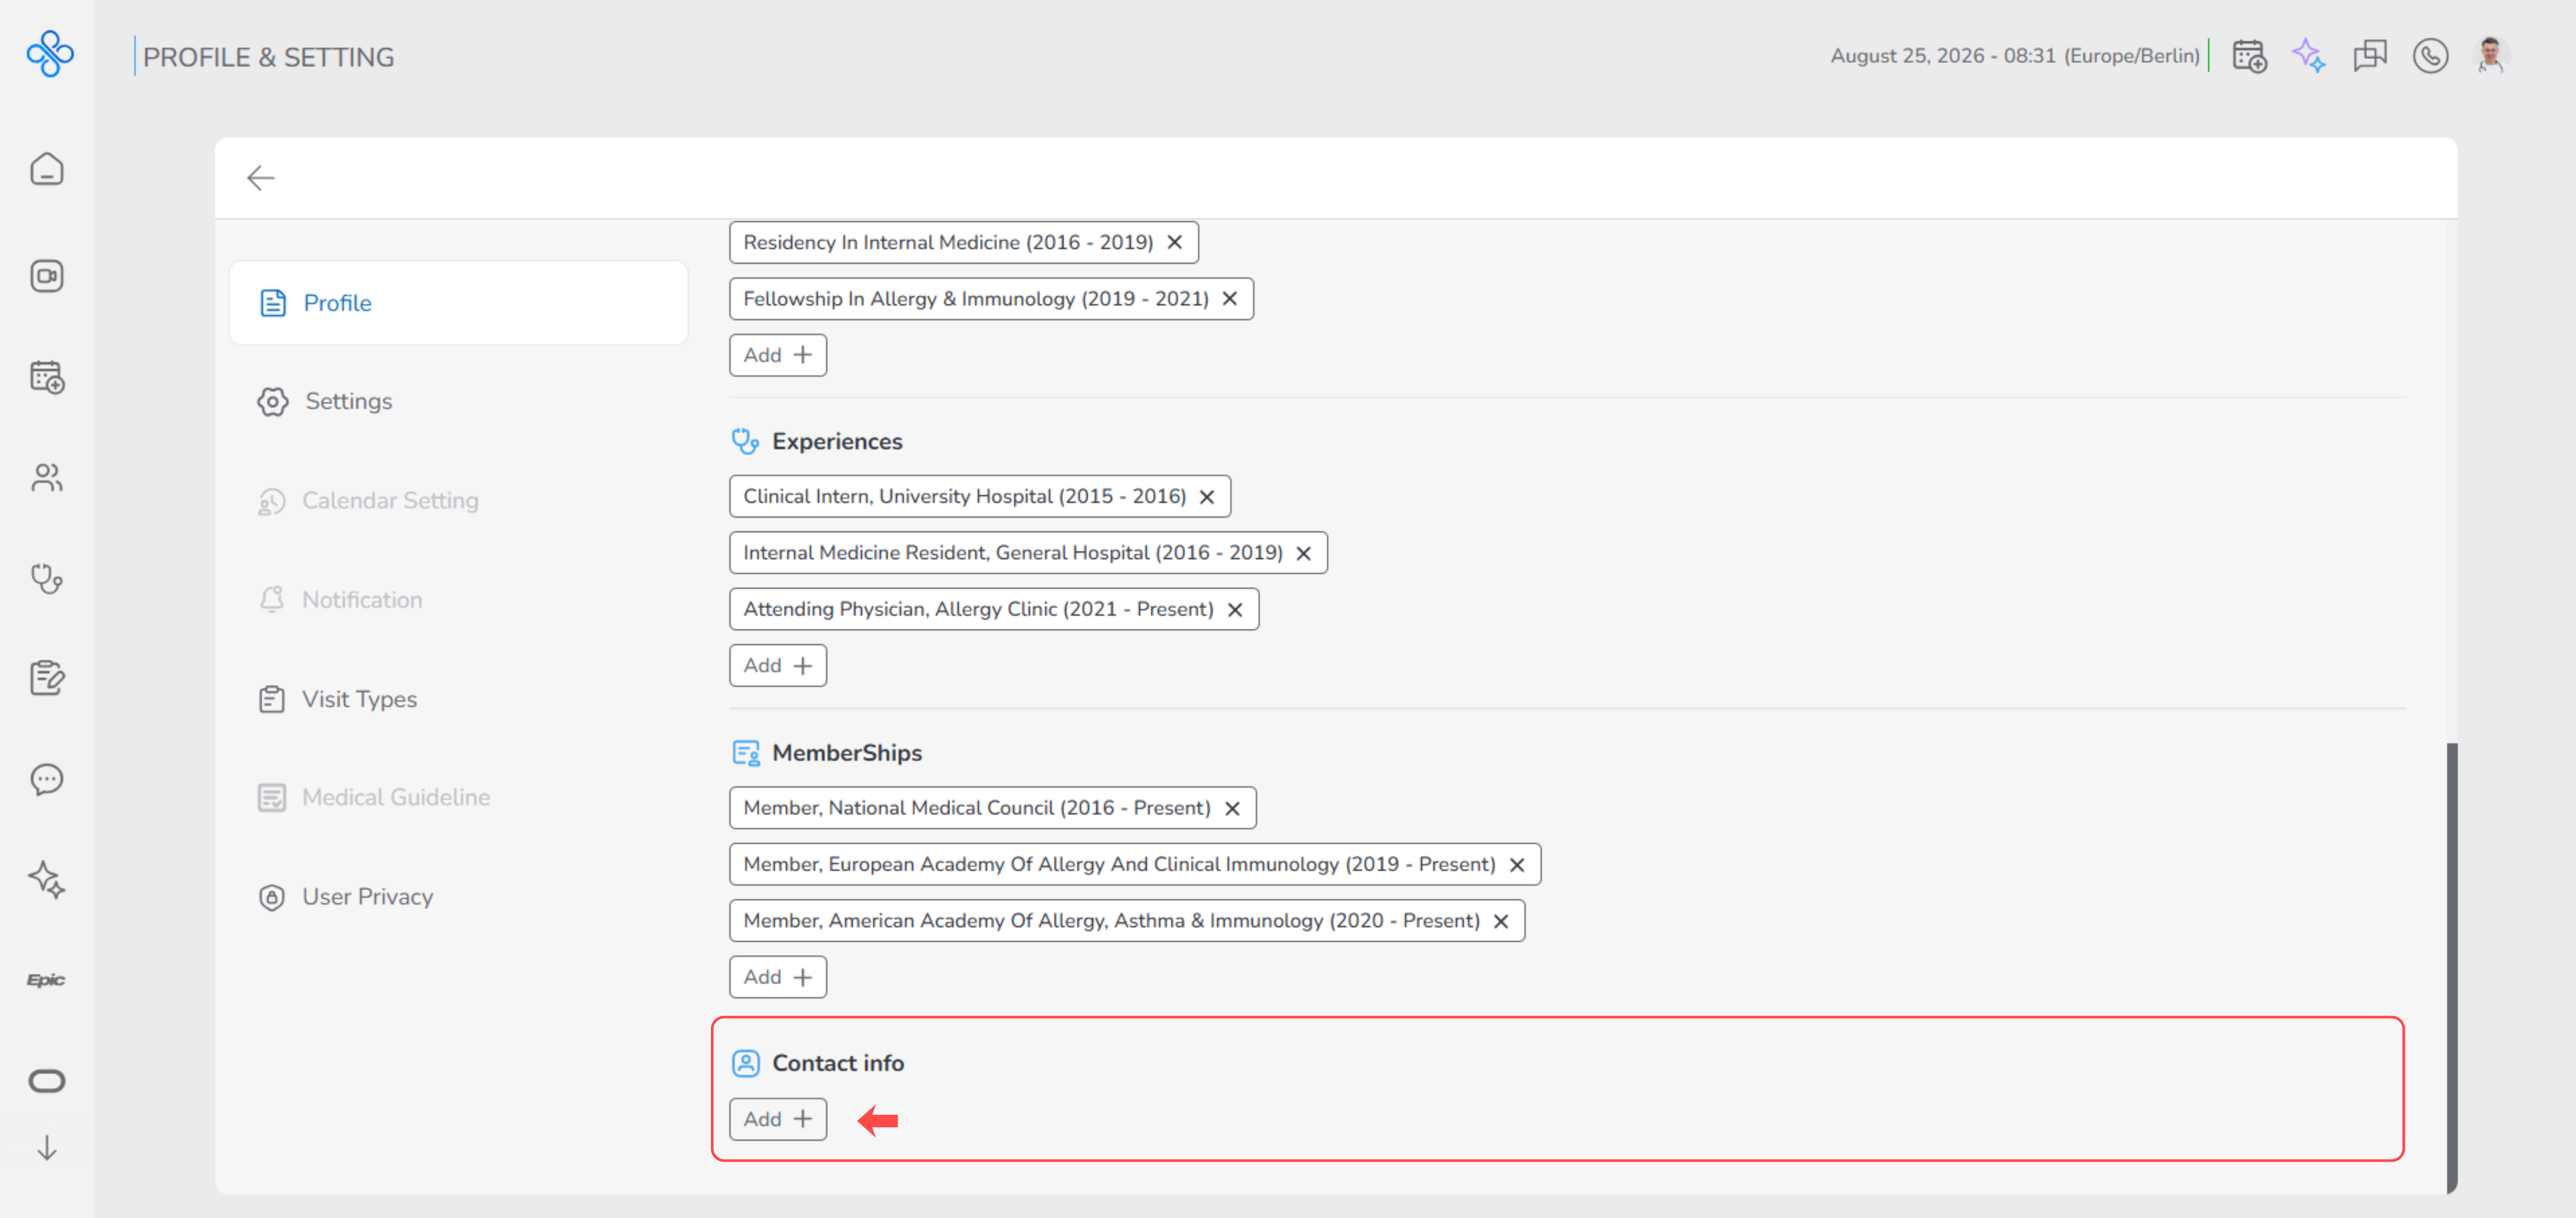
- A modal opens for adding a new contact detail.
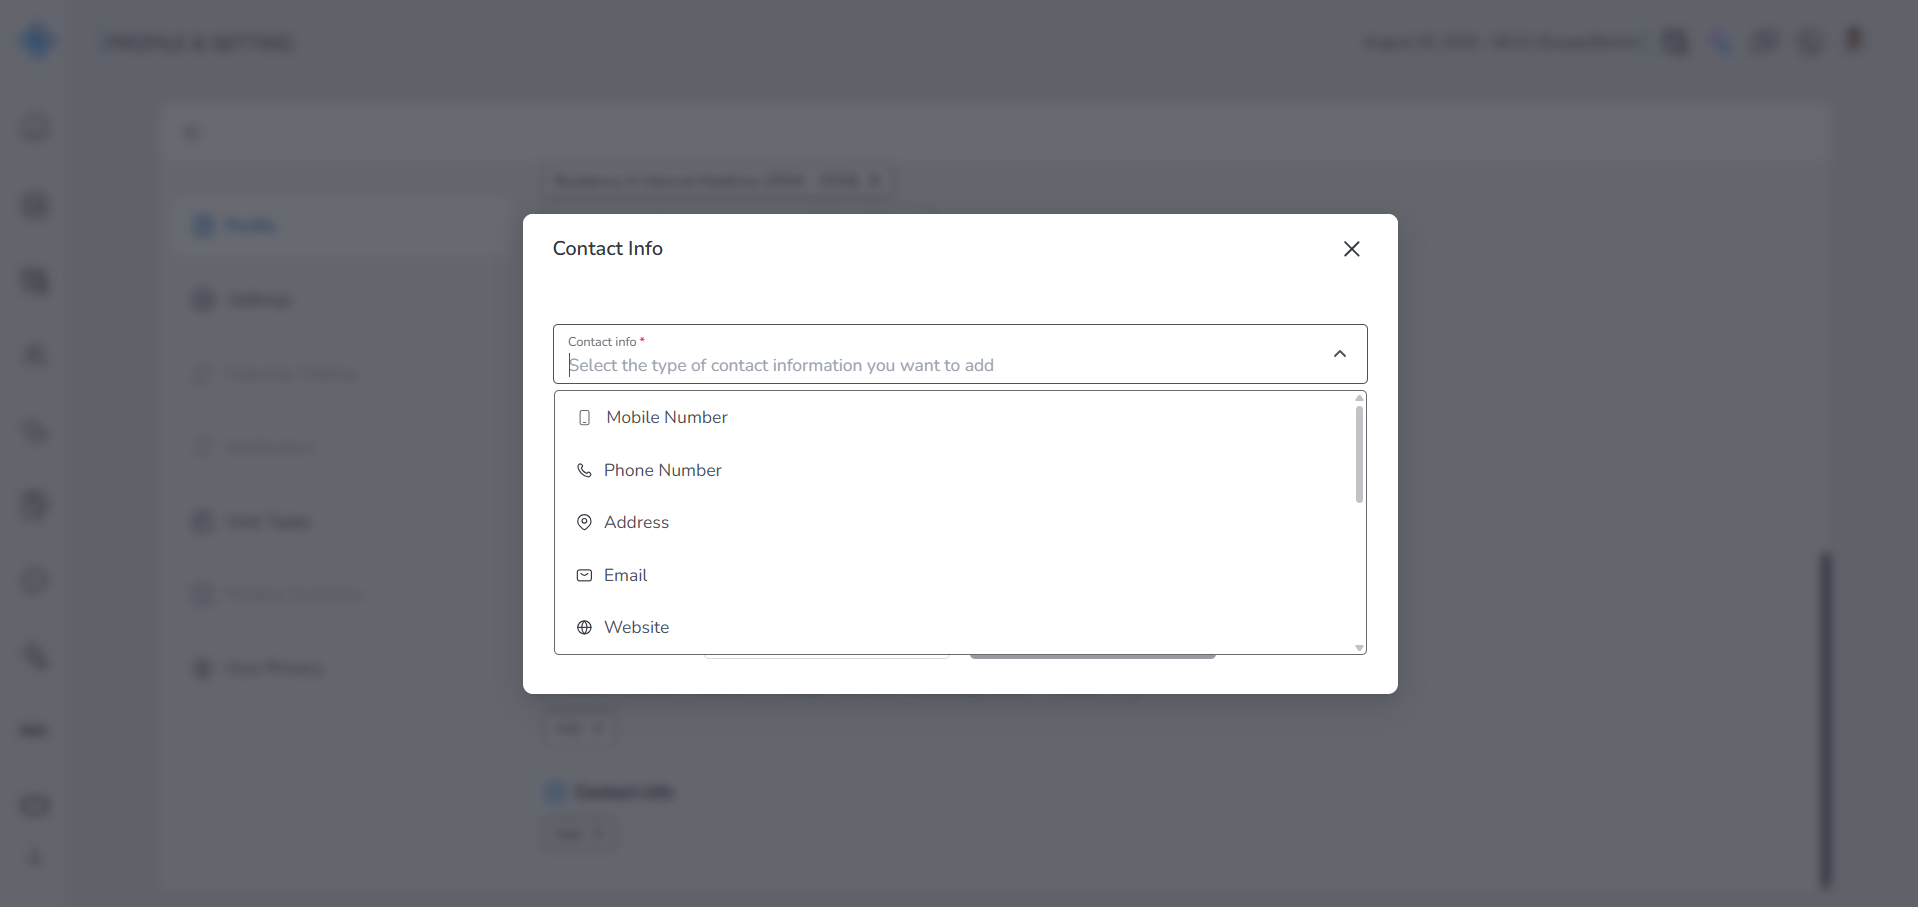
- From the dropdown list, select the type of contact information you want to add:
- Mobile Number
- Phone Number
- Address
- Website
- X (Twitter)
- Telegram
- YouTube
- After selecting an item, a corresponding input field appears.
- Enter the required information in the displayed field.
- Click Save to confirm.
- The saved contact information is added to the Contact Info section on your Profile page.
- Each added item appears as a chip.
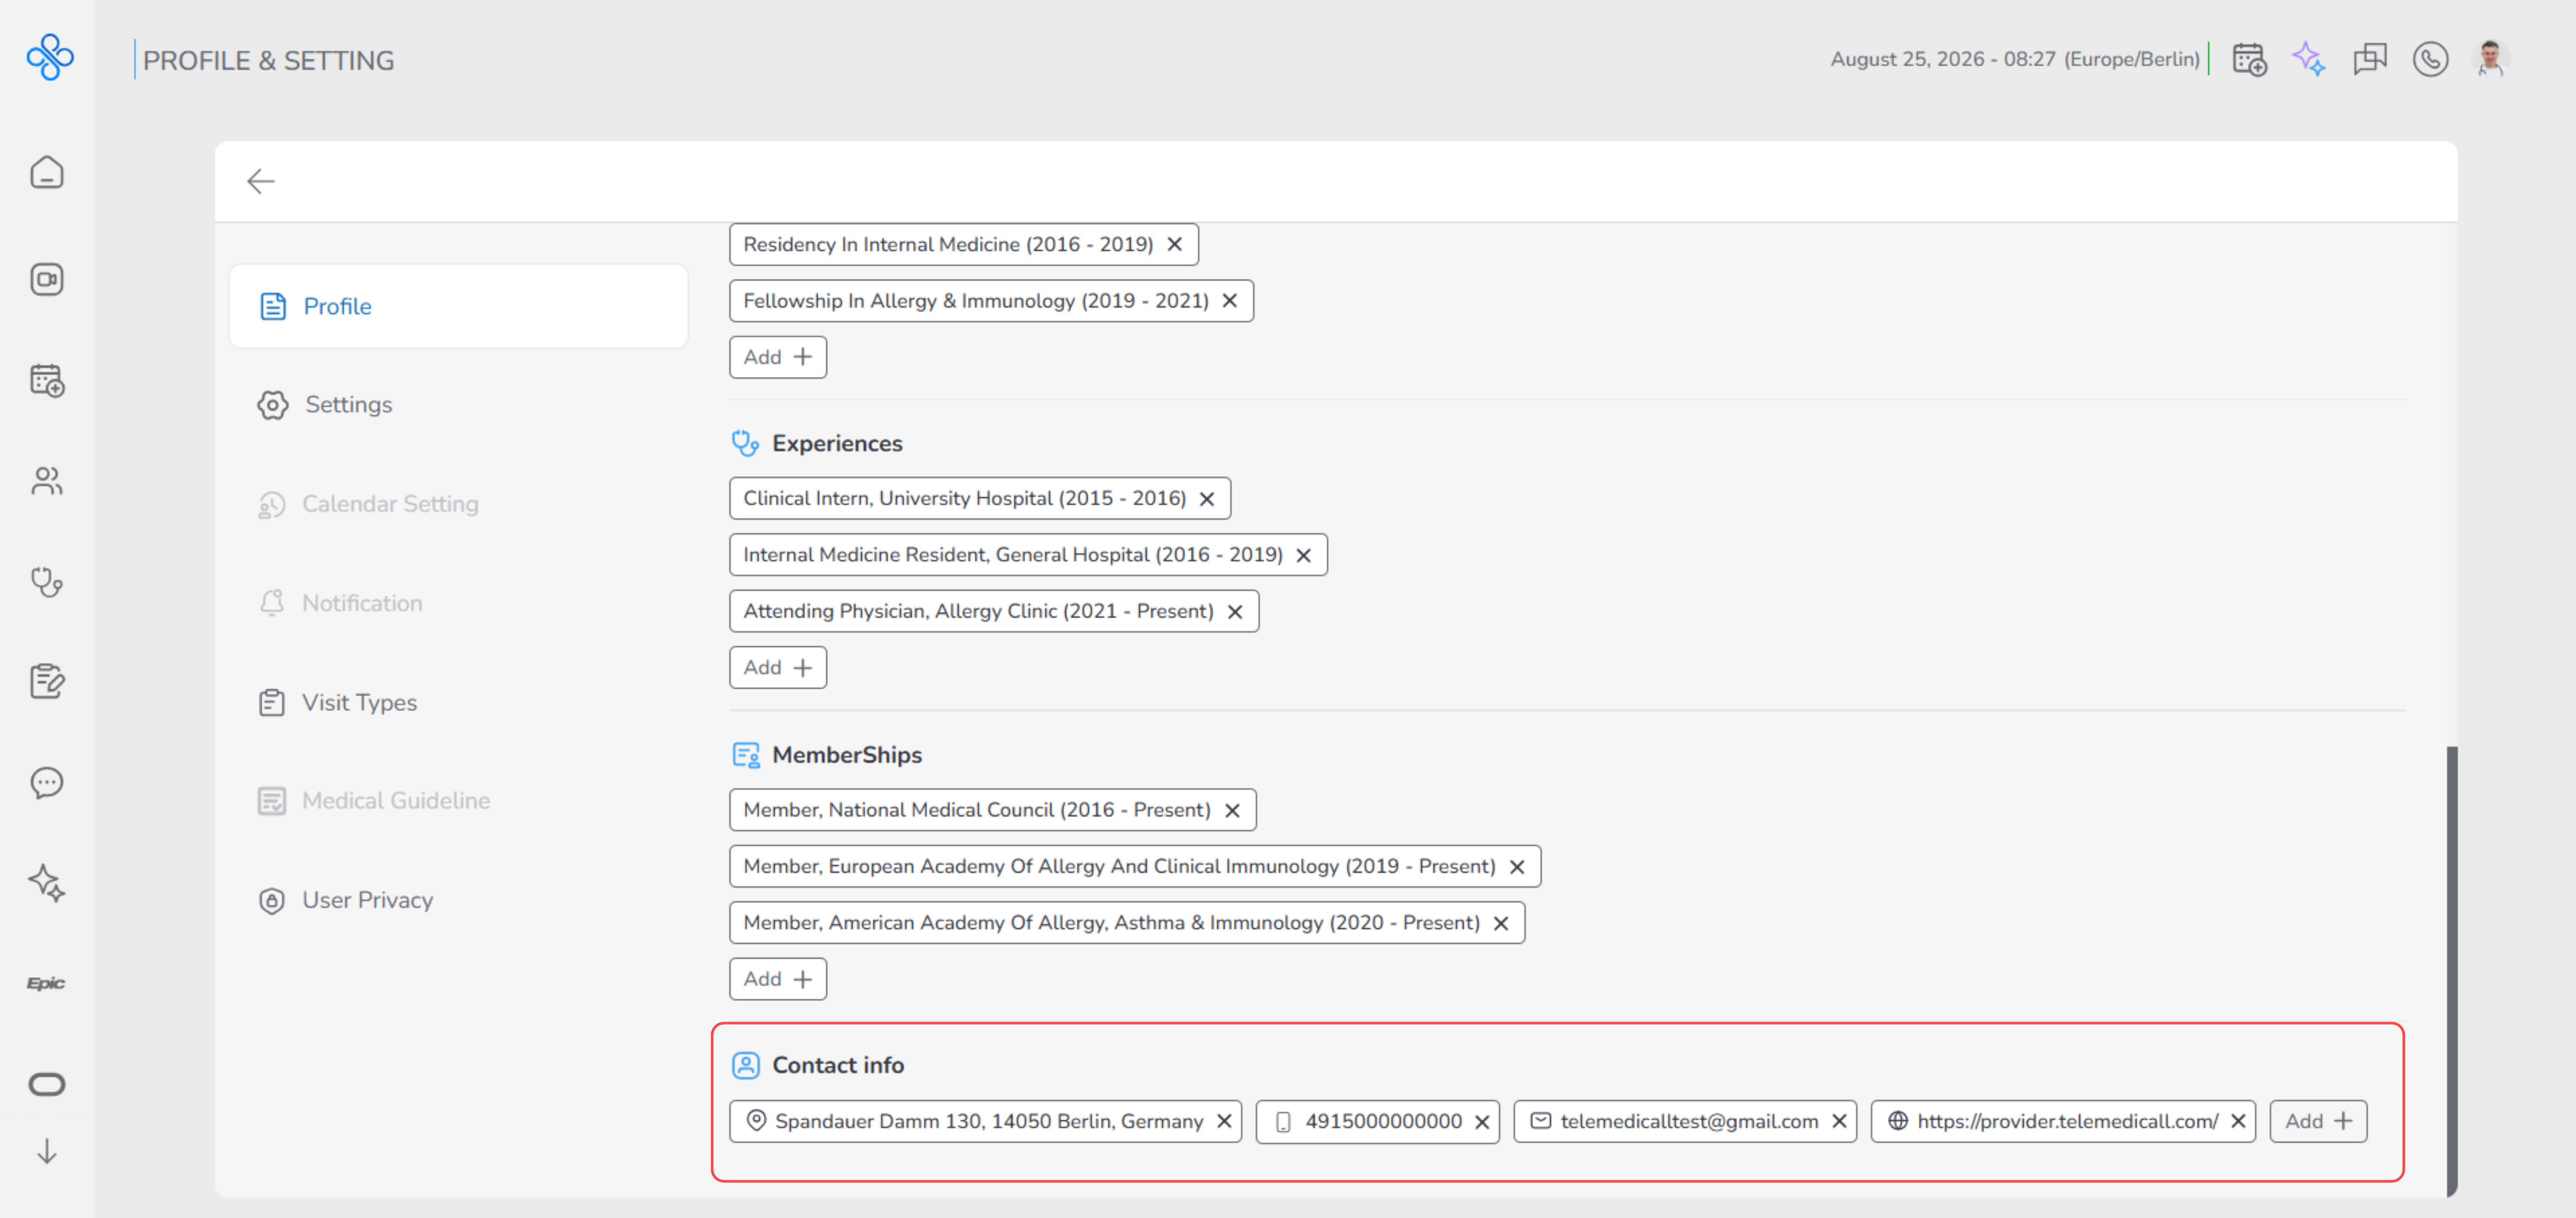
- To add more contact details, click Add + again and repeat the steps.
Fields (Field Descriptions)
| Field Group | Description |
|---|---|
| Basic Info | First Name*, Last Name*, Title*, Gender*, Date of Birth*, Country*, City*, Occupation*, Specialty*, GMC Number |
| Profile Photo / Banner | Upload, crop, delete, or replace images. |
| About | Free text biography. |
| Specialties, Procedures, Treatments | Add up to 12 specialties; displayed as chips. |
| Spoken Languages | Select up to 6 languages from dropdown. |
| Educations | Add up to 6 education records with start/end years or “currently studying.” |
| Experiences | Add up to 6 experience records with start/end years or “currently working.” |
| Memberships | Add up to 6 memberships with start/end years or “currently a member.” |
| Contact Info | Mobile, Phone, Address, Email, Website, Social Media links (Instagram, LinkedIn, Twitter, etc.). |
Behavior & Expected Outcome
- All changes are saved immediately after clicking Save.
- Added items appear as chips and can be removed individually.
- Selecting “currently studying / working / member” automatically disables the End Year field.
- Profile photo and banner updates take effect instantly.
Common Errors + Fixes
| Issue | Cause | Fix<br><br> |
|---|---|---|
| “This field is required” | Mandatory fields left empty in the Basic Info modal. | Complete all required fields before saving. |
| “Maximum limit reached. You can only add up to 6 items.” | User tries to add more than 6 entries (e.g., educations). | Remove an existing entry before adding a new one. |
| Image upload fails<br> | File format or size not supported.<br> | Use supported formats (JPEG, PNG) and keep under max upload size.<br> |